Reviews
Armor
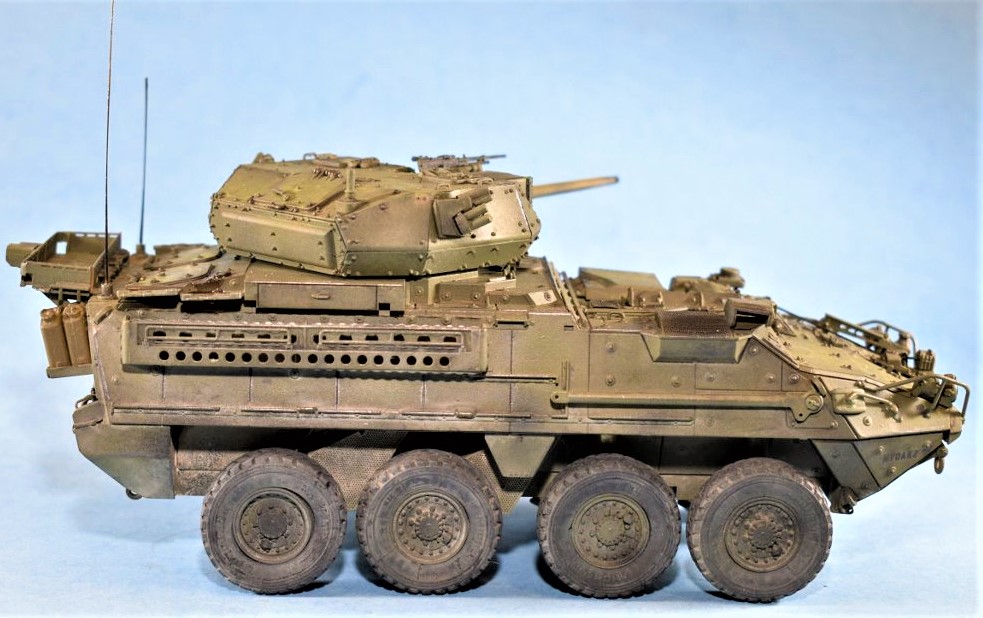
M1296 Stryker Dragoon
by Blaine Singleton
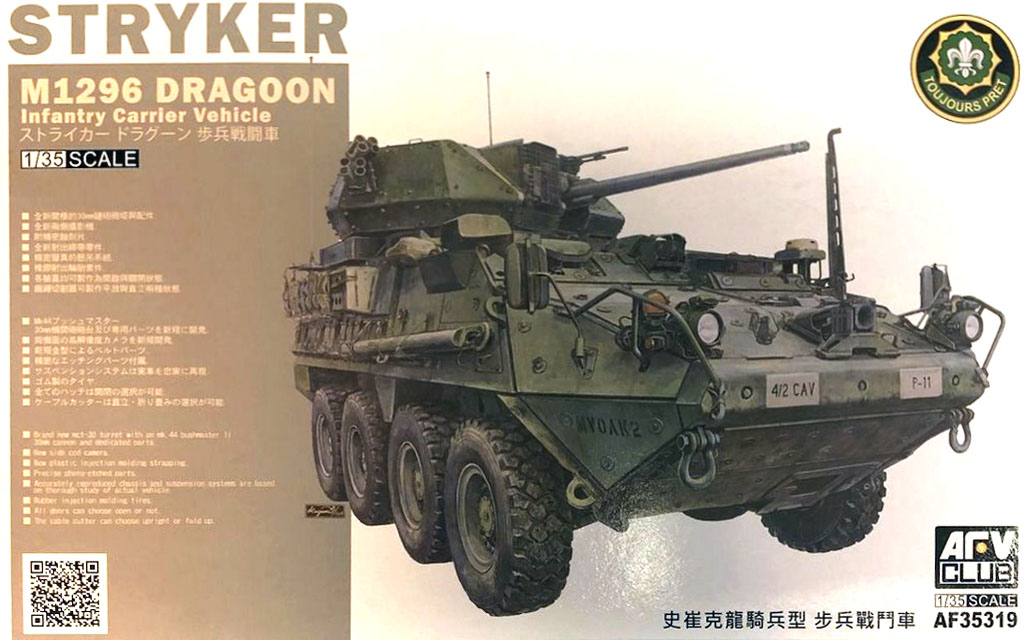 Model: M1296 Stryker Dragoon
Reviewed by: Blaine Singleton, IPMS # 50734
Scale: 1/35
Company: AFV Club
Price: $59.00
Product/Stock #: 35319
Website: AFV Club
Product Web Page: View
Product provided by: Academy and Merit International
In the Box
Instructions:
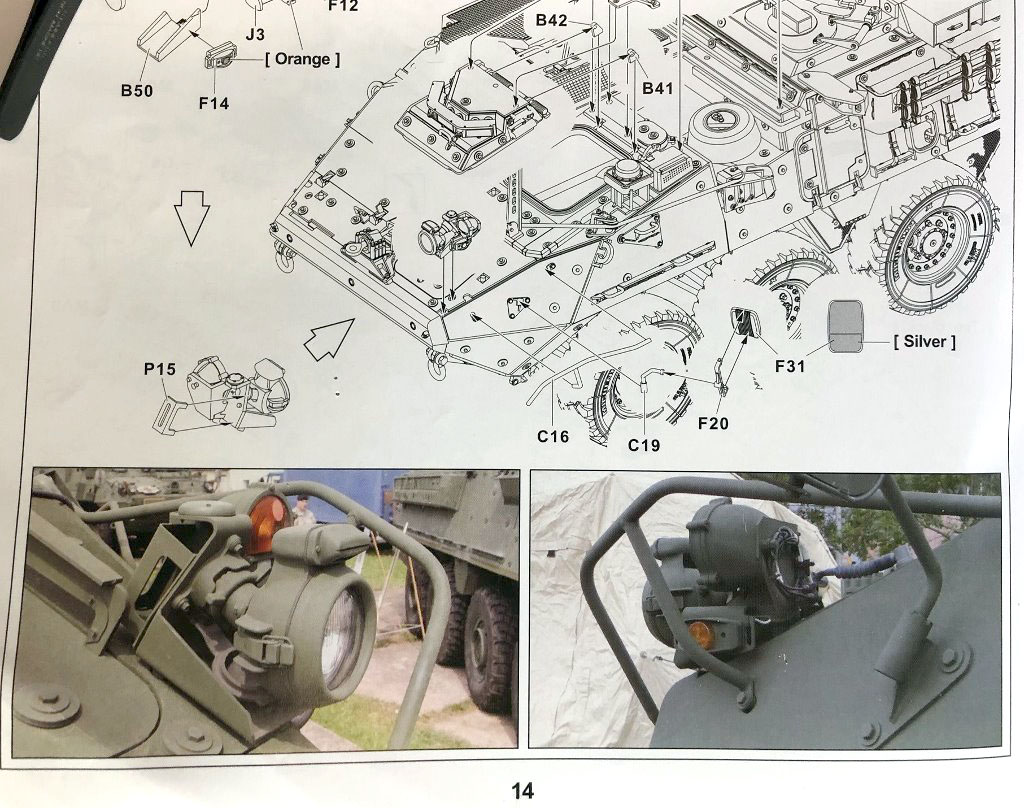
The instruction booklet was divided into 18 pages of clearly marked parts. The instructions contained 38 separate steps to complete the model. At the end of the instruction booklet there were painting and decal application illustrations.
Sprues:
Contained in the box were 19 different model part sprues molded in olive green. Also contained in the kit, 8 rubber tires and a thread type tow cable.
Photo Etch:
Two sheets of PE are included with the kit.
Clear plastic:
There were two clear sprues of parts for the kit, they were for light lenses and view ports on the top of the vehicle body.
Decal Sheet:
The sheet was sparse with vehicle id numbers and stencils. The vehicle had very few areas for the application of decals. Application of the decals went easily, and the carrier film was not very thick.
Building the Model
Chassis suspension
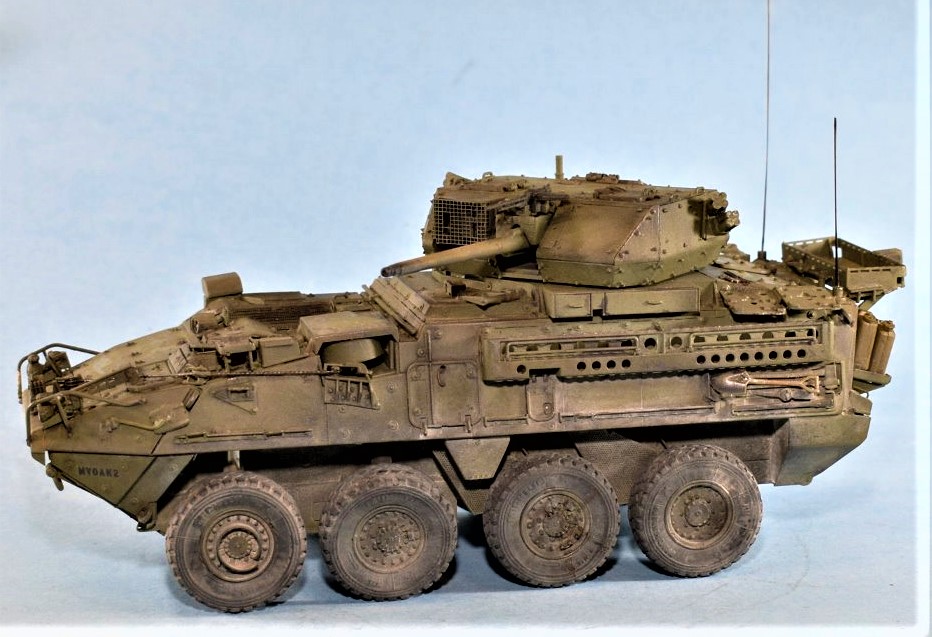
The first 10 steps were the assembling of the suspension and running gear for the vehicle. A nice touch was the addition of 4 aluminum cylinders in the shape of shock absorber struts on either side of the front two axles. Sections 12-21 covered building the upper shell of the body including installing all the armor plates. Steps 22-32 finish out outfitting the body with vision ports and smaller detail parts. All parts fit together nicely.
The inclusion of rubber tires in the kit was much appreciated. Once the model was completed, they accepted weathering very well.
Turret Construction
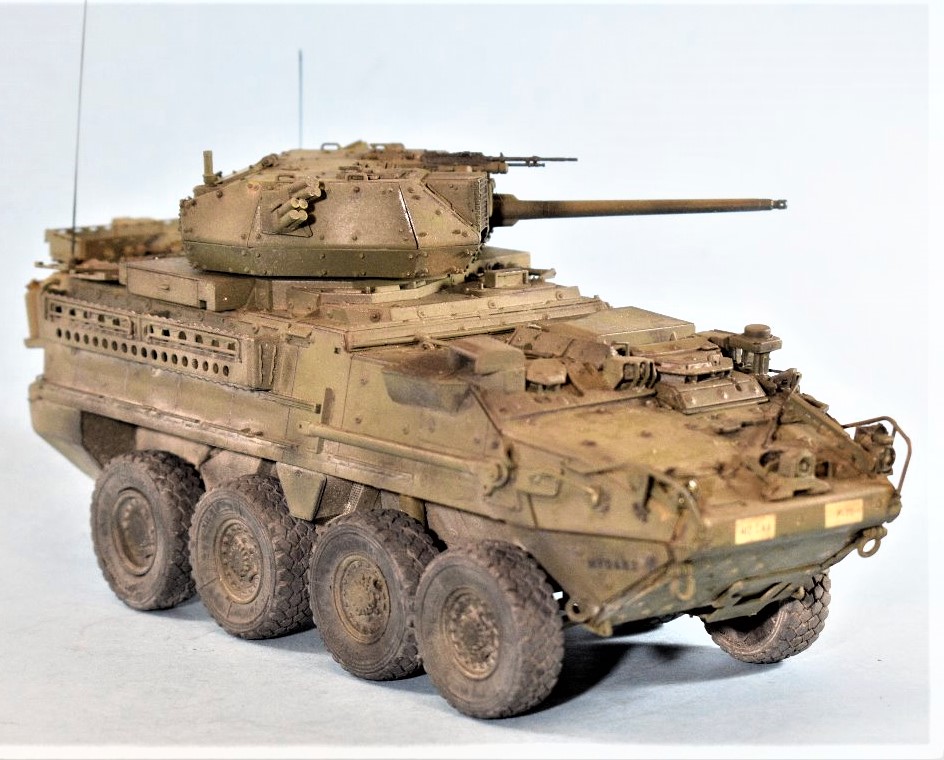
Sections 33-38 build the turret including the armor plates, cannon (molded in two plastic halves) and assembly of the machine gun. The seam between the rear of the vehicle and armor plates on both sides of the body was hard to close so I ended up filling the vertical gap with Vallejo putty. and That was the only place on the model I had to use any filler material. The back section of the model was nicely detailed and had a rear access door that could be left open if there had been parts to build an interior. Maybe that could be included in the next version of the model.
Final Assembly
After the chassis and turret were attached, the last of the small parts were added. The hand tools were painted and put in position. I held off attaching the rear-view mirrors because these were very easily broken off the body. After looking at some reference photos I saw that the rear-view mirrors could be folded next to the body, so I chose to mount the mirrors in a folded position.
There are small equipment strapping bundles attached to the outside of the body of the vehicle. I added some and did not like the way they looked (my personal preference only) so I chose to remove them.
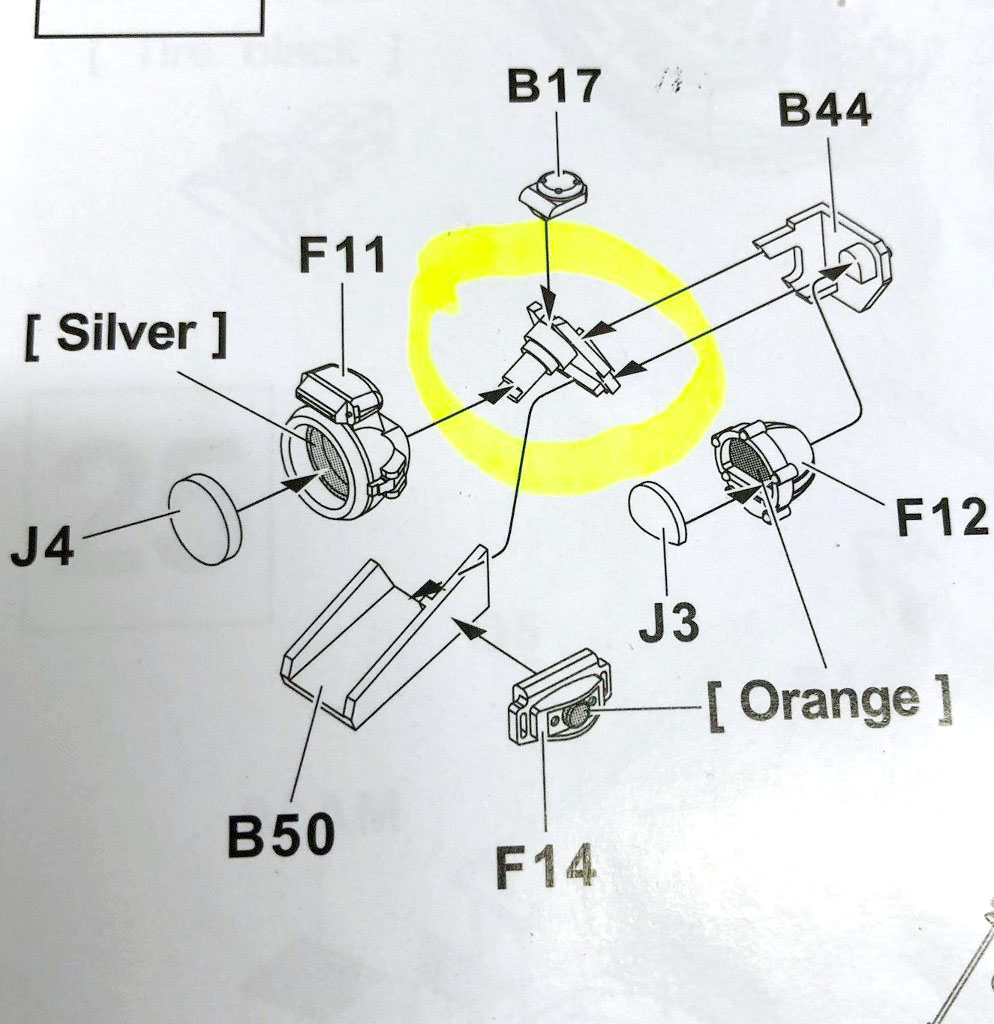
For something different I decided instead of using the normal headlight clear lenses for the headlights, to paint the inside headlight housings with silver. I then filled the housing with a UV glue called Bondic and cured the glue. Turned out that the headlight unit looked very realistic.
There are 4 clear parts at the base of the turret that needed to be masked before paint application. I applied to them Mr. Sol masking fluid, the one in the Blue top because this mask liquid has no ammonia in it to disturb the surrounding paint.
Radio antenna were fabricated by stretching sprue per the instructions.
Painting
Primer and pre-shade
I decided to prime the model with black Krylon rattlecan paint to provide a shadow effect under the base coat. I let the primer dry for 24 hours, once dried, I sprayed white to highlight areas on the top and sides of the vehicle, the white was a 50-50 mix of Mission Models paint and Mission thinner with one drop of Mission Clear Primer.
Basecoat
I applied Mission Models Paint # 30 Russian Dark Olive to the turret and the body of the vehicle. The paint was diluted with 50% thinner 50% Dark Olive and one drop of Mission Clear Primer. I sprayed the paint in light coats to be careful not to overwhelm the white pre-shade already applied.
Once all the paint had dried, I came back and sprayed the base coat thinned with 10% white to further highlight areas of the body and turret. I was pleased by the results of my primer shading, base coating and base coating highlights so far.
The fuel and water cans supplied for the back of the model were painted with Mission Models US Army Sand MMP-086, also 50% paint and 50% thinner and one drop of Mission Clear Primer.
Filter
I added a filter on the overall model of Abteilung 502 Olive Green oil paint mixed with Mona Lisa enamel thinner, this effort gave the effect of modulation to the paint.
Clear coat
After applying the decals, I applied a clear coat over the whole model. I used Mission Models Semi-Gloss Clear, 30% Clear 70% thinner sprayed in light coats to give the model an even coating and covering the decals.
Weathering
Chipping
For paint chipping I used Mission Models Paint black, brown and red. That mixed color was applied to areas susceptible to chipping on the real vehicle, via foam pad pieces dipped in the paint. The foam was dabbed on a paper towel to remove most of the paint, then applied to the model.
Pin Wash
I mixed Abteilung 502 Sepia to make a pin wash and applied around hatches and on rivets to bring out details on the model.
Oil paint highlights
Again, I used Abteilung 502 paints Light Green, Dark Green, Blue and Buff to apply a dot filter and then blend the colors.
Acrylic Ink
I airbrushed Black ink onto all the grillwork on the model to give it a smoked effect.
Graphite pencil
Highlighting some areas of sharp angles on the model was done with graphite to give it a metalized look.
Pigments
I used Vallejo pigments light dust to the running gear and fender areas to give the dusty look to the model. I applied the pigments quite heavily then came back four different times to remove layers of the pigments and get to the amount of dust I was looking for.
Ak Interactive Weathering pencils
I have not used the pencils much before, so I decided to give them a real try on this model. First, I applied pencil marks in areas I wanted then came back with a damp paint brush and was able to blend the colors into the basecoat. I will use this technique on more models now because I was quite happy with the results.
Matt coat
I used Mission Models Matt clear to cover the model and take the shine off the model. When that was dry, I came back in a few small areas and sprayed some of the base coat to give a varied sheen overall.
Summary
This was a great detailed model to build, I have some changes that might make it an even better project for the future:
First is the attachment of sprues to some of the parts, one area is an attachment between the hinges of a hatch. This area is very small to get into and the sprue is difficult given the hinge mechanism of the hatch. I think the sprue attachment could be on a different part of the hatch that would make part cleanup easier (see attached photo).
Next is an area associated with the assembly of a headlight unit. This is in step 29, one of the pieces has no label part number and given all the sprues to look for the part on, this can be taken care of with a reedit of the instructions.
Some sub-assemblies had too many parts to them like the headlight unit, I think this could have been done with fewer parts and still been quite detailed.
Instruction Sheet
Given an assembly that requires several parts, it would be nice to list the sequence of part assembly. I found some confusion with a couple of assemblies that I added the wrong part only to find out that it was out of sequence and had to be removed. This also could be accomplished by a further edit of the instruction sheet.One thing that I thought was a nice touch were some included pictures of assemblies on a real vehicle. Not only were the photos of assemblies appreciated to see their configuration, it is also great to see a color photo of the real color of the vehicle.
The AFV Club Stryker M1296 Dragoon will be a nice addition to anyone’s model collection. The model has a lot of detail and parts fit together nicely.
Thank you to AFV Club for the opportunity to build and review this model.