Reviews
Armor
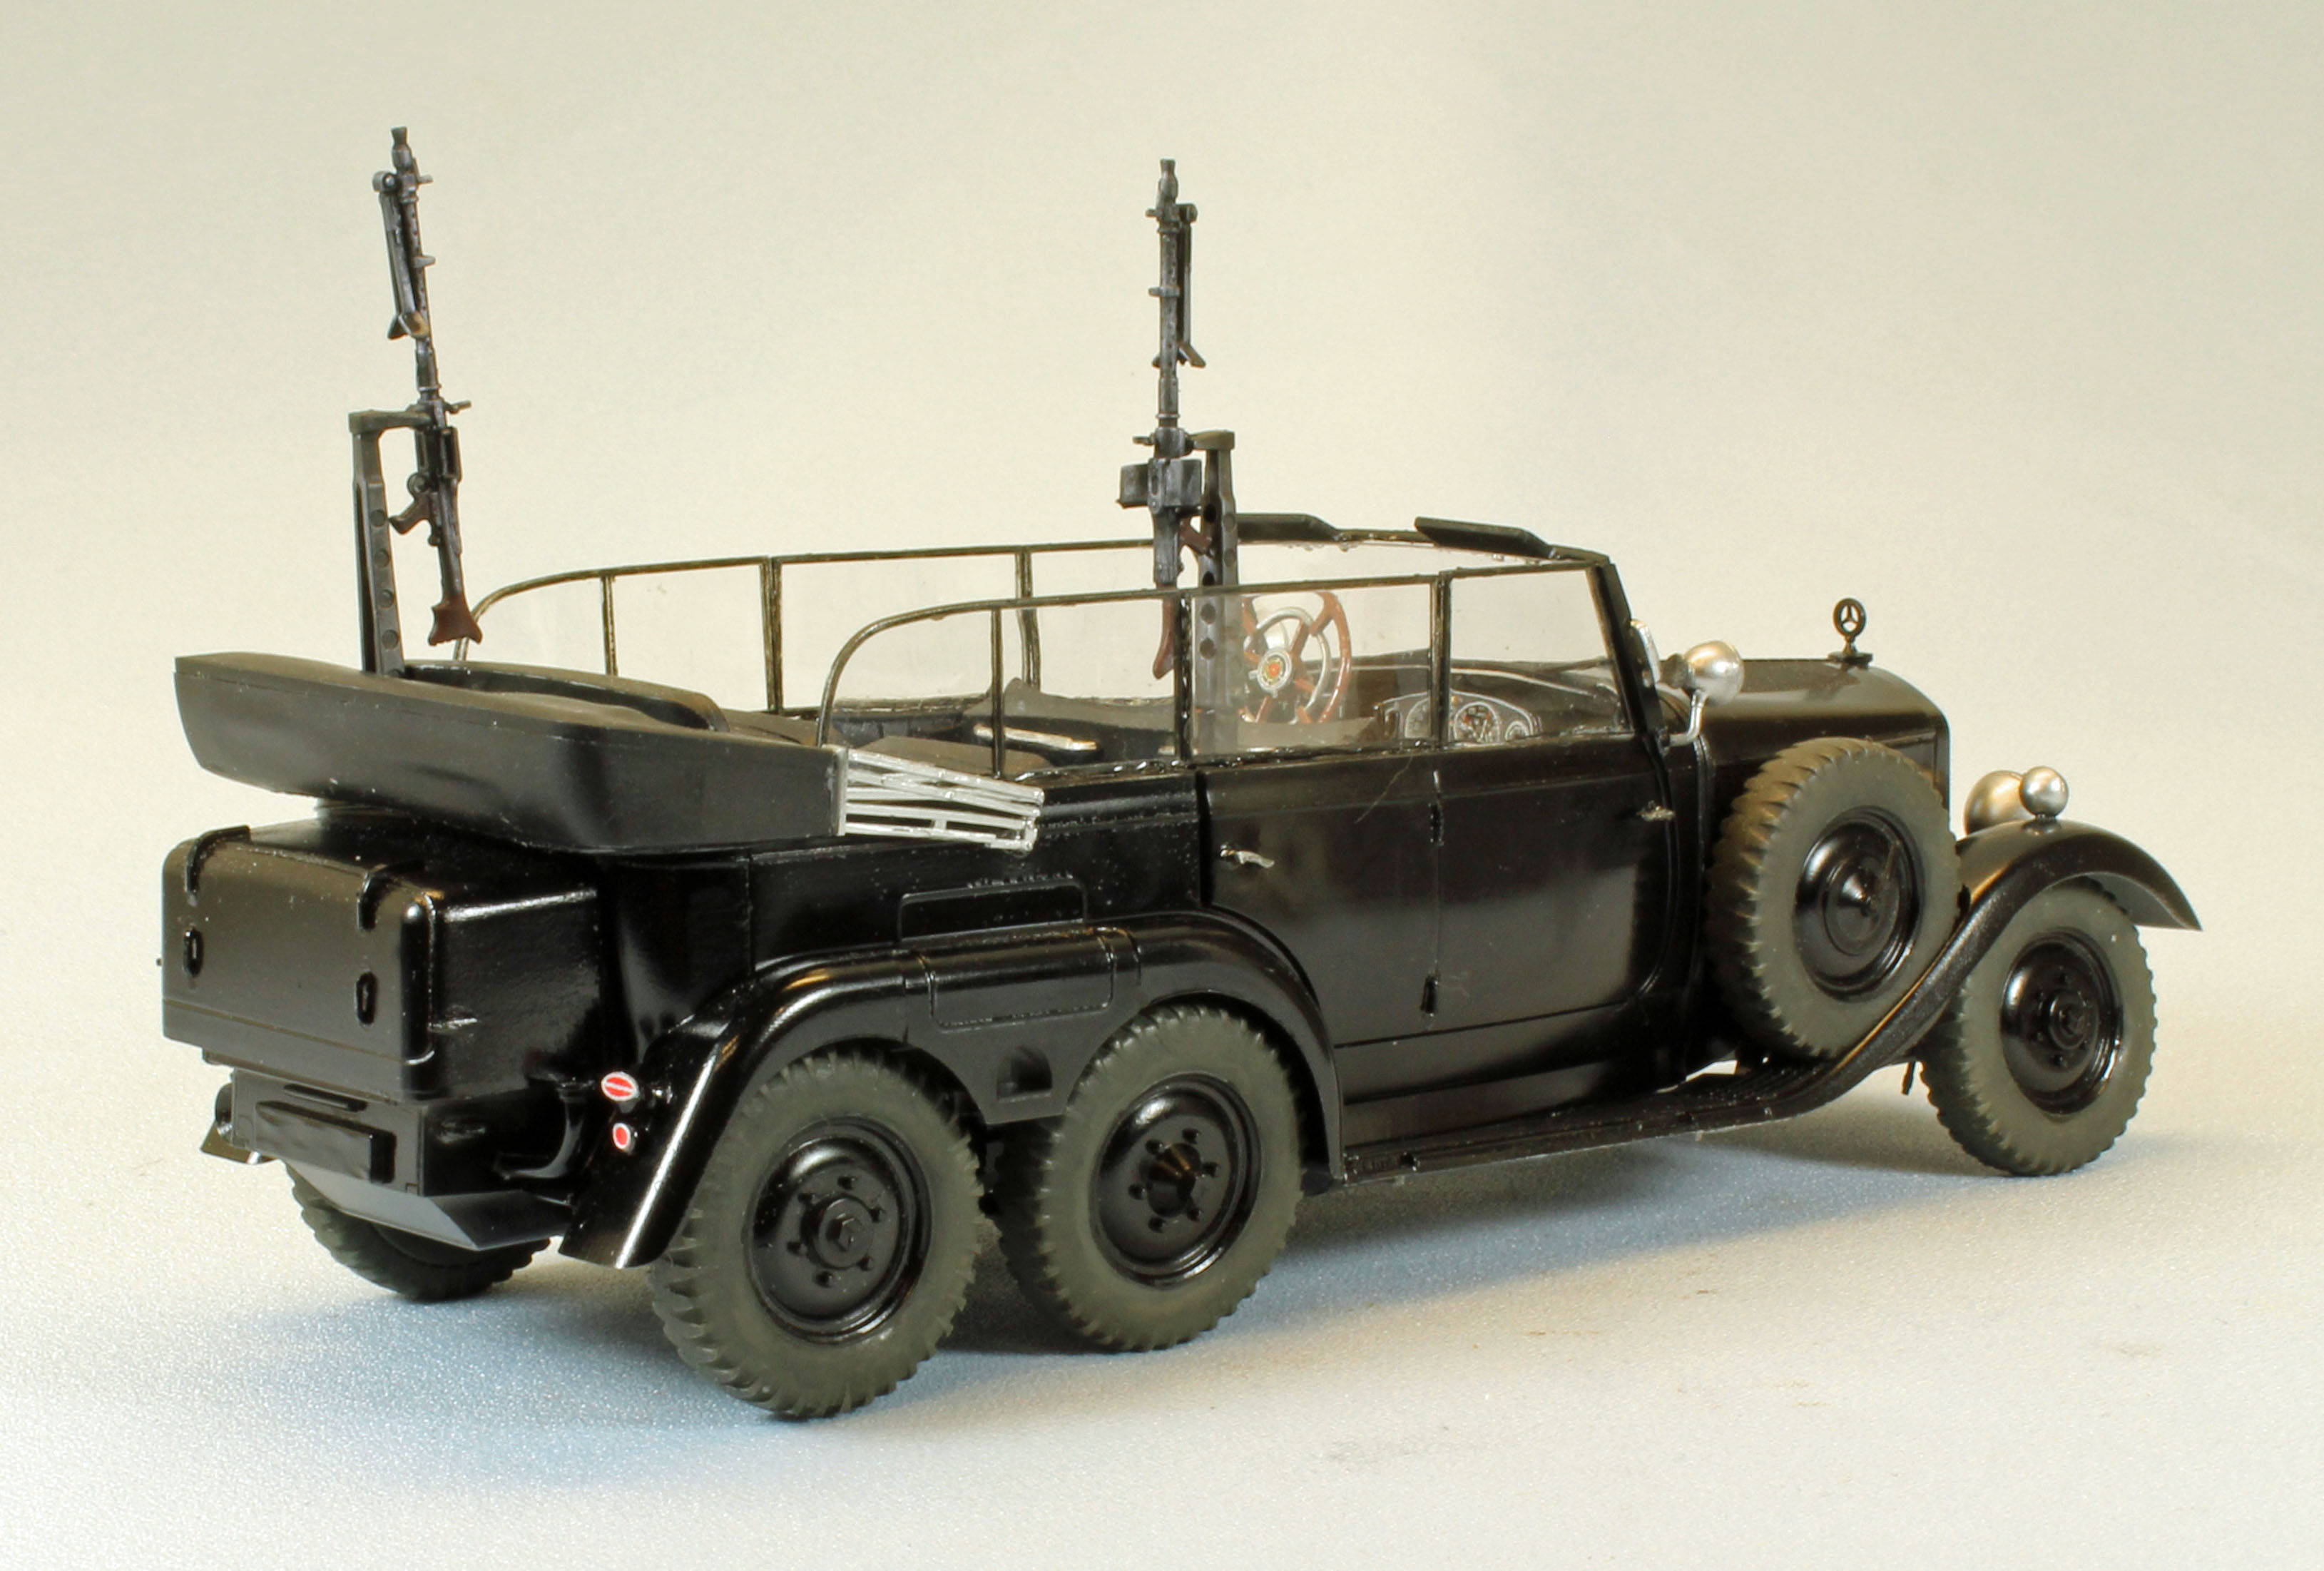
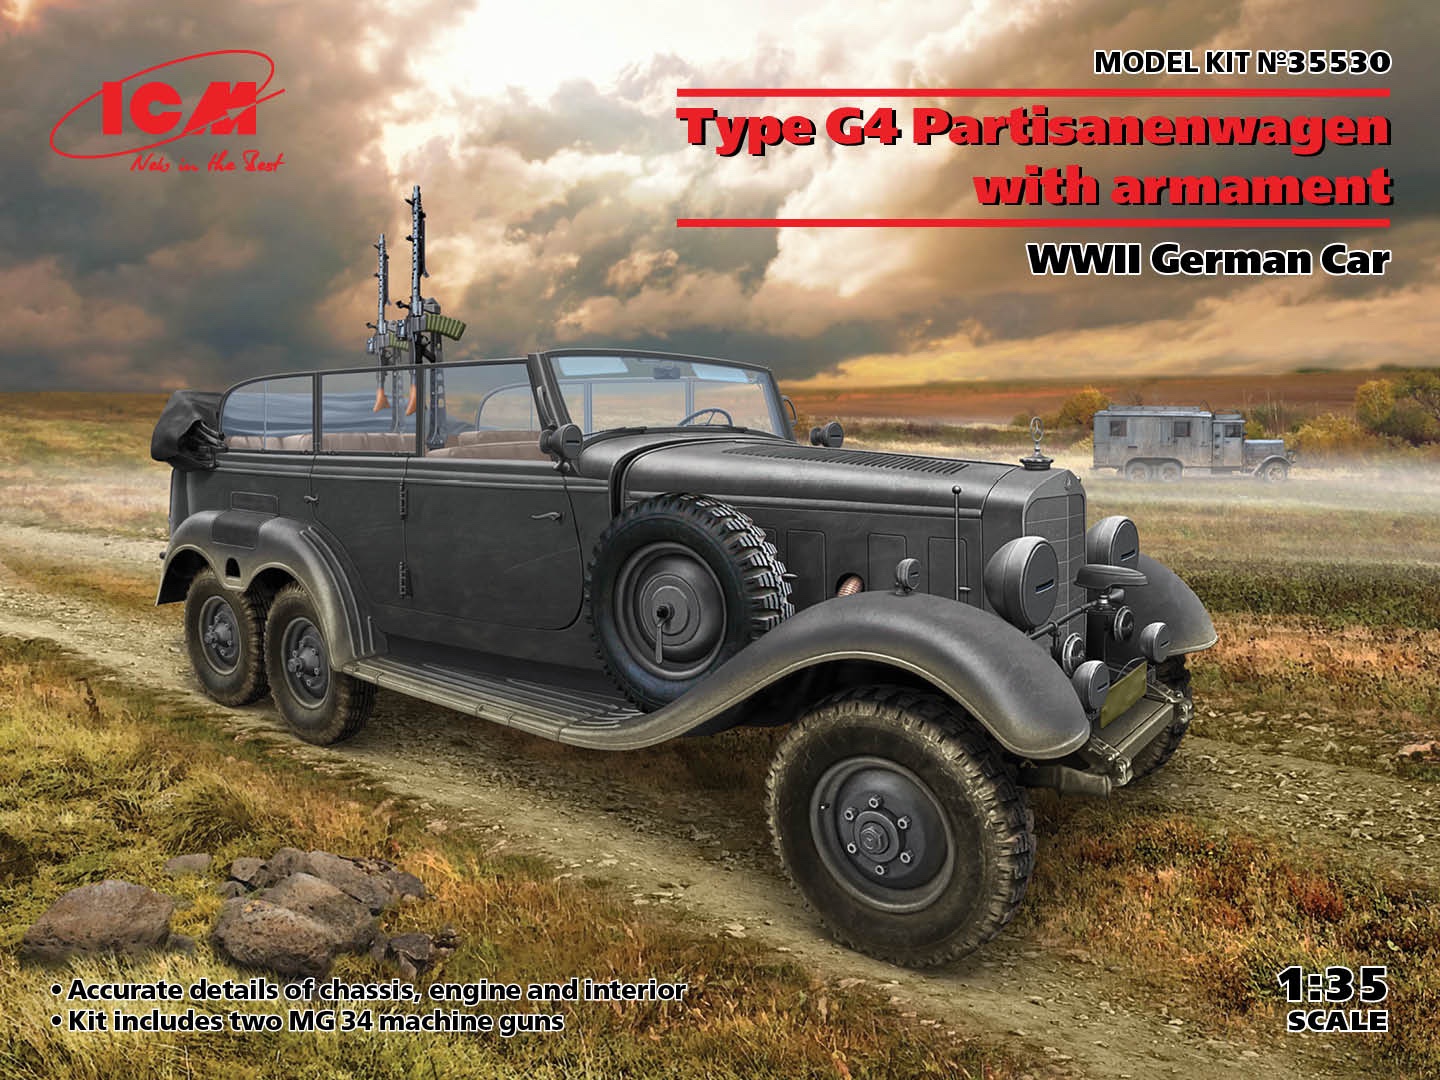
German Type G4 Partisanenwagen
by Eric Christianson
 Model: German Sd.Kfz. 247 Ausf B with Crew
Reviewed by: Eric Christianson, IPMS # 42218
Scale: 1/35
Company: ICM
Price: $65.97
Product/Stock #: 35530
Website: ICM
Product Web Page: View
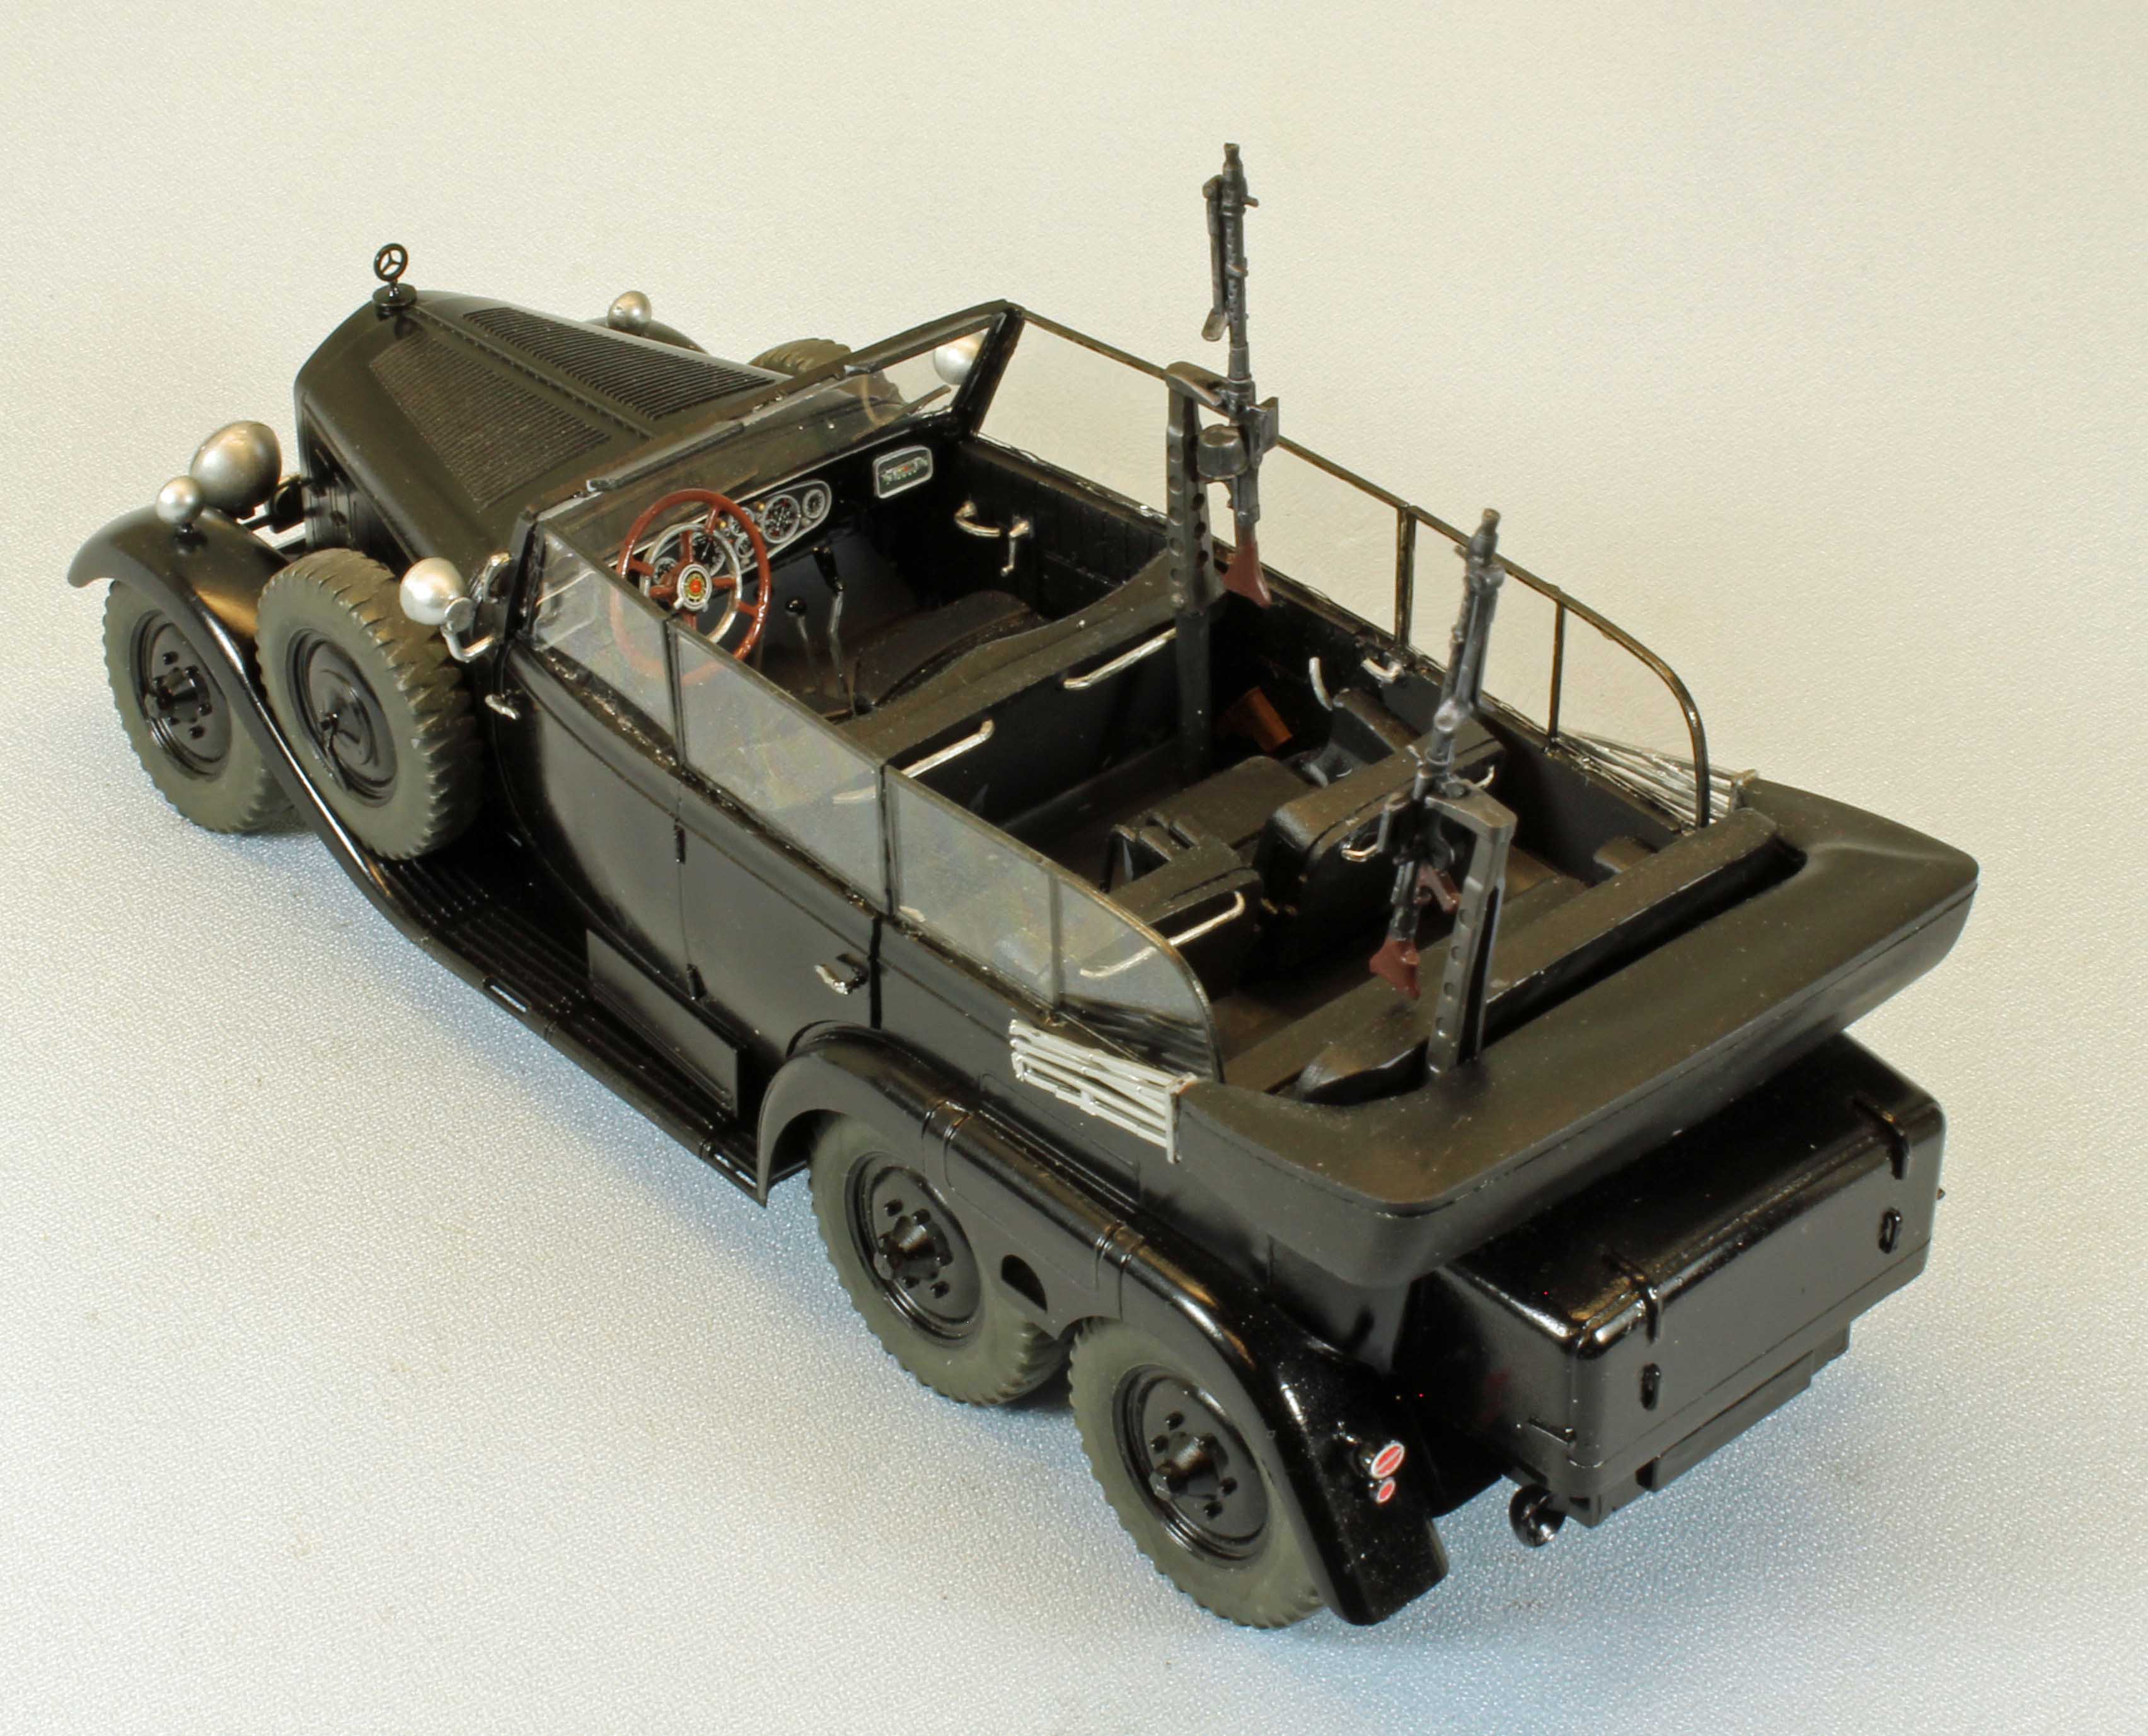
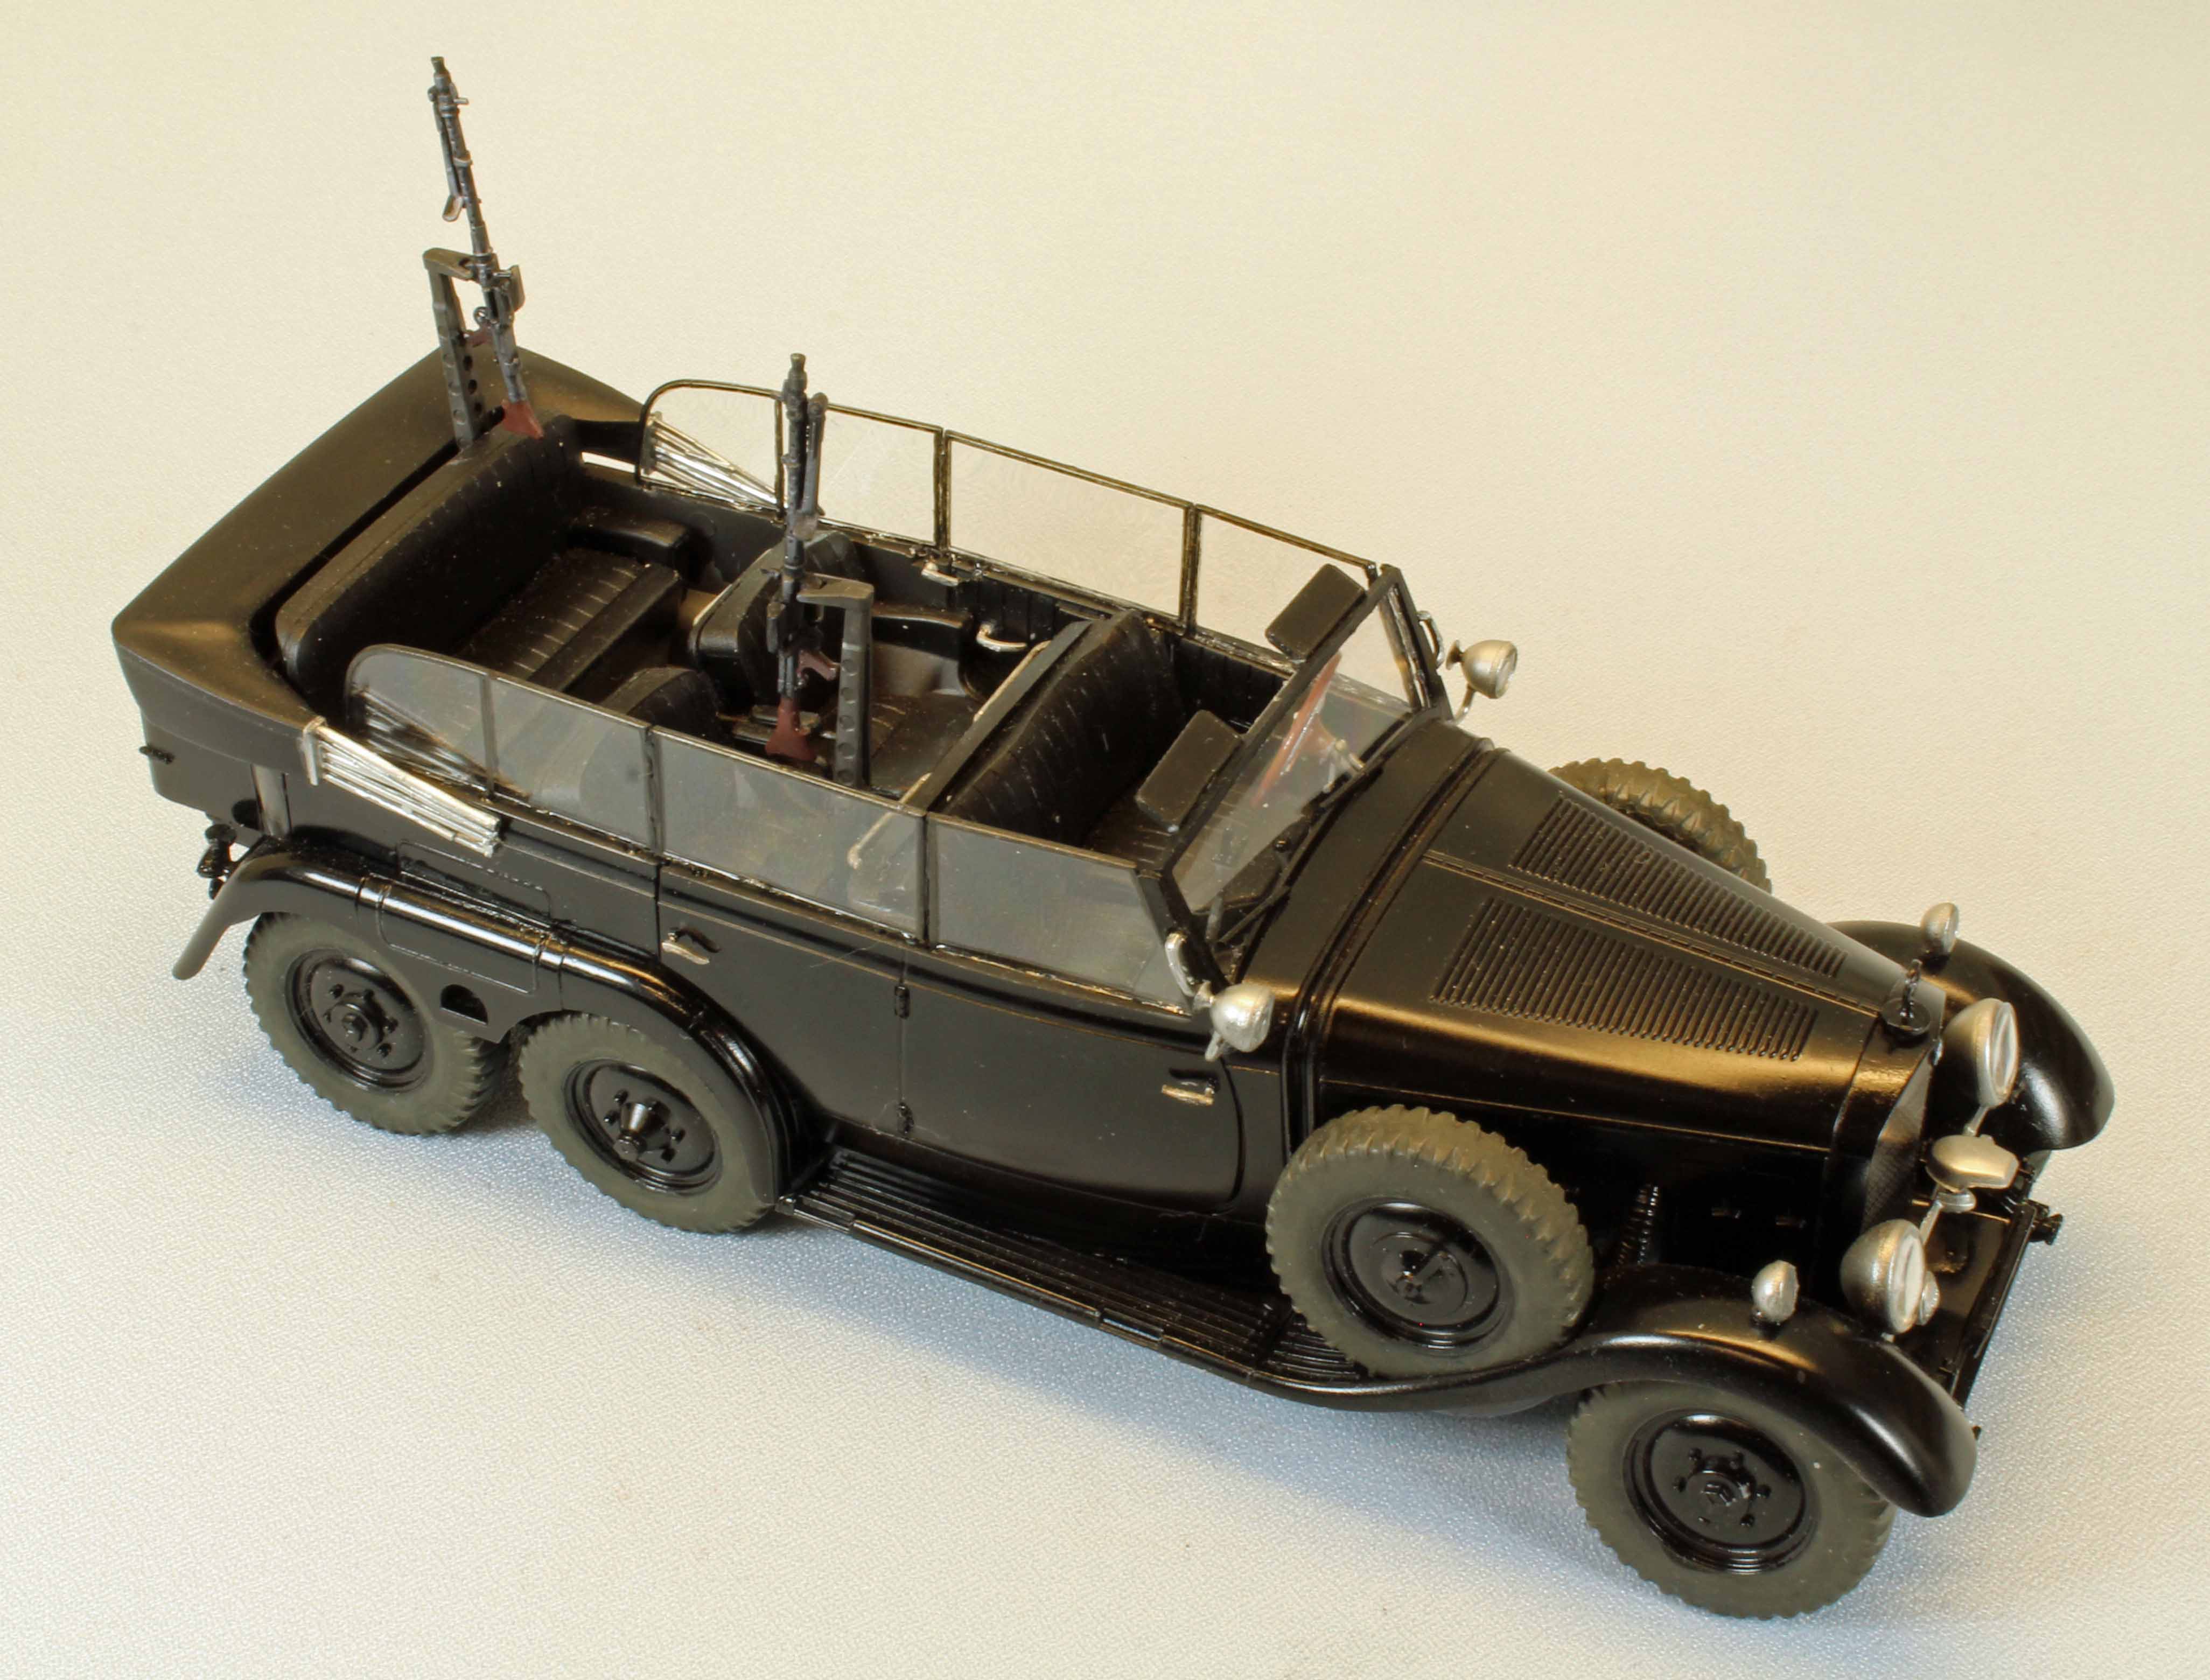
Ukraine-based ICM has enhanced their venerable six-wheeled G4 Staff Car with a couple of post-mounted Type 34 machine guns; a configuration that served to transport high command staff of the Wehrmacht, as well as guards and escorts. Vehicles in this variant were called Partisanenwagen. While the vehicle itself sports the older sprues from previous versions, the machine guns and mounts are new.
History
Officially introduced at the end of 1934, the three-axle Type G4 passenger car was designed by Daimler-Benz and produced until 1939. This heavy six-seater, off-road vehicle had an eight-cylinder engine with an output of 100 (later 110) hp and was designed for high-ranking officials of the Third Reich, as well as for the Wehrmacht where it was used as a staff car under the designation Kfz.21. The G4 was produced as a four-door sedan with a folding roof. The vehicle was too complex and expensive for mass production, so it was made in a relatively small quantity. Of the 57 cars produced, only three still exist in original form.
The Kit
Looking into the genealogy of the kit, ICM first introduced the G4 in 2011, adding decals and new parts through several versions. I make this distinction because most of the build reflects its 2013 heritage (the last time new parts were added). The fit is spotty in places, and the design is not the same as many of their more recent offerings. The two (new) sprues are limited to the machine guns and mounts, and are free of defects.
The first thing I noticed about ICM’s release was the unusual box. The kit is shipped in a sturdy, white ‘locking’ clamshell box. But instead of sliding a simple sleeve over the box, ICM drops a standard model box top over it. The overall impression is one of sturdiness. Since the kit is not shrink-wrapped, the double layering helps to ensure that nothing will be lost in transit. Nice. Once open, all parts are bagged and the decals are slipped inside the instruction booklet.
The plastic is soft but not too soft, and the molding is excellent with no noticeable flash or sink marks. The six tires and two spares are molded with their wheels as one piece, in plastic. The detail overall is crisp, and while many of the parts are very delicate, ICM pulls off the design without resorting to using photo-etch, which is a big plus (for me at least).
The contents of the box include:
- Seven sprues of parts molded in light-grey plastic, including 2 sprues for the Type 34mg’s, all packed in a single clear plastic bag.
- One sprue of clear parts, including headlights, windows, and hand-operated searchlight, packed in a single clear plastic bag.
- 1 small-sized decal sheet of instrument dials
- 1 28-page, full-size color instruction booklet, including a parts map and (one) three-view color painting and decal guide. All text and label information are translated into English.
There are no markings included for this vehicle.
The Instructions
The instruction booklet is excellent. Printed in color on high-quality, satin-finish paper, it starts off with a short history and vehicle specifications, color reference information, contact information, and an excellent parts map with unused parts clearly identified. What follows is a two-color set of instructions broken into 138 well-illustrated, small steps. Images are rendered from several angles so you are never forced to guess about how things go on ‘the other side’. The last page shows a full-color three-view of a single German Grey camouflage scheme.
Clearly ICM has invested heavily in making an excellent set of instructions, and the quality shows through. Good job.
(Minor errors in the instructions are called out in the build sections below.)
What to Consider Before You Start
There is a lot of detail that is visible on the finished model, adding several painting steps during the build which will cause you to deviate from the instructions as needed. Many parts are very small and delicate and care in handling must be taken once they are attached. The wheels and windows can be painted separately and added to the vehicle at the very end of the build. If you want to paint this vehicle in two or three tone (as in museum replicas), you will need to study the construction sequence very carefully and make changes where appropriate. It will be too late, for example, to paint the front fenders a different color from the chassis if you attach them in Step 54, as instructed – they can actually stay off the chassis until Step 119! Otherwise, take the time to check the fit on everything – there are many challenges in this kit; but things will come together fine if you go slowly.
The Build
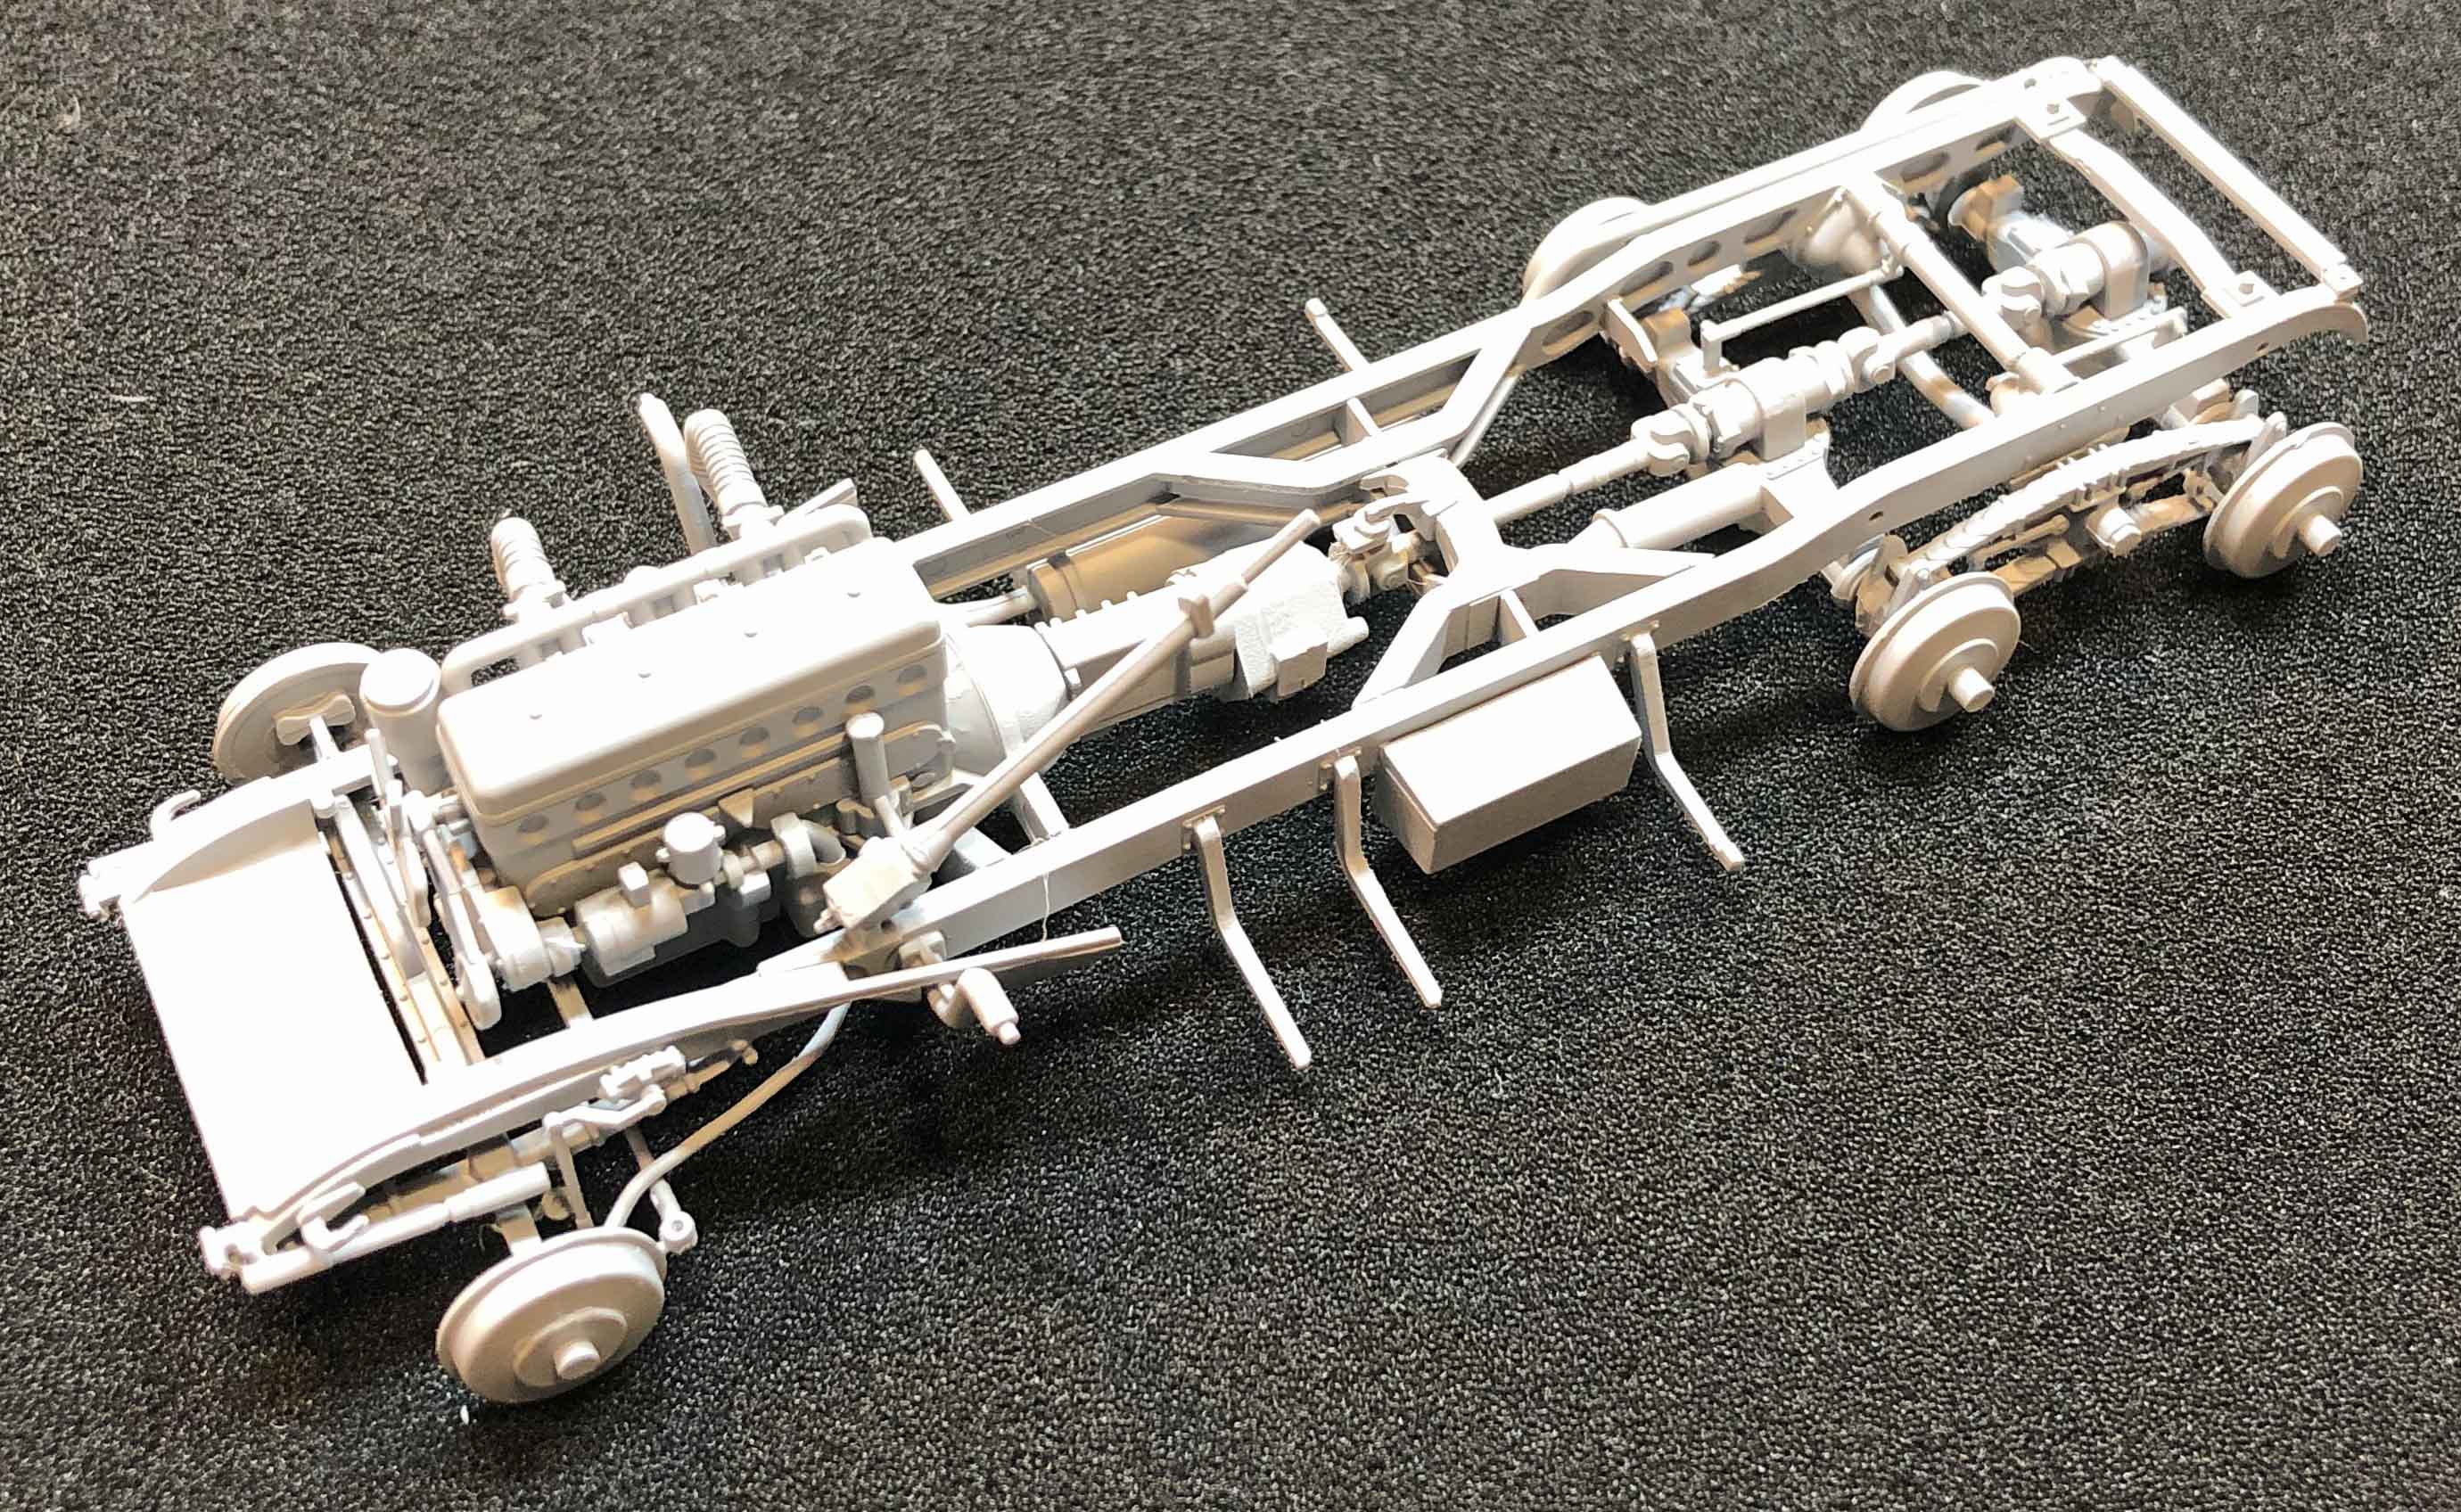
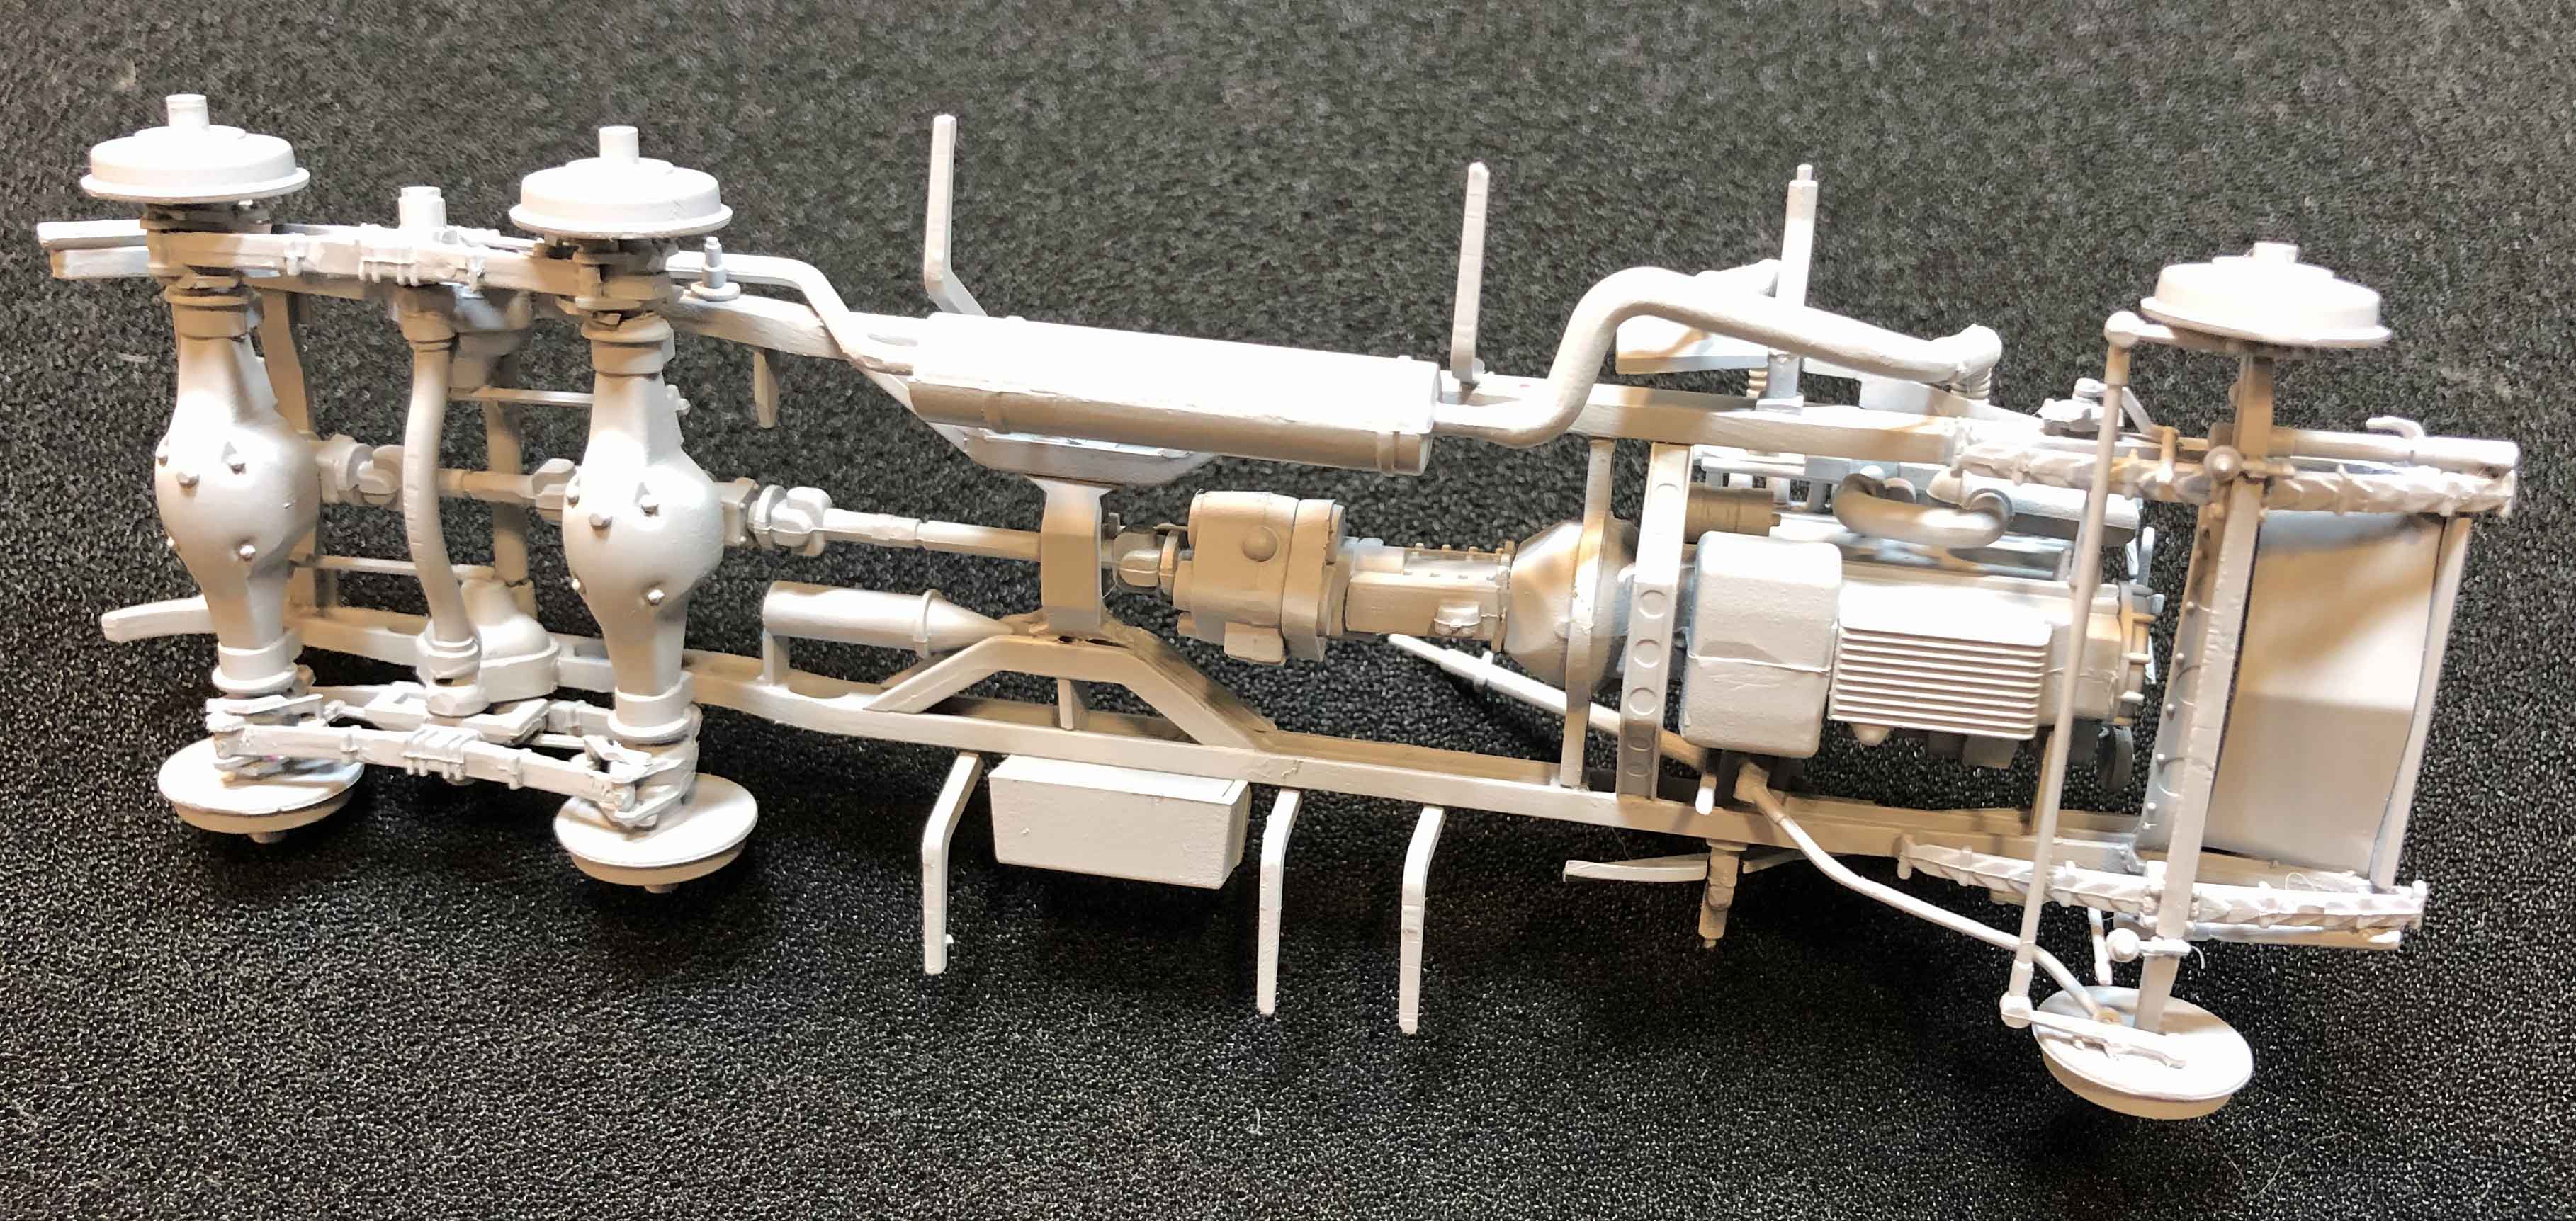
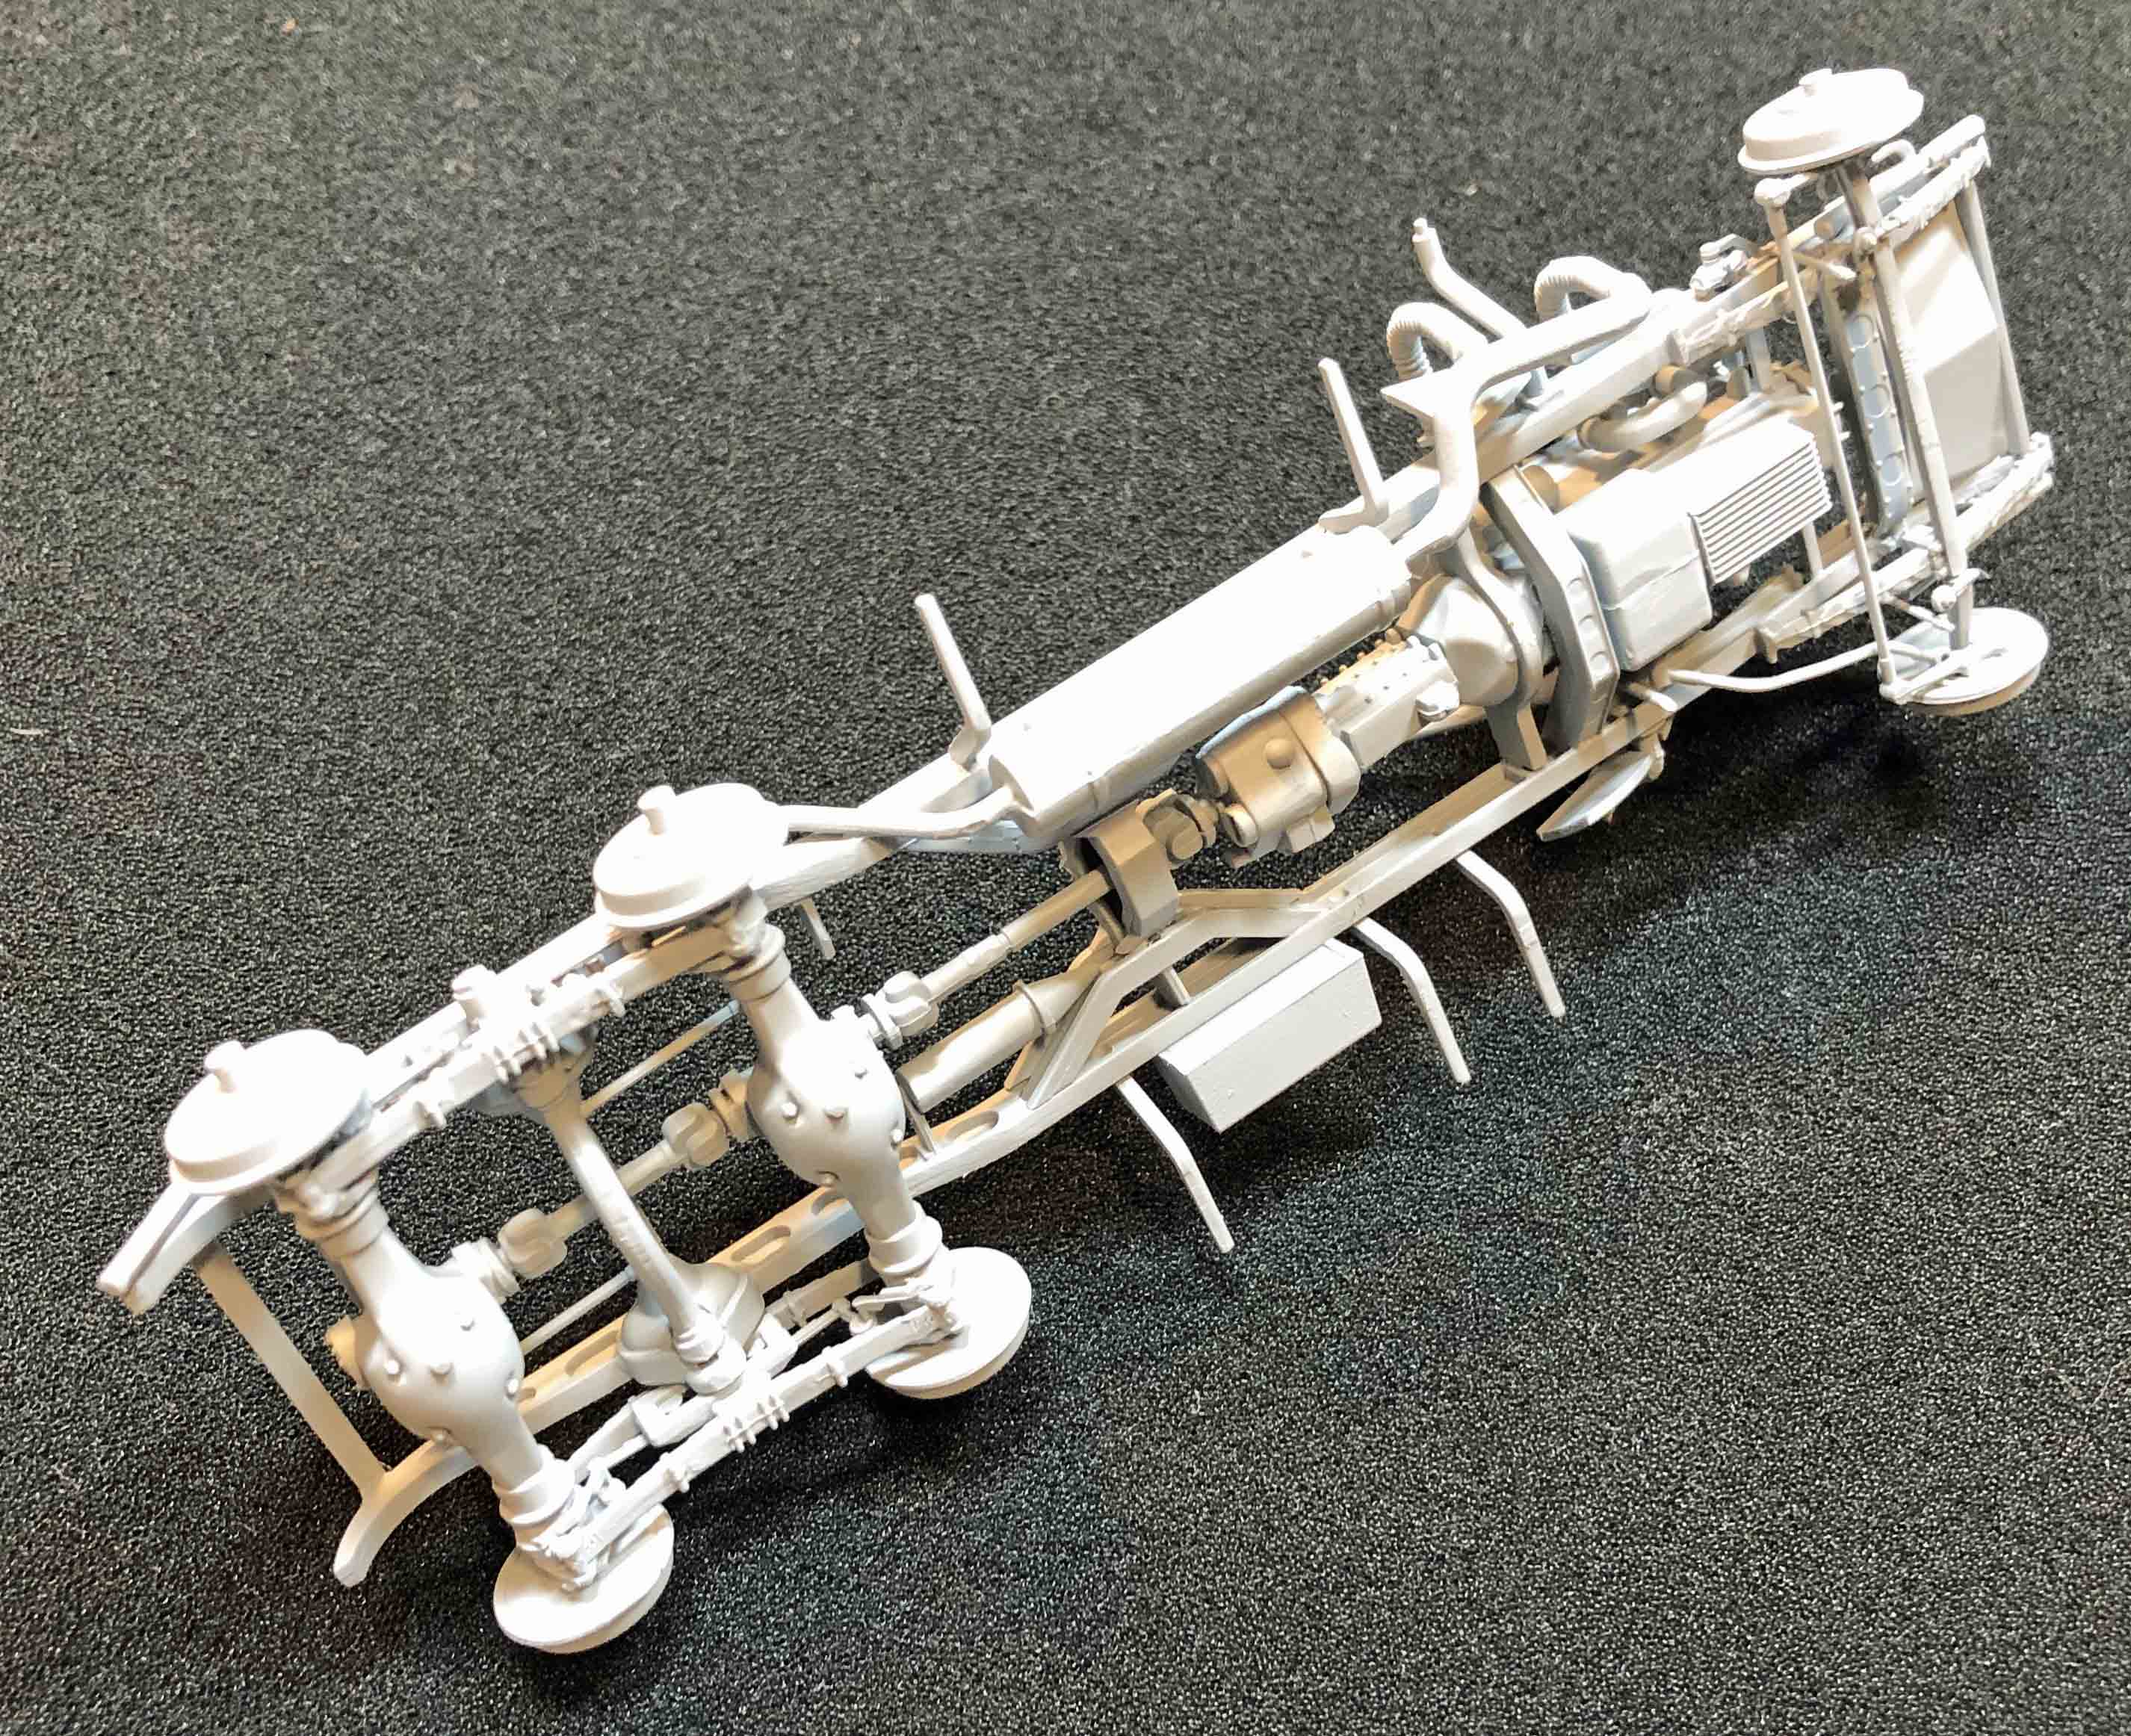
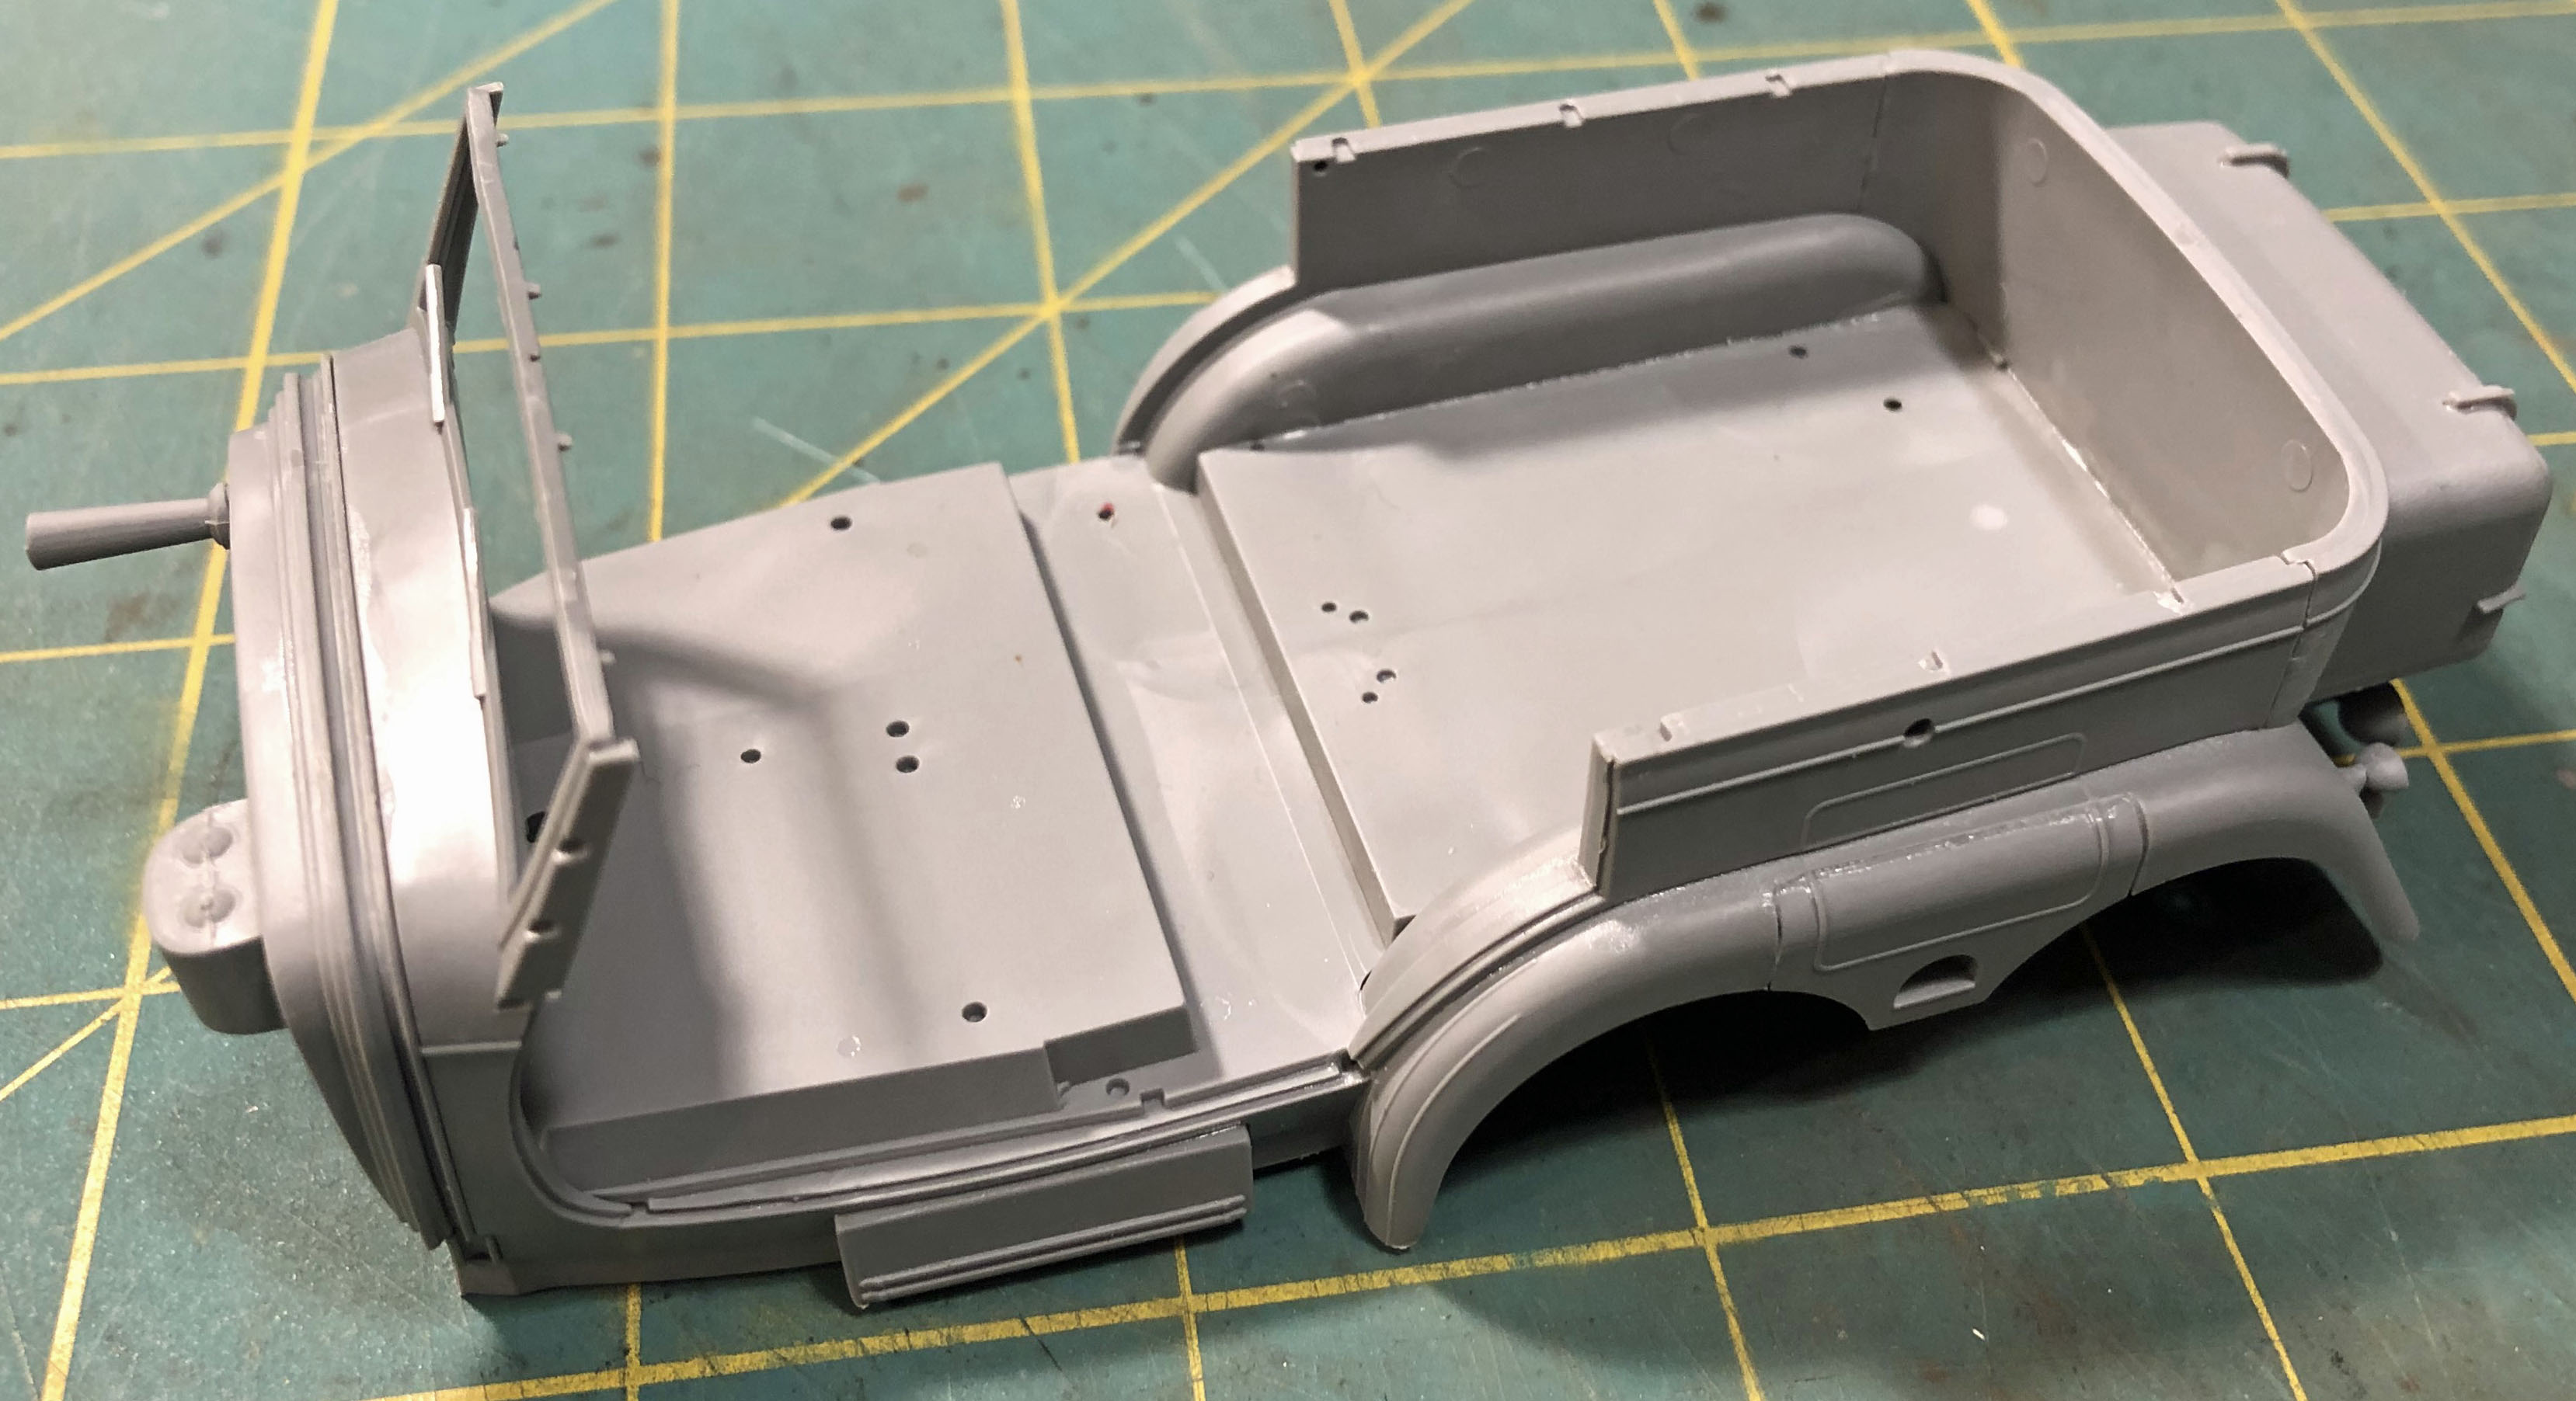
Assembly starts with the lower chassis, which is quite detailed and built in layers. Unable to take advantage of the slide-molding technology found in their more recent kits, the G4 relies on a chassis based on two long, full-length parallel beams, connected by a half-dozen cross members and other assemblies, such as the engine. Any mistake made here will show itself later on if things don’t align perfectly, so go slow and be methodical. Many parts are sided, and can attach more than one way; but they can only go on one way without causing problems later on. I suggest that you pause to let everything dry fast in Steps 11 and 15, before continuing on. Part A55 in Step 19 will reflect the final color of the vehicle – this is the first point where the final painting scheme must be taken into consideration during construction.
The first real challenge comes with the assembly of the double axel in the rear (Steps 22-45), which consists of 45 small parts that don’t want to stay put once assembled. Note: Part C58 is not called out in the Parts Map, or labeled on the sprue. Steps 28-33 look simple in the instructions but ‘there be tigers here’ – the similarity in parts and image orientation may cause confusion. The wrong parts in the wrong place fit fine until added to the larger assembly later.
The exhaust system is next, and I suggest that you attach the muffler to the chassis as a first step. Once that is dry, attach the rest of the piping and hoses to the muffler and chassis, now that you know the orientation and how things will fit. The images in the instructions are well done; they just fall short of showing the actual angles that everything needs to be at.
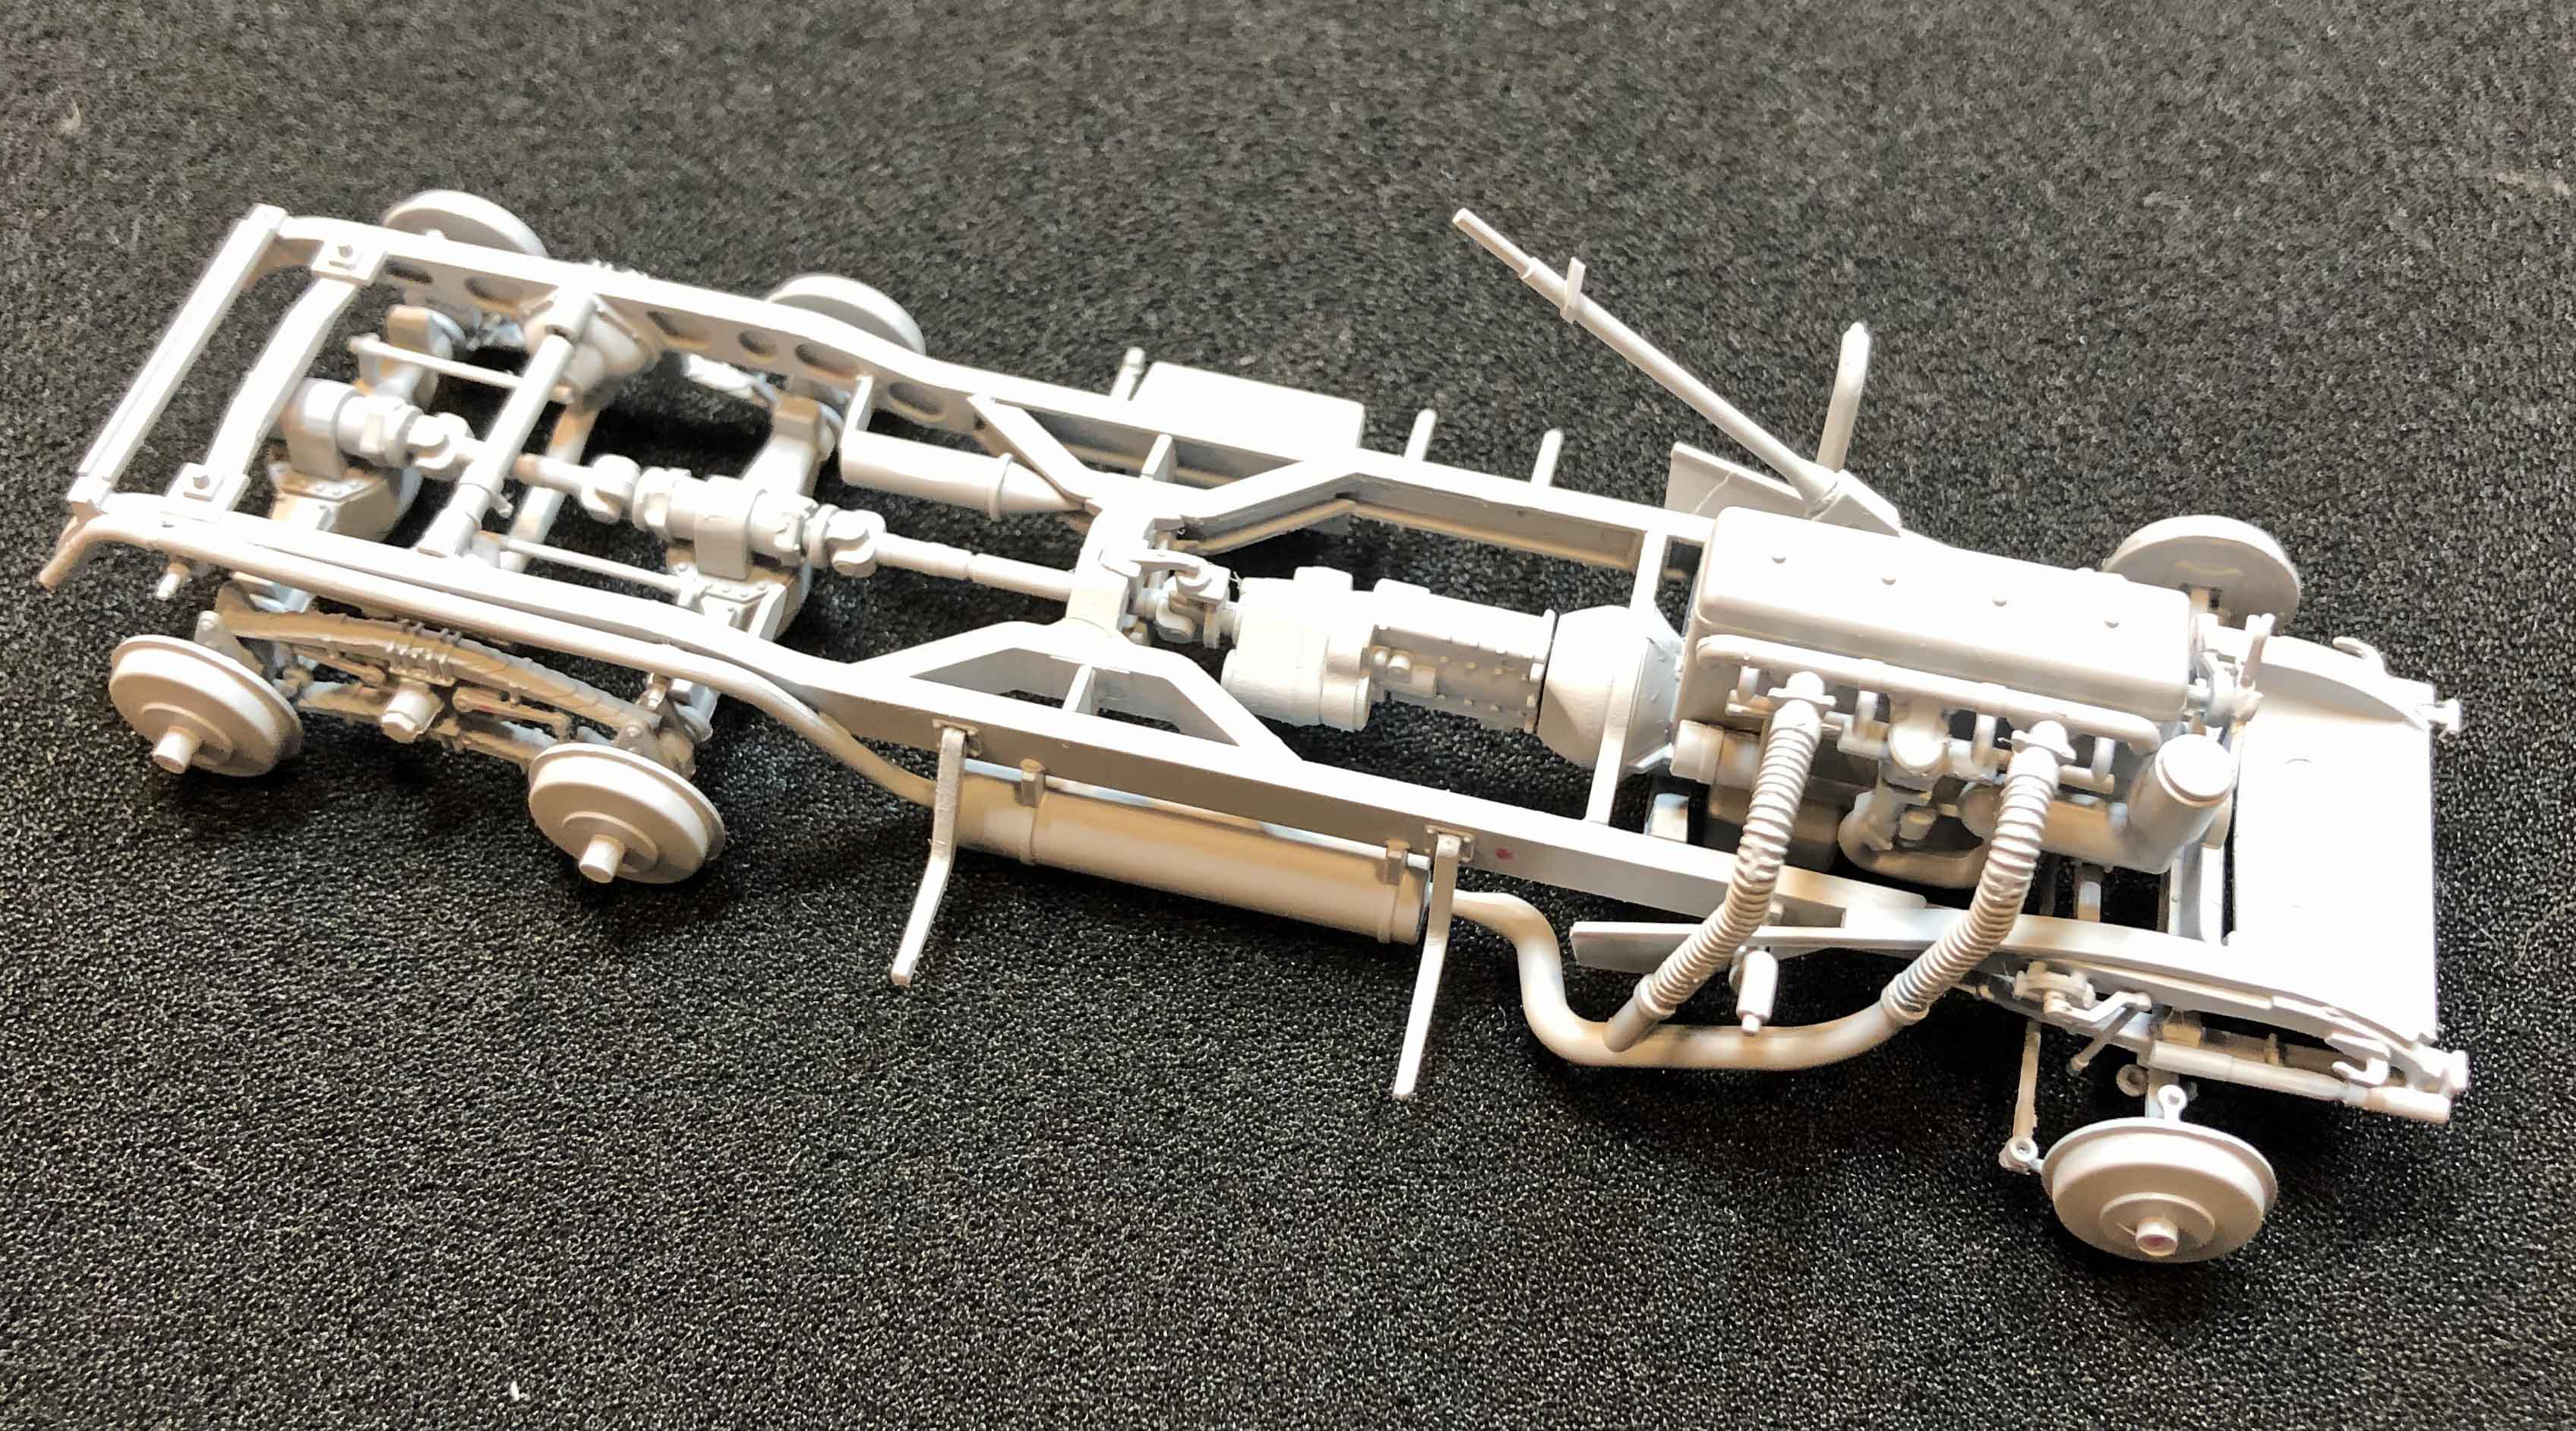
Attaching the Wheels
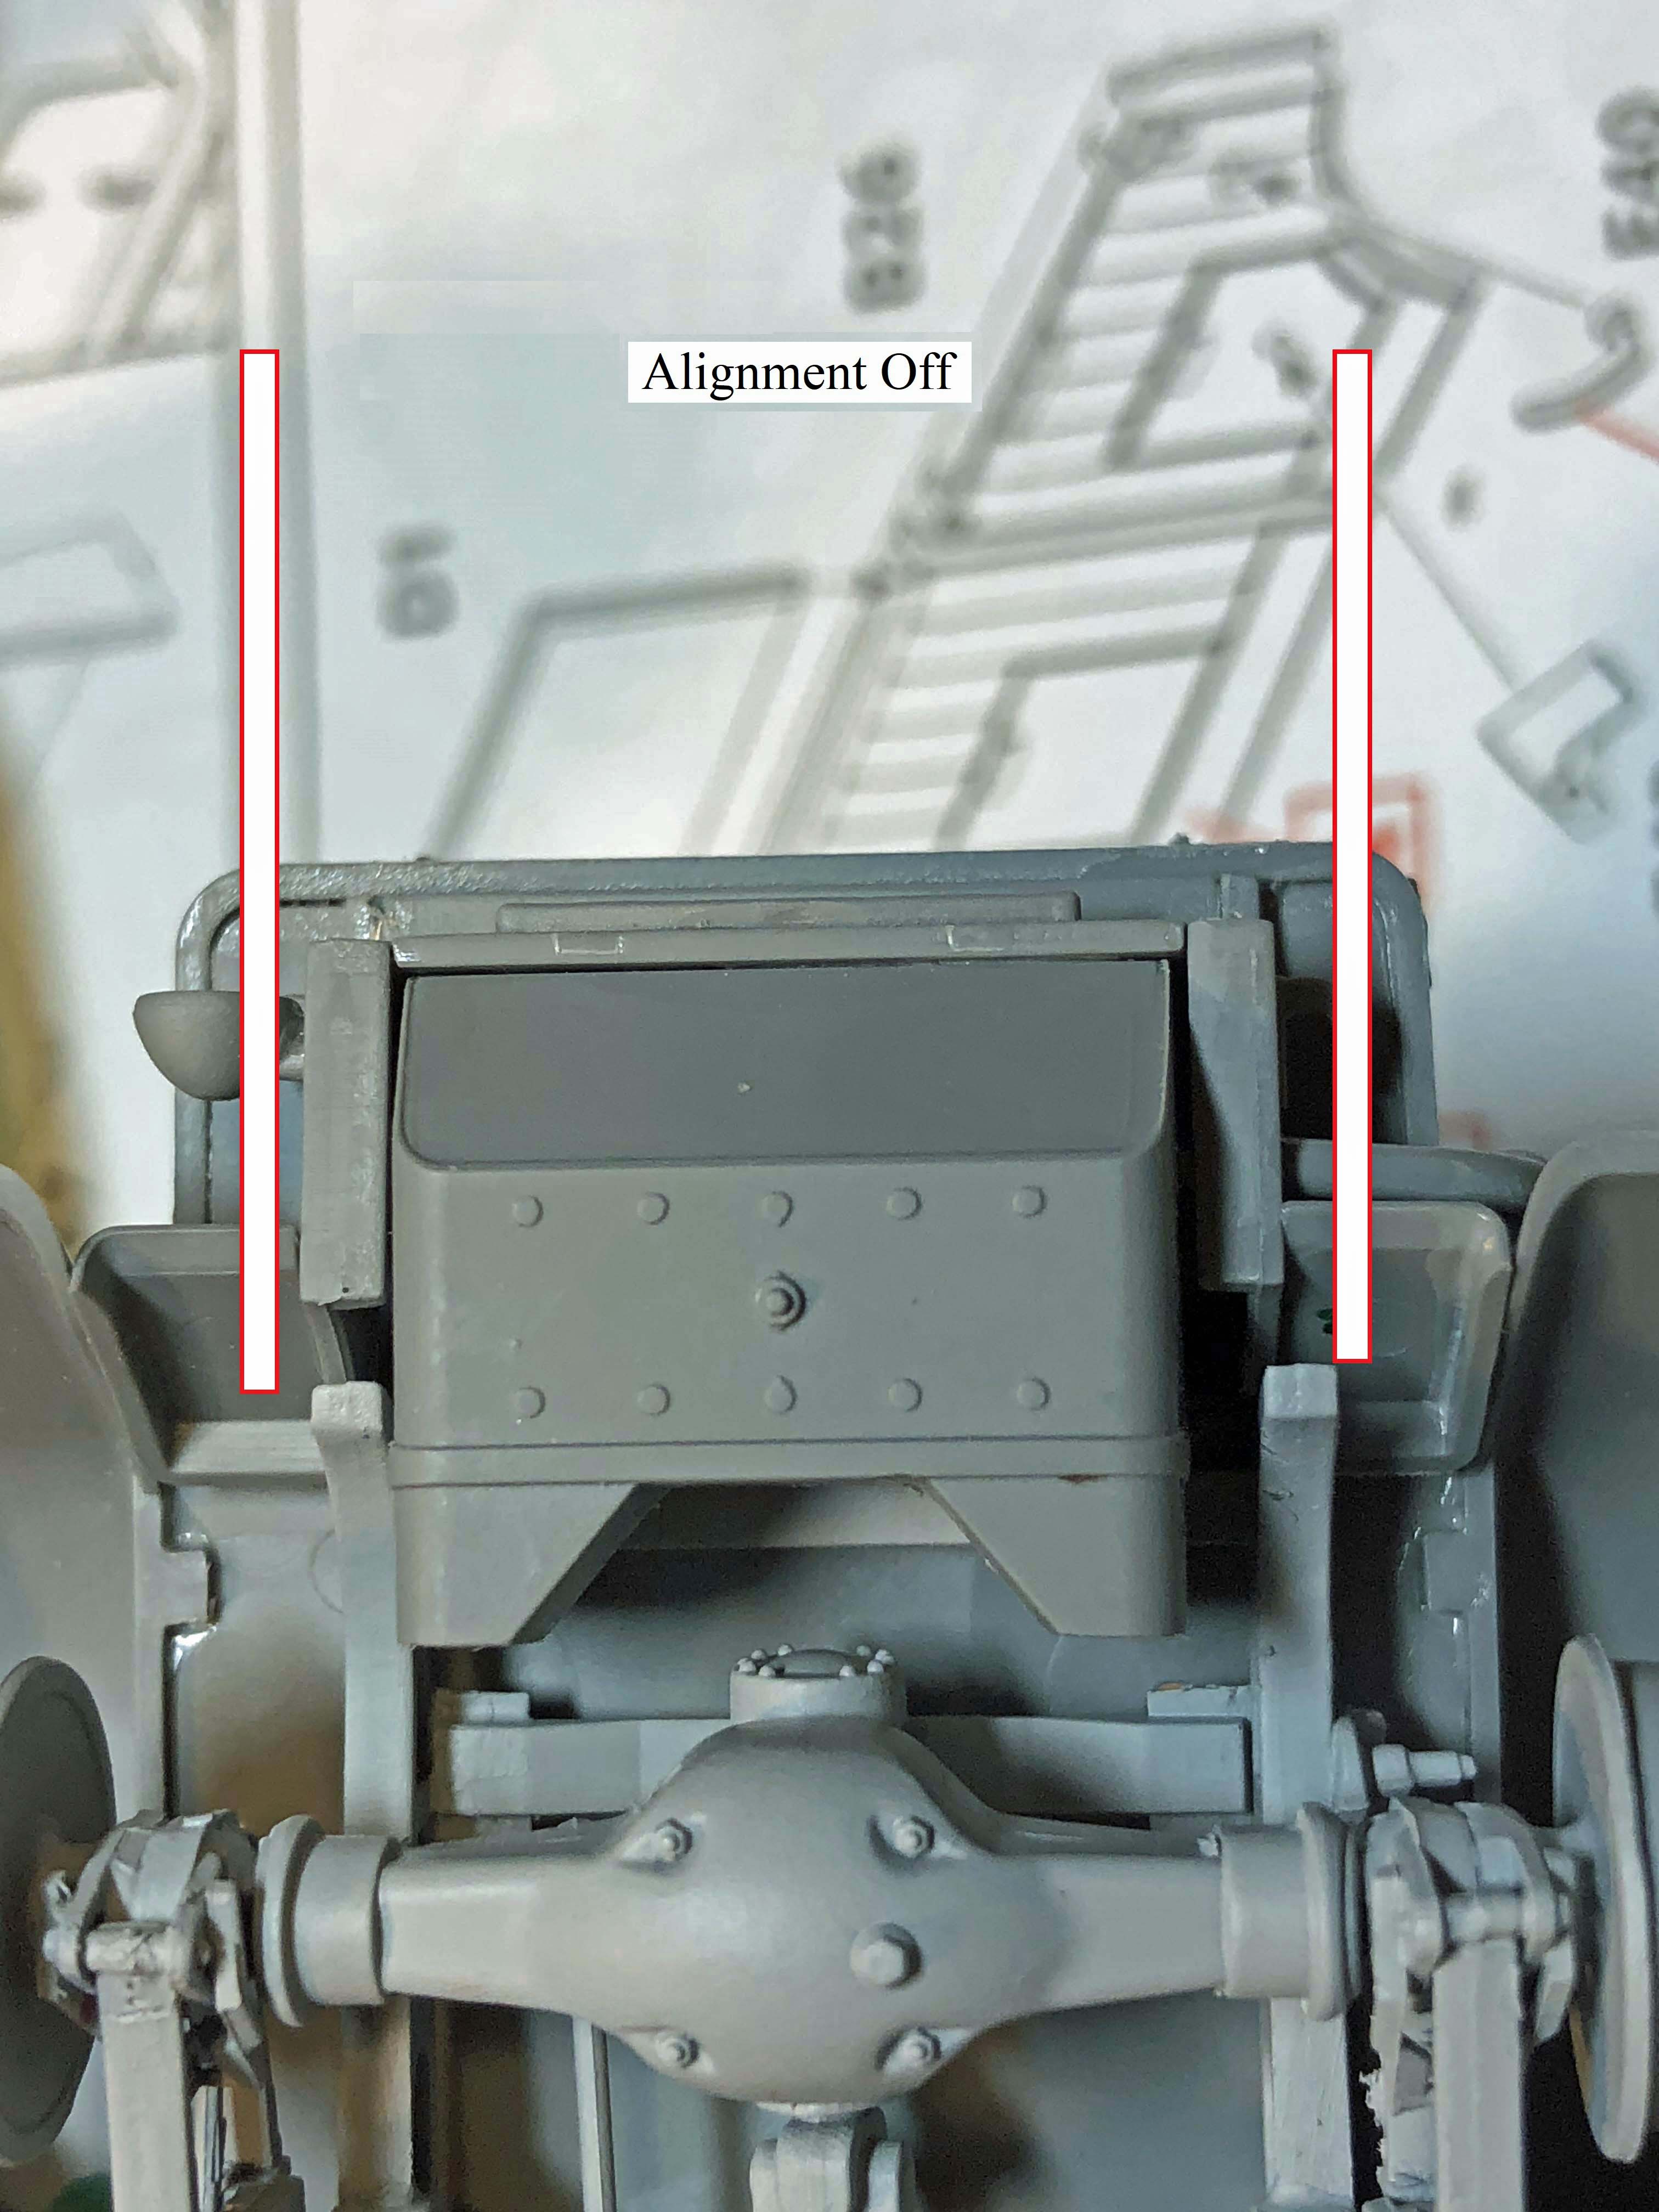
ICM designed the kit so that the eight, multi-part wheels can be painted, weathered, and attached at the end of the build, which is what I did. I attached the front two ‘brake drums’ (Parts C7/C8) per the instructions in Steps 23 and 25. I also attached the four rear brake drums (Part C9) in Step 25, and the two spare wheels (in their entirety) at the end of the build.
The actual attachment points between the brake drums and the wheels, as well as the attachment points of the four rear brake drums to the chassis, are small and tenuous at best. It’s almost as if they were designed to break off. The (male) posts on all six drums stand just proud of sealing into their (female) destinations, and the four rear drums themselves stand just proud of sealing on the axles - so the actual connecting material for all of these points is made up of just the tiny posts themselves.
I decided that a few adjustments were needed to give the wheels the firm connection they required without affecting their overall placement on the vehicle. For the four rear drums, I drilled out the small indentations on the ‘backs’ of Part C9 to a depth needed to have the entire chassis ‘nubs’ seal to the brake drums.
Solving the other issue of having the wheels themselves attach to more than just a tiny post, I filled the cavity behind the wheels with two-part epoxy before pushing each wheel onto the receiving brake drum. The posts were now reinforced with the epoxy, and the slow-drying time allowed me to make sure that all wheels touched the ground and were lined up. I did this by using an old aircraft trick – I laid the completed car on its top (upside down) and placed a flat piece of stiff cardboard on it to ensure that every wheel touched the cardboard and lined up.
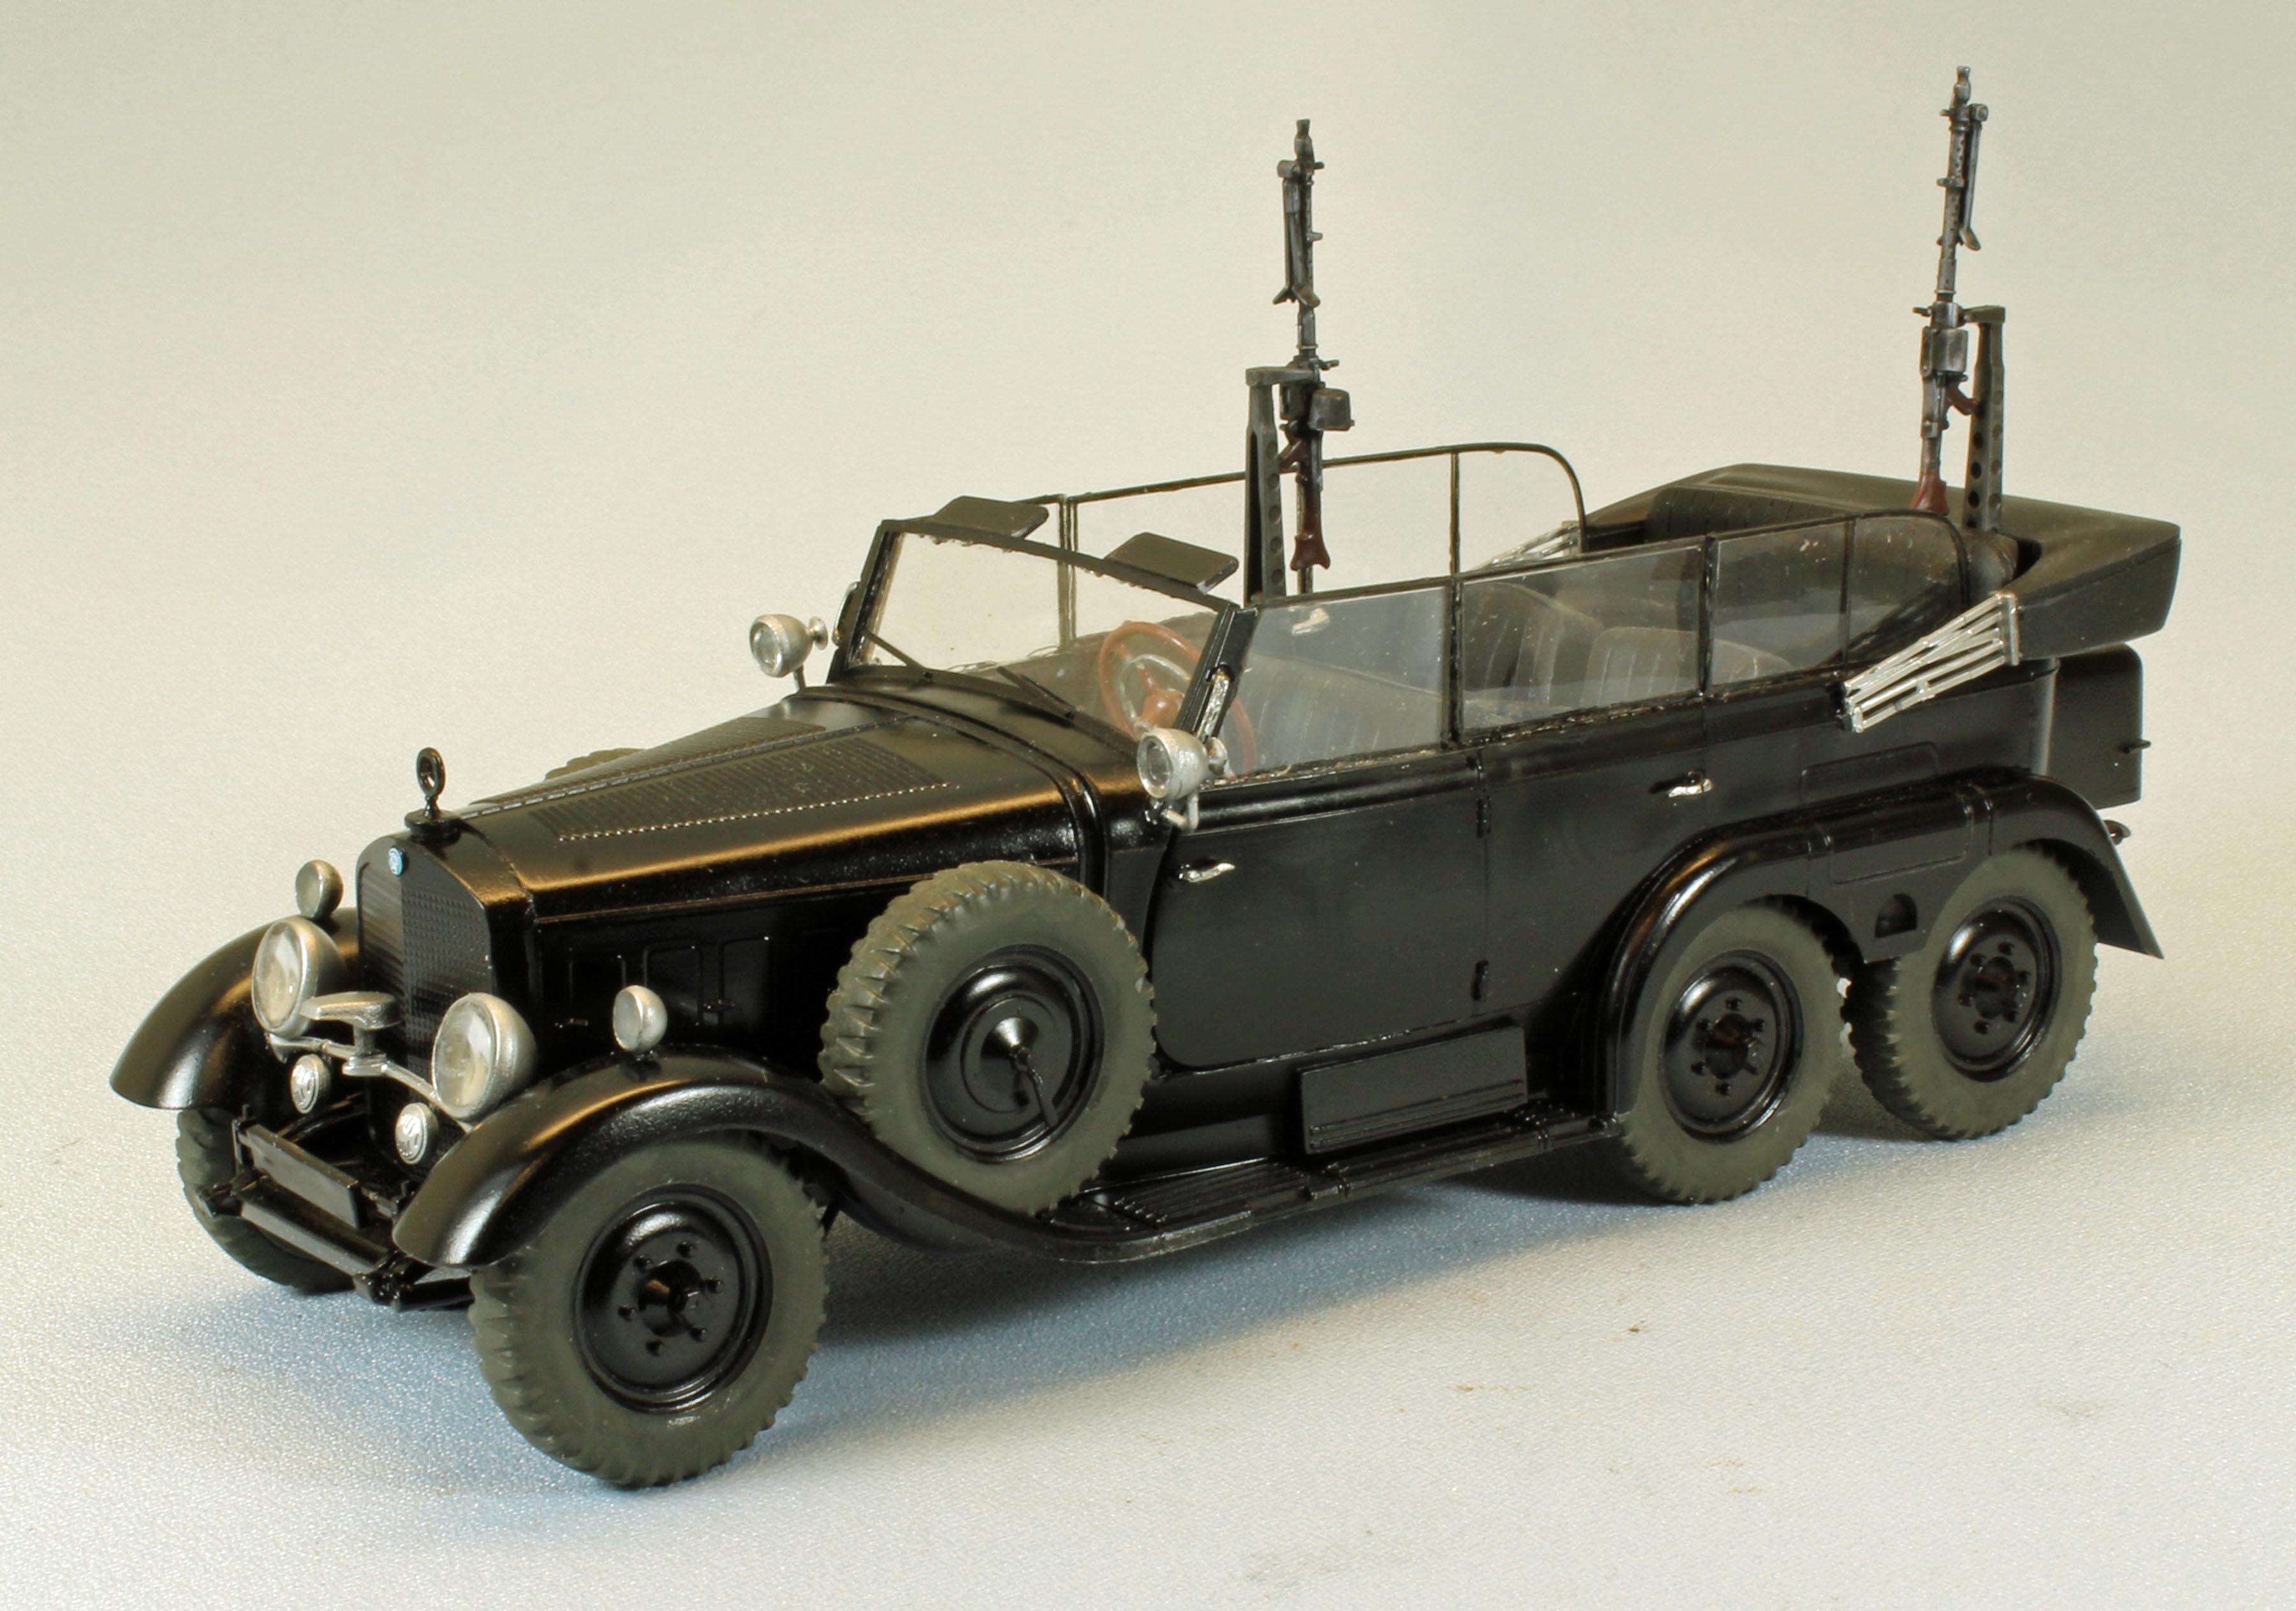
I substituted the dashboard decals provided by ICM with an excellent 3-D decal set produced by Quinta Studio [Mercedes-Benz G4 W31 interior 3D decals, Quinta Studio QD35021 (2021) (scalemates.com)], custom-made for the ICM G4 Mercedes. Access to this area is limited after Step 59, so I suggest you paint things up, throw on the decals, and loosely mask everything over to uncover later. The centrally-located machine gun mount hole is drilled out in Step 61. The two machine gun mount ‘male’ studs are of different sizes so make sure you keep track of what goes in where.
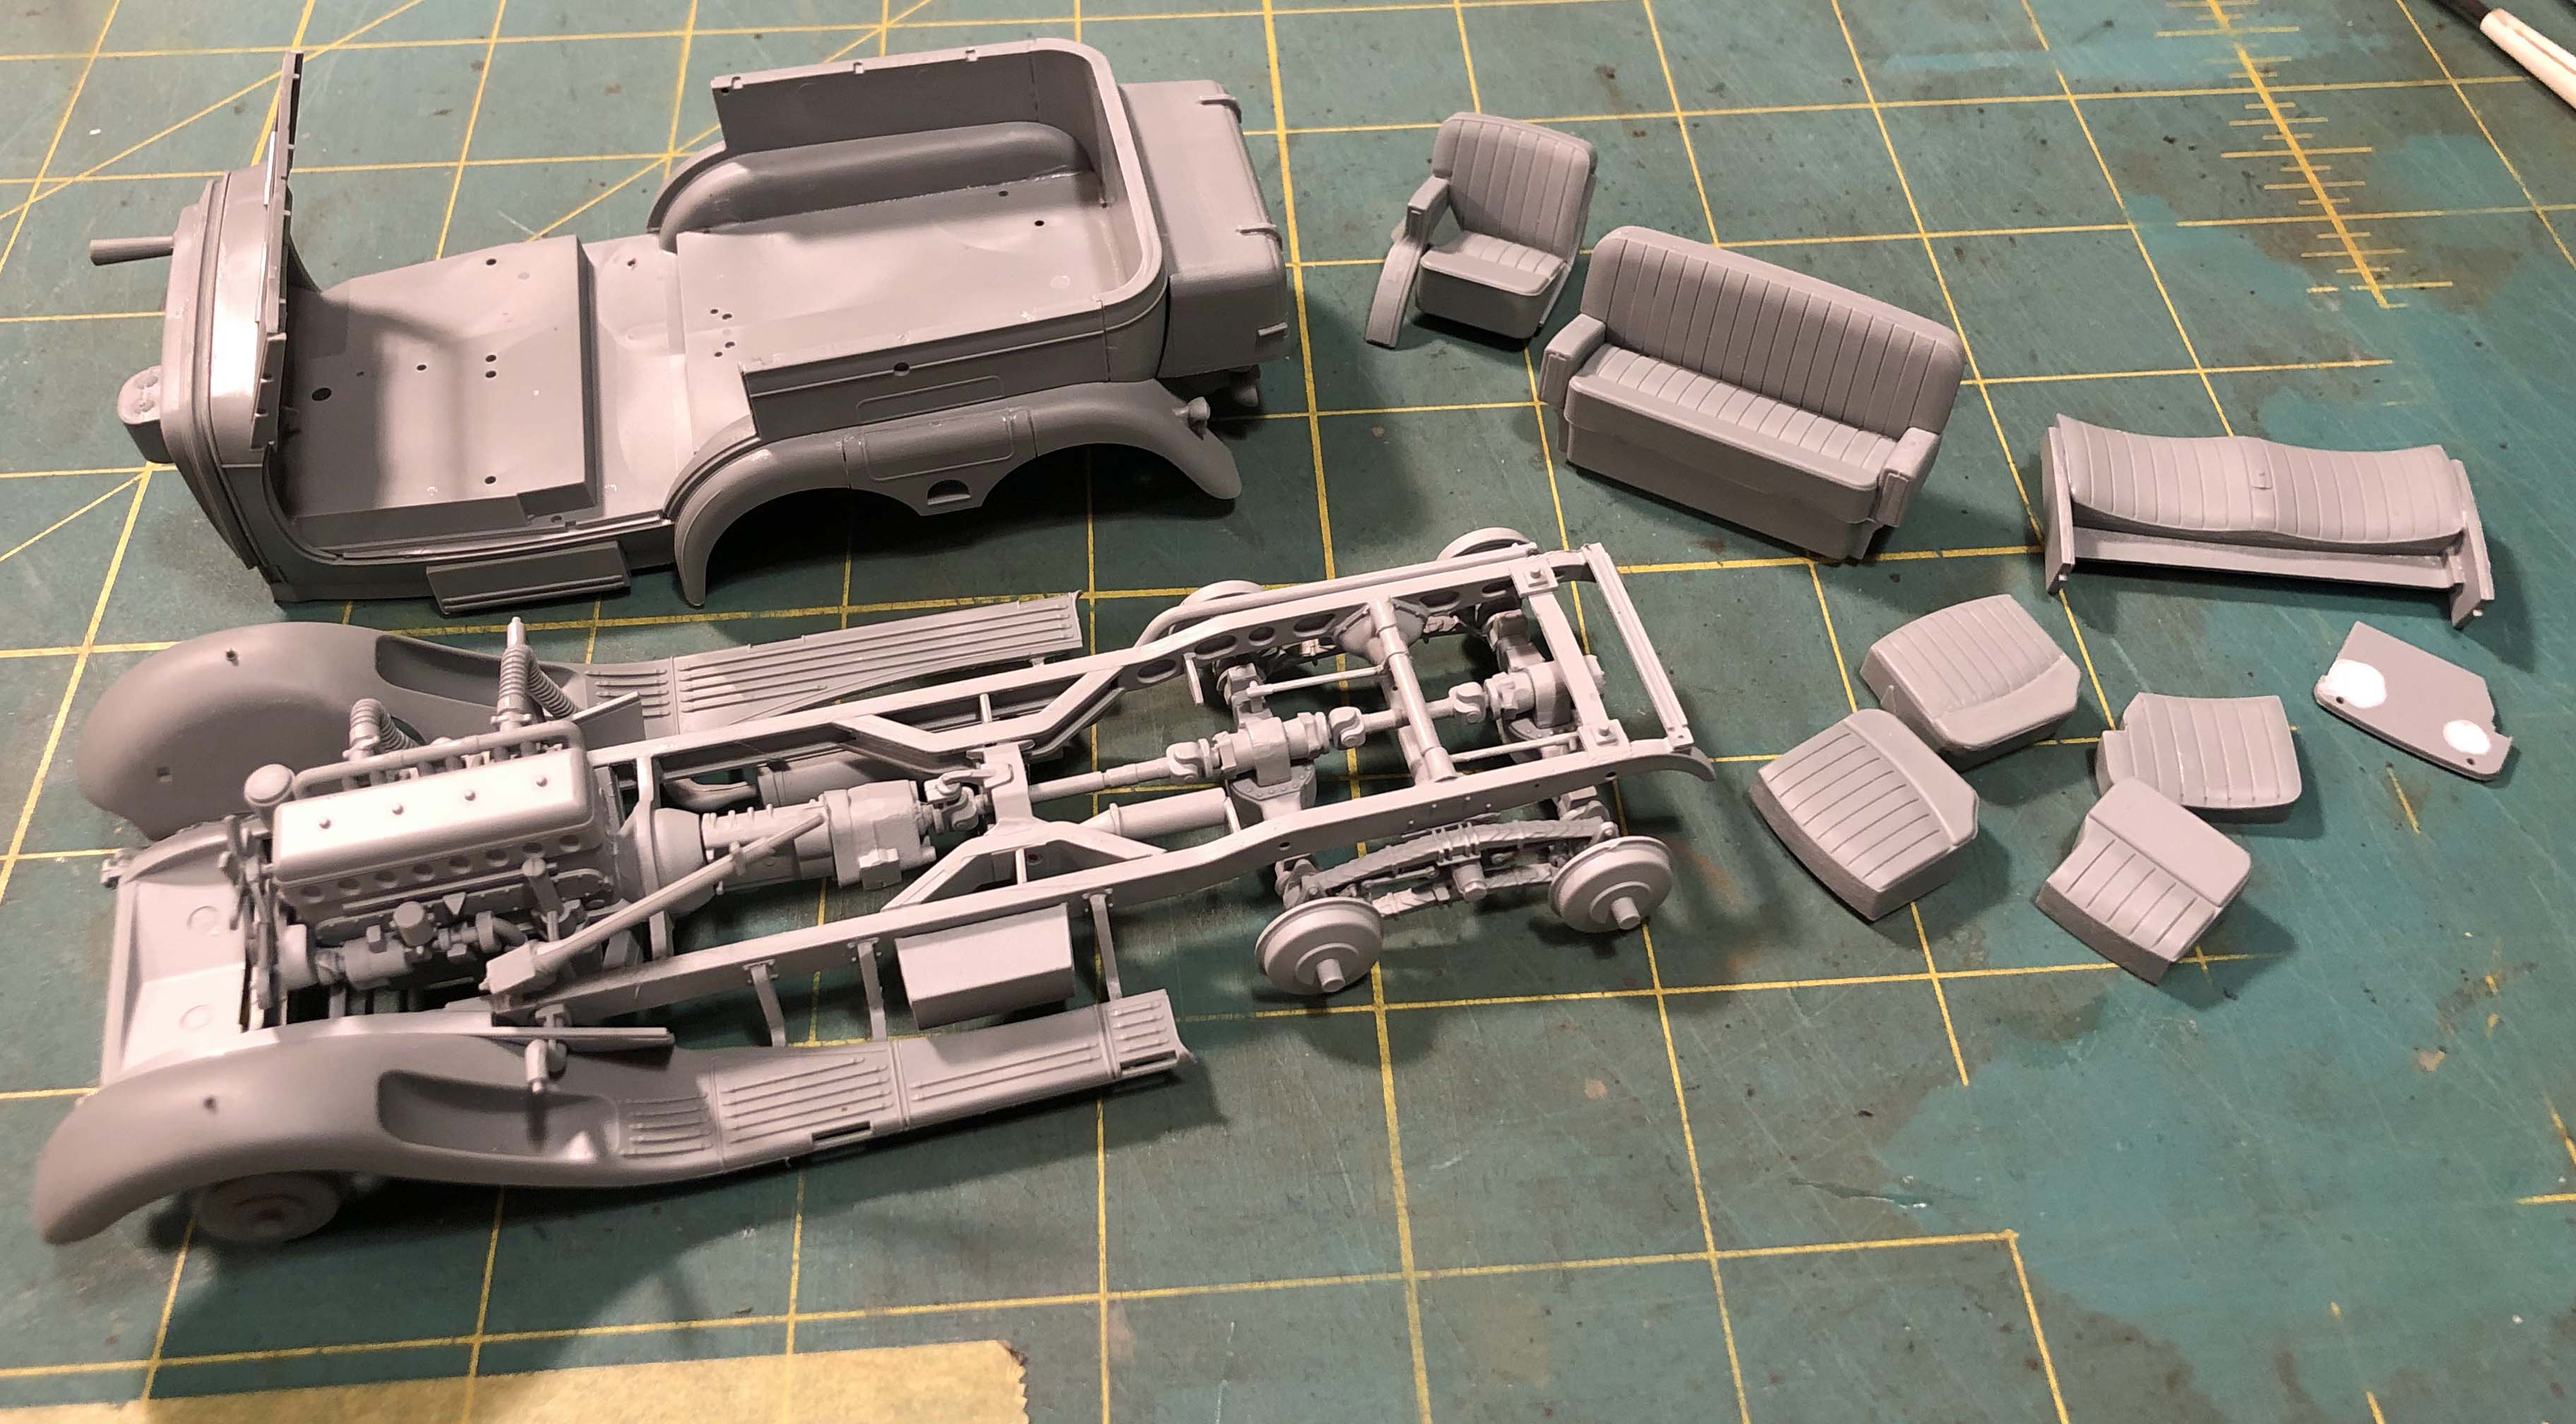
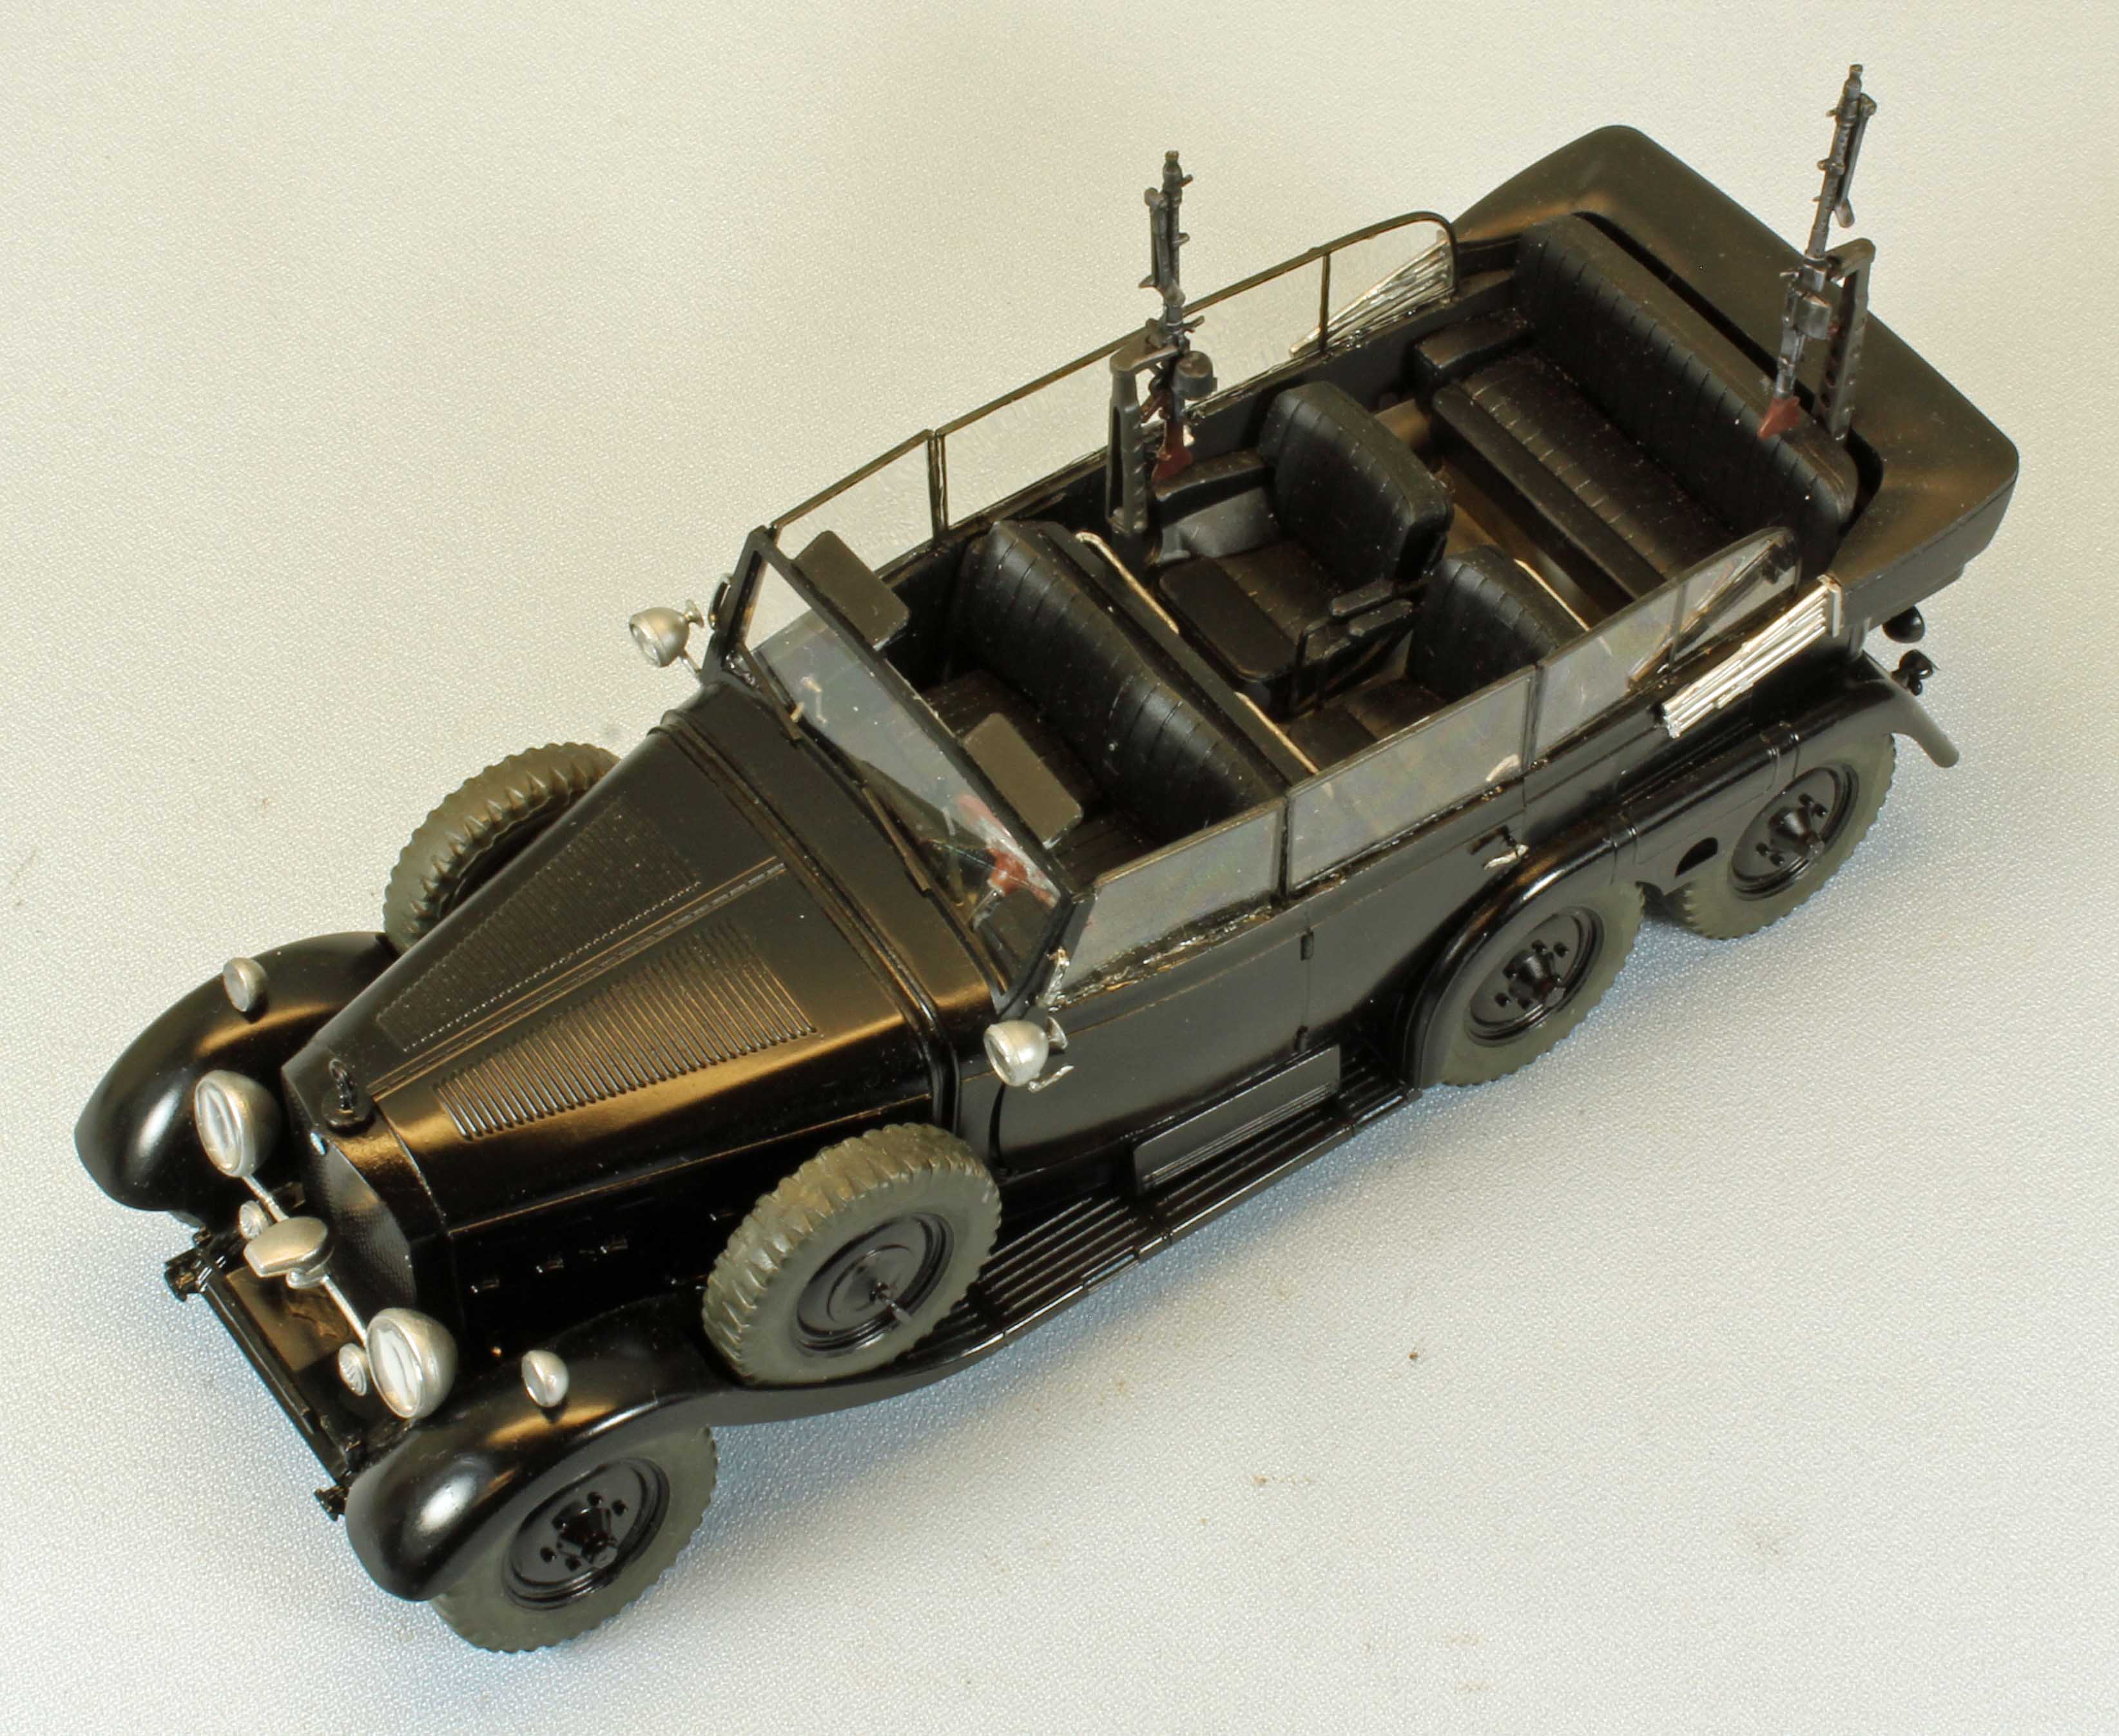
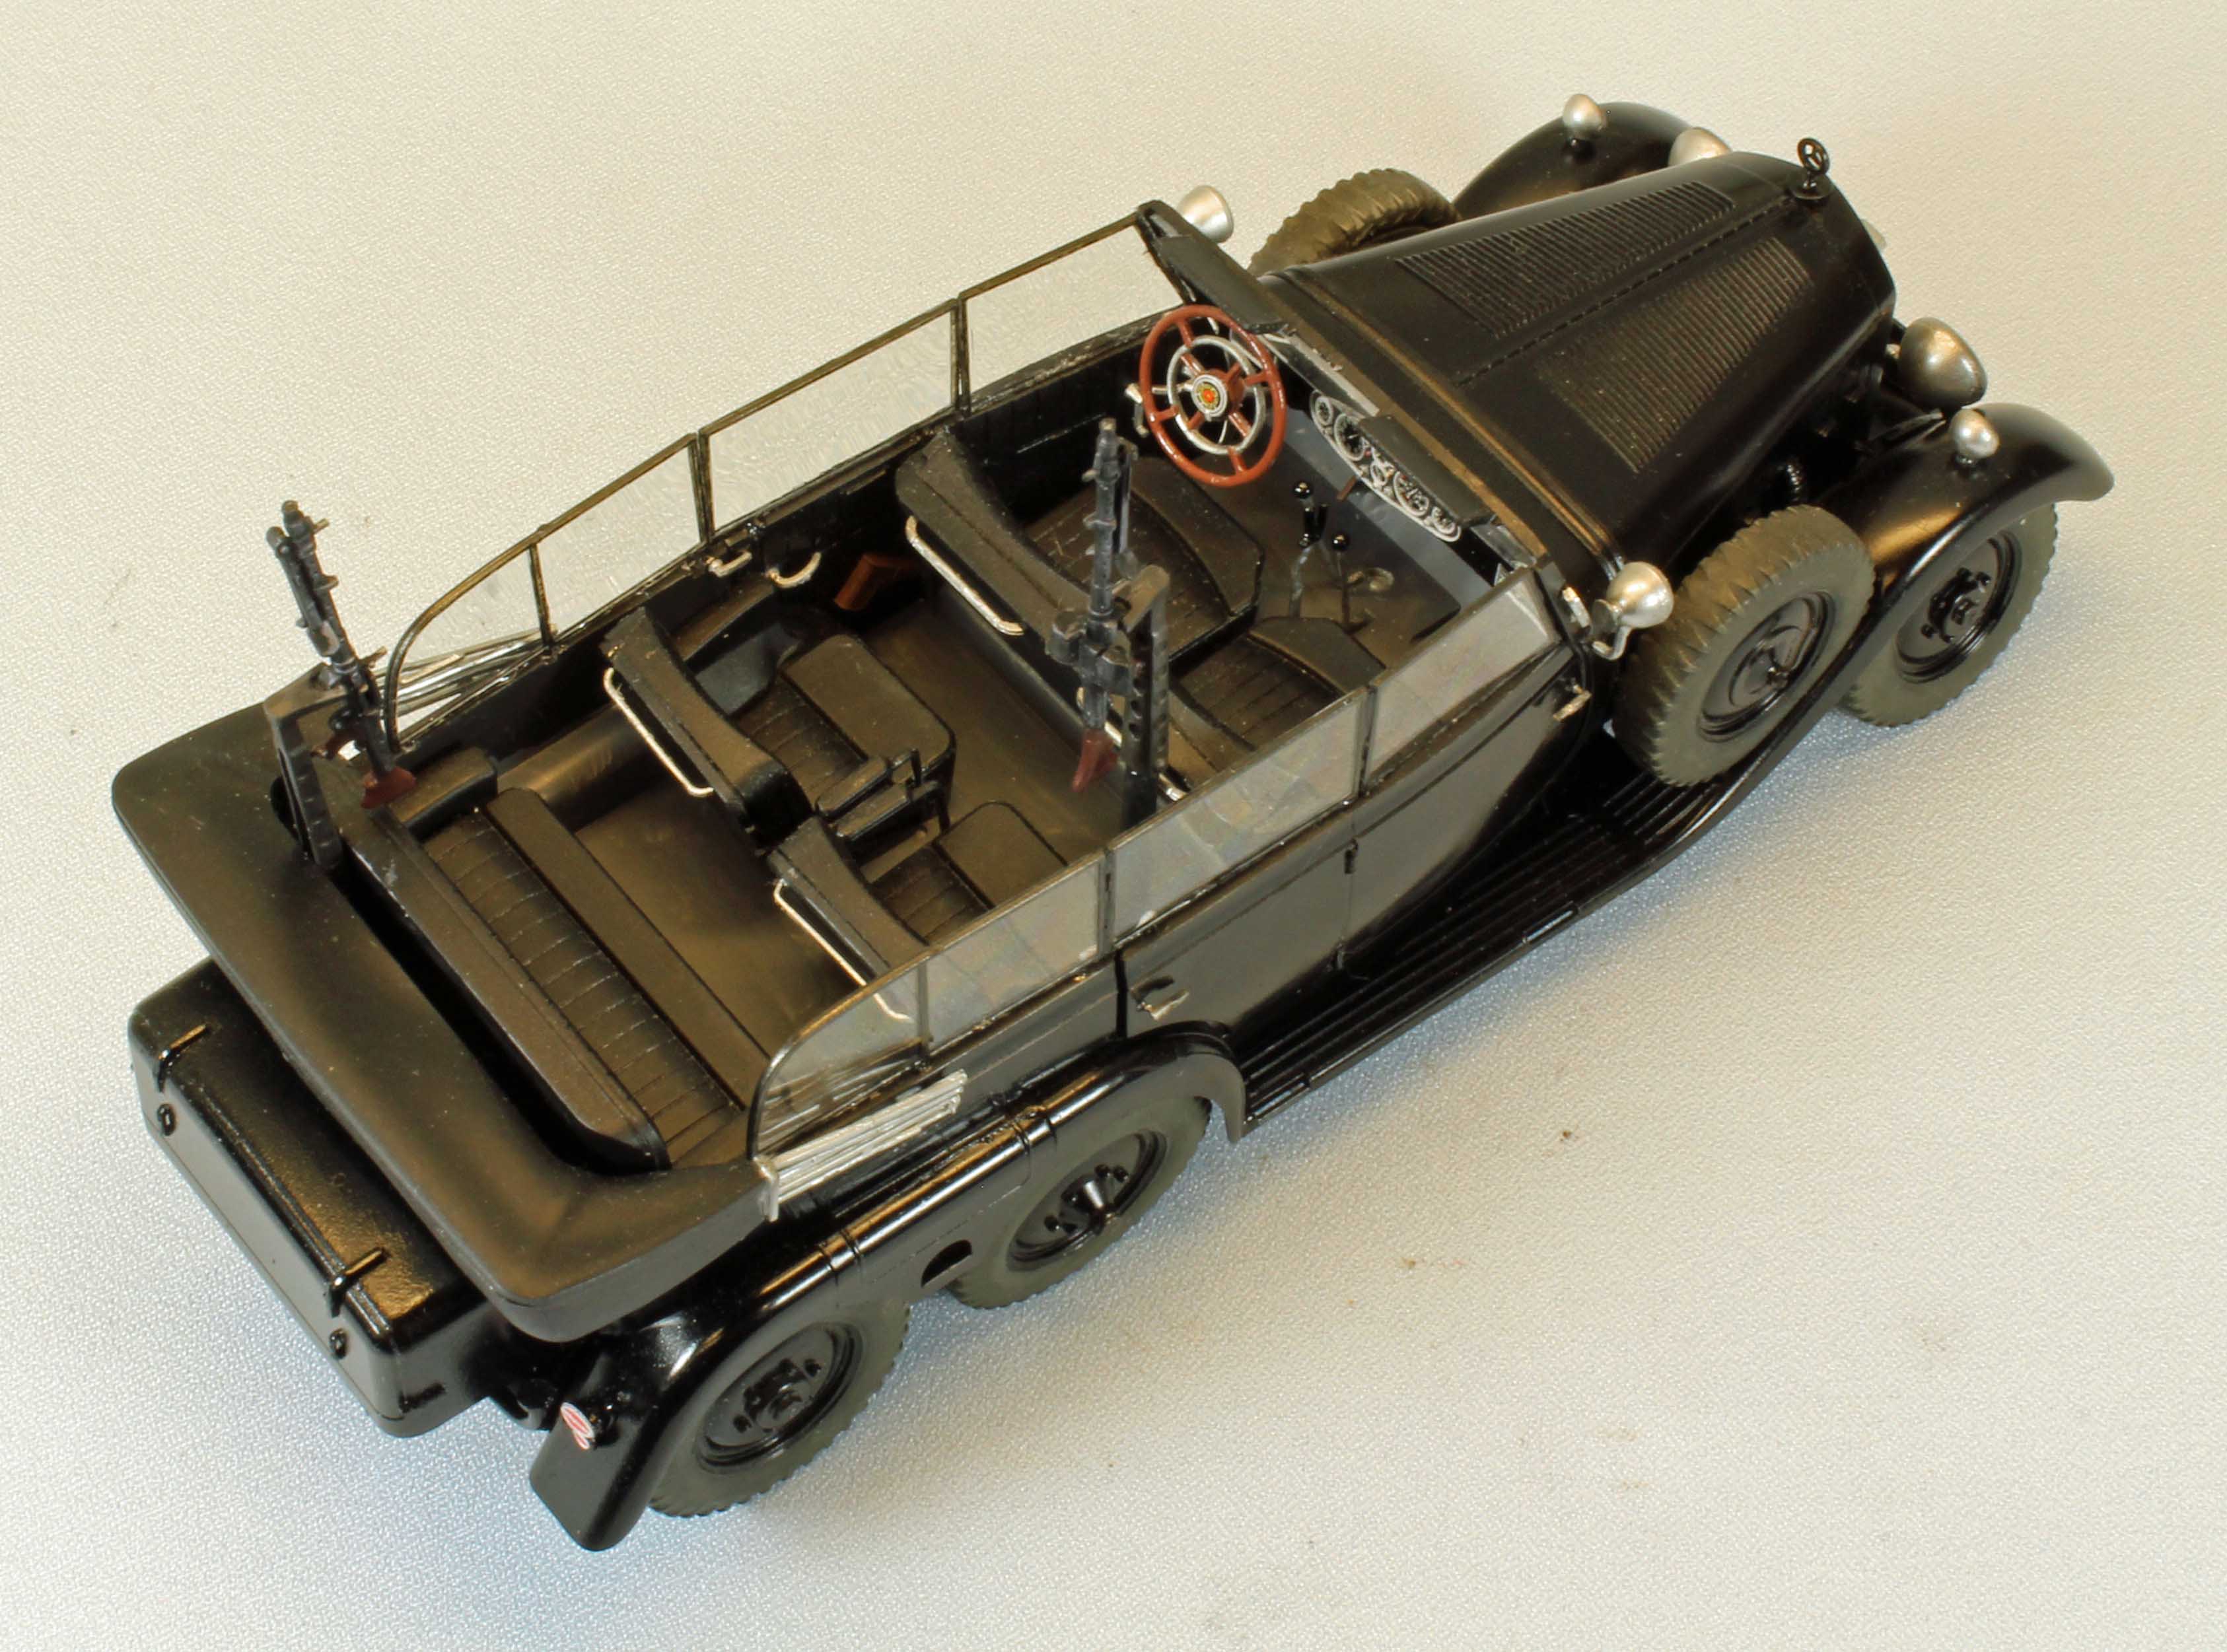
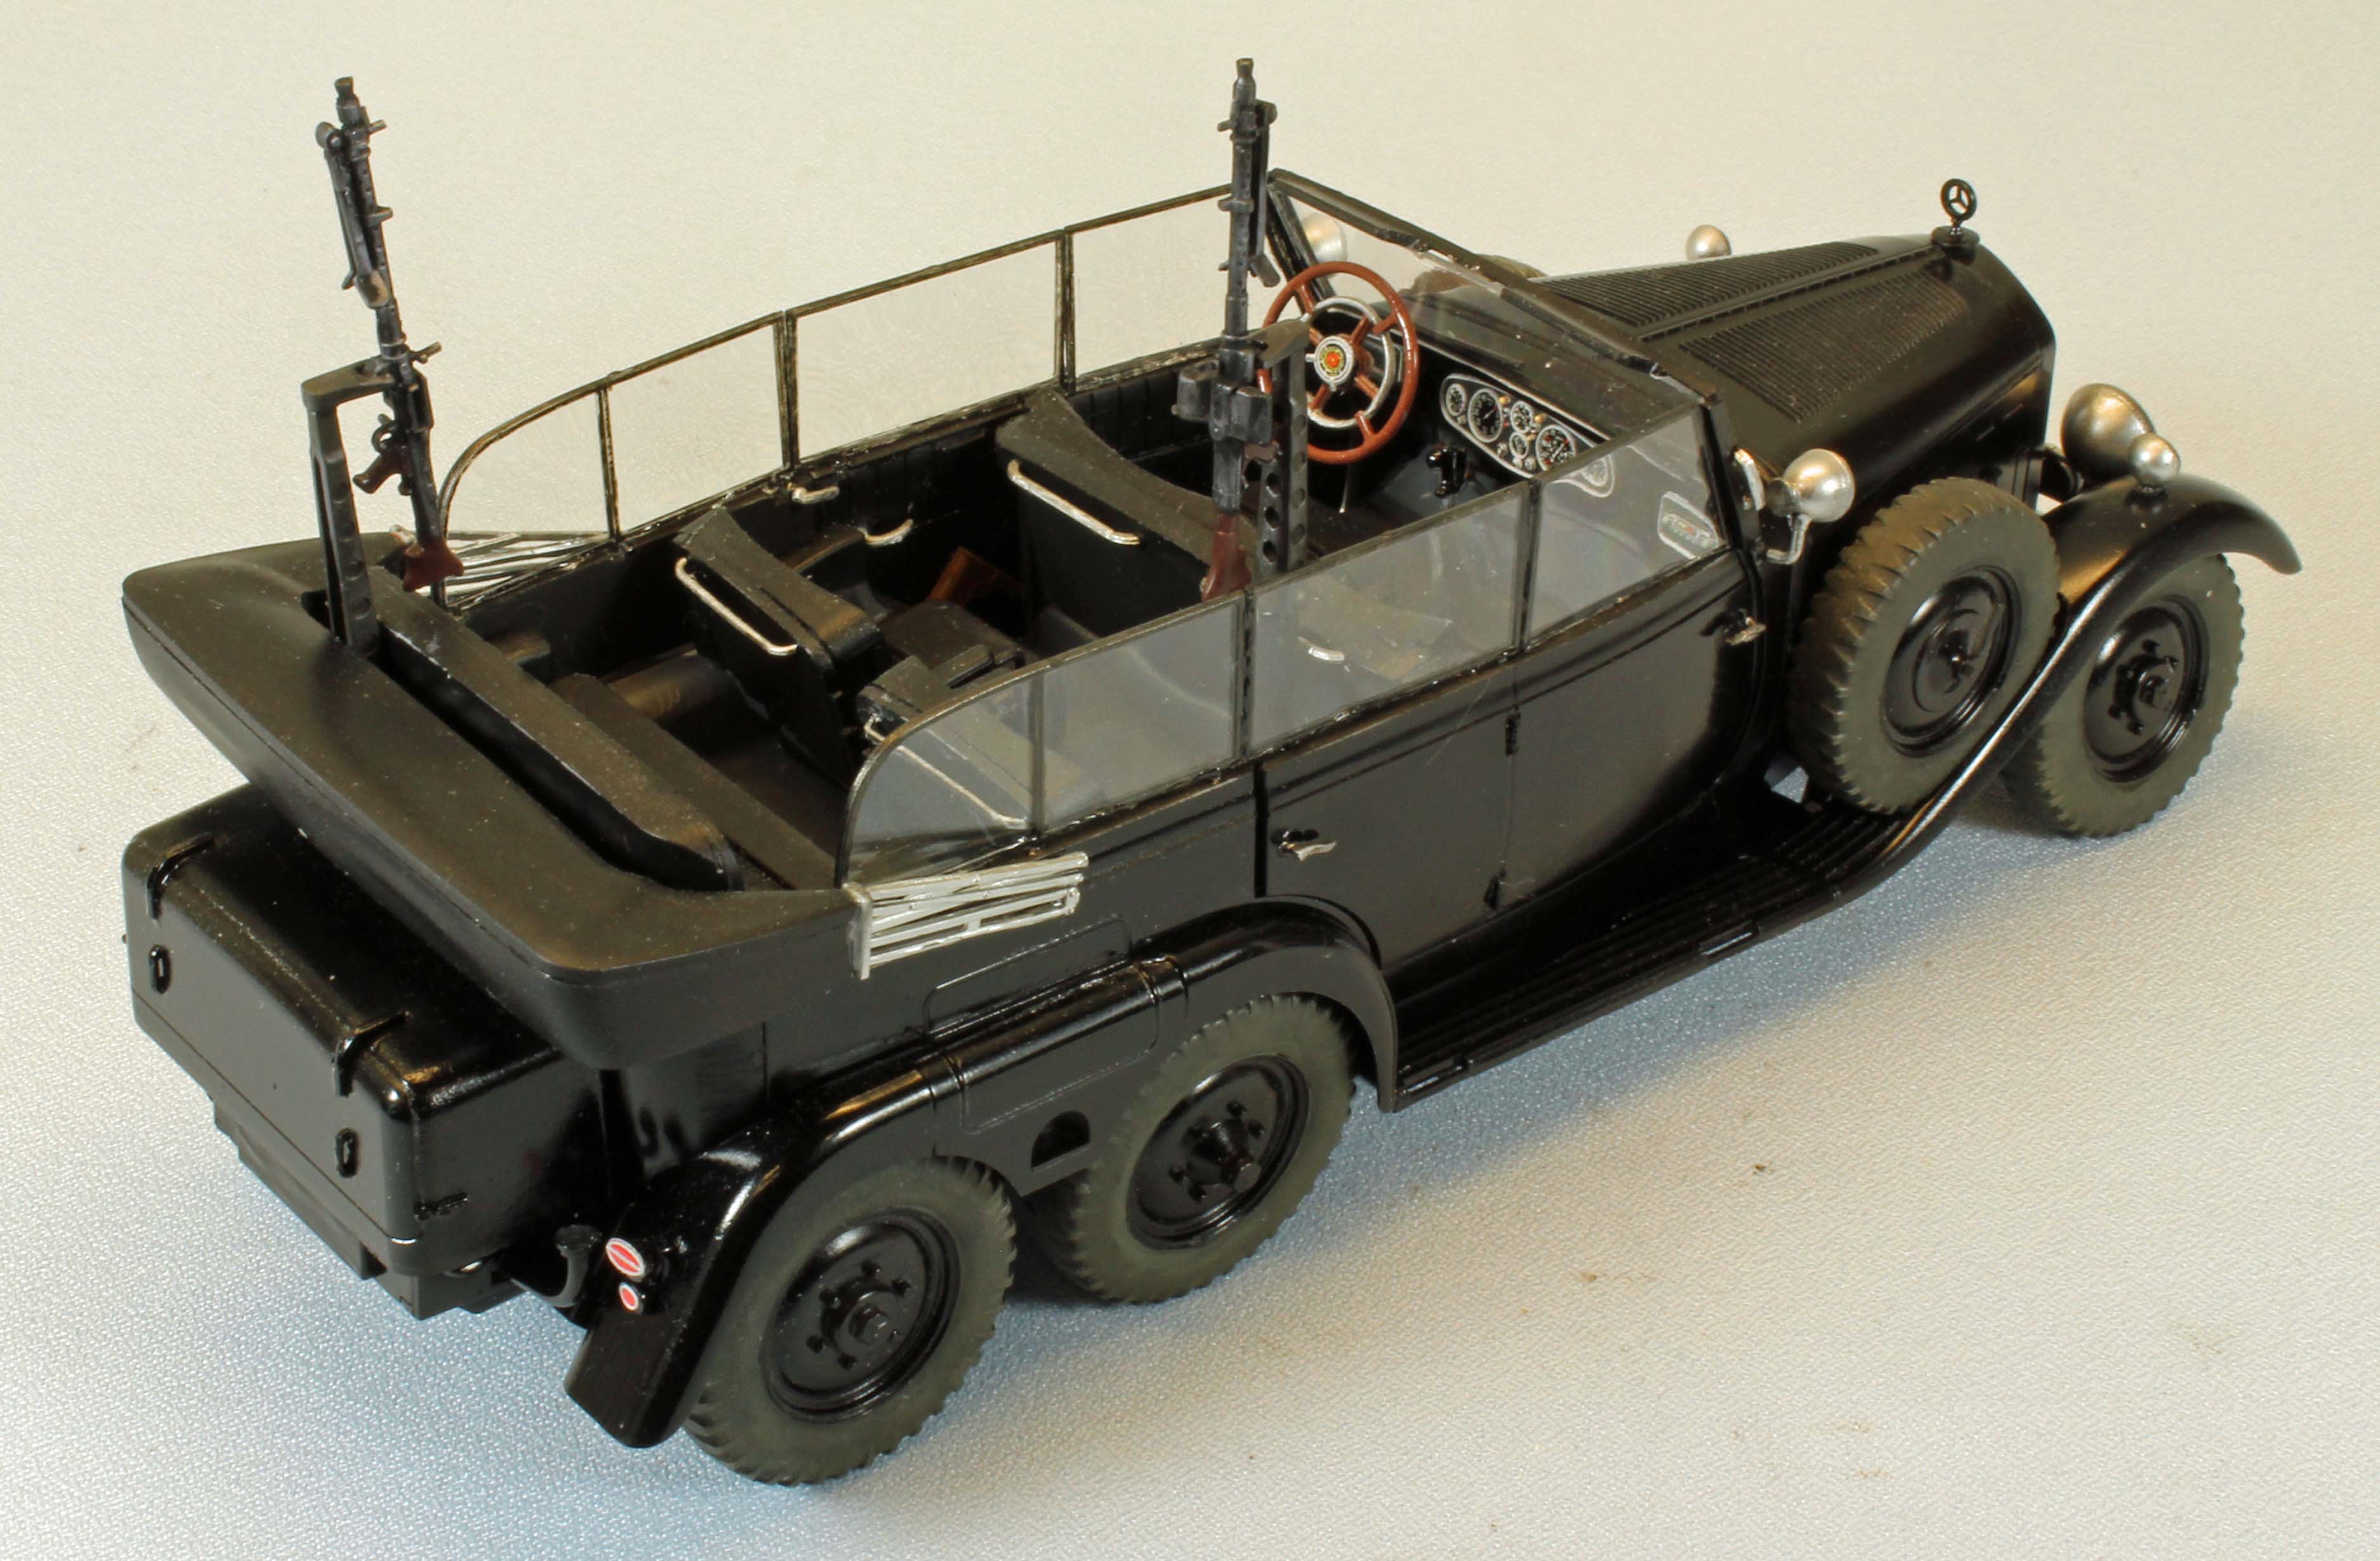
Seats and Couches
ICM engineered the kit so that the two forward seats, the two central seats, and the rear bench can be completely assembled and finished separately, and then dropped in at any time during assembly – very nice, since these little gems will be what attracts the eye on the finished product. I treated the upholstery with a black oil-based finish and chrome detail – which would have been difficult in-situ. The same thing goes for all the lights and door machinery – I suggest you leave it all off and add it at the end where it has less chance of being snapped off during the assembly of everything else. NOTE: Test-fit your two gun assemblies before attaching your (starboard) middle seat and the back bench – you will not have access to those areas once these seats are in place.
In Step 98, I suggest that you attach Parts E46/47 to the inner walls of the passenger compartment (Steps 99/102) and then attach those assemblies when directed.
I left off all windows until the very end of the build – literally the last step. I assembled the full hood and then attached it as one unit in Steps 112/113. Unfortunately, there are two sprue attachment points on Part B5 in Step 113 that are right-up-top-visible, and, nearly impossible to clean up.
Finally, I would say that the last group of Steps (114-131) take as long as the first 113 Steps – simply because the parts must be painted and attached until completely dry before moving on – a very time-consuming process. Each part you add is one more part to break off. If patience holds out, however, your results will be worth the wait – and effort.
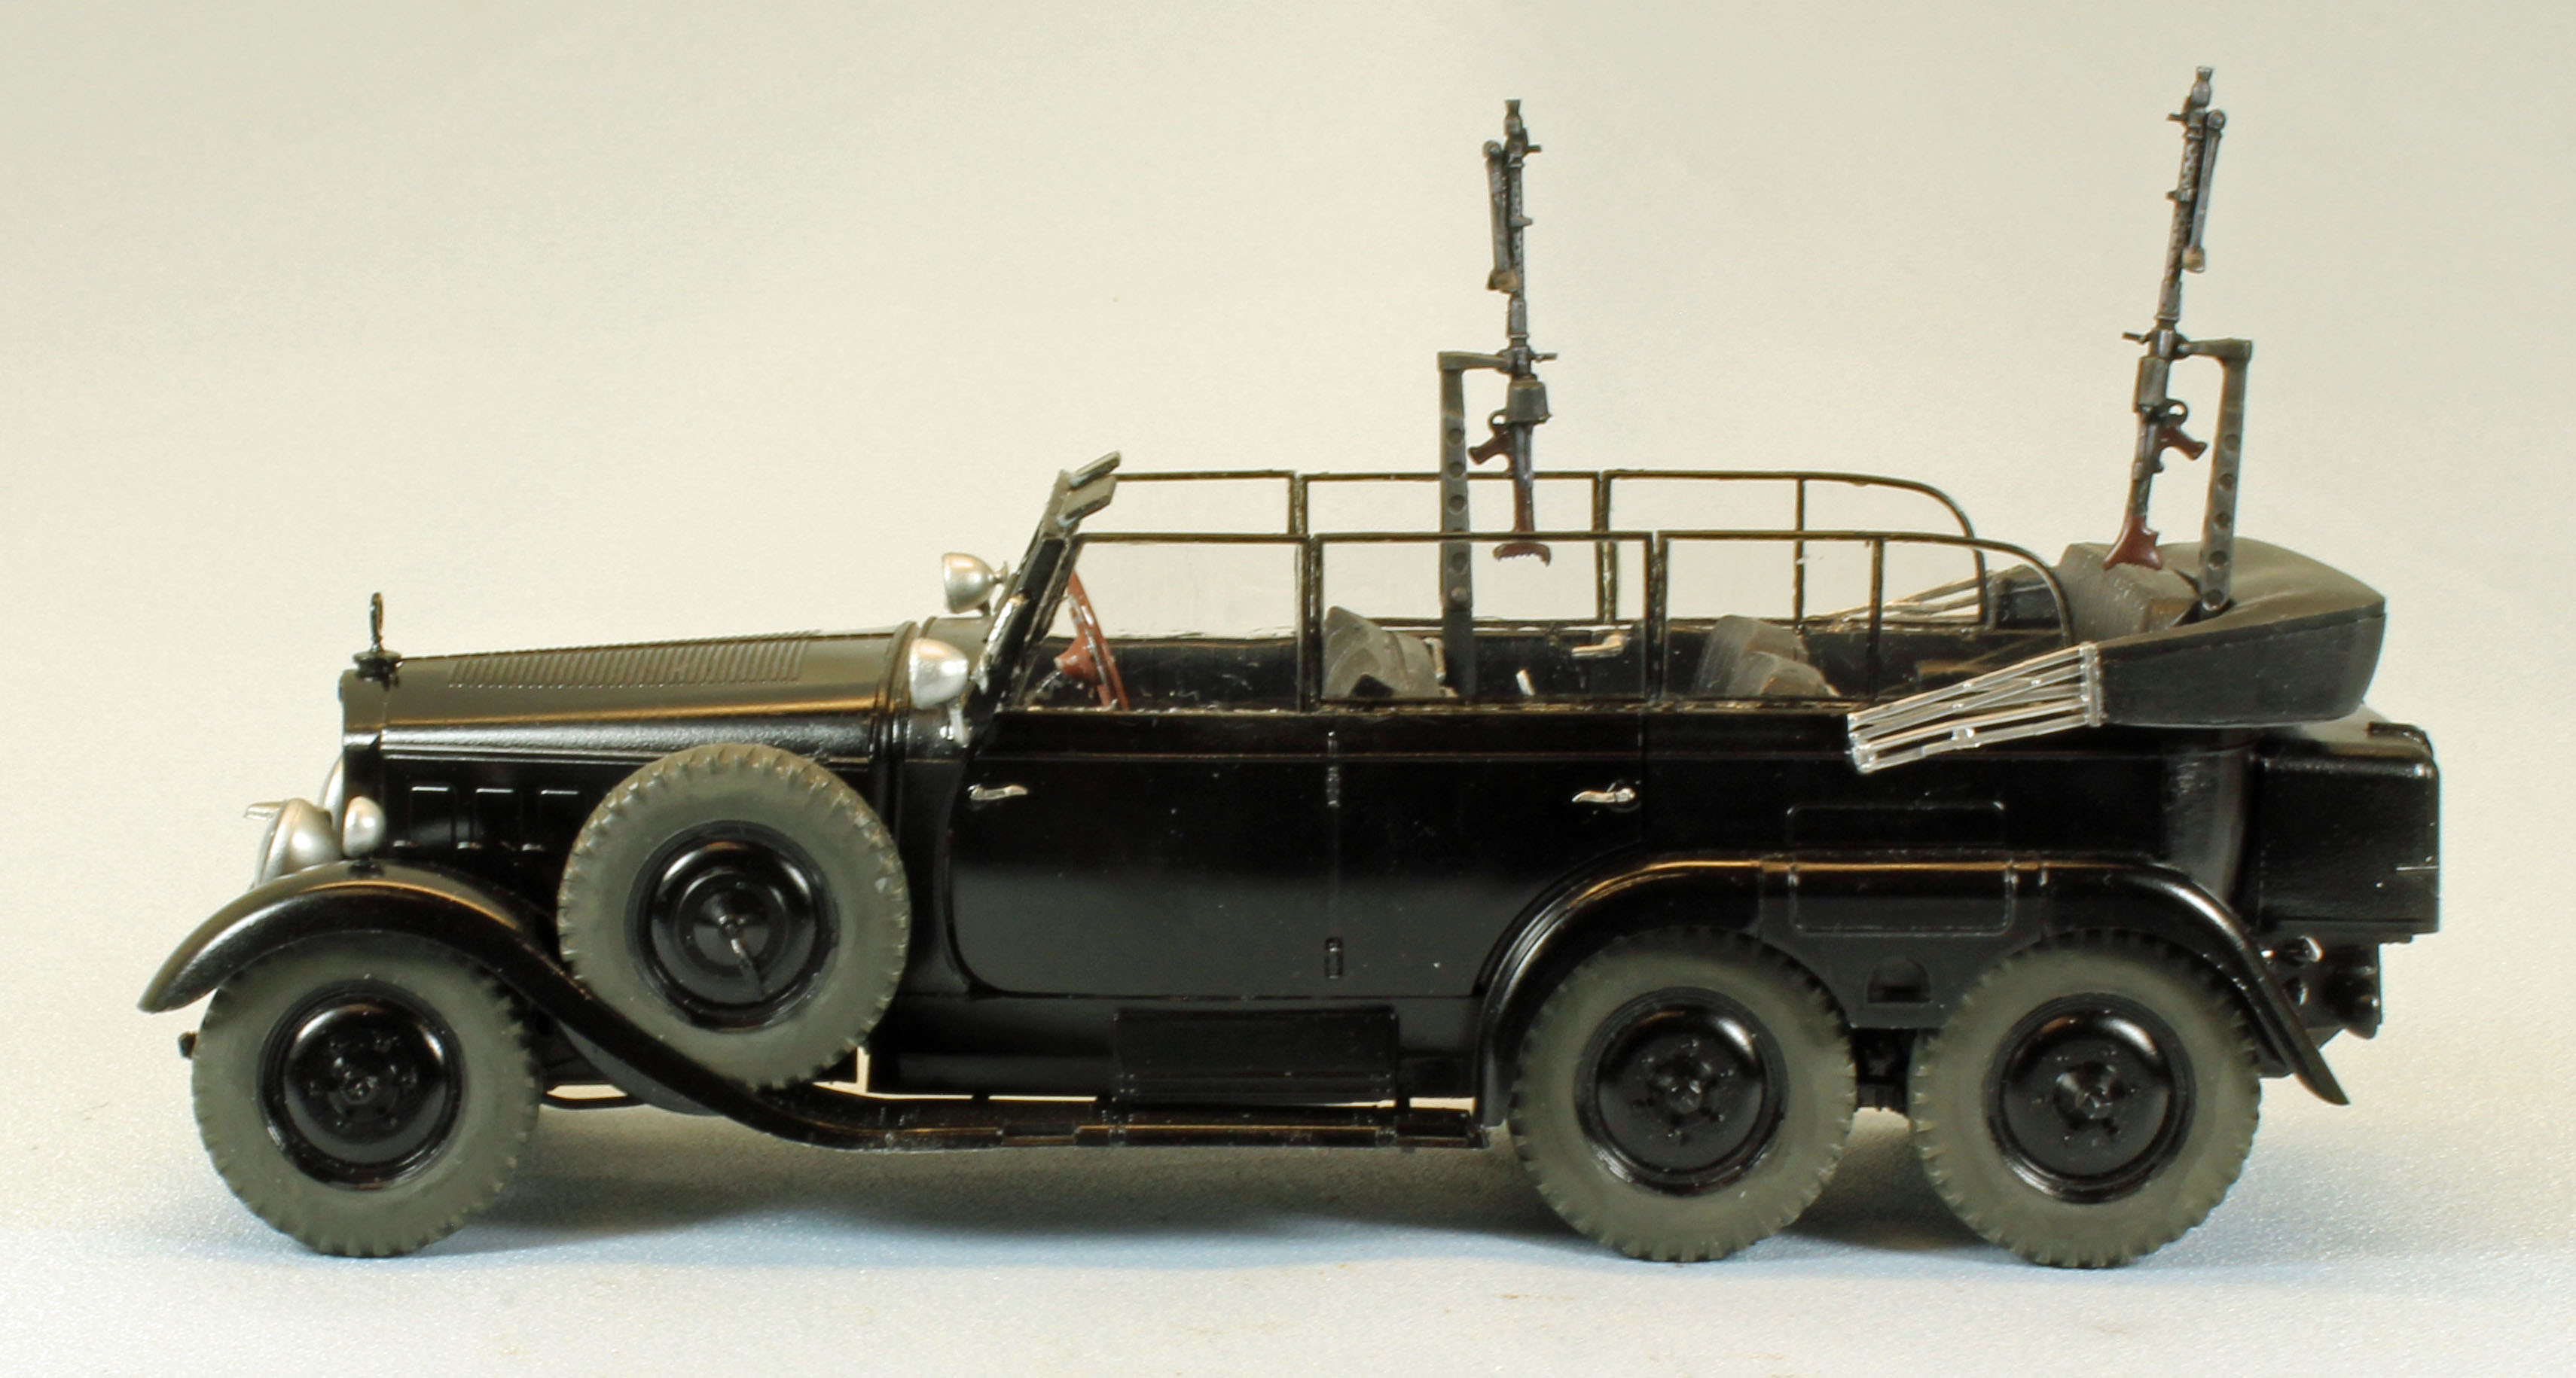
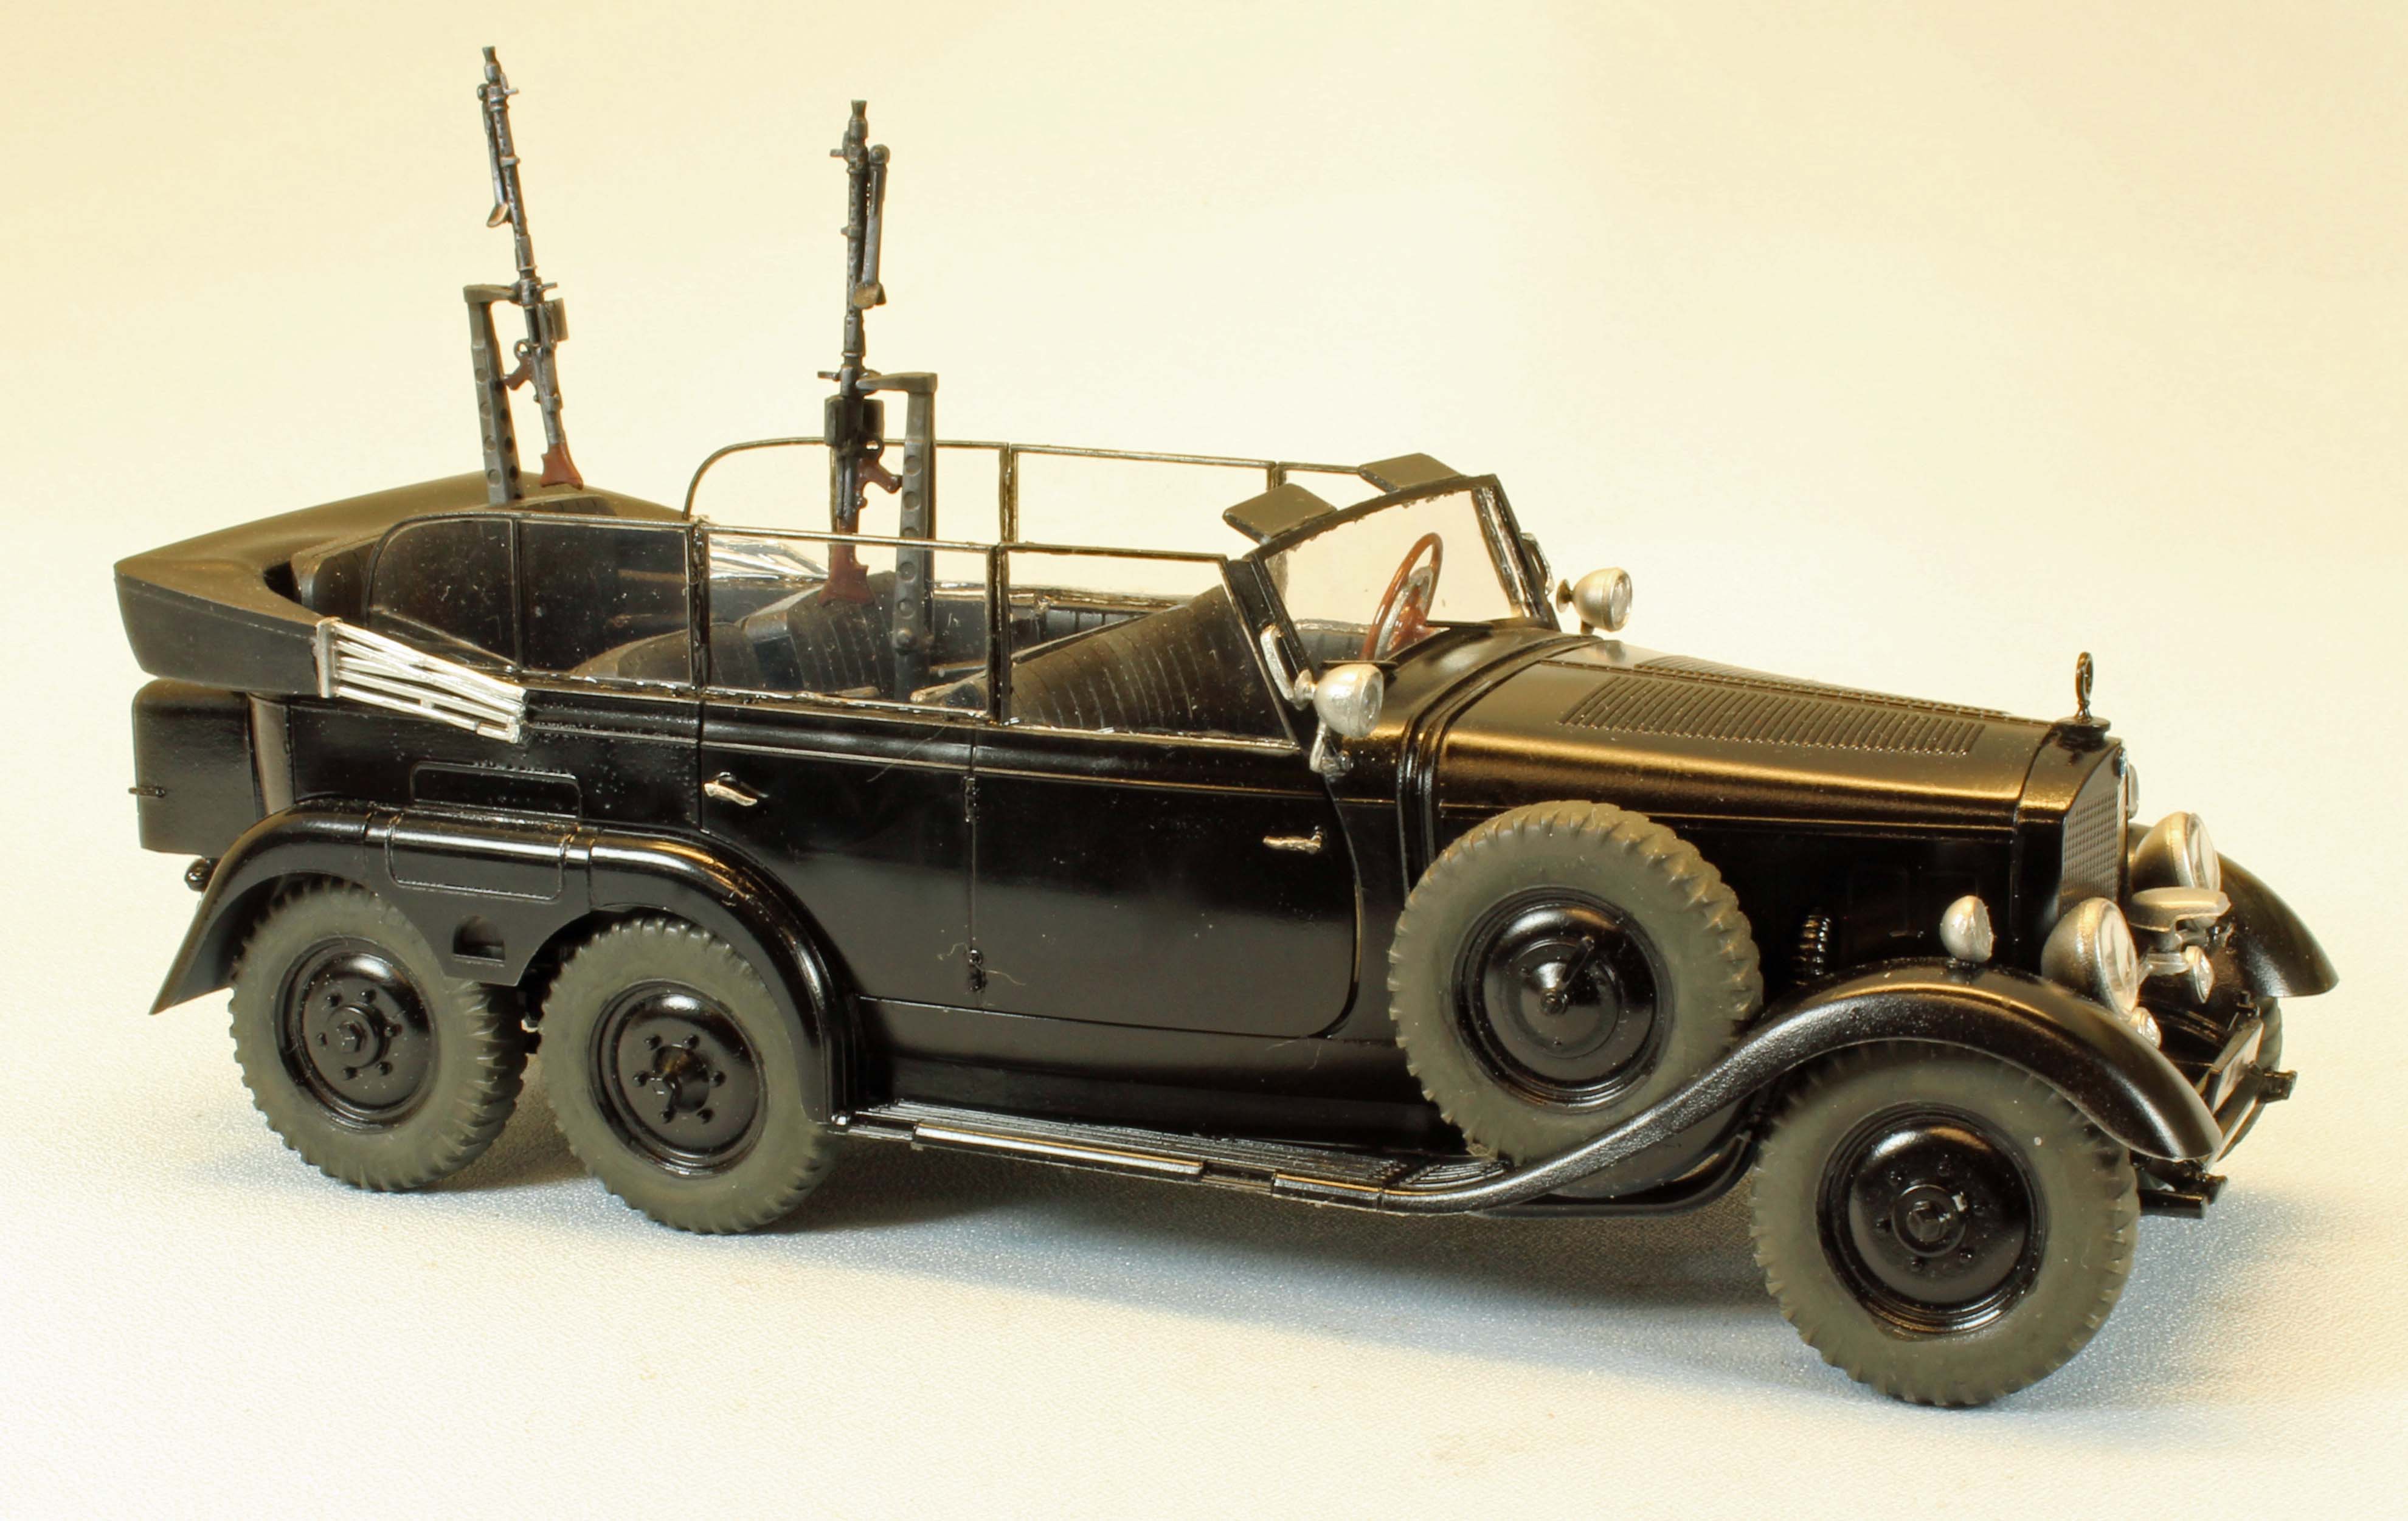
The MG34 Machine Guns
The two Mg34 machine guns are new to this kit, look great, and clean up well. One of them is attached to a short stand and one to a longer stand. The short stand (rear gun) is supposed to mount into the top of the rear bench seat, instead of into the floor of the chassis, where there is a suitable gap behind the bench. I decided to elongate the stand with a 1.5-inch piece of plastic tubing fit into the floor, which I think looks better – even though it may not be accurate.
Painting and Finish
I had great plans for painting the G4; I had picked out a 2-Tone Butternut Yellow and Gloss Black scheme, which I really liked the look of. But while waiting for this paint to arrive, I accidentally attached too many parts to allow for proper masking and painting. Going backwards, at this stage, was not an option so I just went with what I had – a solid gloss black scheme. Here is a breakdown of the colors used:
- Primer: Alclad Black Primer and Microfiller
- Interior: AKI real Colors RC201 Standard Pale Grey
- Upholstery: (Tube) Lamp Black, brushed on, left for 2 days, and rubbed off with soft cloth.
- Tires: Mission Models MMP-040 Tire Black 1
- Detail: Mr. Hobby SM206 Super Metallic 2 Super Chrome Silver 2 (over Tamiya X1)
- Guns: Tamiya XF-84 Dark Iron, highlighted with Uschi Chrome Pigment
- Overall: Tamiya X-1 Gloss Black
Conclusion
This is my fourth ICM kit in a row, all of them IPMS reviews. The other builds were of some of their most recent offerings and were a joy to build. Upon opening the box for this kit, I discovered that the majority of the sprues reflected the G4 Mercedes of ‘ICM-yester-year’. While eminently buildable (certainly for a car modeler), the kit was not up to par with their more recent efforts. I’ve always loved the big G4 touring car from newsreels of the war, and I thought an experienced armor builder could push this out in a matter of weeks. I was wrong. This was a real challenge for me to build, and to paint. The instructions were a bright spot, taking on the look and content of their most recent kits, and the plastic was well molded and free of defects. The use of fine plastic parts instead of photo-etch, and the choice of plastic tires instead of some kind of rubber/poly tires were both great decisions by ICM (in my opinion). But the dated design and engineering of the various assemblies from the old 2013 kit ended up requiring a better modeler than I to produce a really great representation of the mighty G4.
This kit was a challenge to finish due to the many small parts and complicated assemblies, and, in my opinion, requires a car-modelers eye to paint and finish properly. For these reasons I would recommend this kit only for experienced modelers. Having experience building and finishing car models would certainly be a plus.
A Heart-felt note to those at ICM, and their families: I have truly enjoyed building the last four ICM kits, and interacting with people at the shop (sup’ Valeriia!). ICM is based in Kyiv (Kiev) Ukraine, and it breaks my heart to see what is happening in your great country right now. My prayers go out to everyone in your community, and I sincerely hope that you’ve found a place that is safe, and that this terrible war ends soon.
I would like to thank ICM for providing this kit for review, and to IPMS USA for giving me the opportunity to build it.