Reviews
Armor
US M2A1 Medium Tank
by Eric Christianson
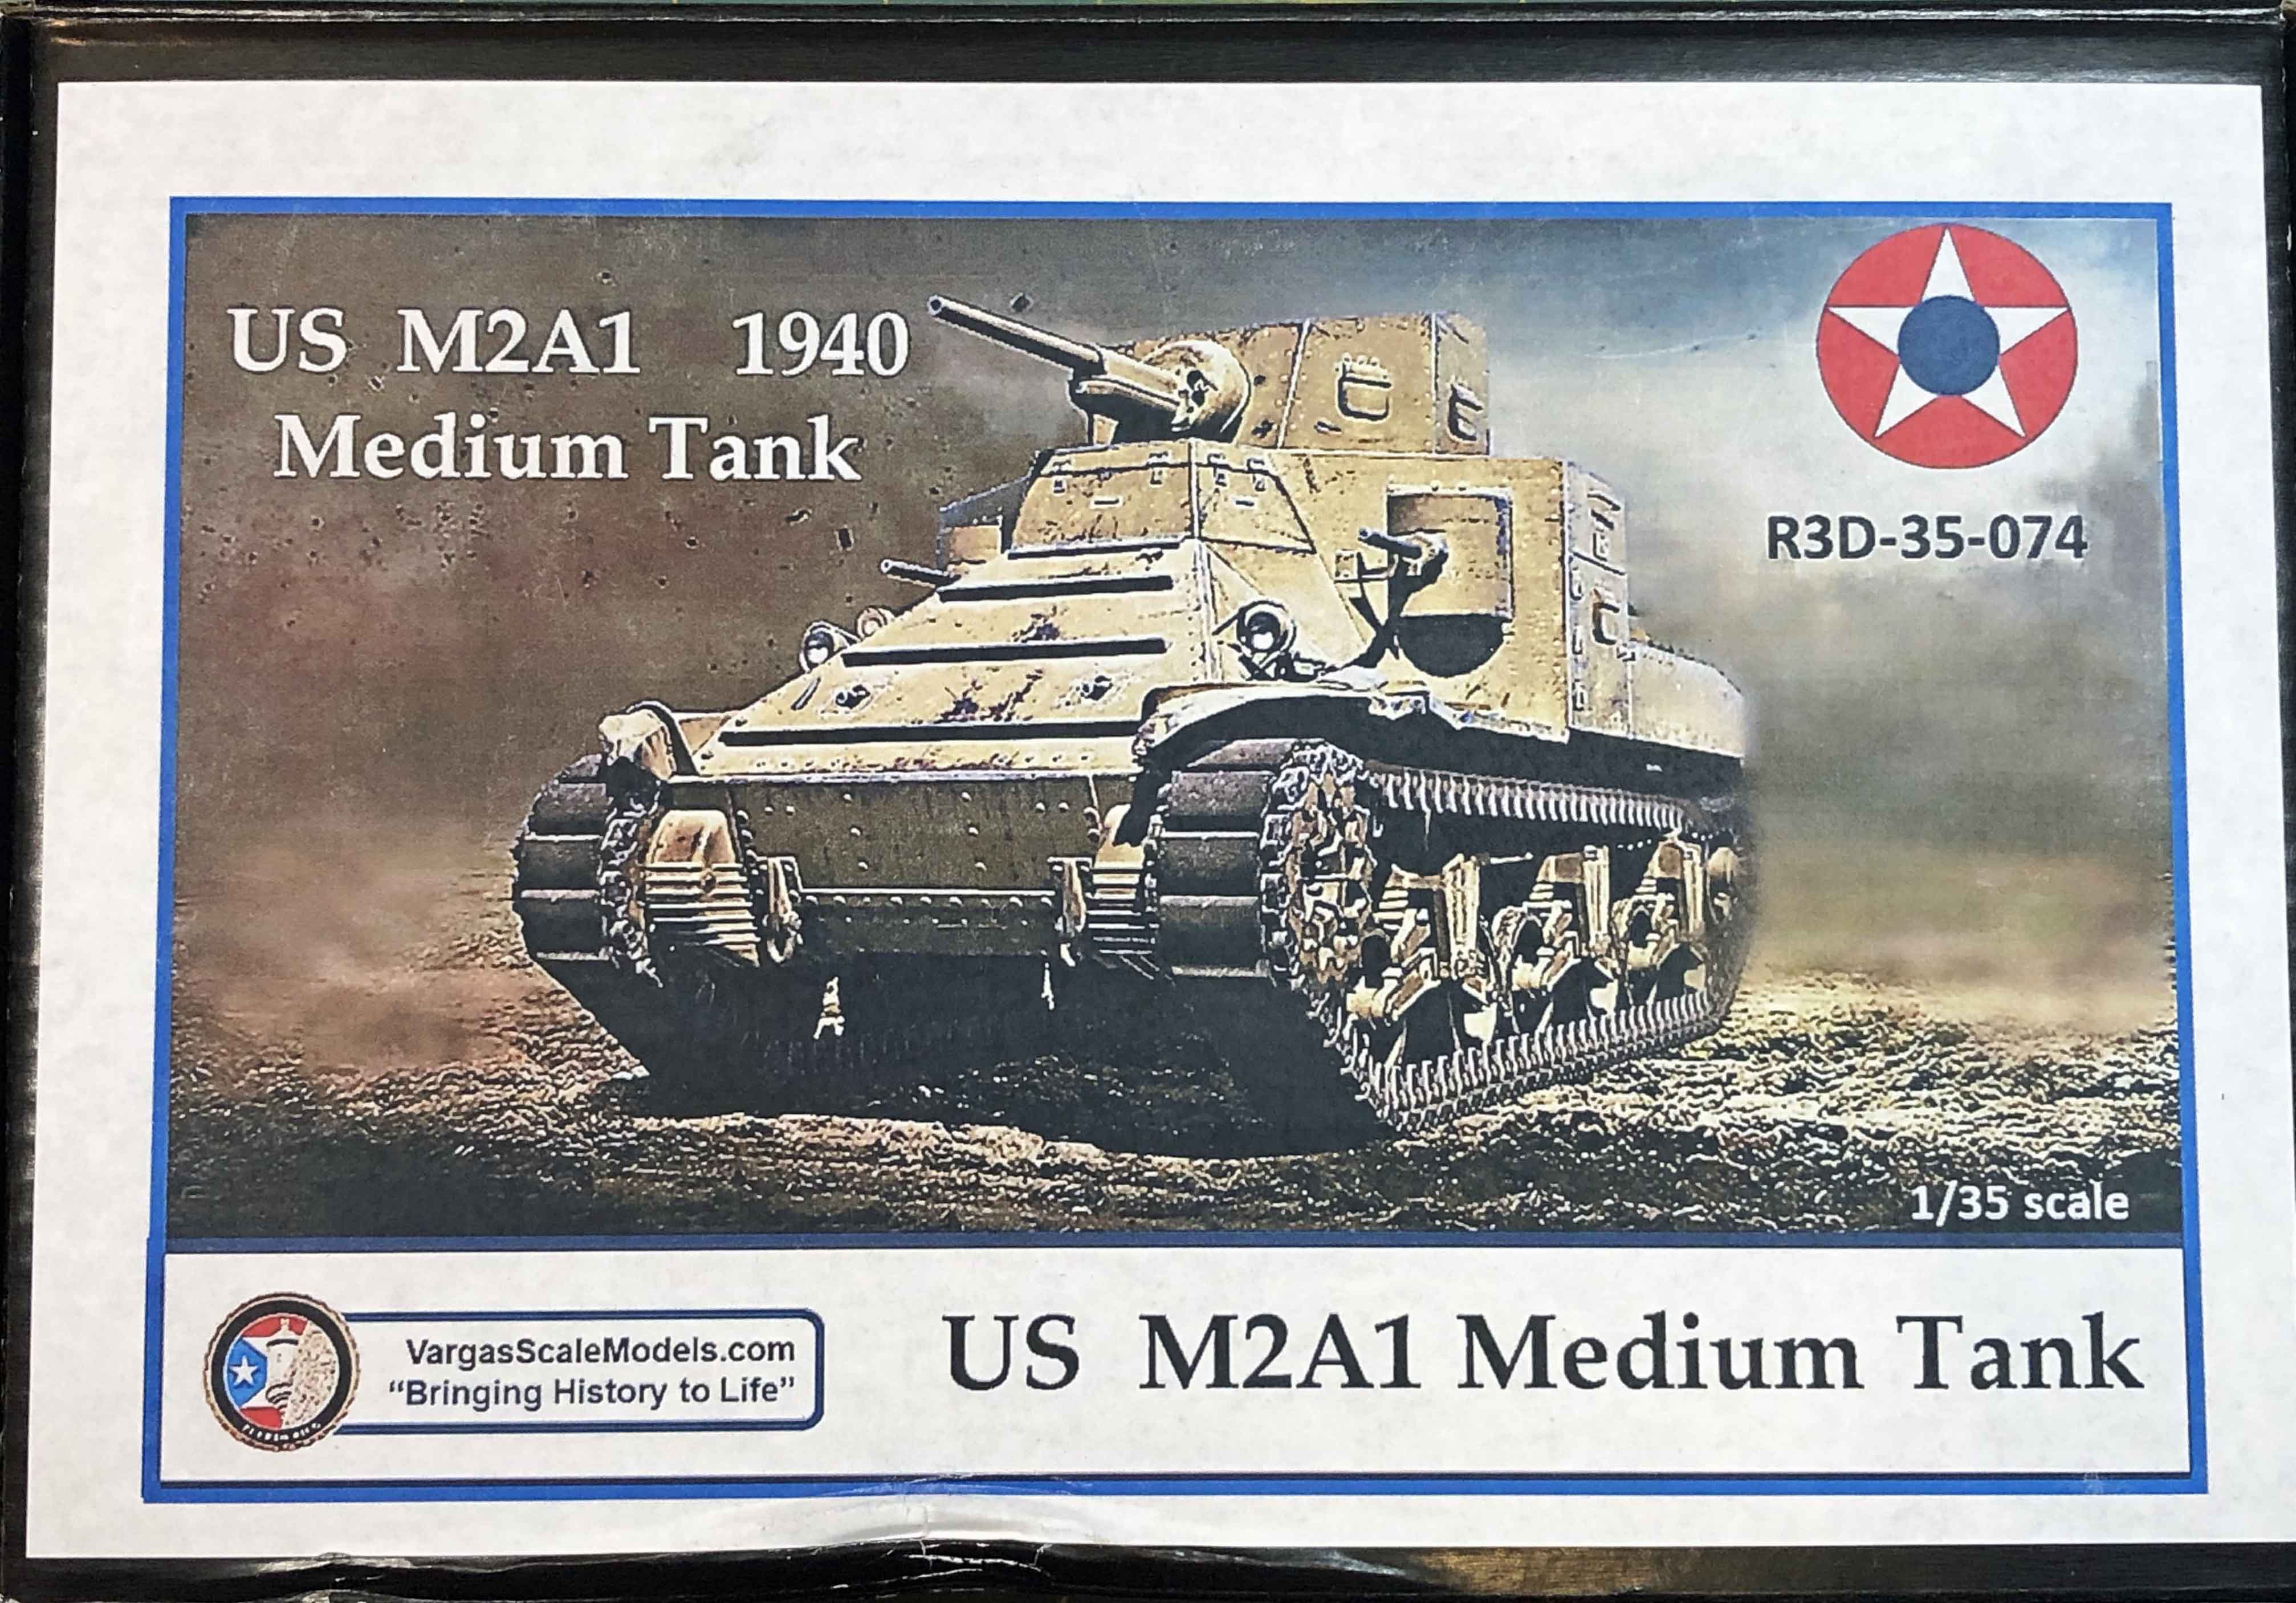 Model: US M2A1 Medium Tank
Reviewed by: Eric Christianson, IPMS # 42218
Scale: 1/35
Company: Vargas Scale Models
Price: $69.95
Product/Stock #: R3D-35-074
Website: Vargas Scale Models
Product Web Page: View
Product provided by: Vargas Scale Models
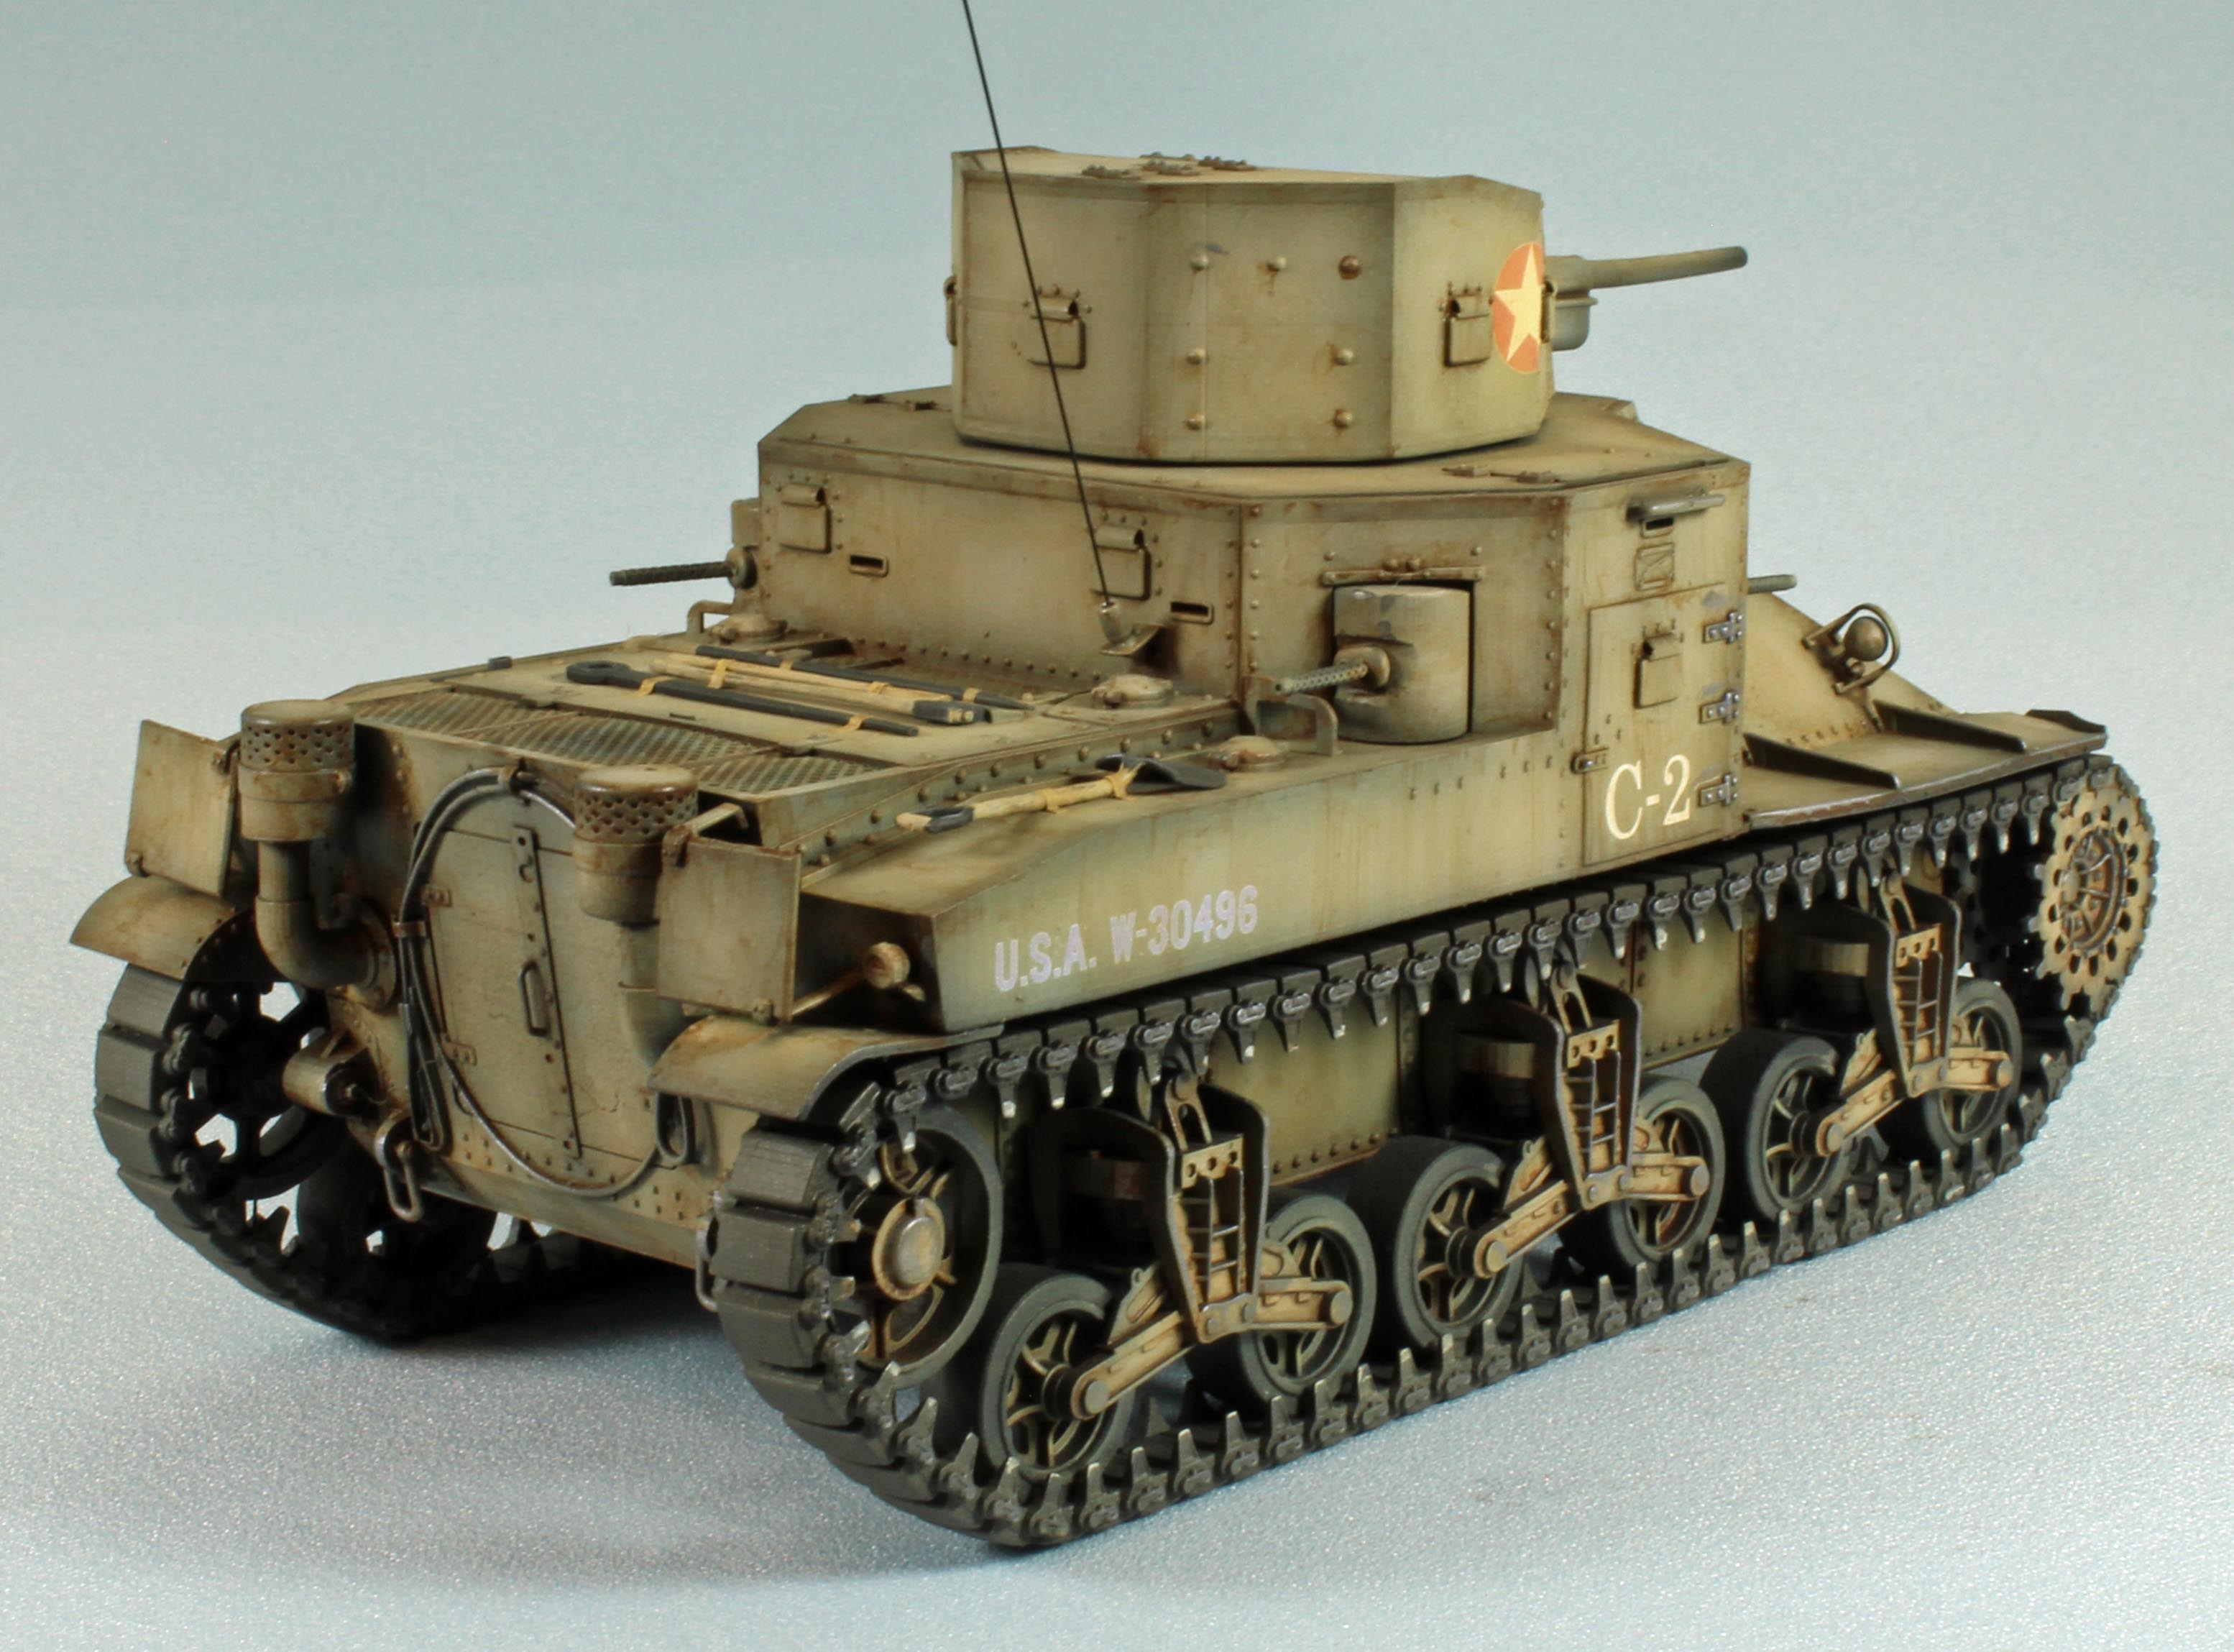
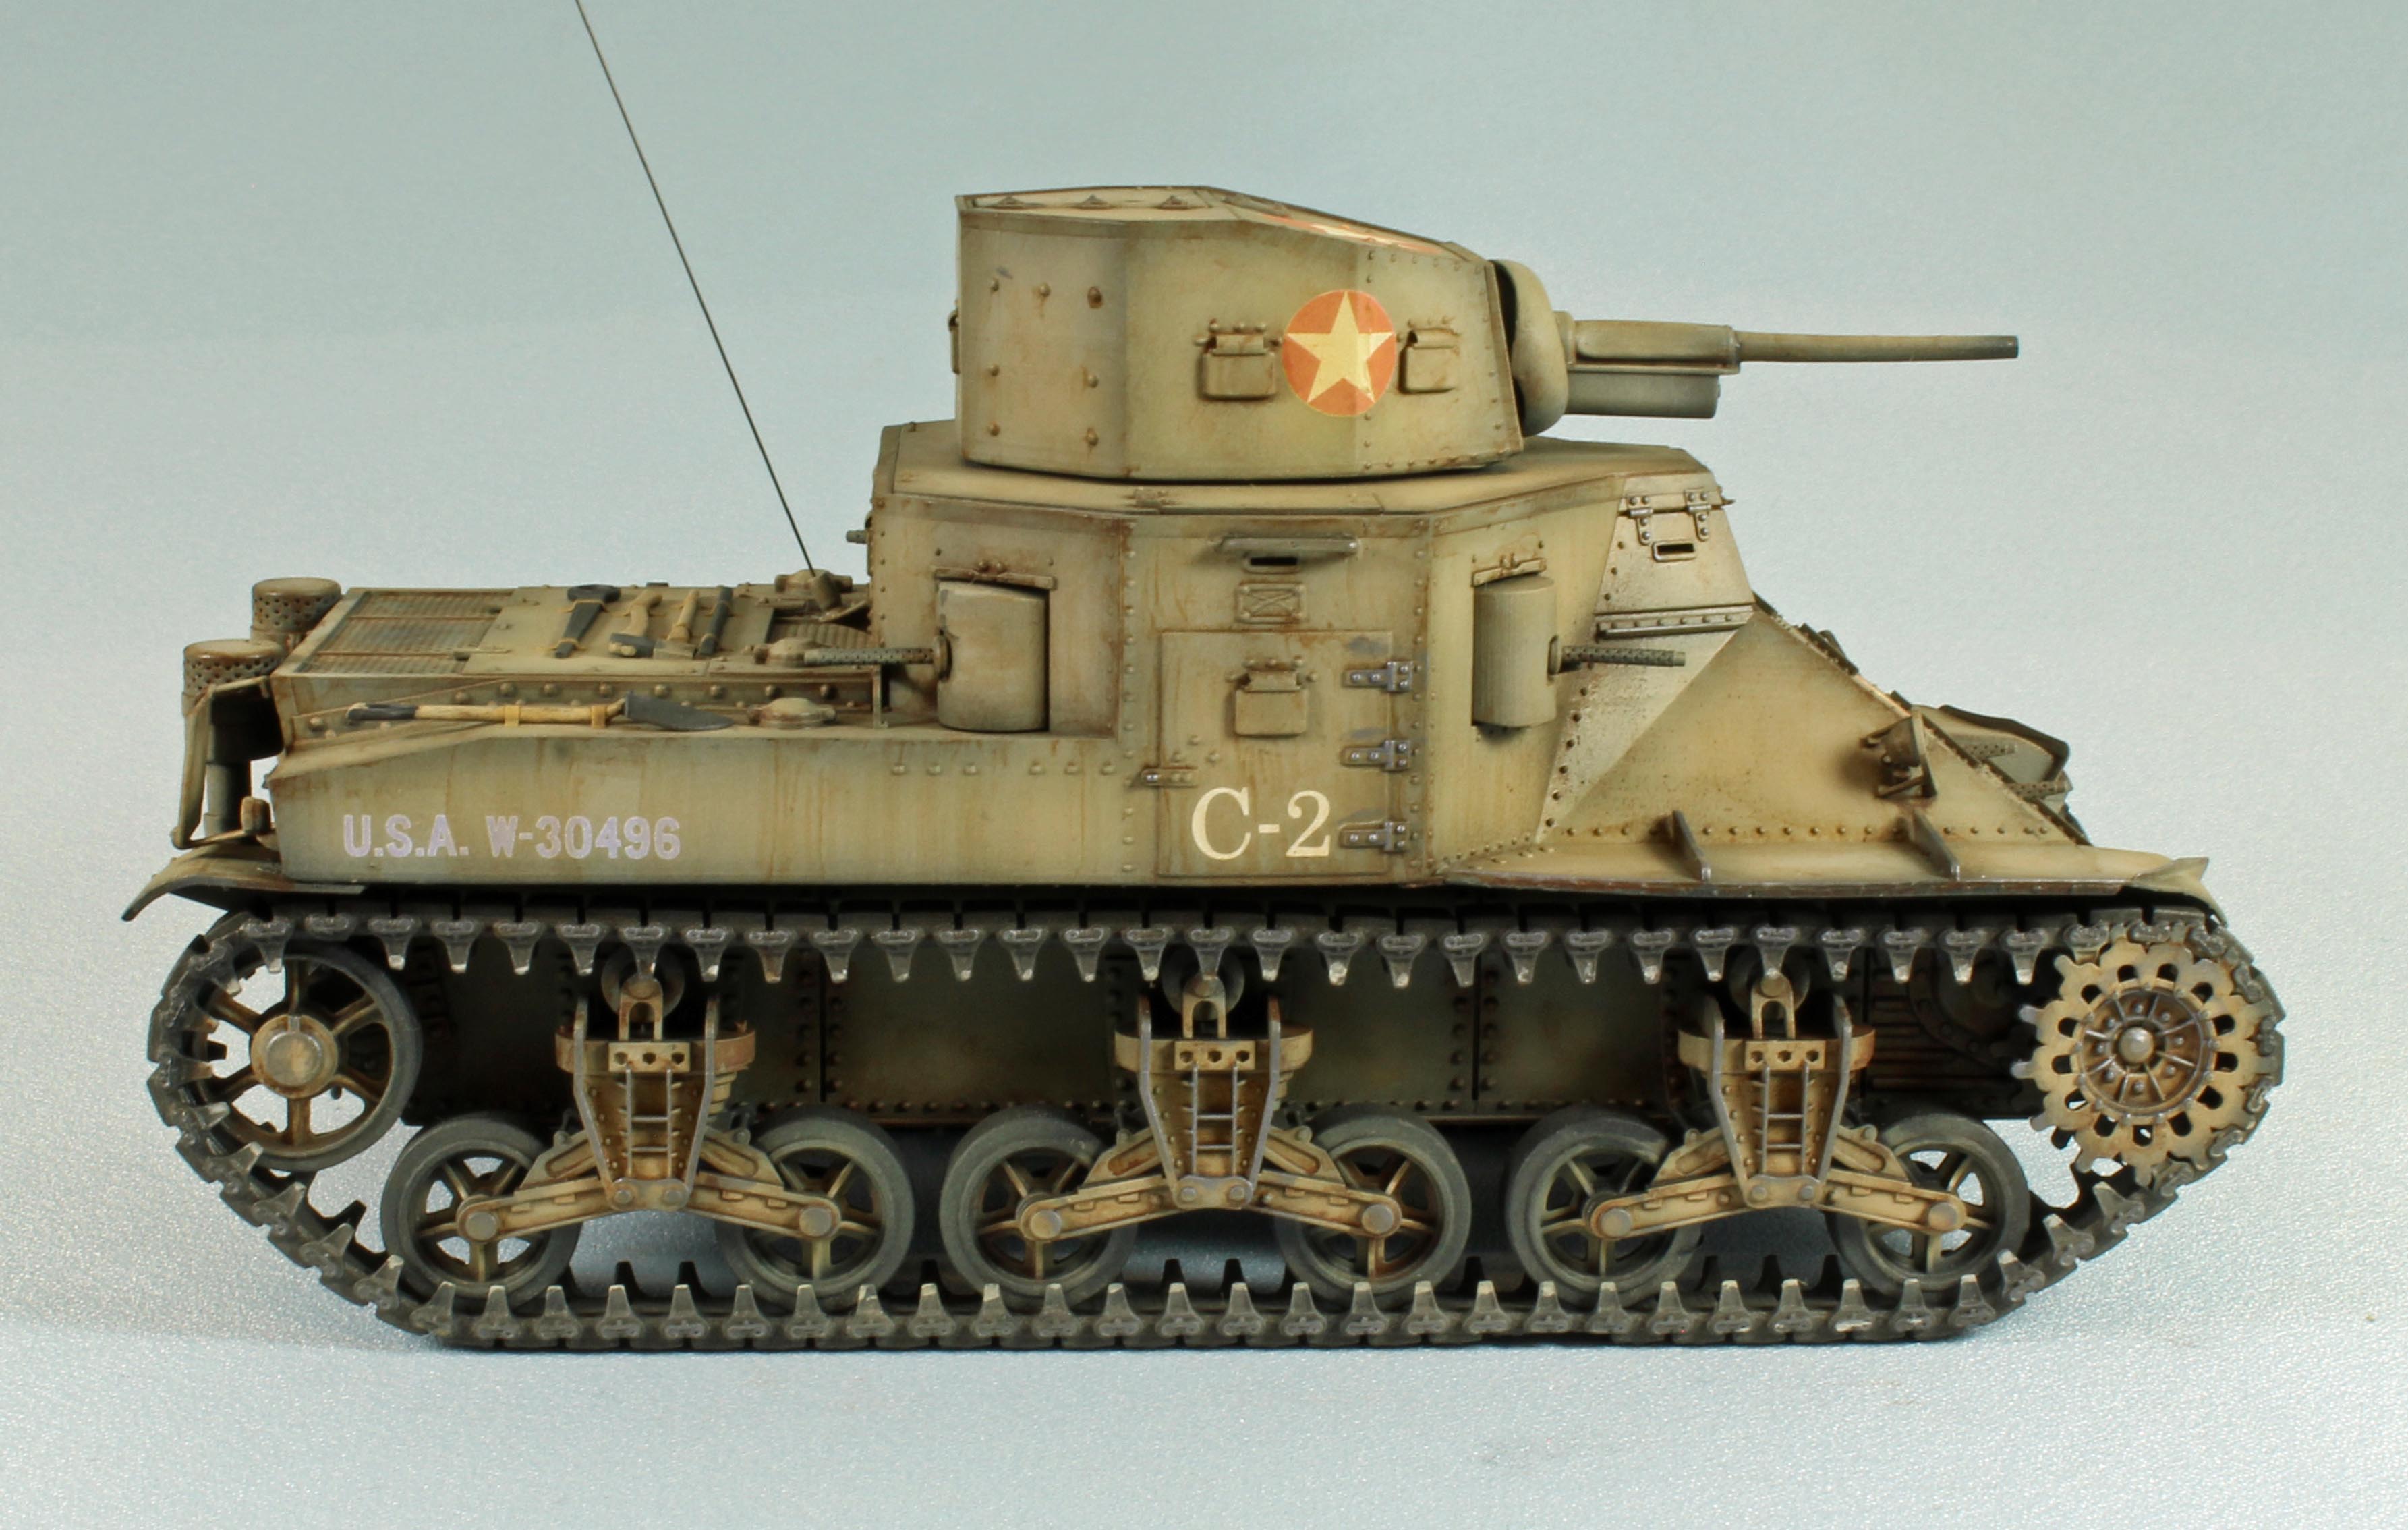
Vargas Models specializes in unusual 3-D printed, limited-run armor models, and is now offering the M2A1 Medium tank, the forerunner to the venerable line of early-WWII medium tanks.
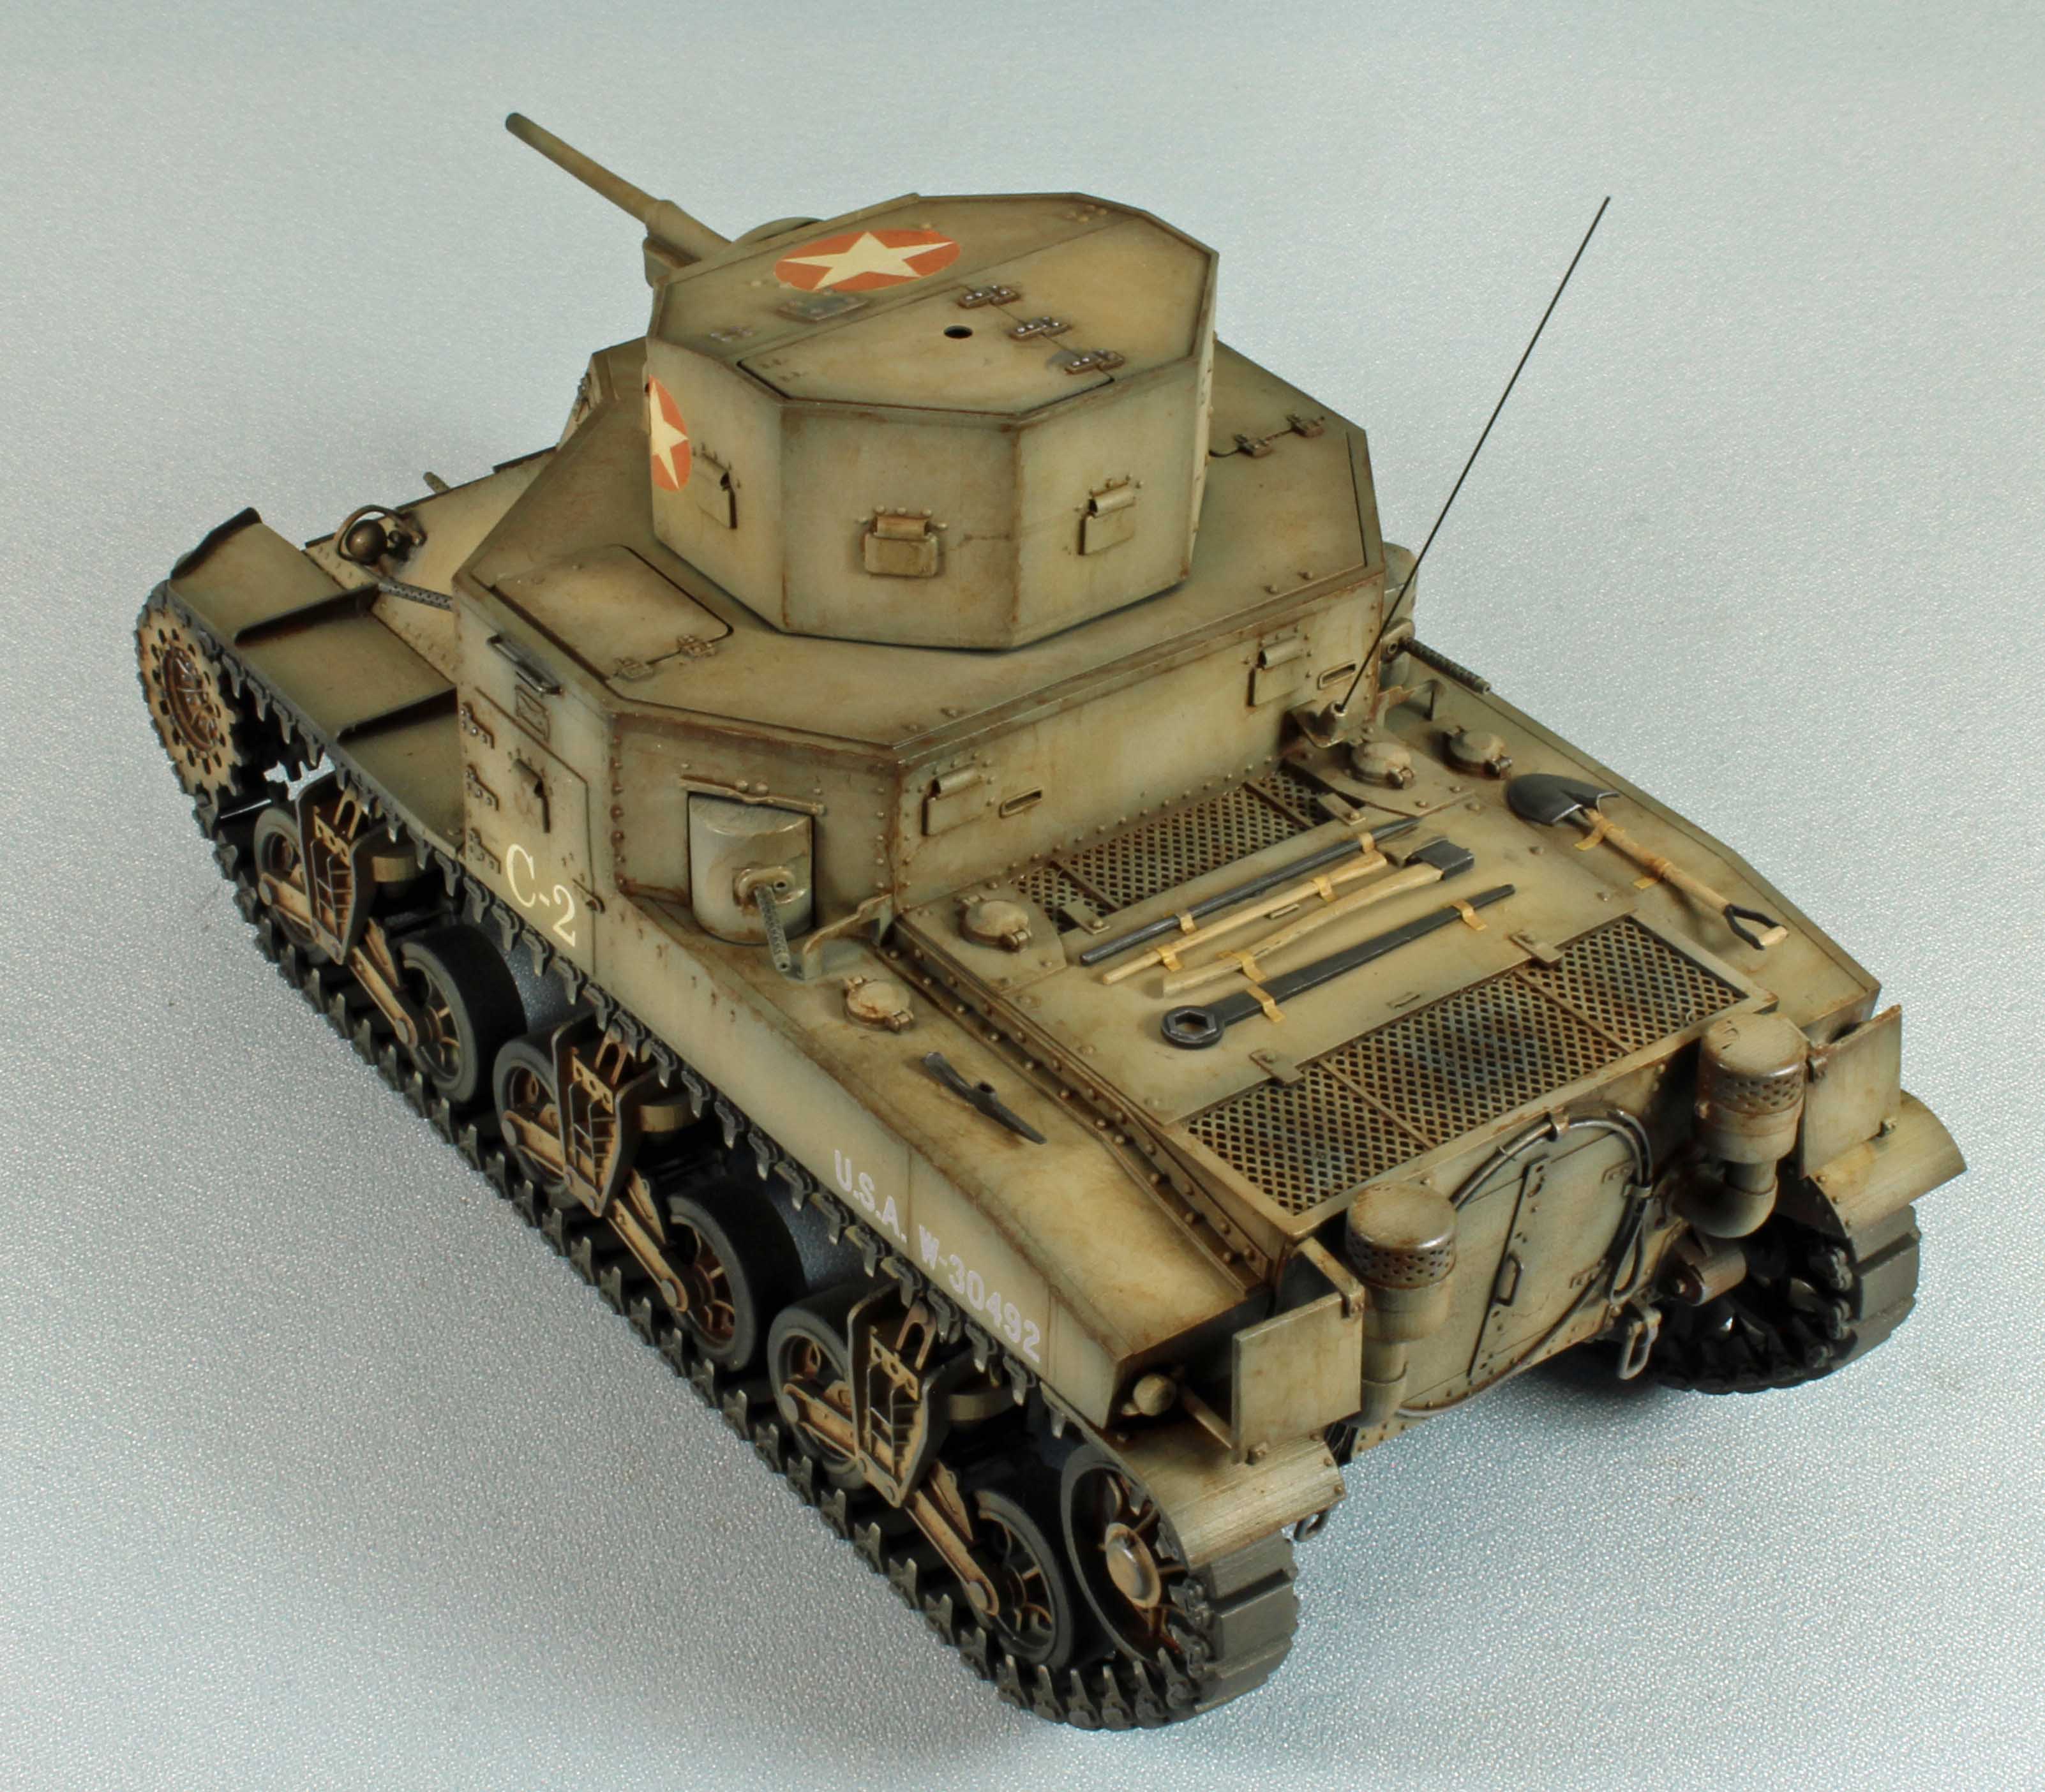
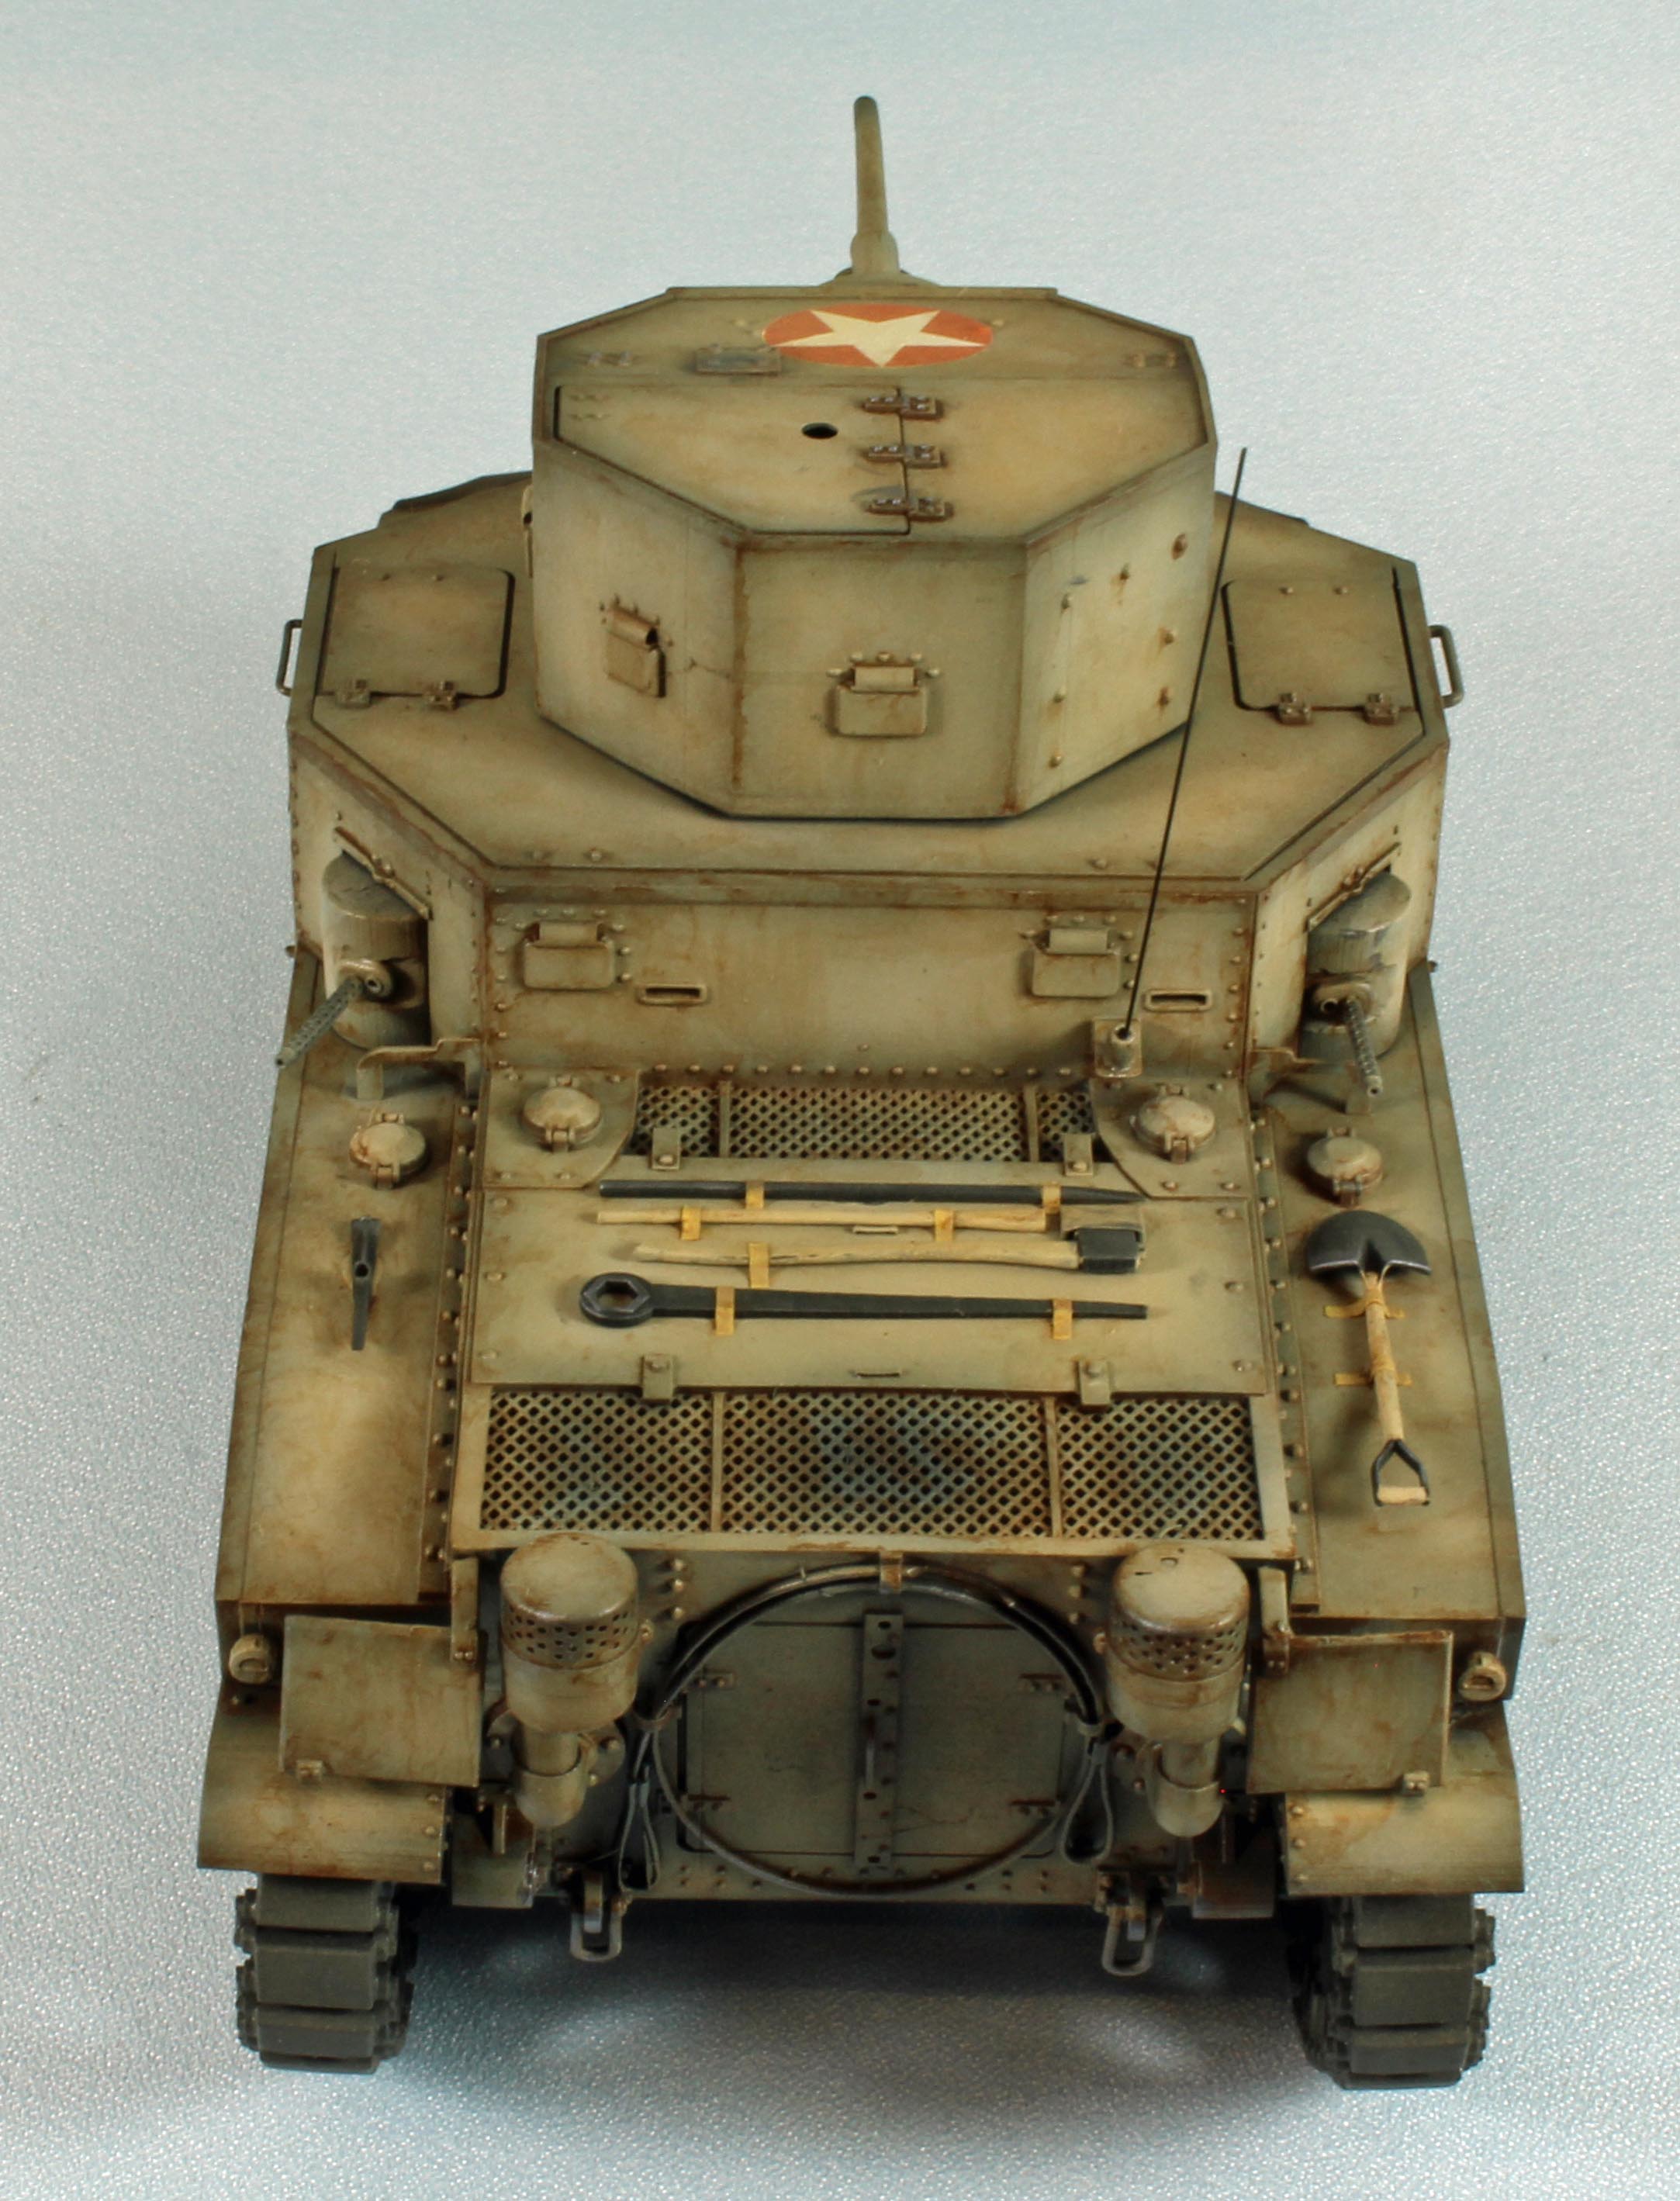
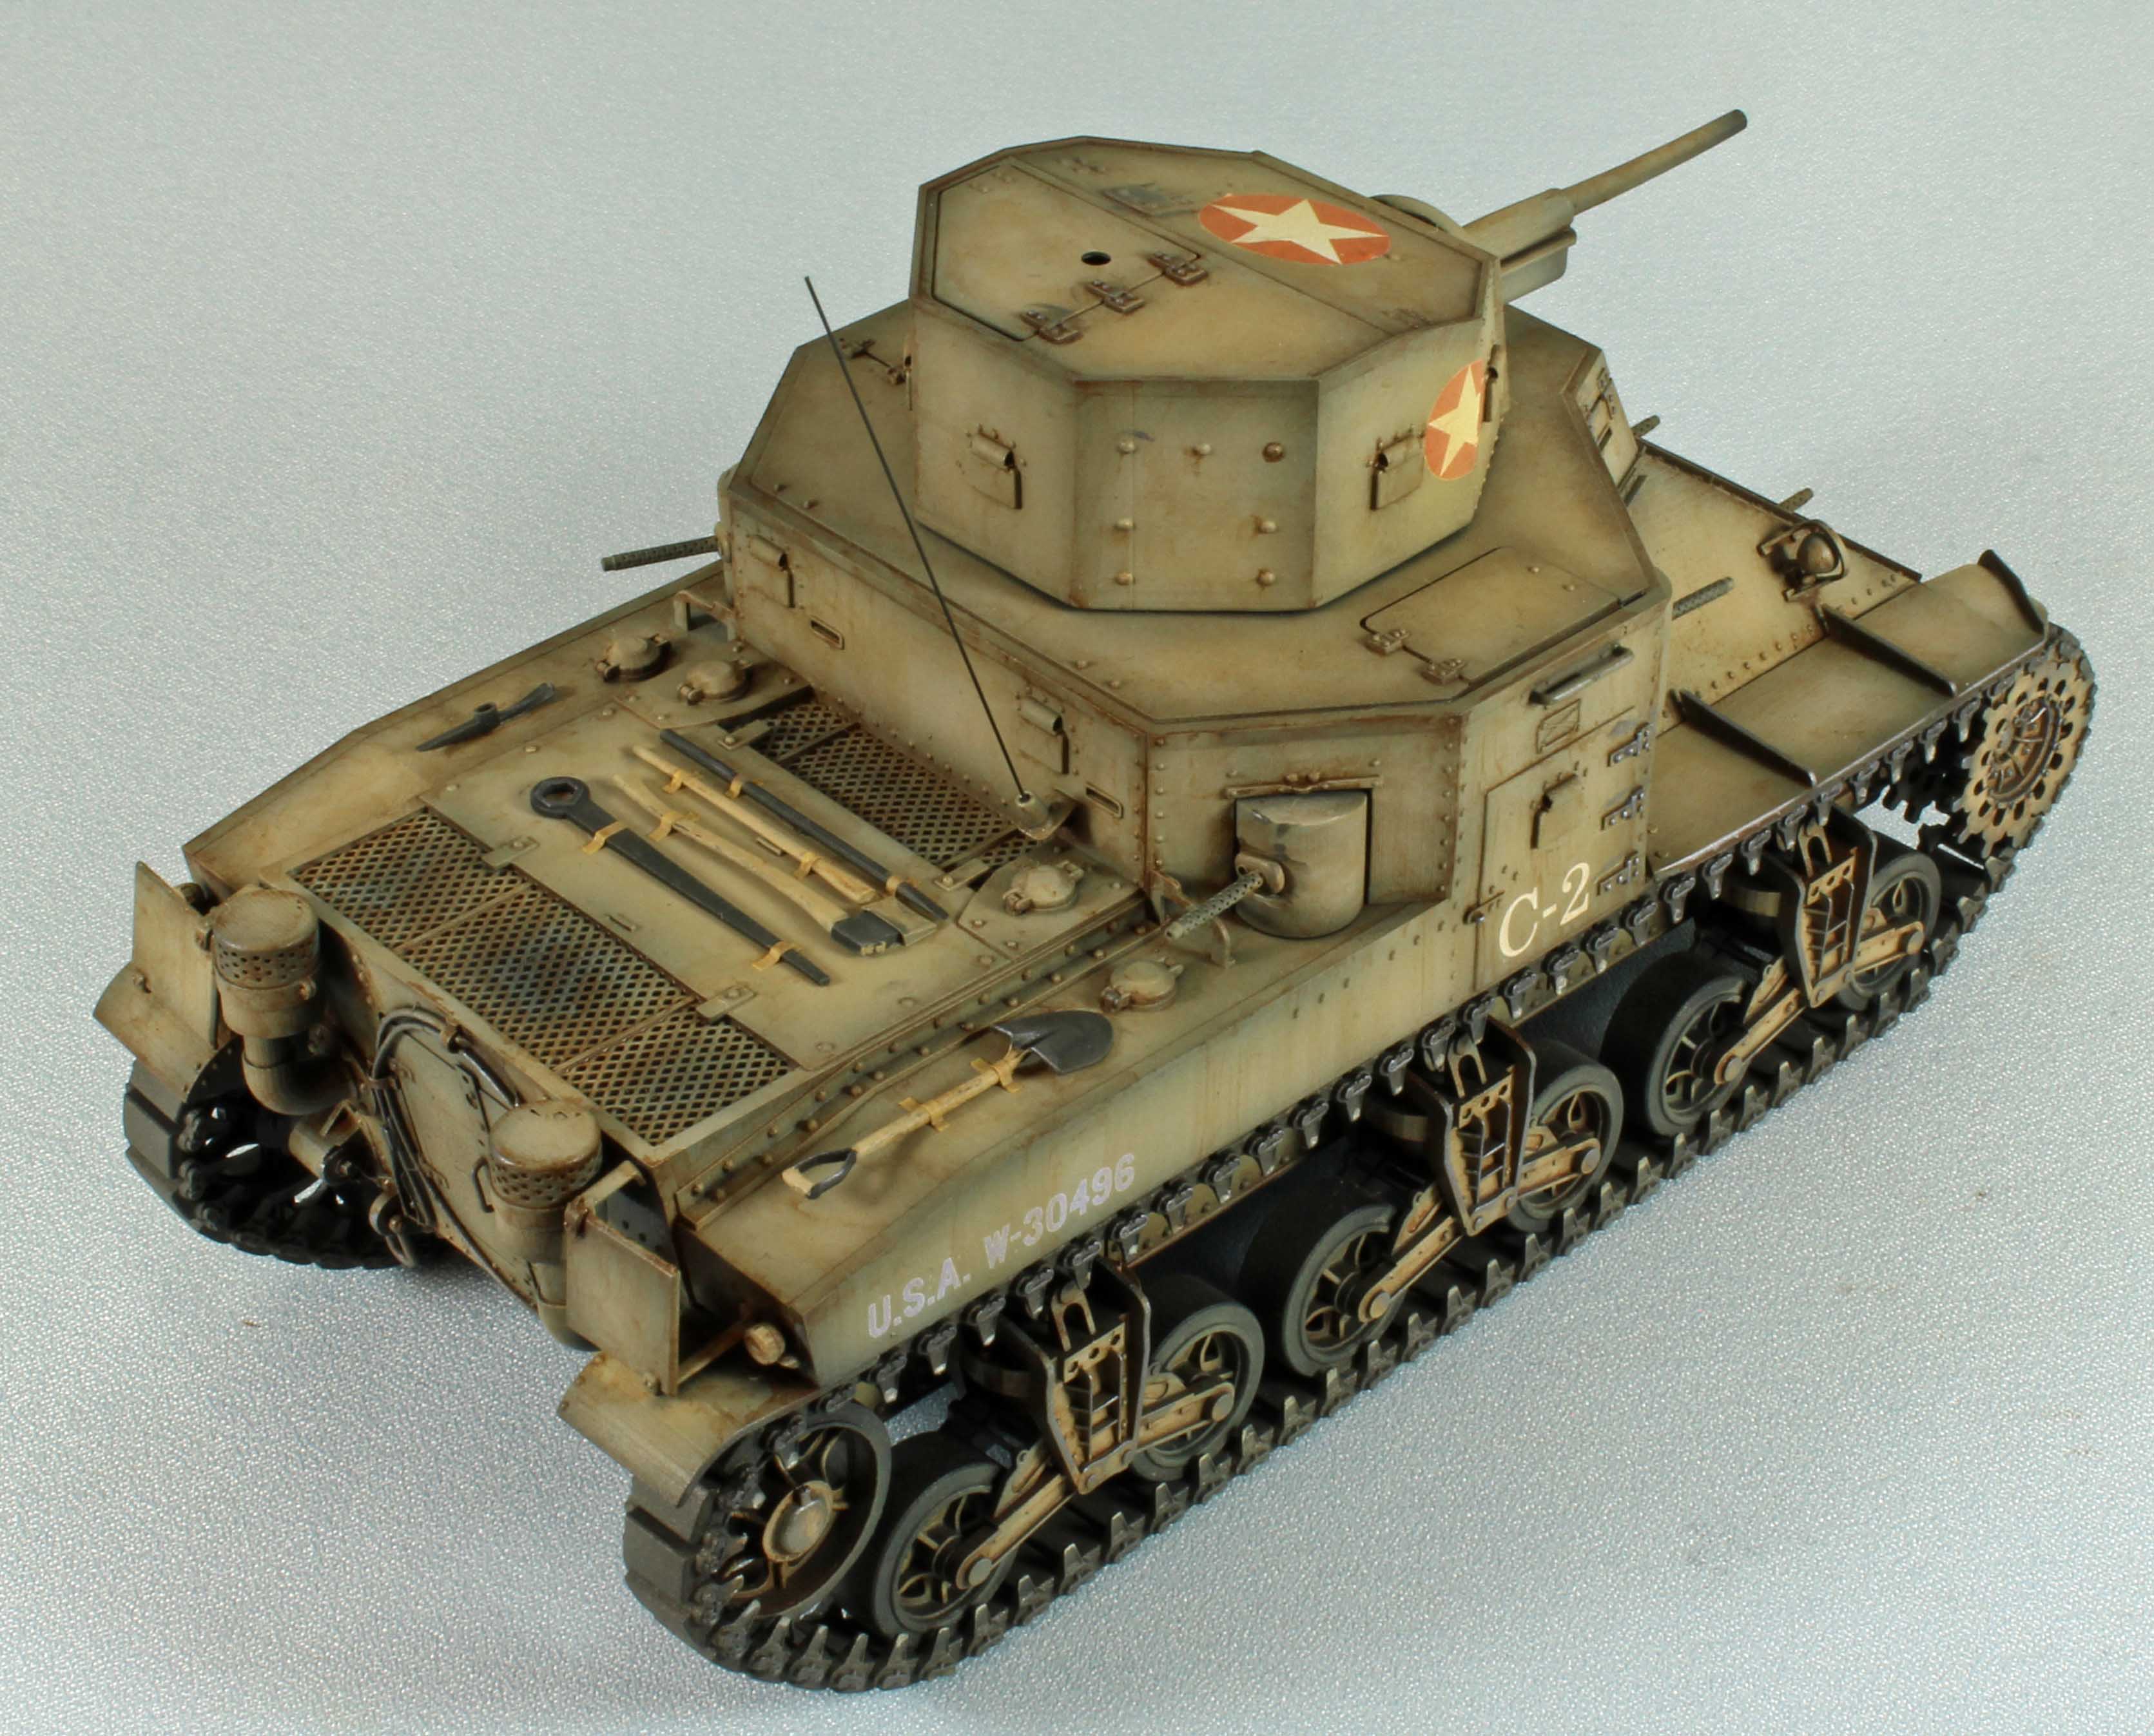
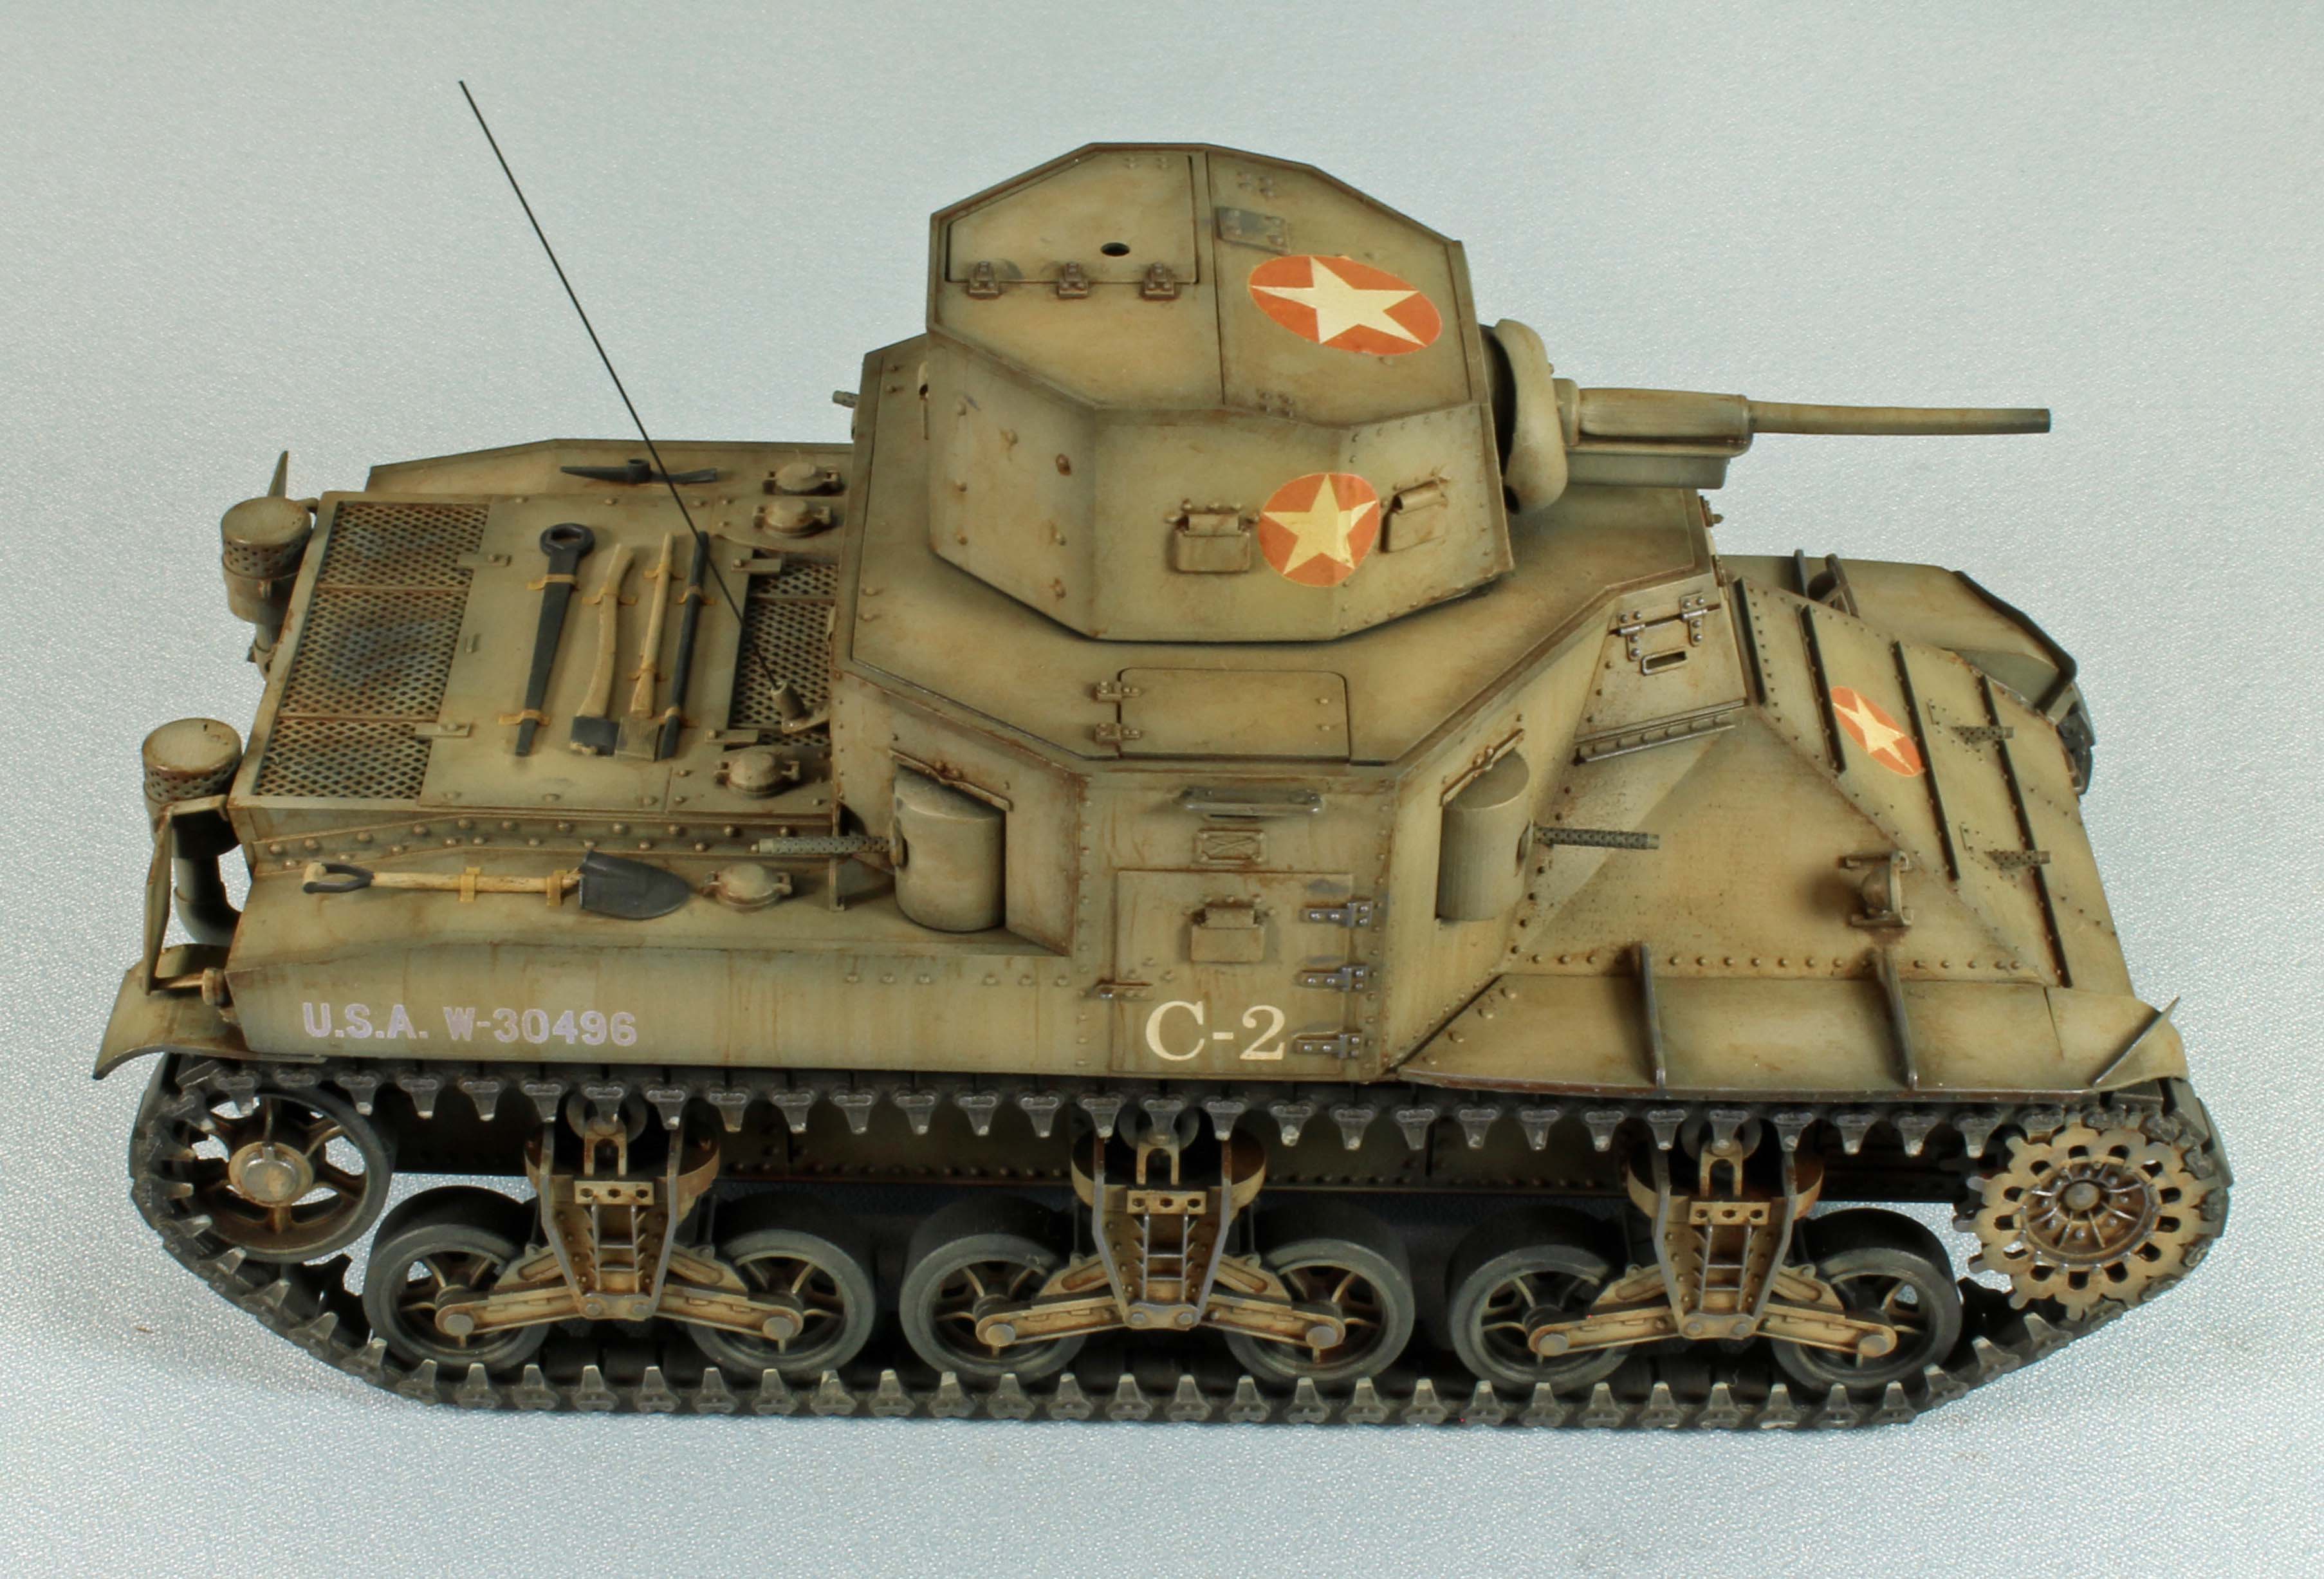
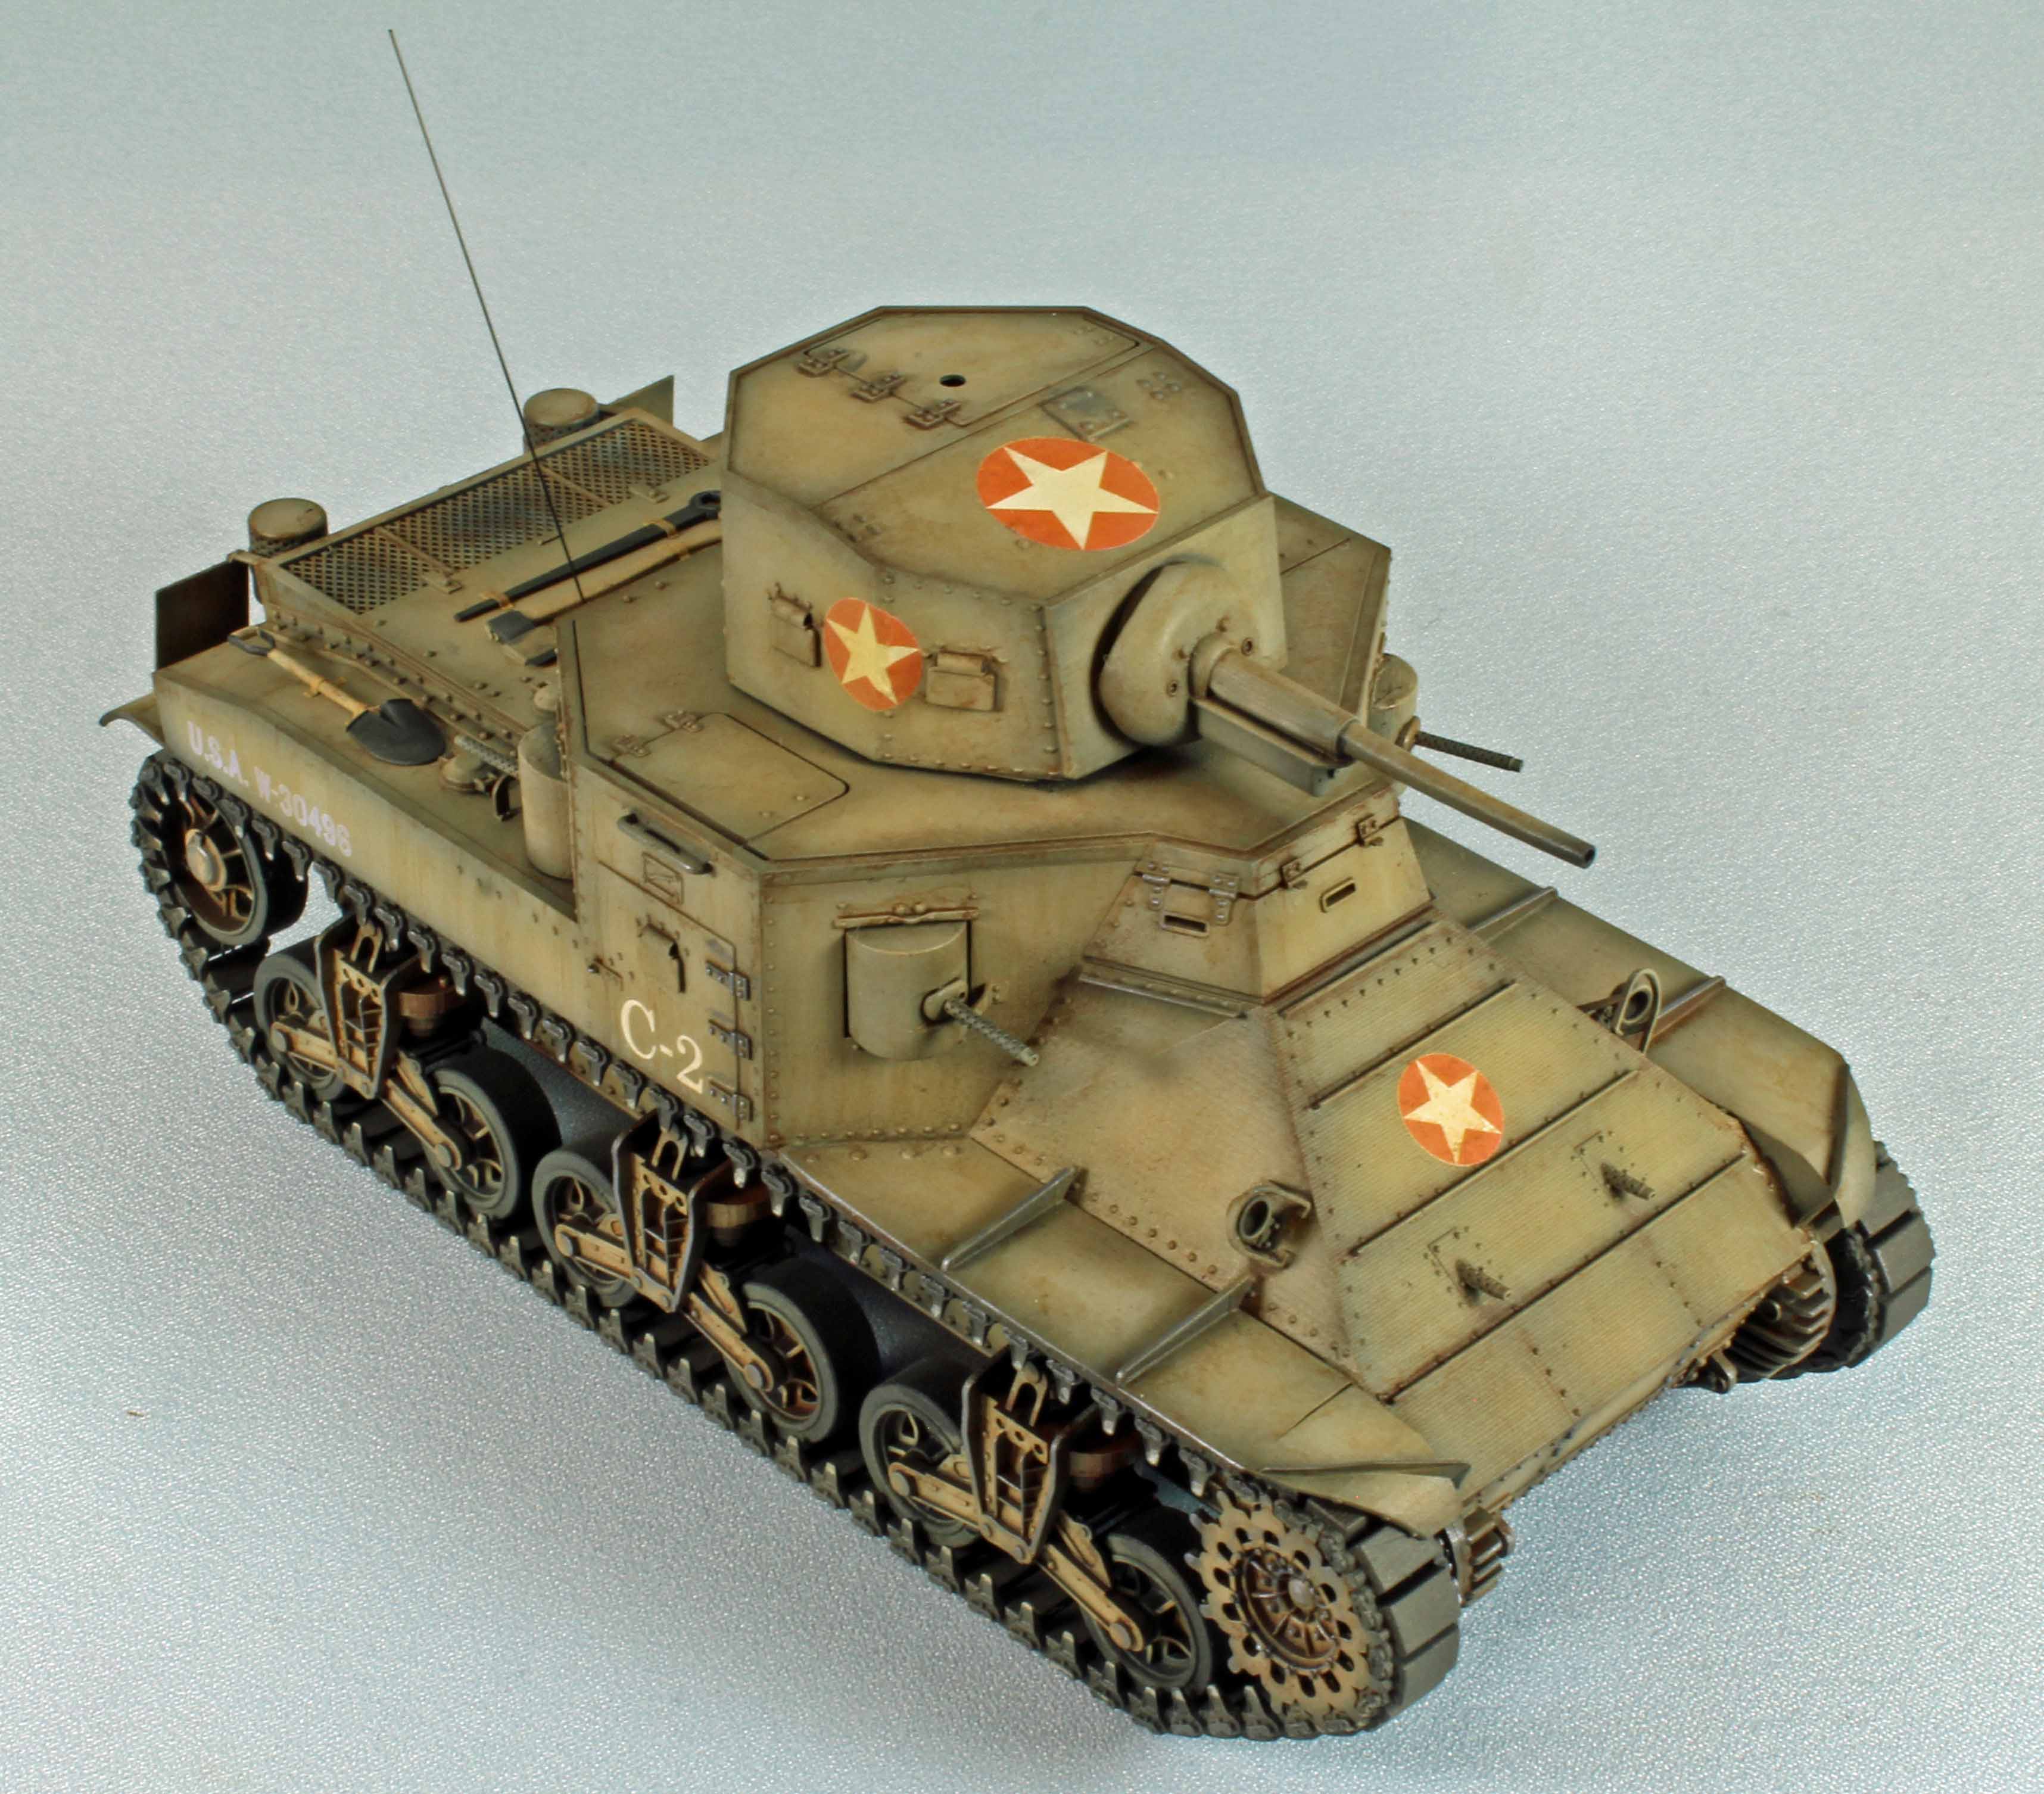
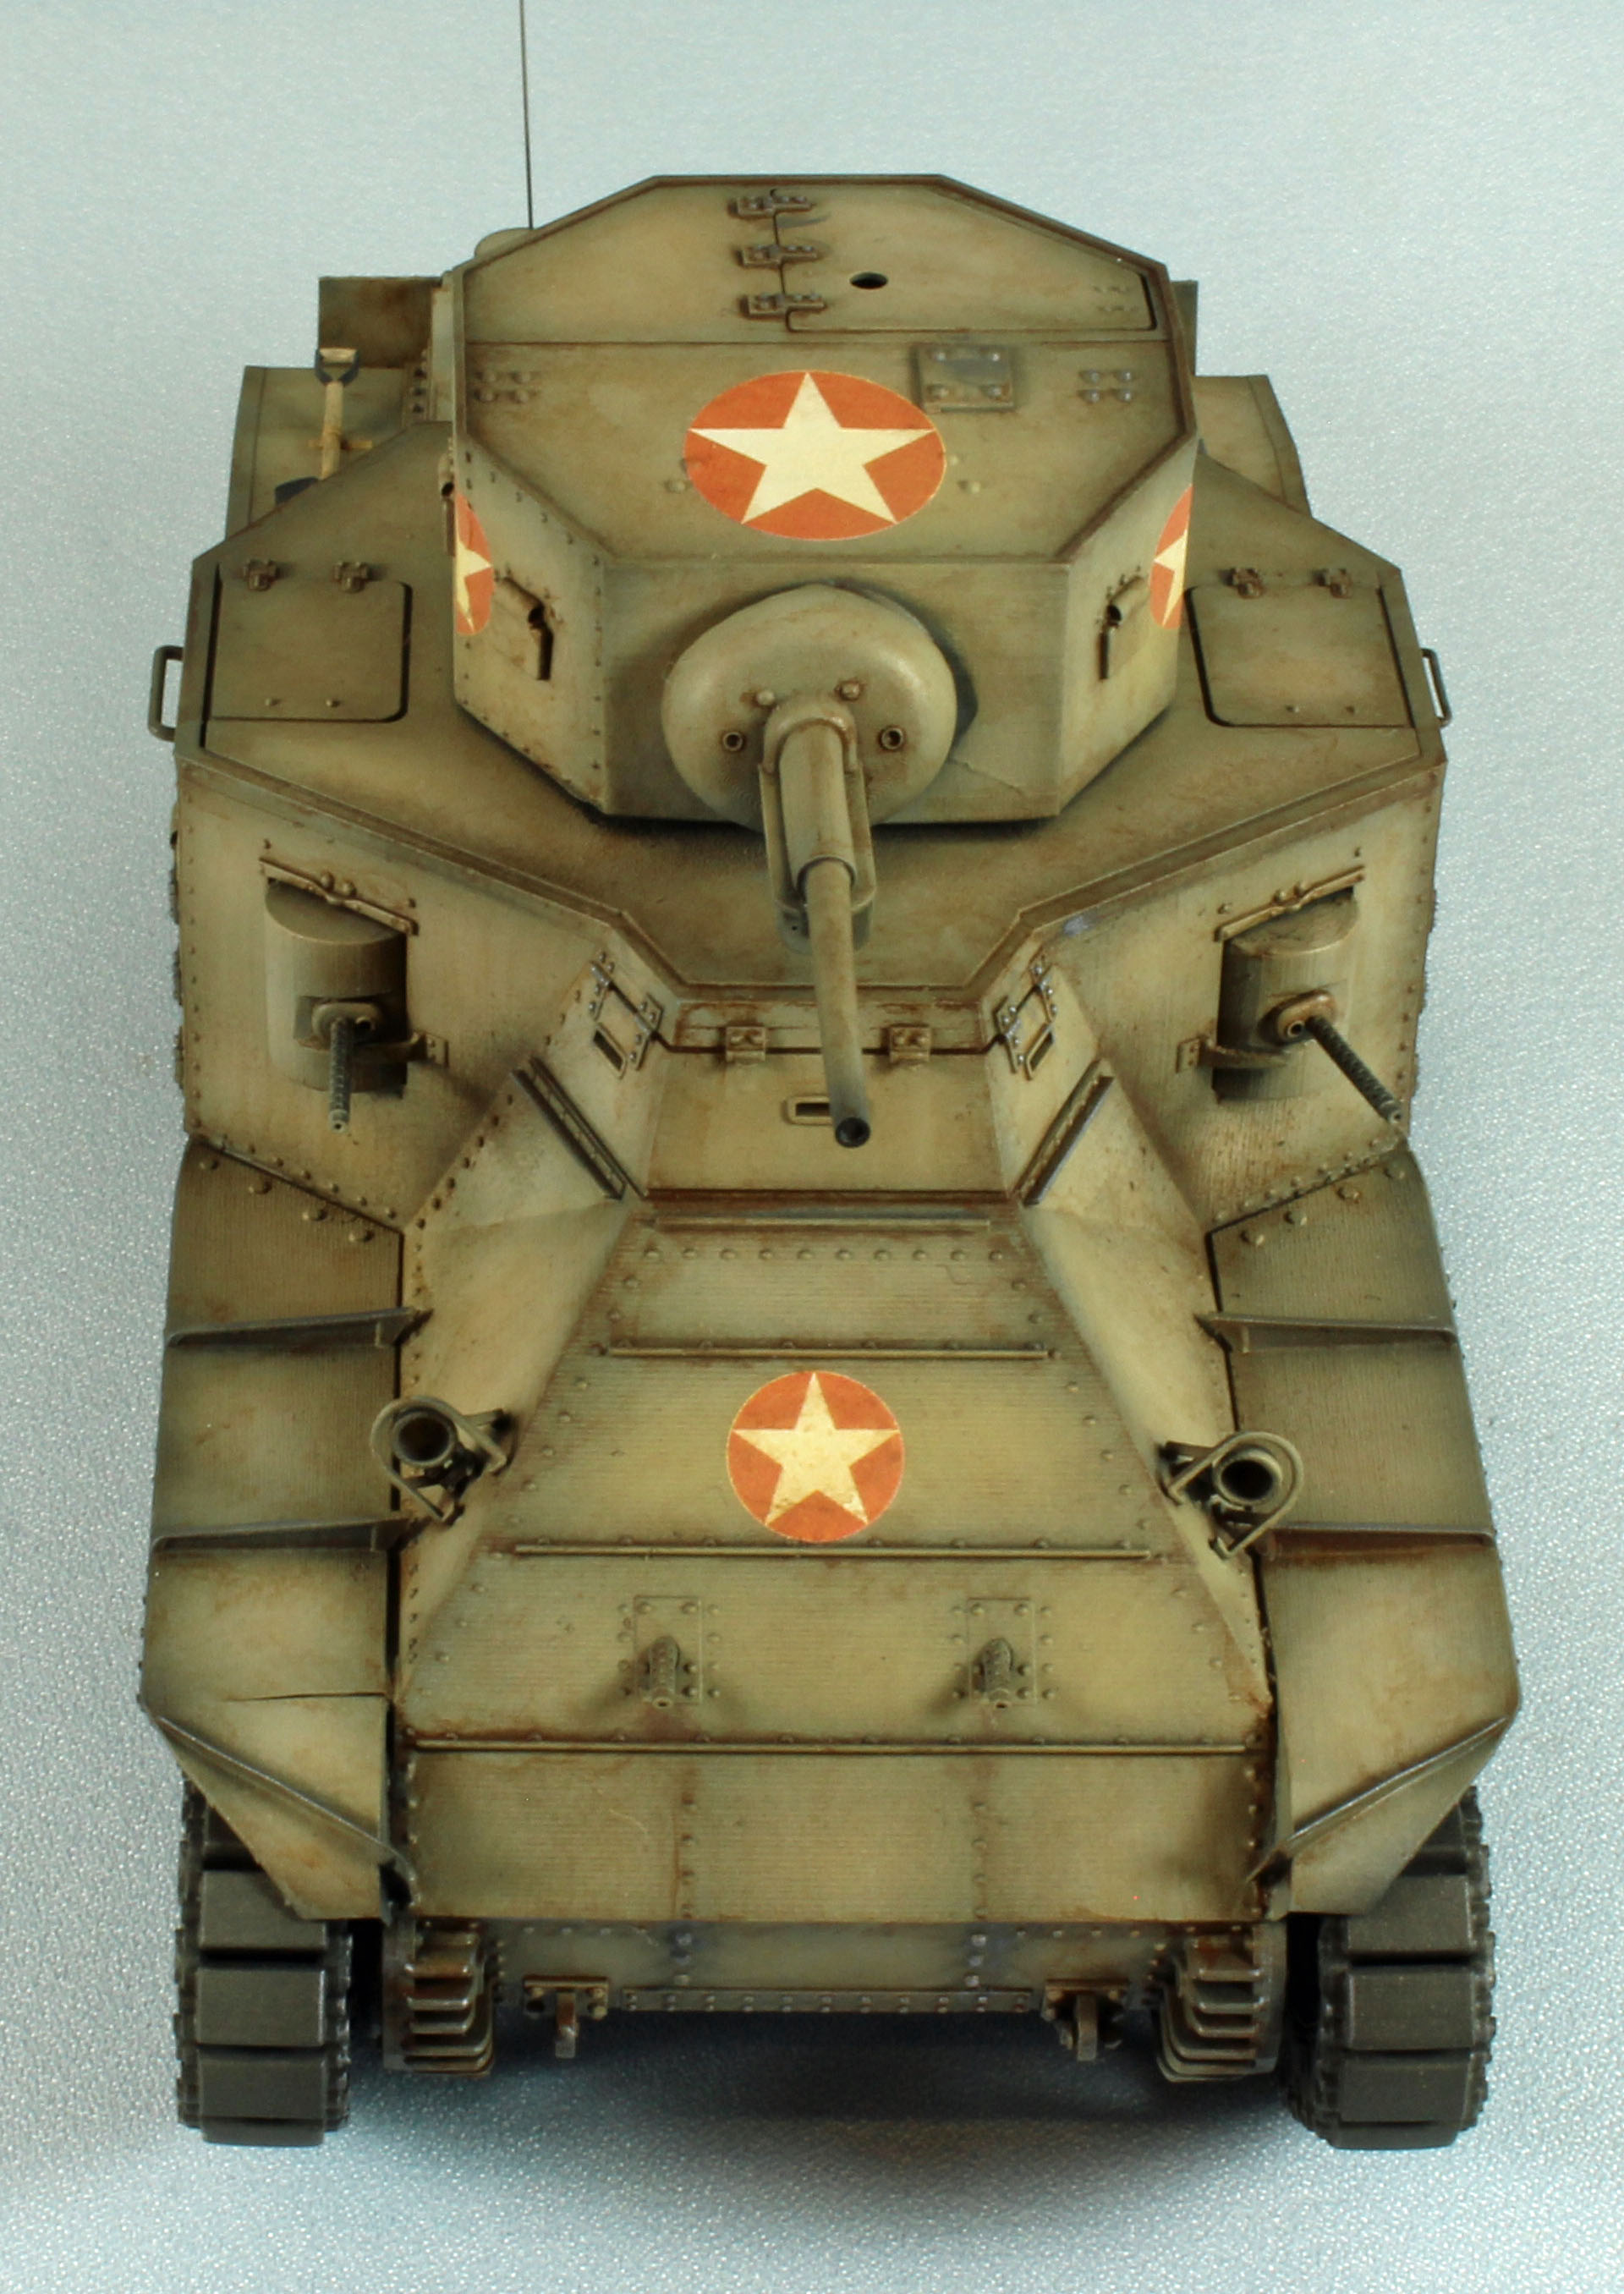
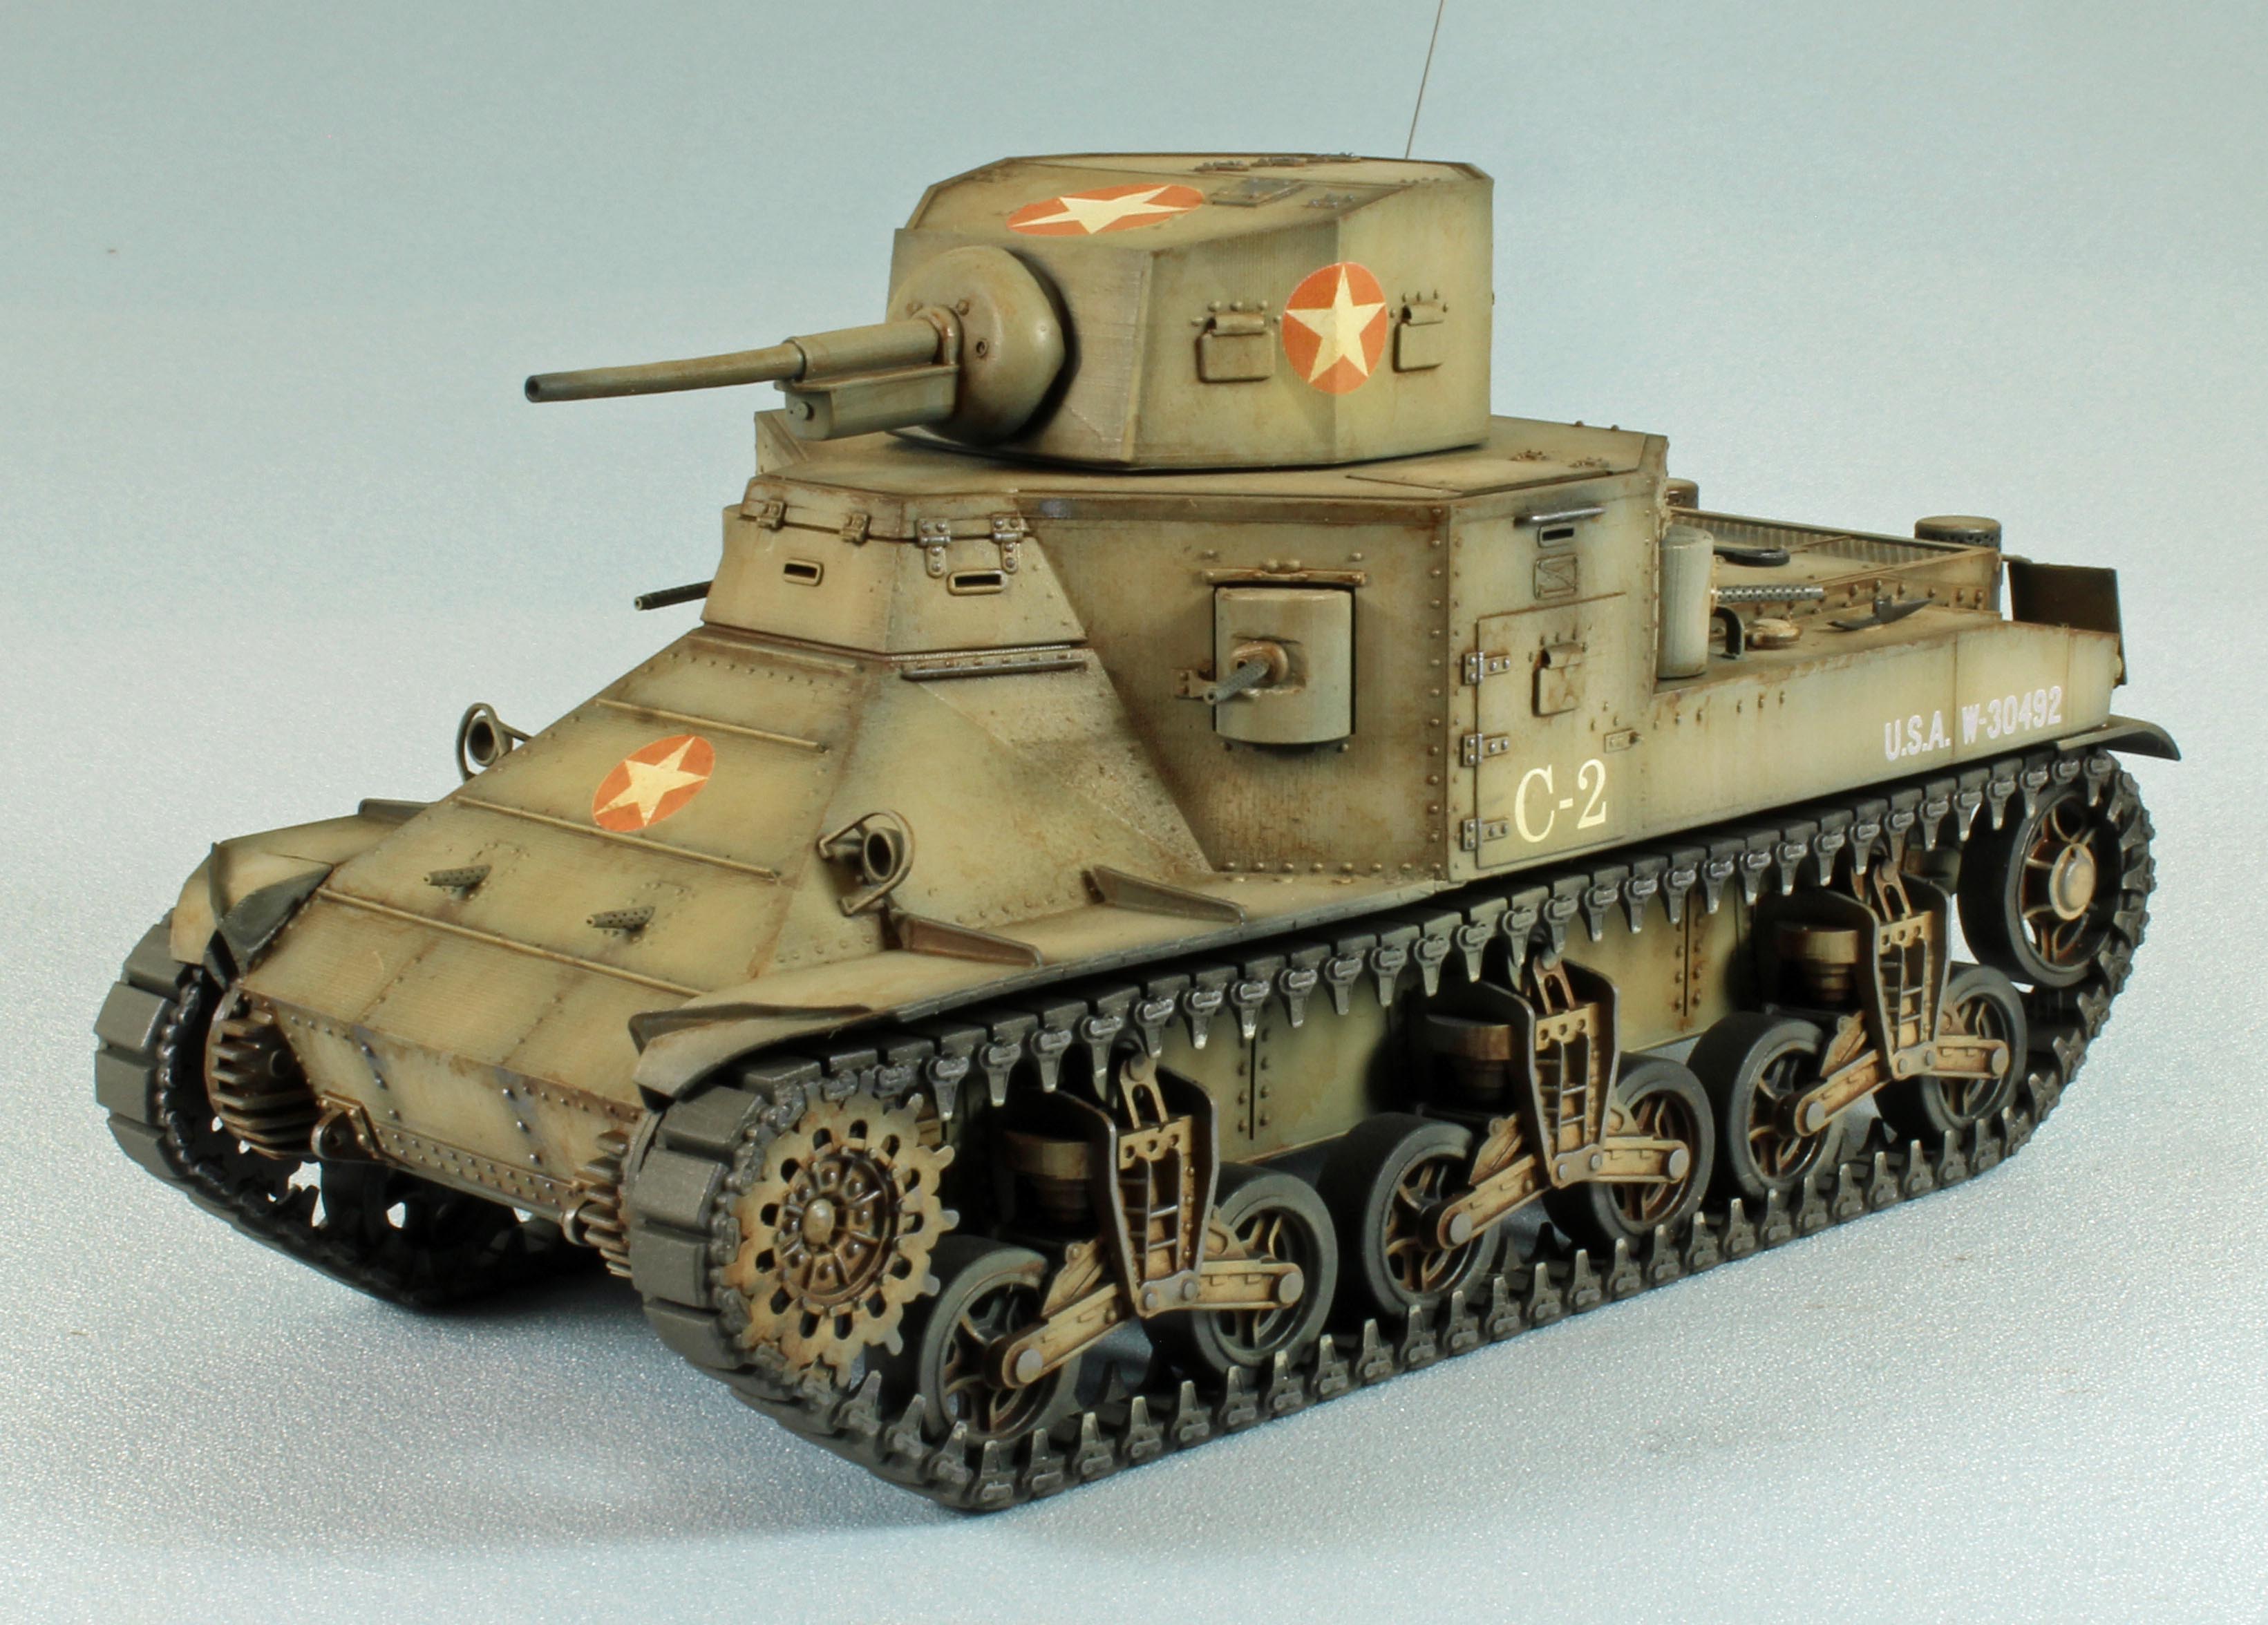
The unmistakable lines of the M3 Grant/Lee hull are evident in the M2A1, and the lower chassis and running gear point straight at the M4 Sherman, the most-produced Allied tank of the war. The M2 was armed with four 30-caliber machine guns mounted in revolving sponsons bracketing the turret, two additional, fixed 30cal machine guns in the front hull, and a turret-mounted, 37mm main gun. The M2 carried an impressive 12,250 rounds of ammunition for a simple reason; at the time of its design, medium tanks in the US Army were employed not as tanks proper, but as infantry support weapons. To this end, the 4 revolving machine guns and the 2 fixed hull machine guns would have greatly helped it in that role.
Ultimately the M2’s service career was doomed to a limited (but invaluable) training role, providing US tank recruits a far more modern training tank than what was used previously.
The Kit
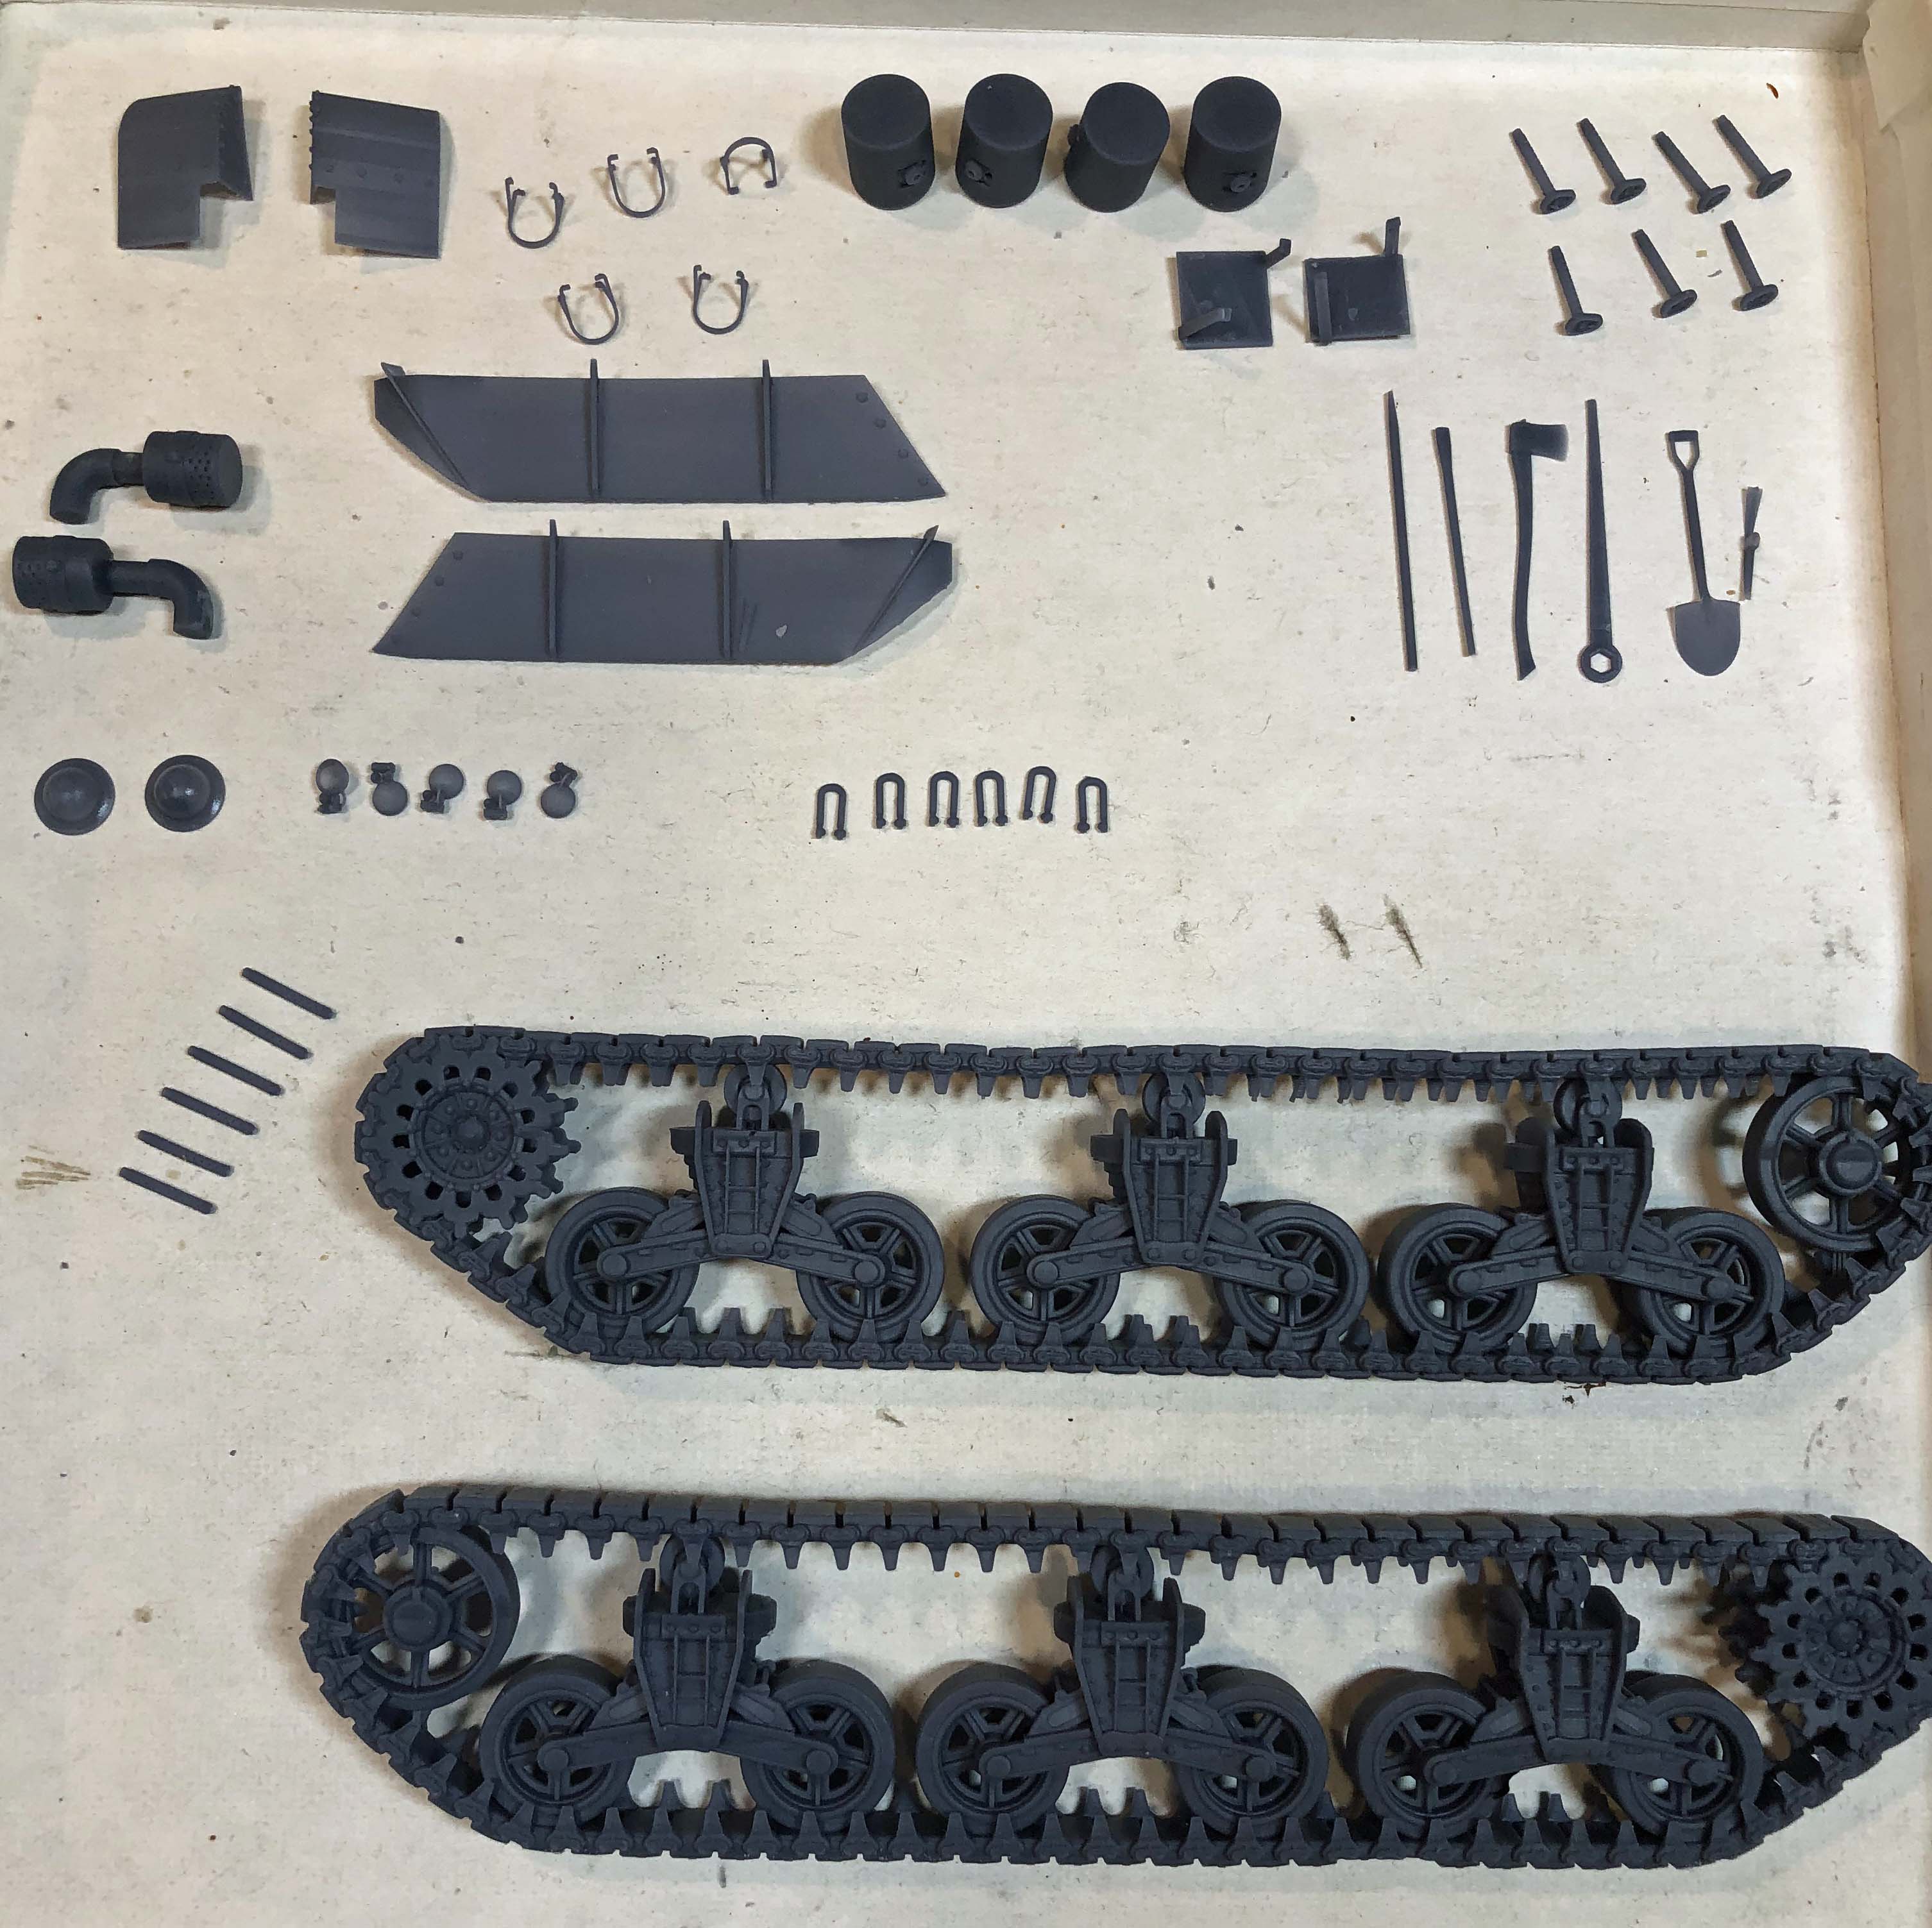
As with most 3-D printed kits, the Vargas sprues do not have any old-school poured-resin blocks to remove; instead, each sprue contains dozens (hundreds?) of very thin connecting rods that are part of the printing process. This makes the parts very simple to remove from the sprues. Most of the smaller parts are printed within a flexible, protective ‘cage’ of resin. There are very few actual parts (36), and these are exquisitely detailed – some of the best work I have seen in this medium. There is cleanup required, to be sure, but nothing like what I would normally expect for limited-run, resin subjects. Some extra parts are thrown in as well, which serve to replace some of the smaller items that might go on walkabout. A welcome addition to this kit are a nice set of ‘pioneer’ tools, although these require the modeler to fabricate some kind of attachment hardware to secure them to the rear hull.
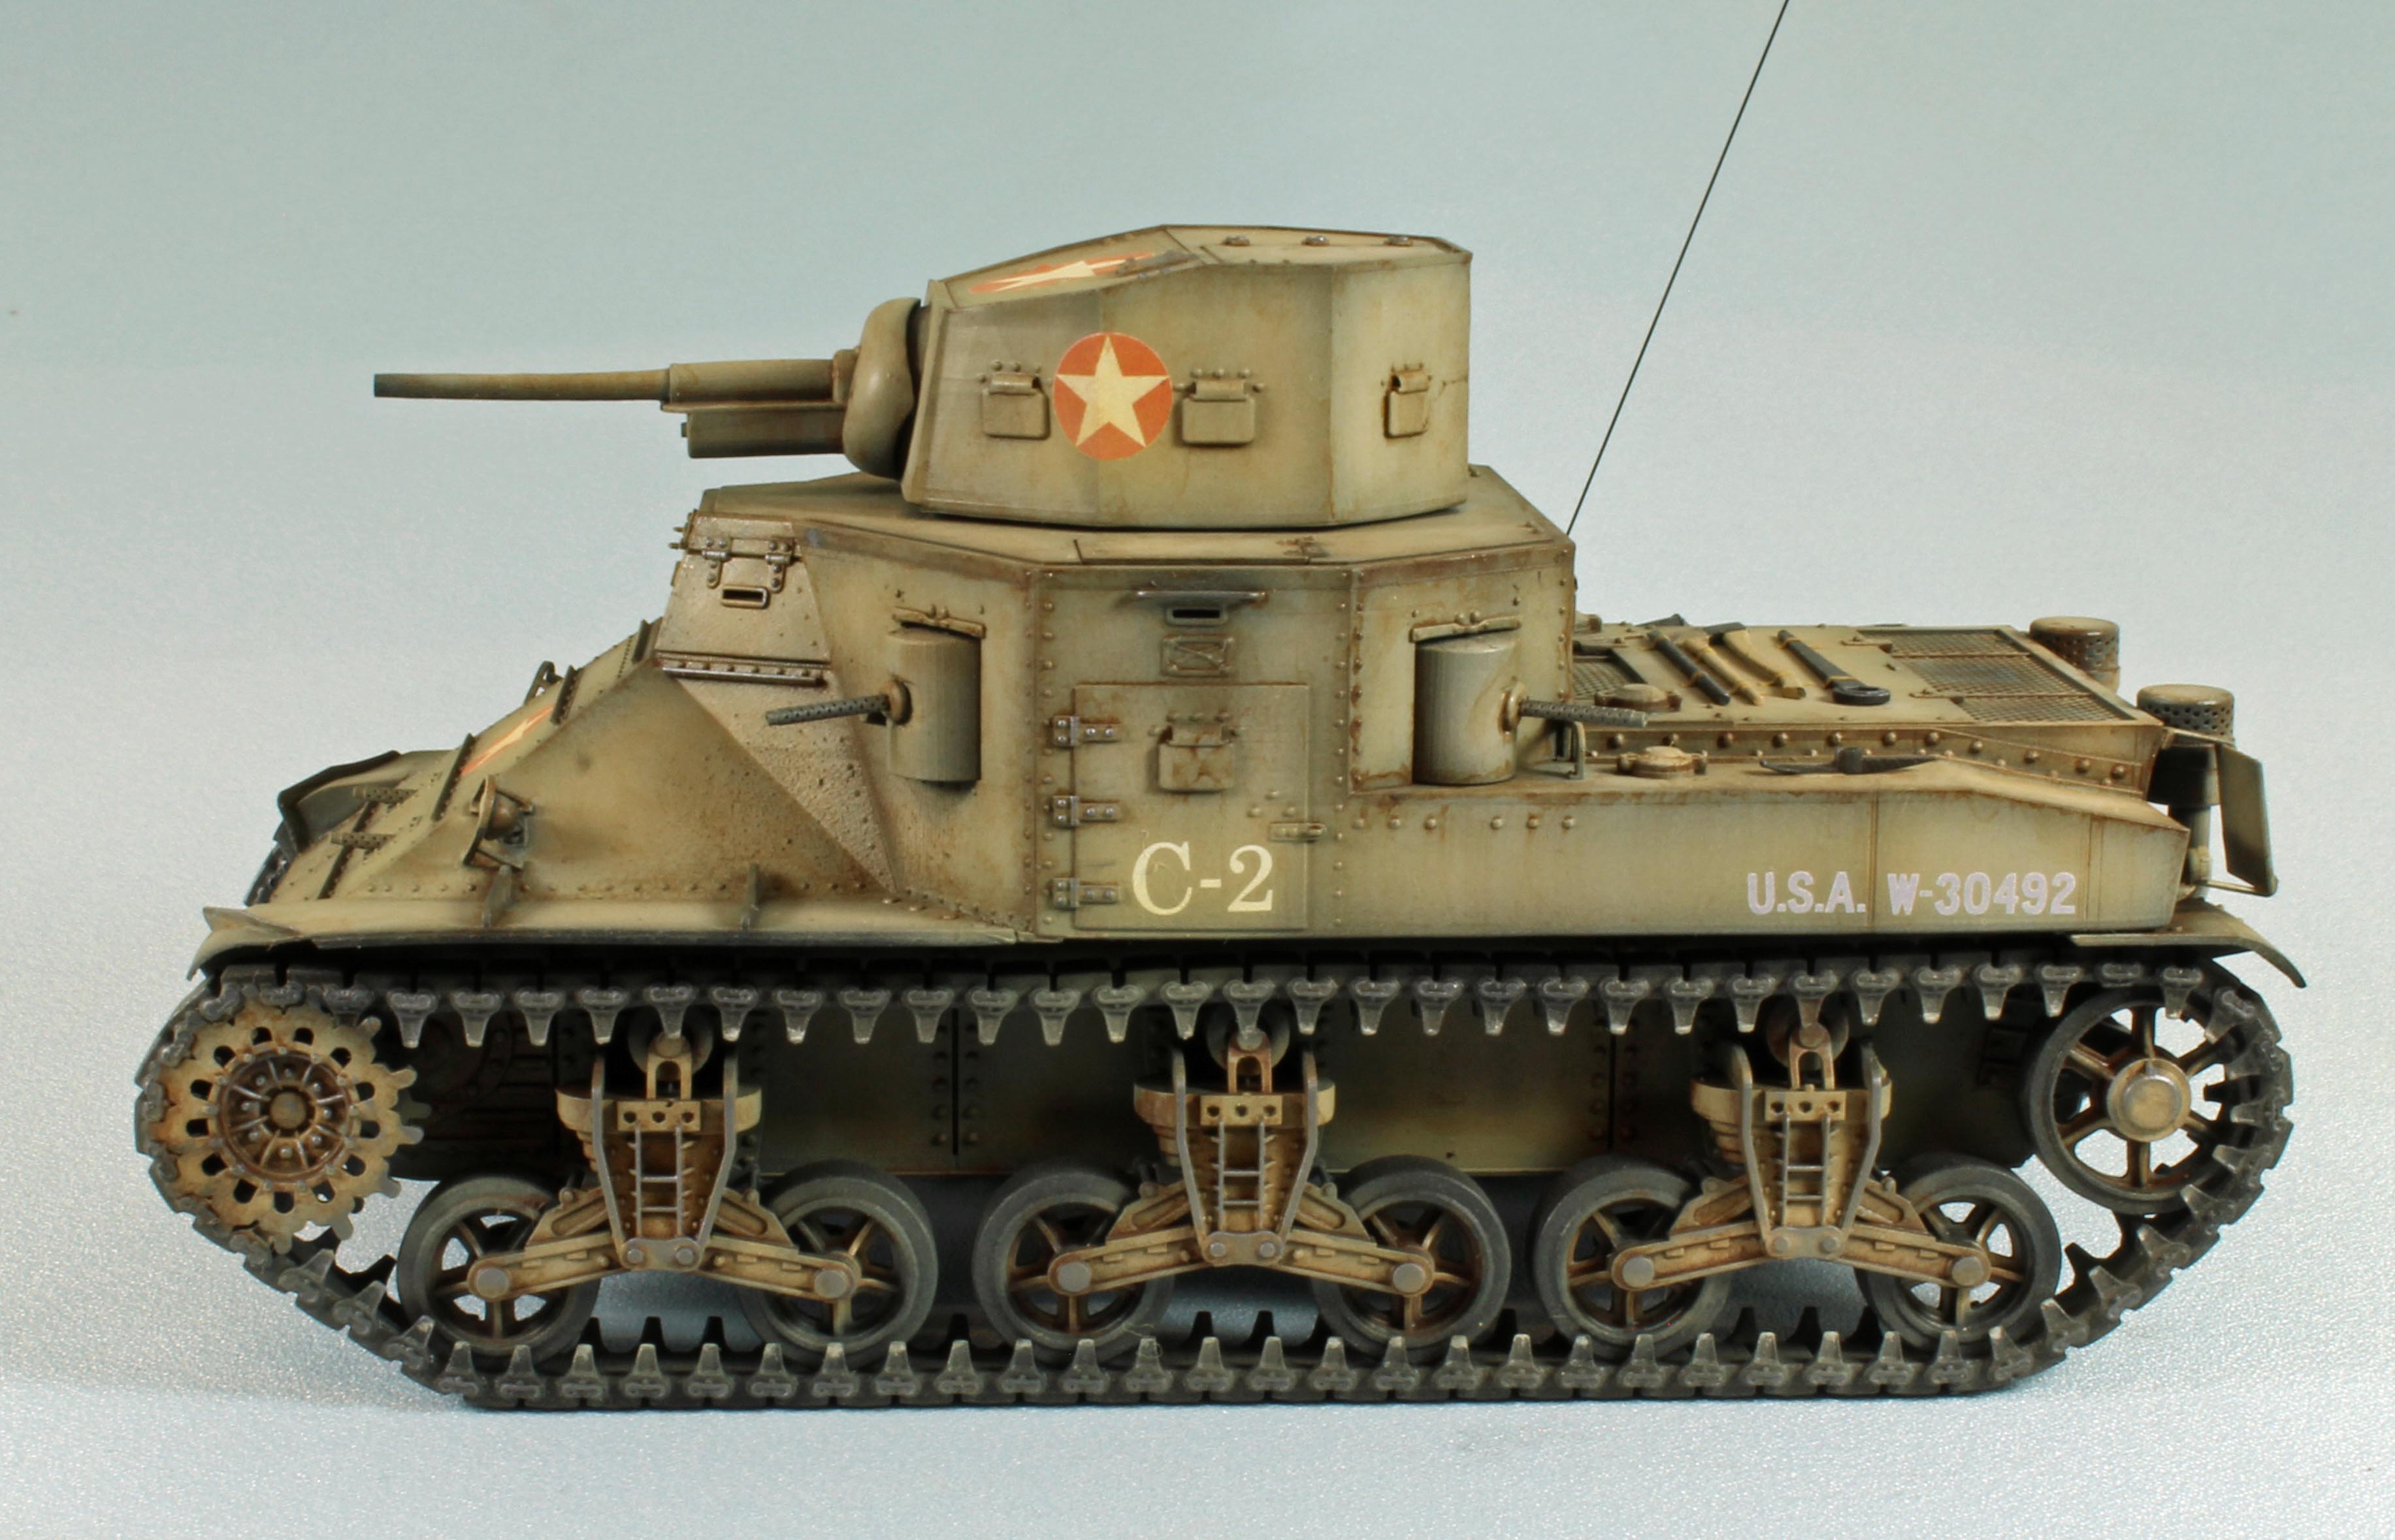
The dark-grey resin is firm, but sands easily enough, and there are some very slight surface striations on some of the curved parts that require attention, making preparation more important than with typical styrene kits. Comparatively, however, this work from Vargas is pretty darn good as delivered. There are very few, if any, surface flaws and the molding is excellent with no noticeable defects. The detail overall is crisp, and while many of the parts are very delicate, Vargas pulls everything together without resorting to using photo-etch or other finicky mediums, which is a big plus (for me, at least). The two pieces that represent the full track runs, one for each side, are simply breathtaking, as is the rivet detail throughout.
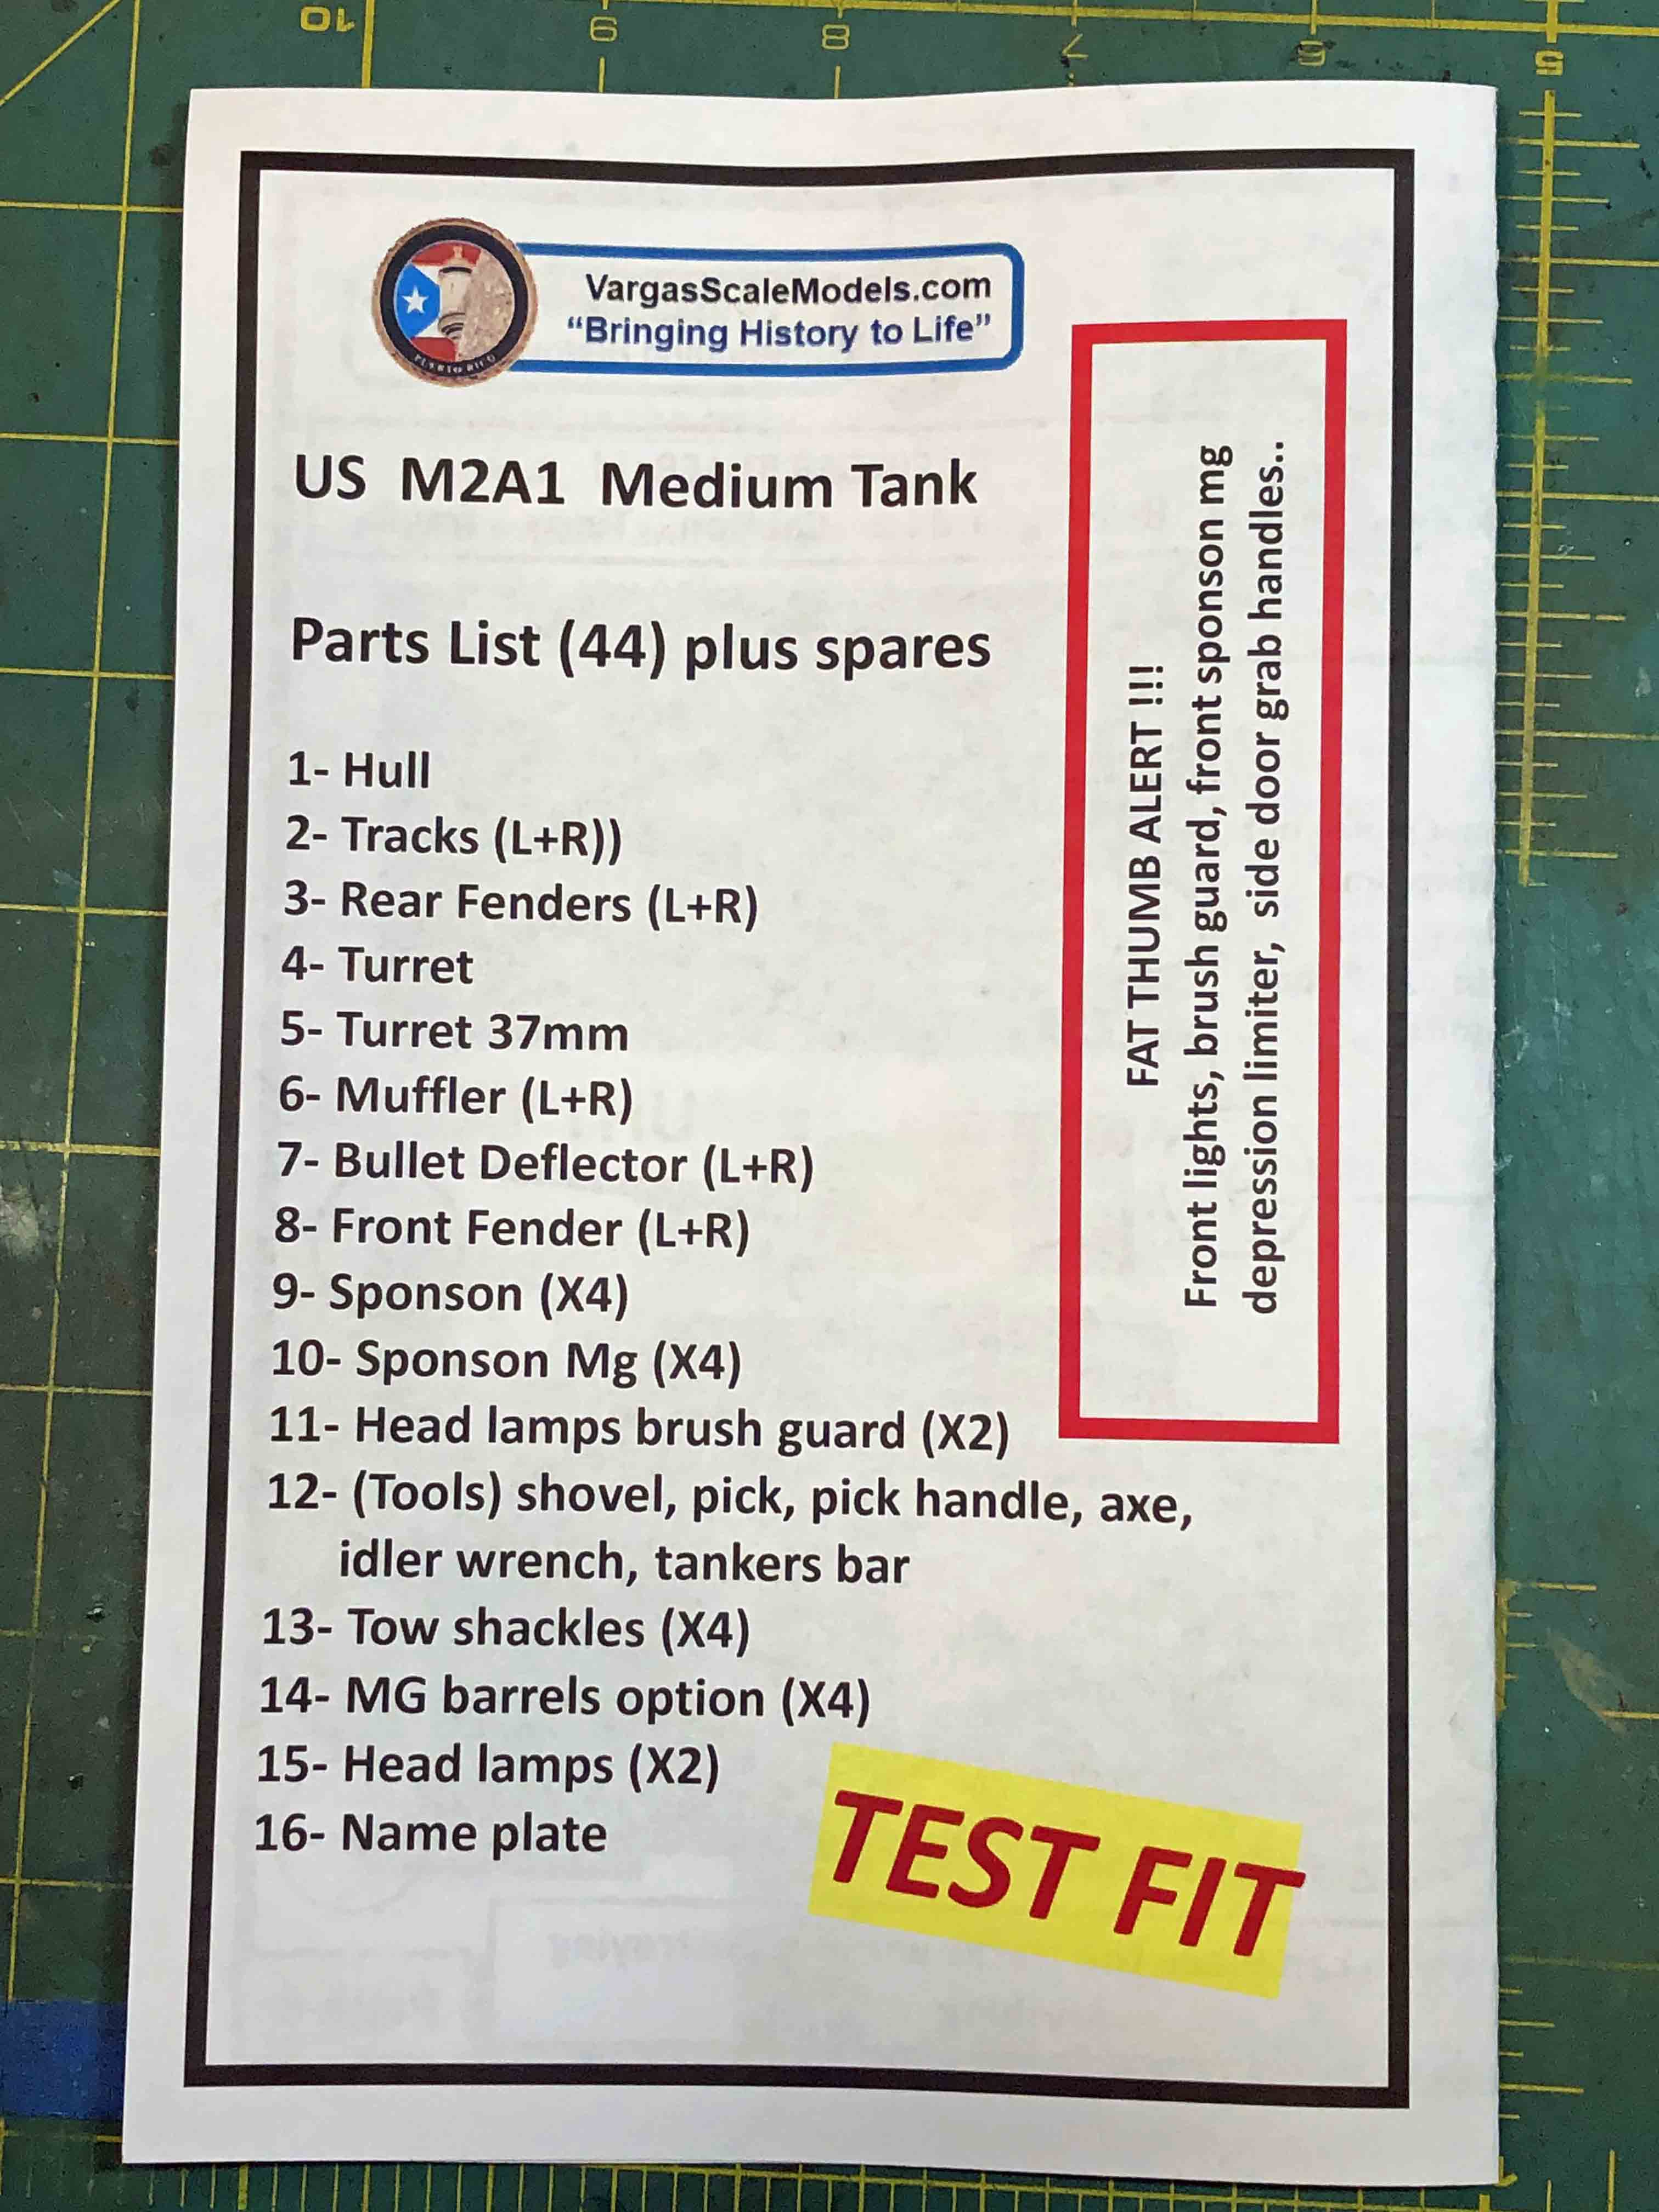
The contents of the box include:
- A single, dual track sprue, packaged separately.
- One turret, packaged individually.
- The single main hull packaged separately.
- A single sprue of all the remaining parts, packaged separately.
- An 8-page, color instruction booklet consisting of two full-size sheets, folded in half. All text and label information are printed in English.
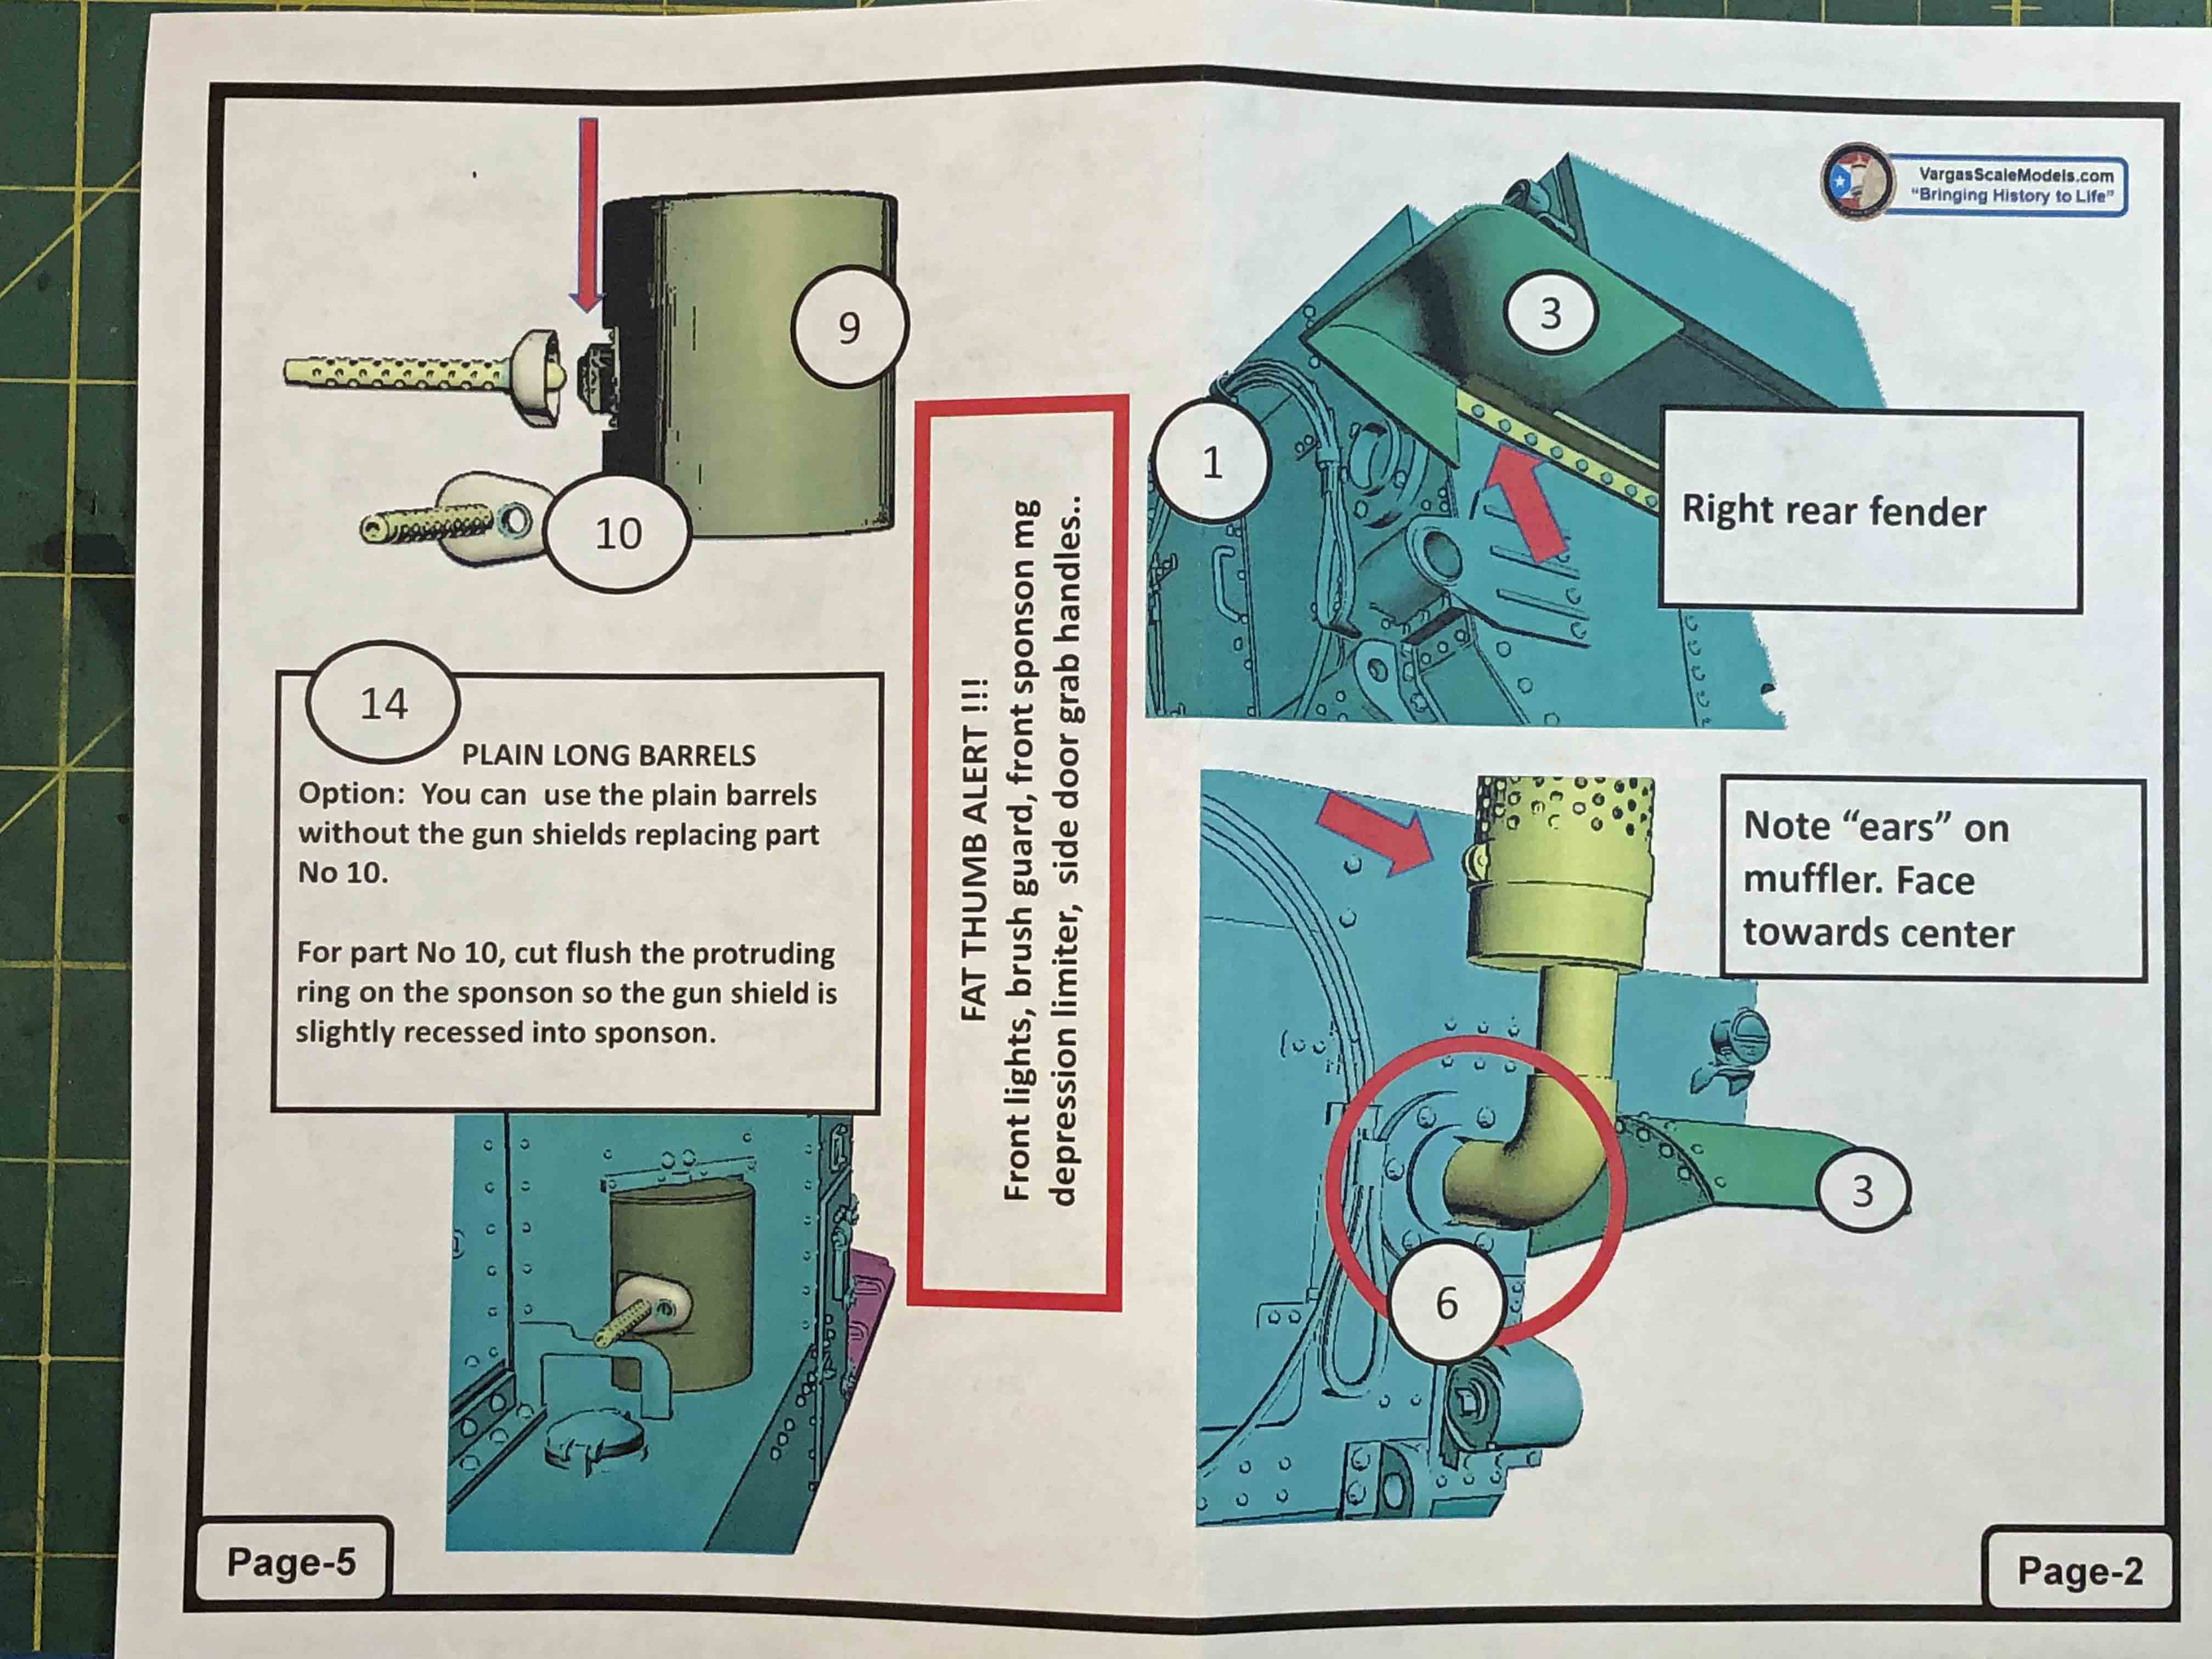
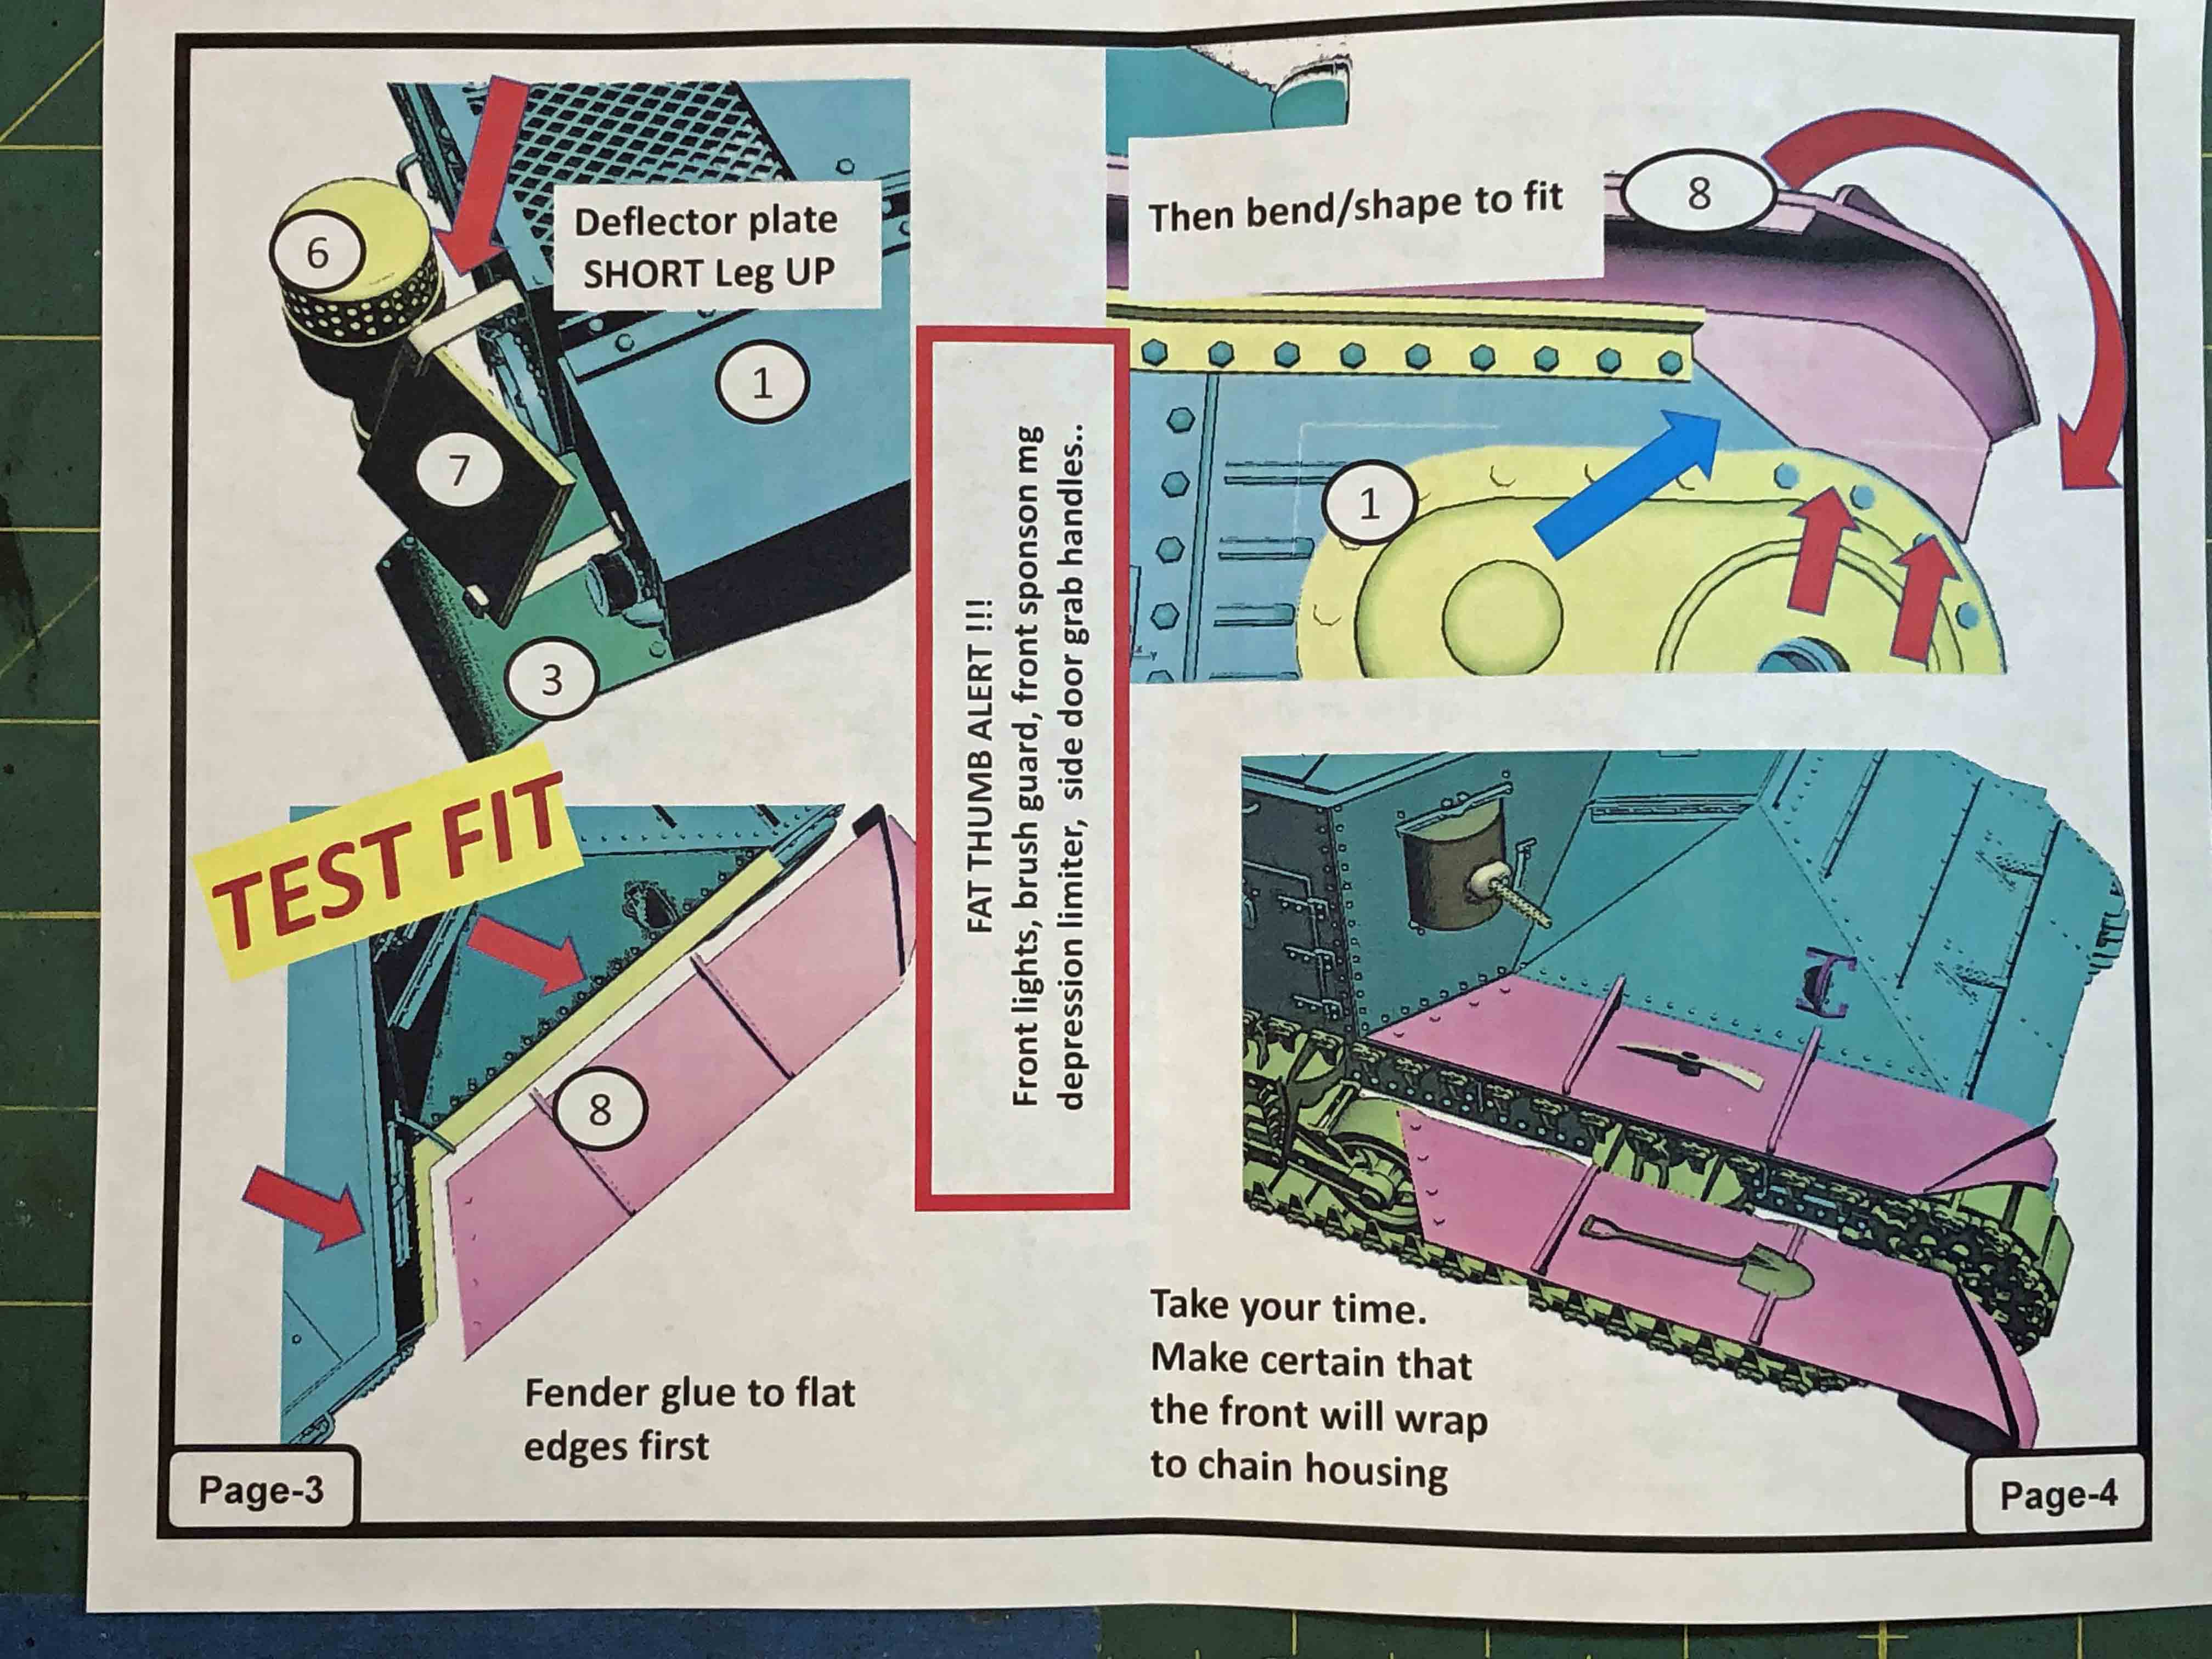
The Instructions
As with most limited run, resin kits, the instructions are brief and not always ‘enough’. Assembly requires test fitting and comparing what you have to drawings and images of the real thing, easily found on-line. In place of text, Vargas provides simple CAD images from the printing process itself for use as a rough go-by to start with. Fortunately, each piece is shown assembled and printed in a different color from the one adjoining it, which makes things a little easier to follow – but only a little. If you have built limited-run kits before, this one is typical – a lot of testing and adjusting surfaces to fit. Fortunately, the images are rendered from several angles so you are rarely forced to guess about how things go on ‘the other side’.
Clean Before You Start
Even though there are relatively few parts in this kit, a 3-D printed model requires a good amount of preparation before assembly. After unwrapping all the parts, and carefully snipping (not pulling) the parts printed inside the protective sprue cagen, I carefully shaved and sanded the surfaces of everything to remove any remaining vestiges of the thin resin posts that held the parts to the sprues.
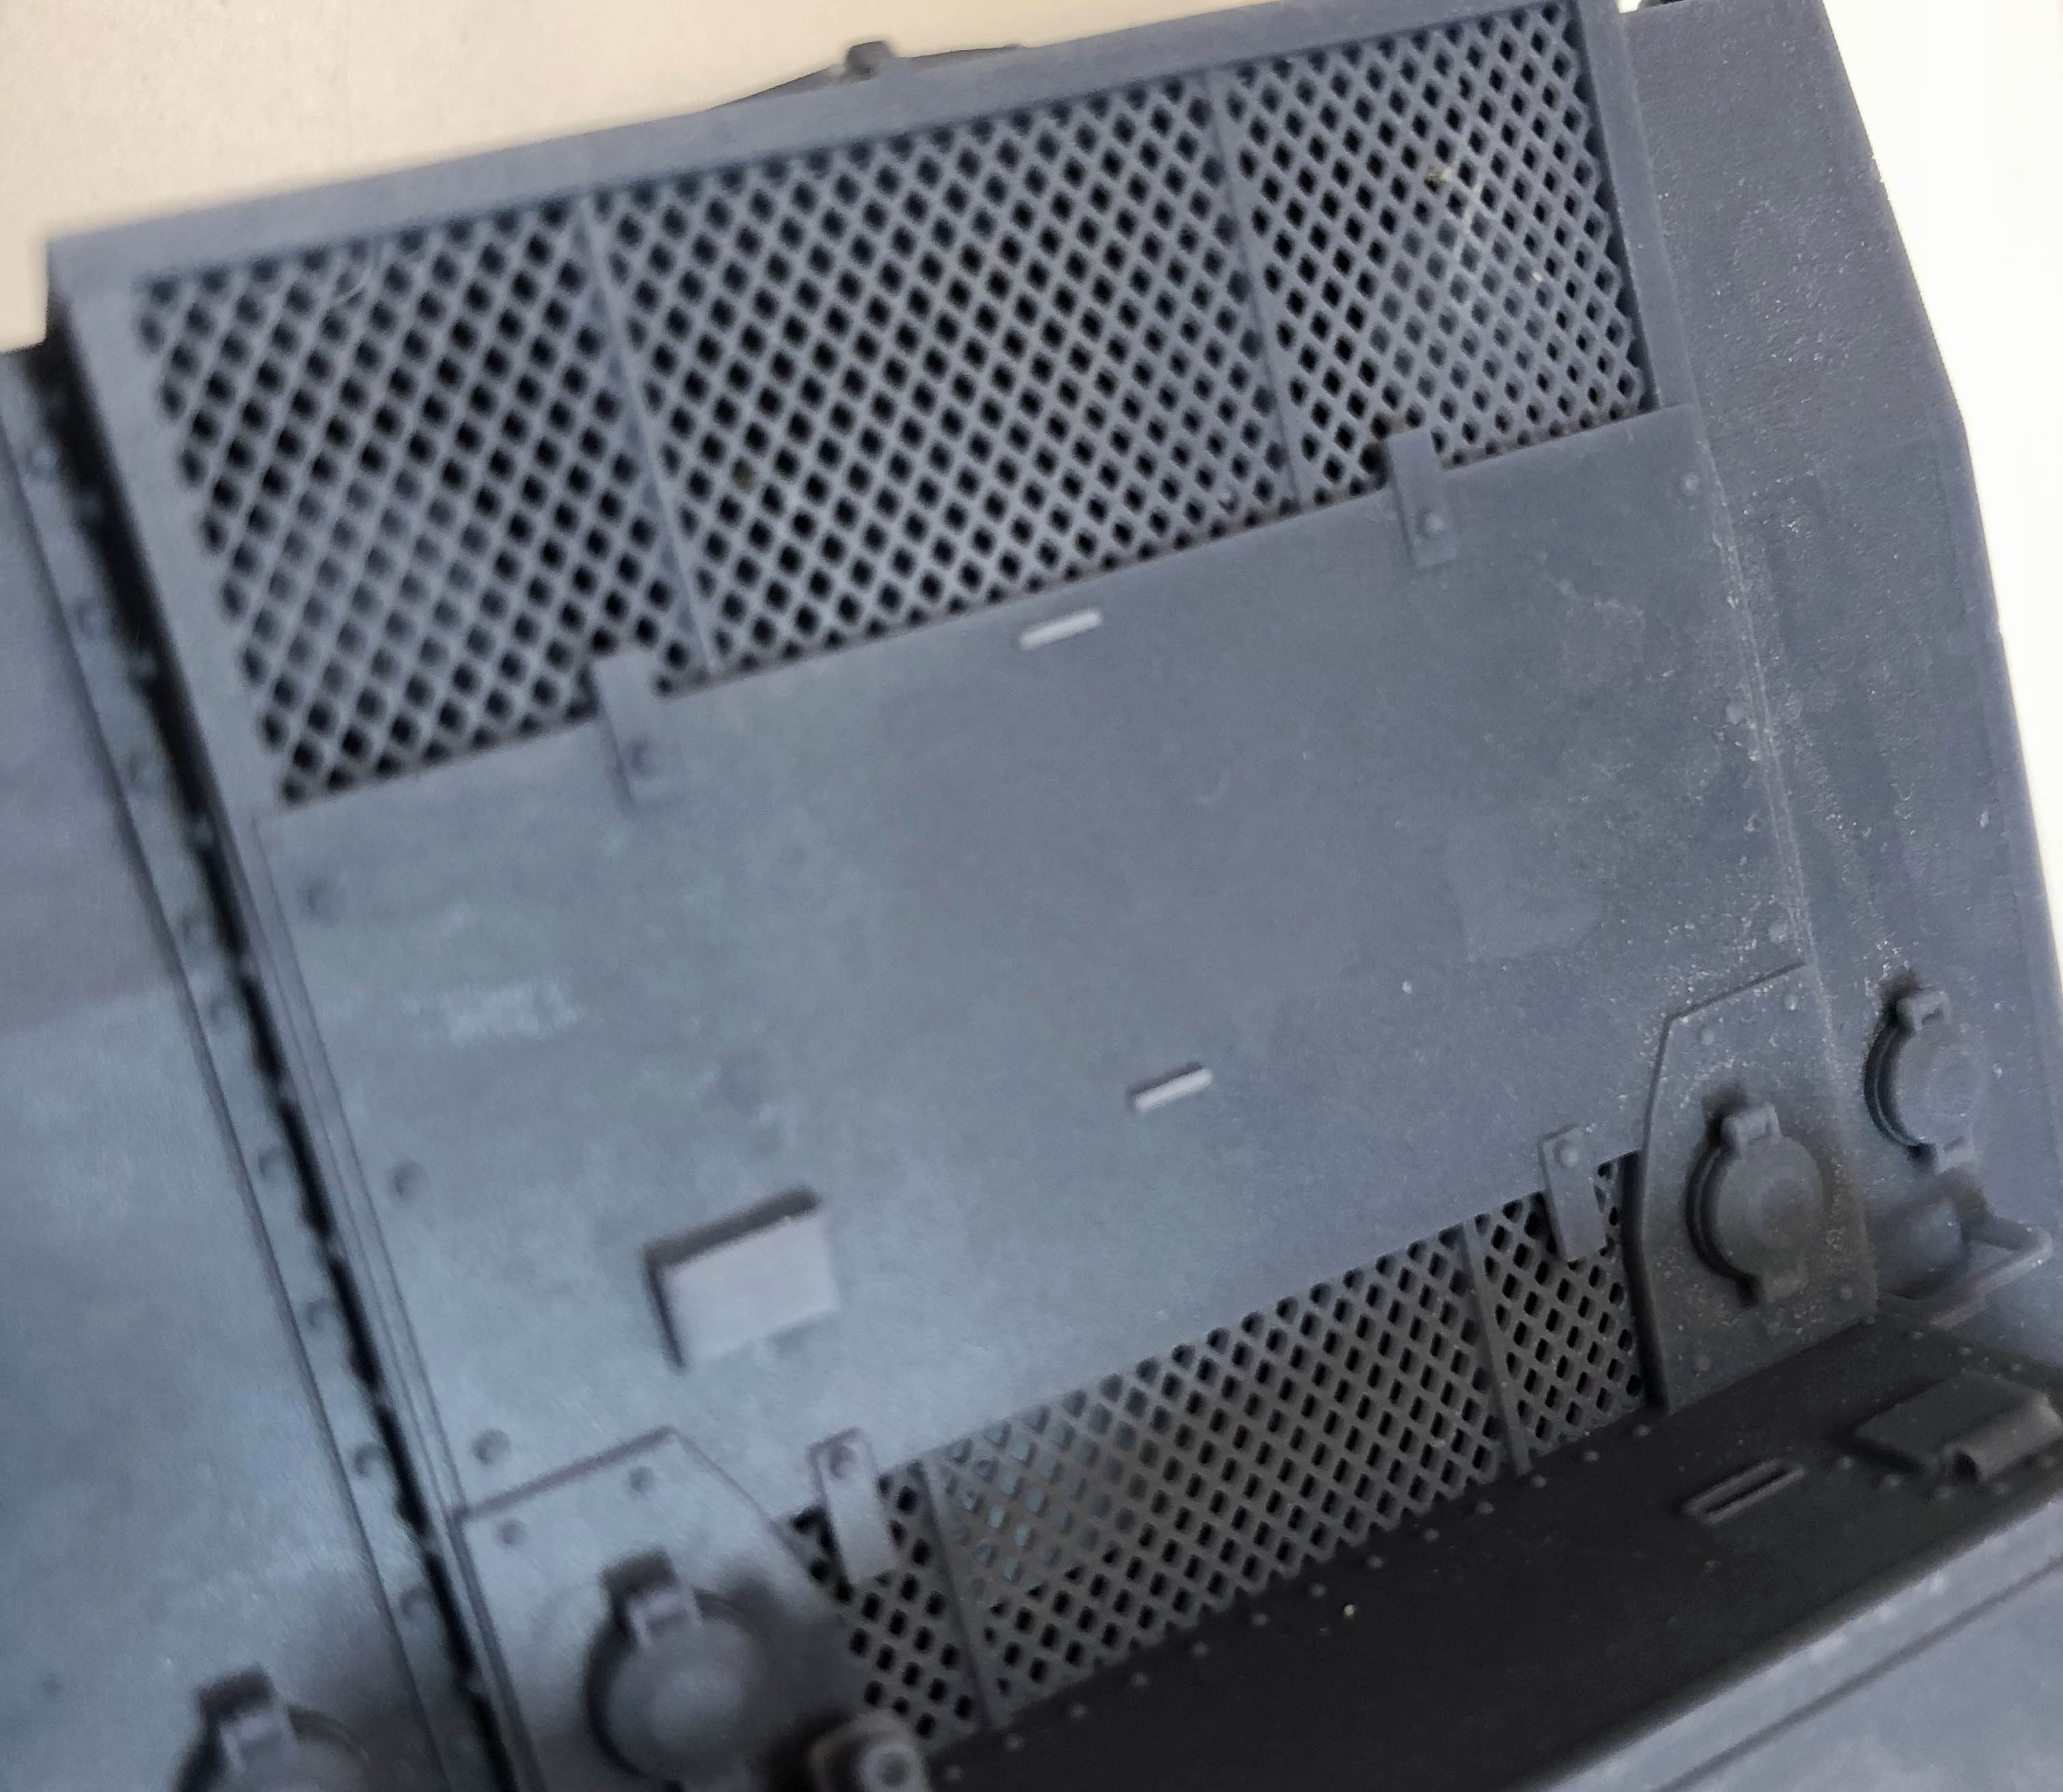
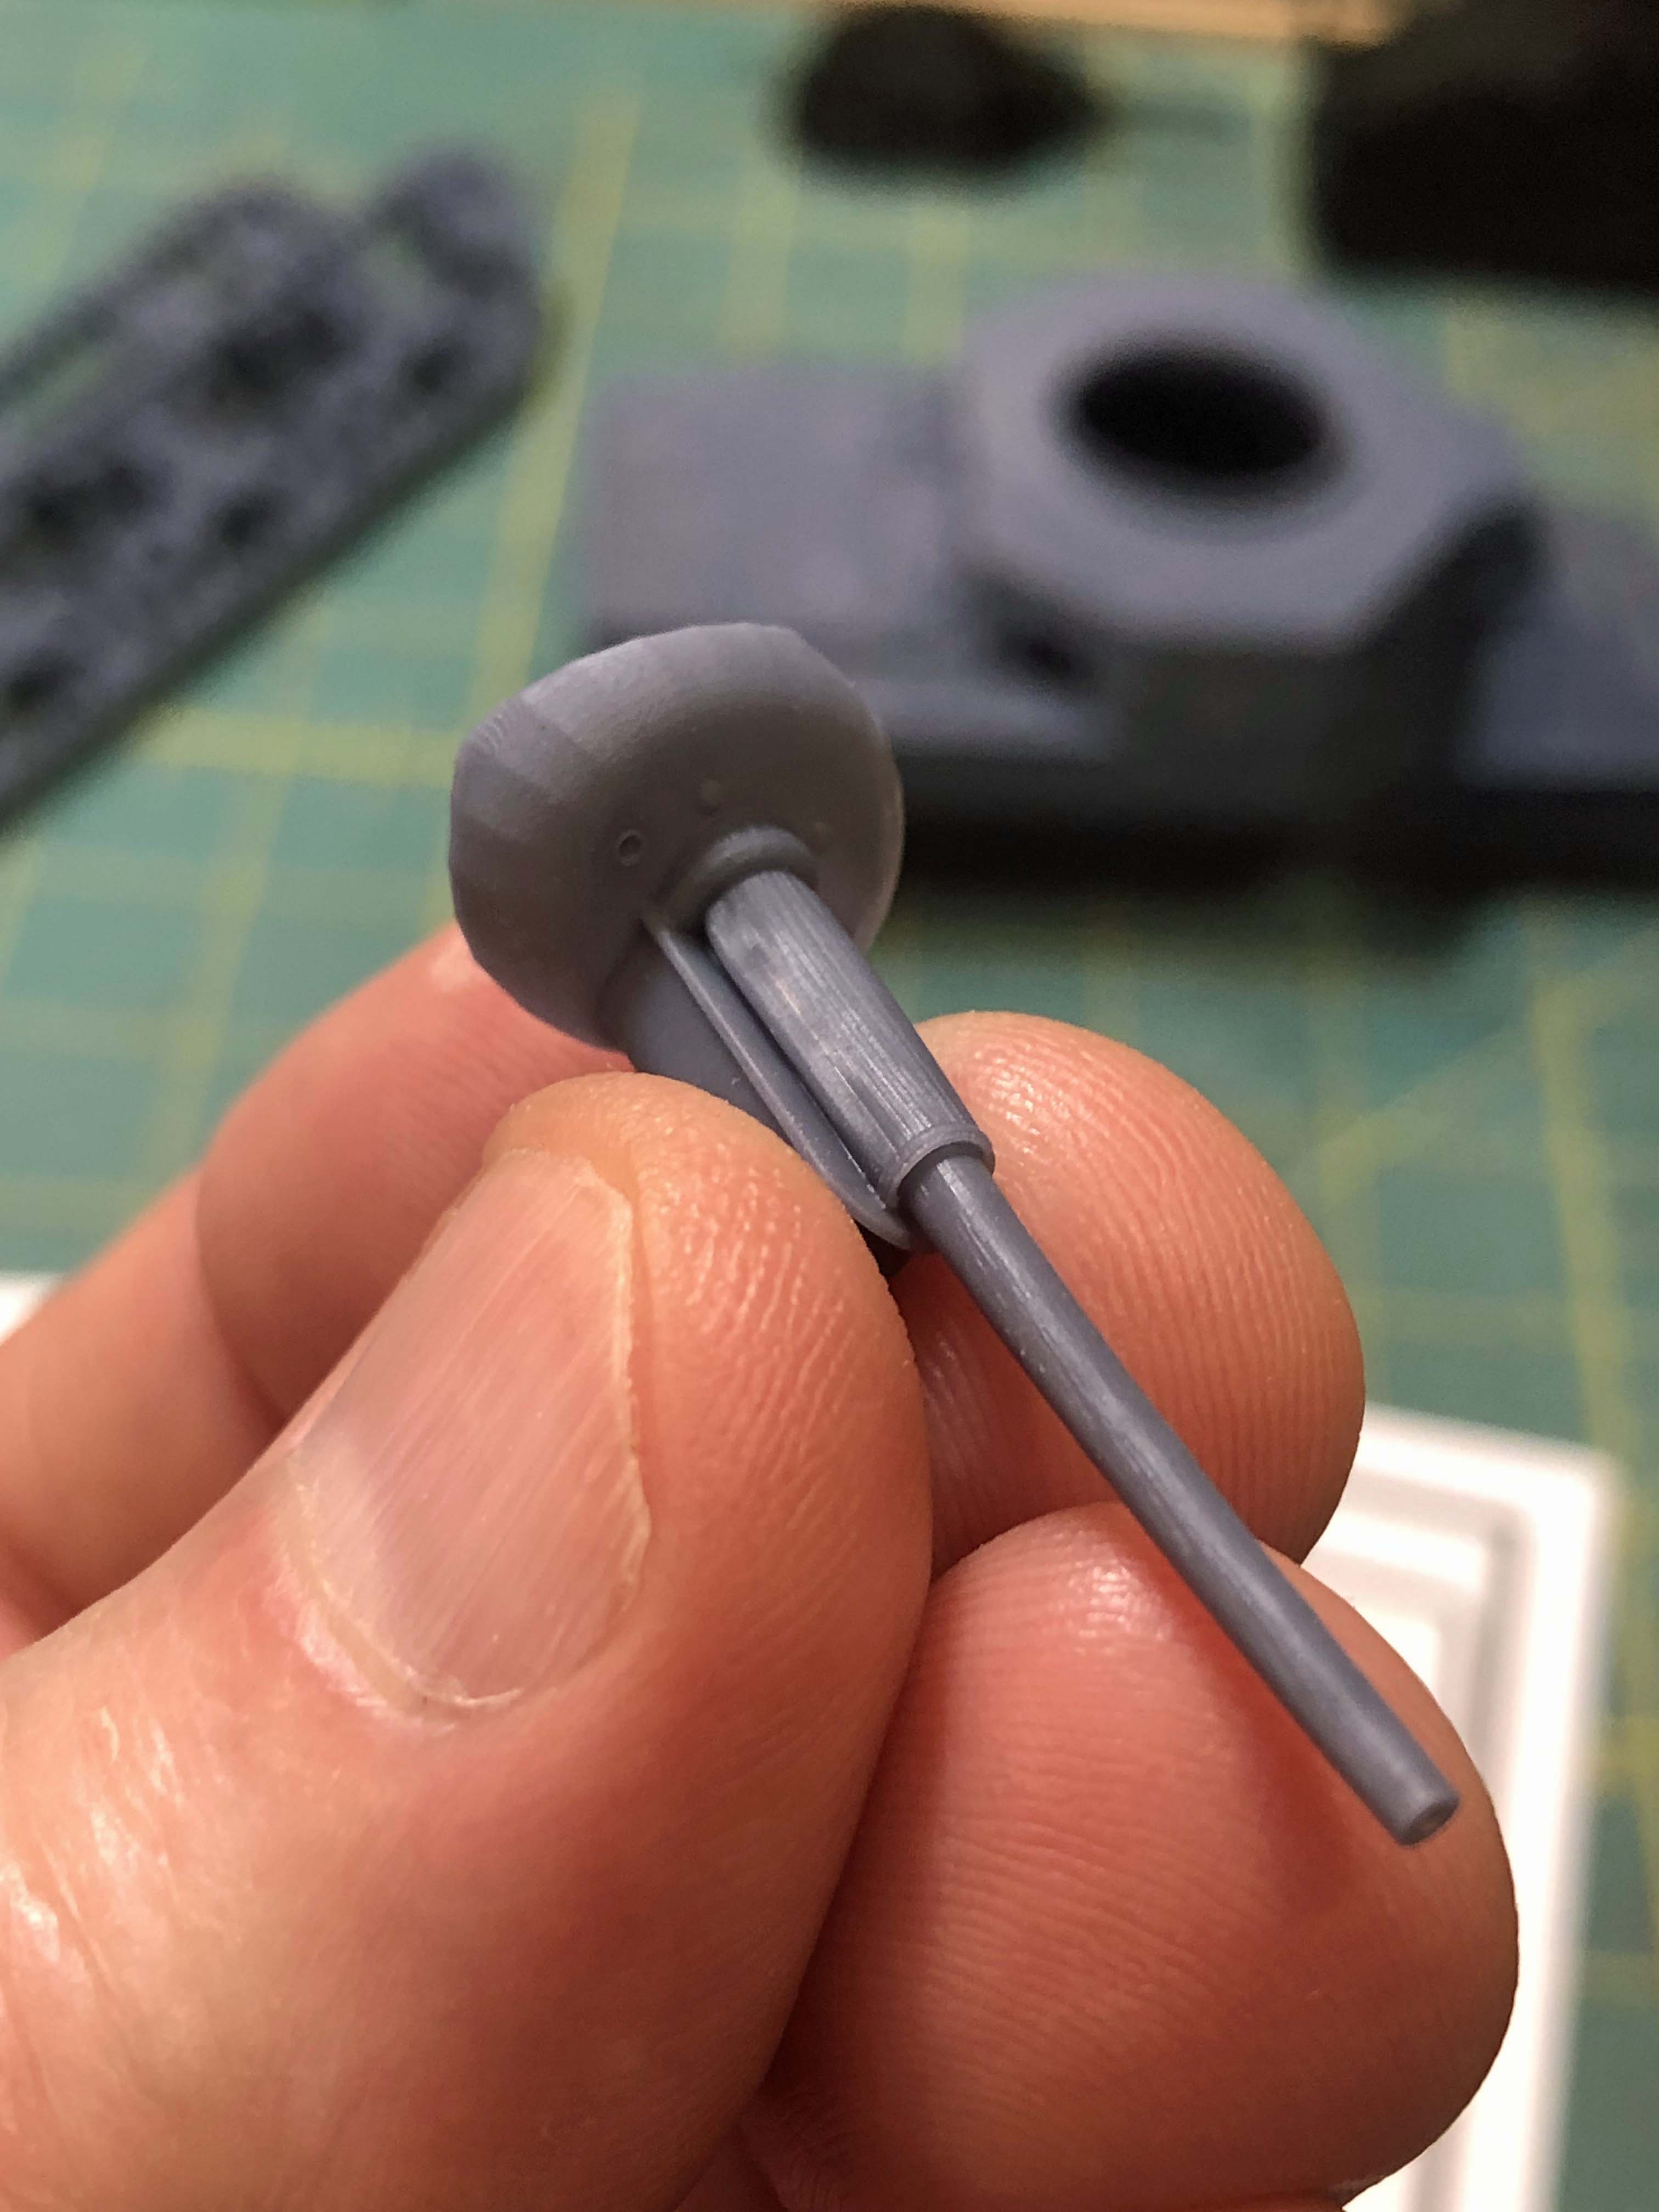
Next, I went to work smoothing out some minor (but noticeable) grooves on the surfaces of the round parts, such as the mantlet for the 37mm main gun (see image). The resin is not soft, but it works away with a little effort, resulting in a smooth surface relatively quickly.
Once I thought I had everything pretty well cleaned up, I gave the parts a warm bath in soapy water, rinsing them in warm water. After drying I felt the surfaces with my fingers, and, if I found anything tacky, I repeated the wash, rinse, and dry steps until all the tackiness was gone. With all the parts clean and free of defects, I was ready for assembly.
The Build
The M2 instructions start with some good advice – work and test-fit the two large track sections to the side of the hull, so that later, after painting, they will slip on without causing any damage to all the other prickly parts added during the build. Assembly was straightforward and nearly hassle-free. The super-thin fenders came a little warped out of the box, which is understandable due to their thinness, and easily addressed. I simply glued them to the hull sides a little at a time, which allowed me to straighten them up as I went.
I felt the four sponson-mounted machine guns stood a little proud of the surface of the rounded sponsons. This may be accurate, but I still opened the mating surfaces a little, allowing them to ‘snuggle’ into where they go. The fit of the sponsons themselves is tight – you can choose to sand them a little to easily slide into place, or just be quick about mounting them in the proper orientation before the CA glue takes hold.
The front headlights and guards attach with the most delicate of mating surfaces, so these were the last items I attached. Somehow, I was successful in steering clear of them during painting and finishing.
There are two vertical plates on the rear of the hull that were used to deflect machine gun fire down to thwart attack from below, and these are also mounted in a very delicate manner. I was not so lucky with these – knocking them both off during finishing! The pioneer tools are nice but lack attachment hardware. Some modelers might scratch-build their own, or purchase resin versions – I just used a little Tamiya tape and moved on.
And that was that – assembly complete, with the barrels set aside for attaching at the end, along with a carbon-fiber antenna from my spares box. Vargas models are perfect for modelers like me, who enjoy the ‘finishing’ steps to those involving assembly!
Painting and Finish
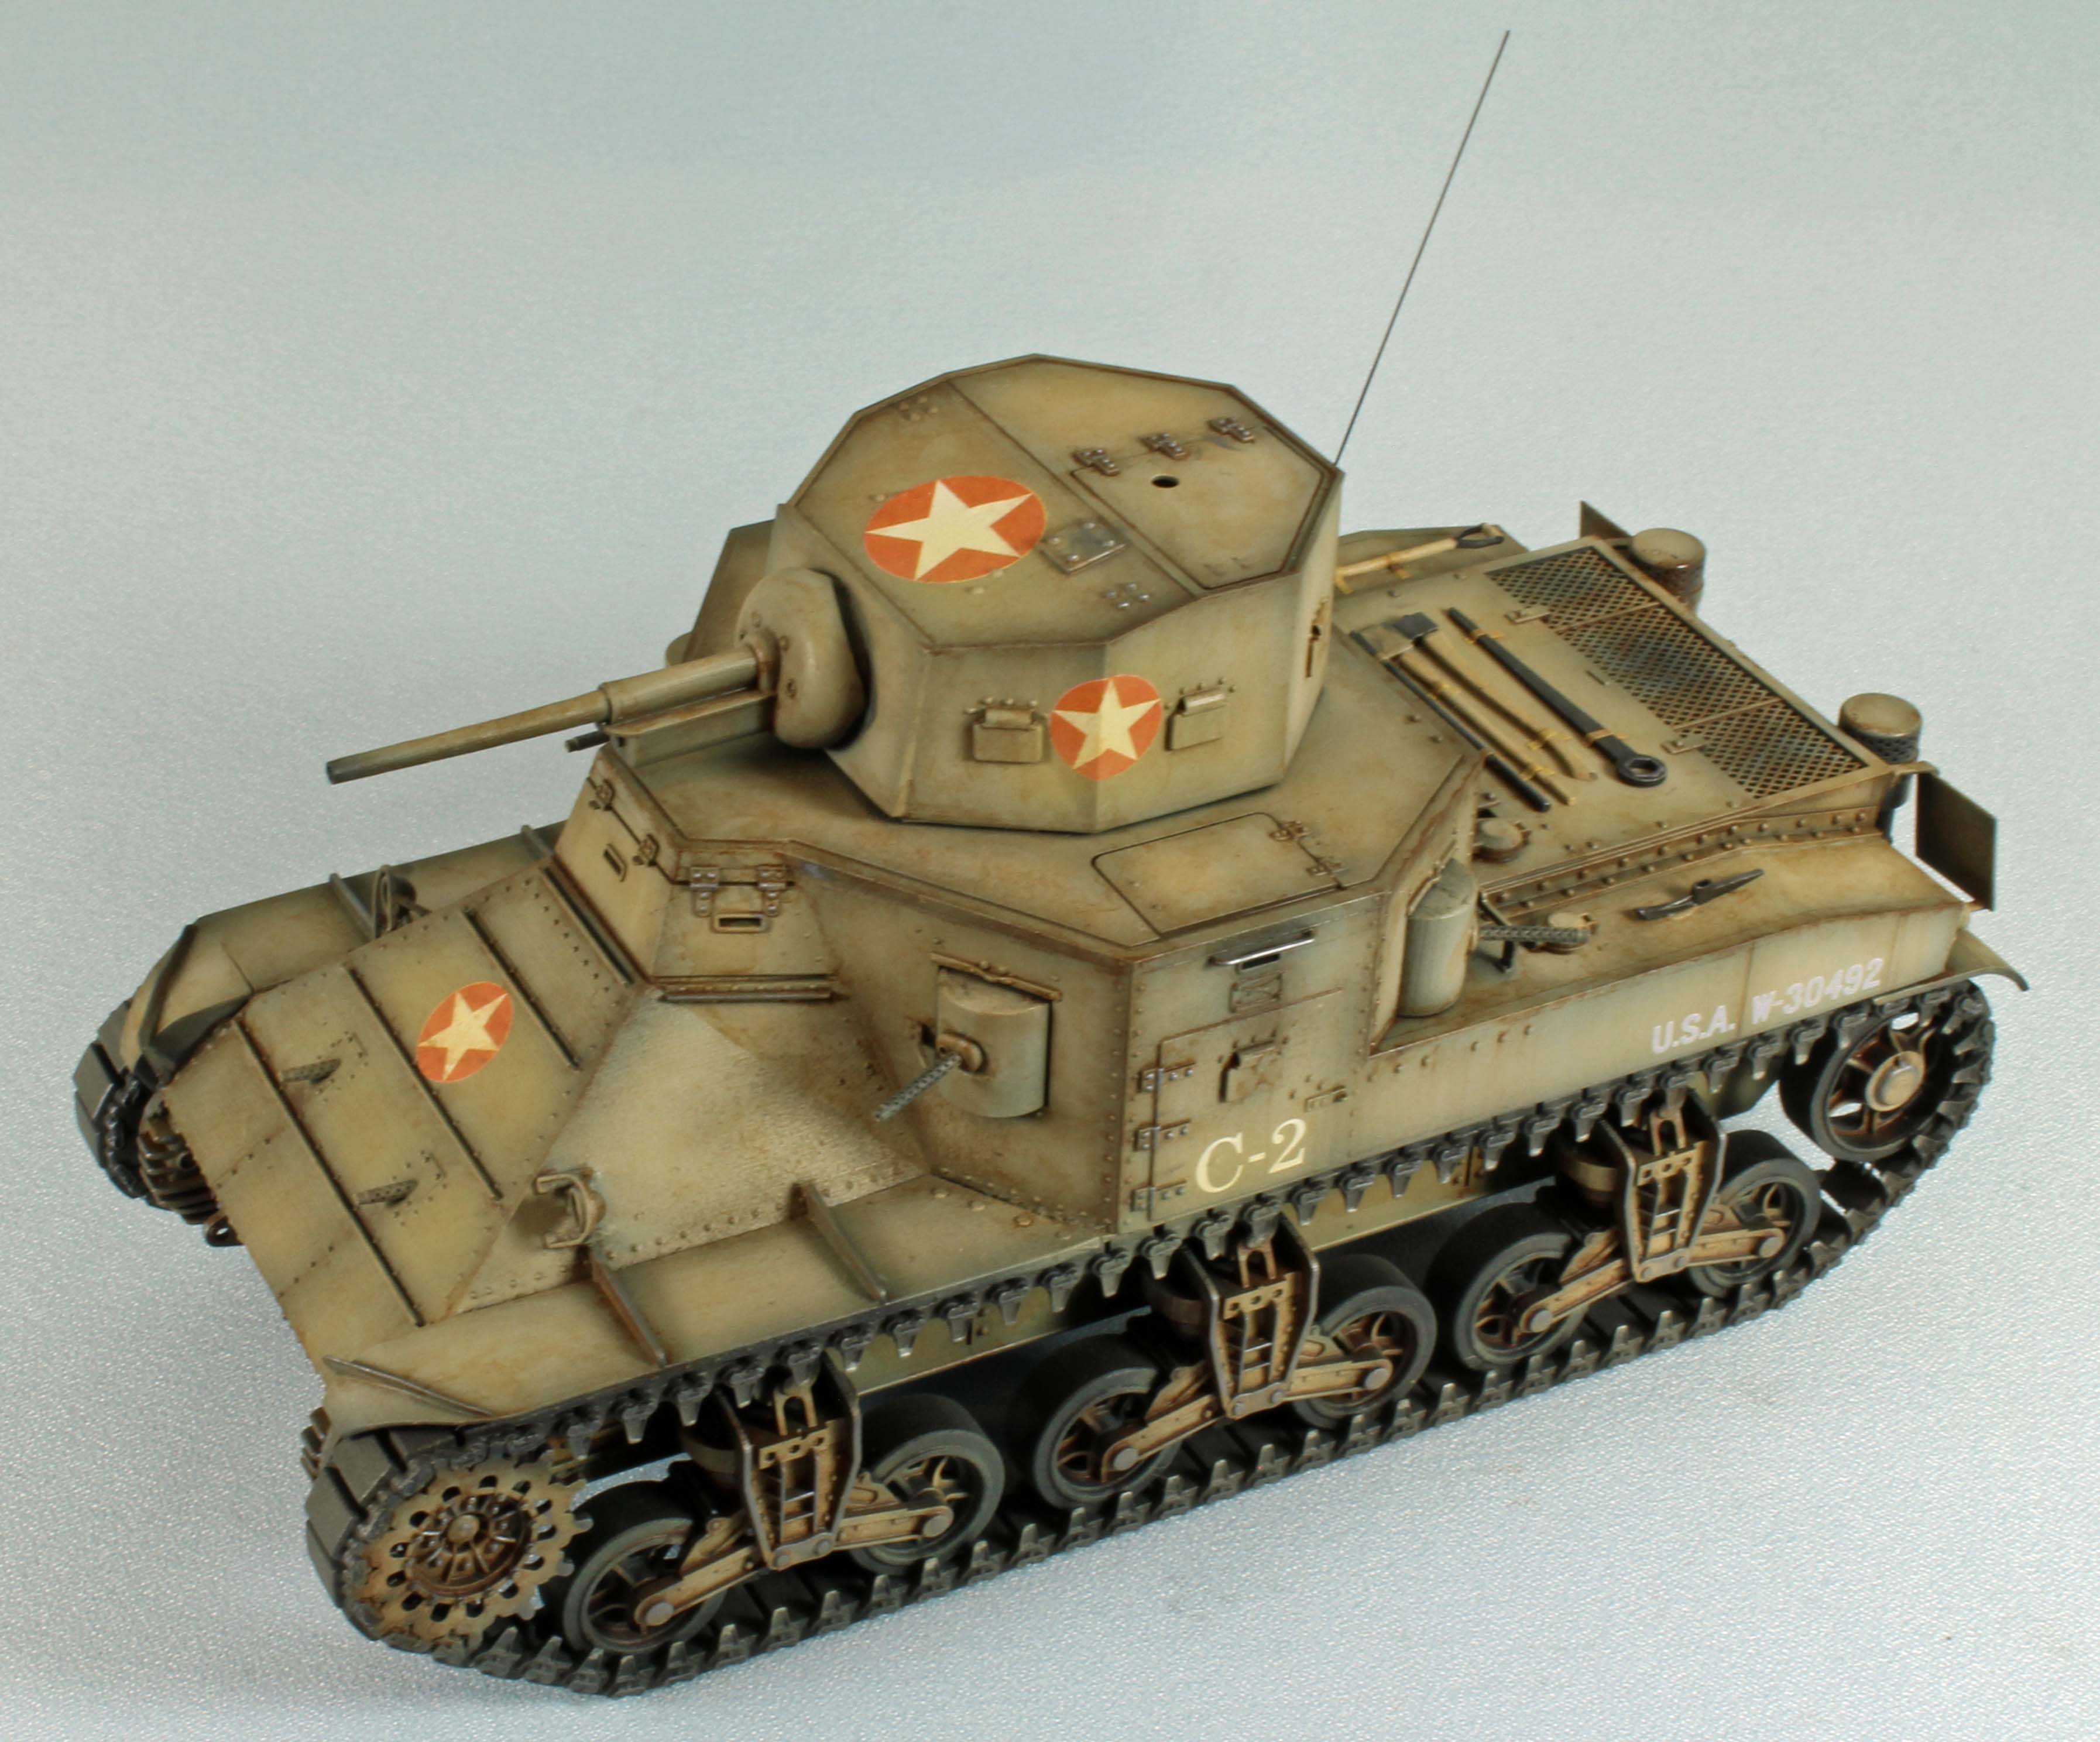
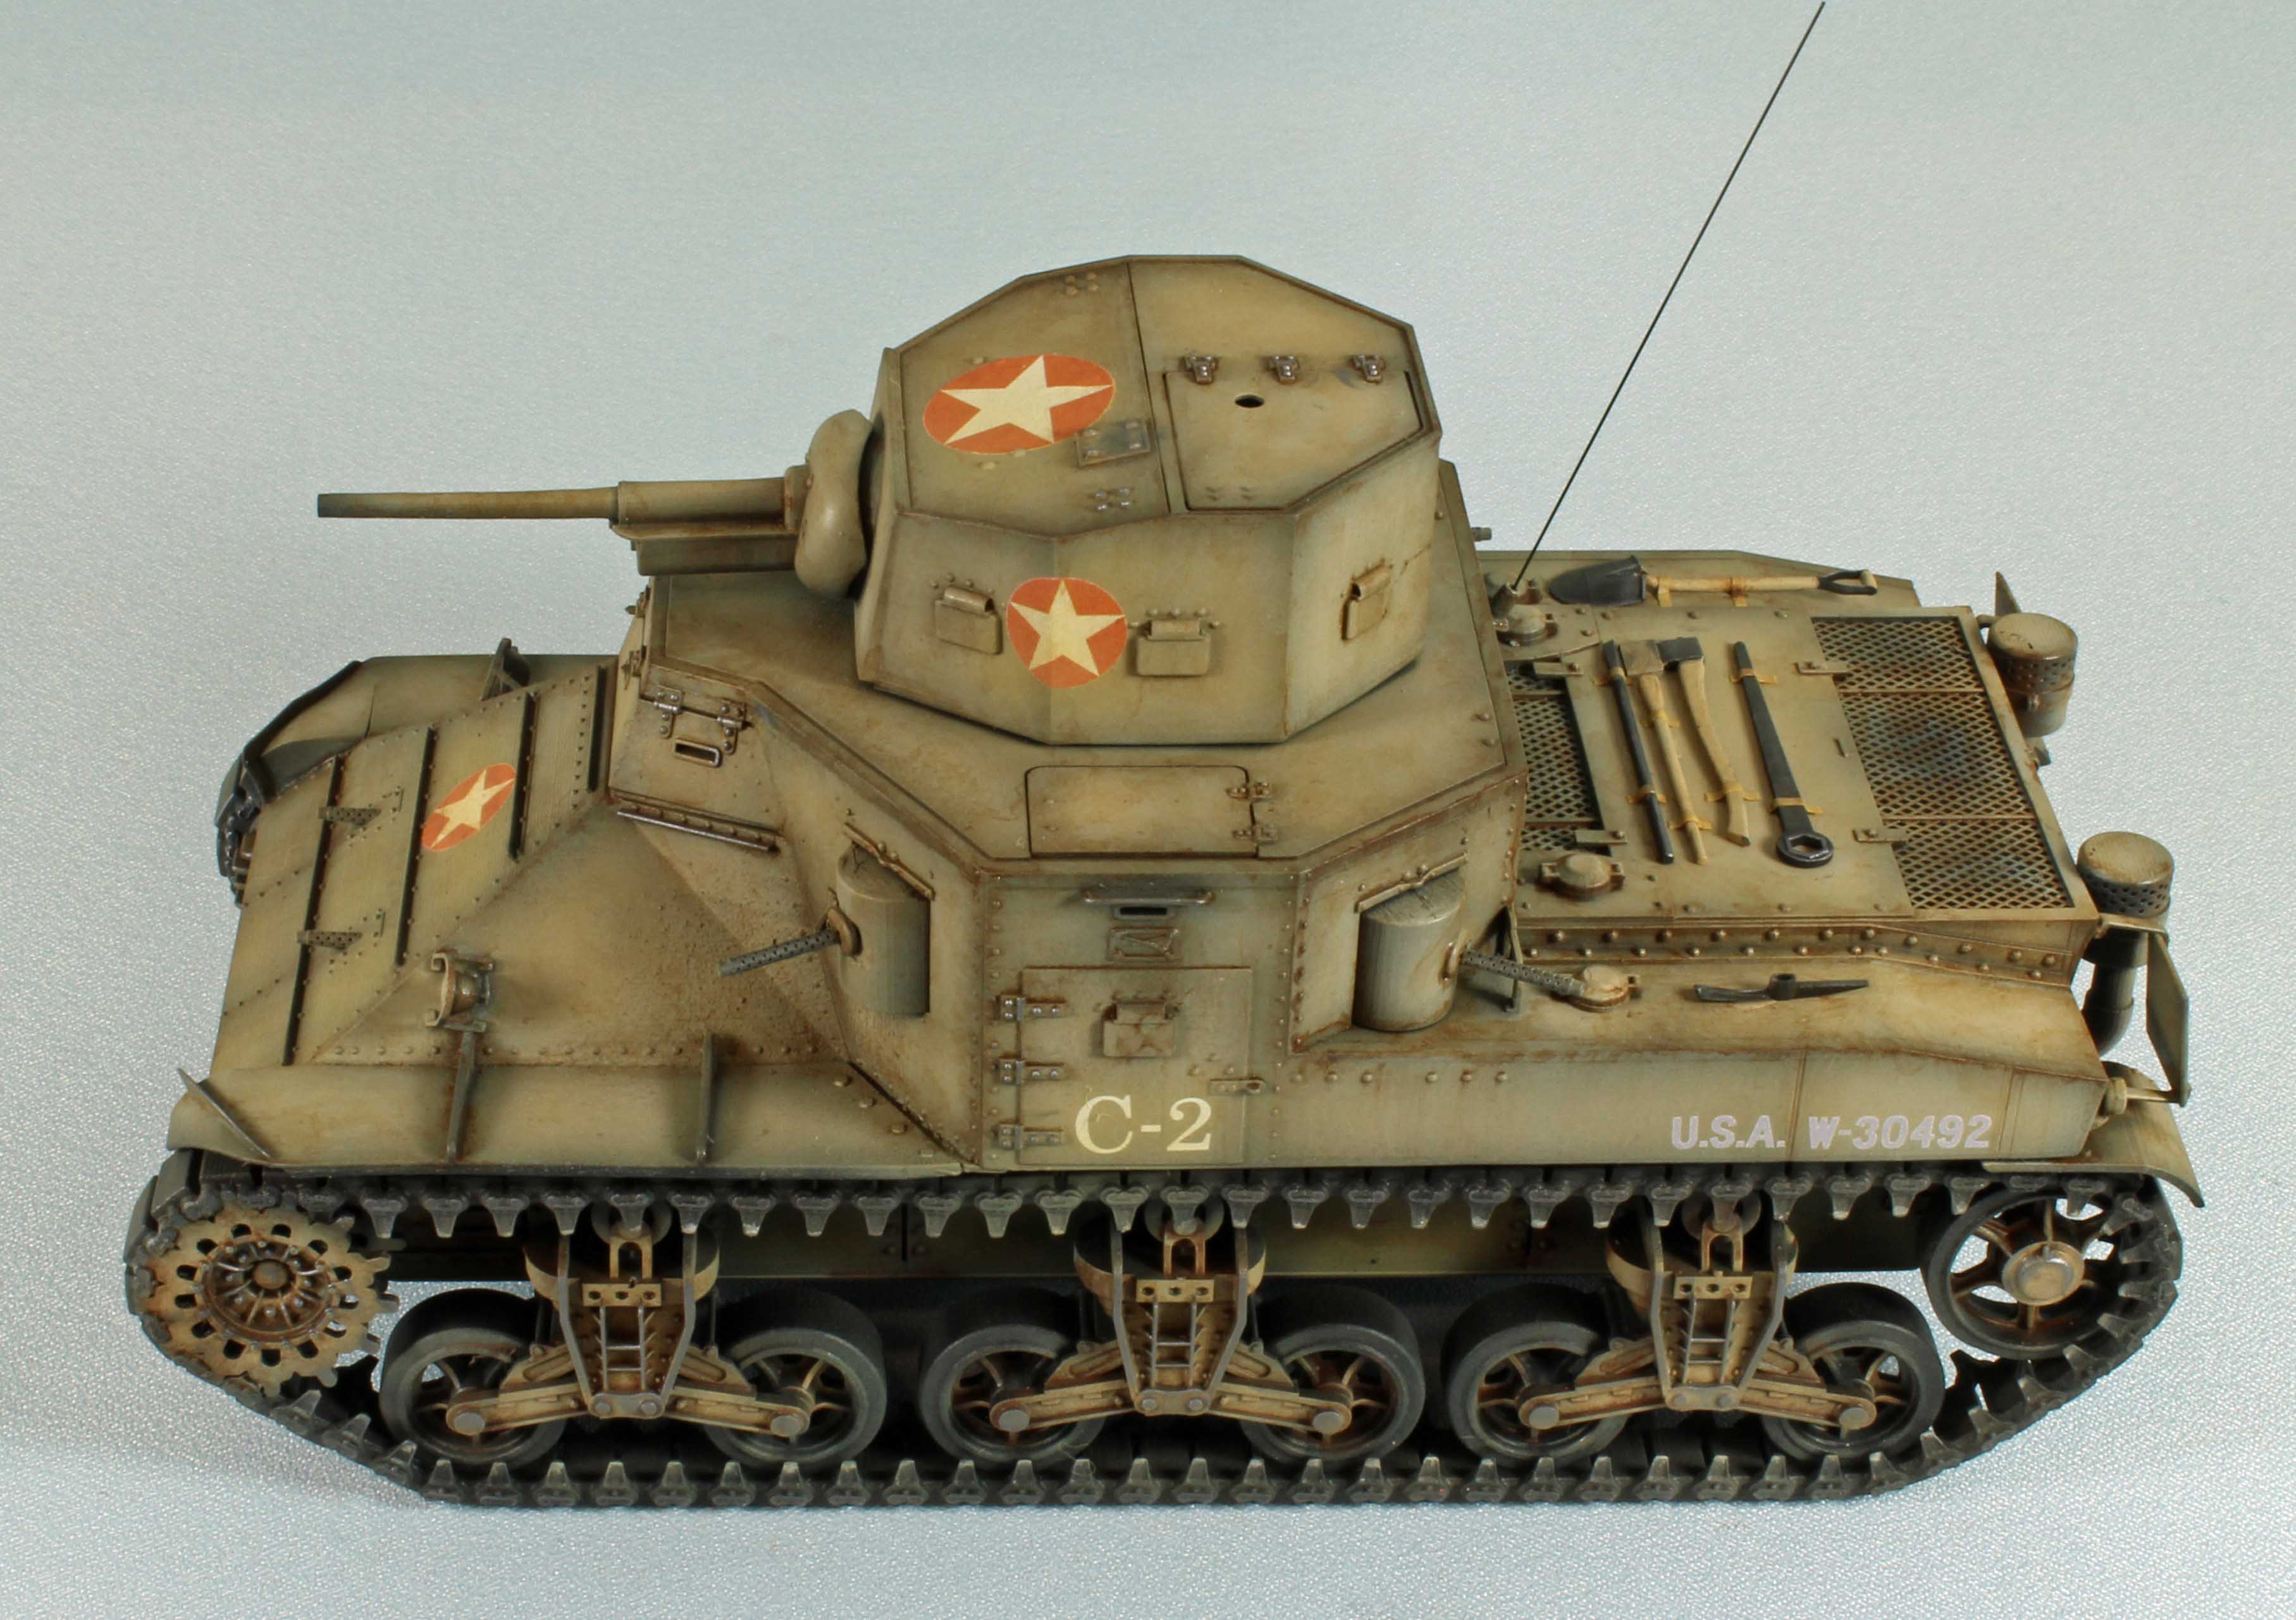
There are several images of the M2A1 online that include several different color schemes, although I suspect that many, if not all, are colorized in some form. I chose a single overall sand scheme, and broke up the monotone base with weathering that might reflect time in the field, training.
Here is a breakdown of the colors and materials I used to finish the build:
Painting:
- Primer: Alclad Black Primer with Micro balloons
- Base Coat – 80/20 mix of AKI Real Colors RC032 Desert Sand and RC023 Olive Drab
- Post Shade – AKI Real Colors RC032 Desert Sand thinned 20/80% thinner
Painting: Track Sections and Detail
- Primer – Alclad Black Primer with Micro balloons
- Base Color (Track): Tamiya Dark Iron
- Base Coat (Wheels) – (same as base coat, above)
- Post Shade (Wheels) – Tamiya XF-57 Buff thinned 20/80% thinner
- Bling – Vallejo 77.716 Semi-Matt Aluminum and Uschi Chrome pigment
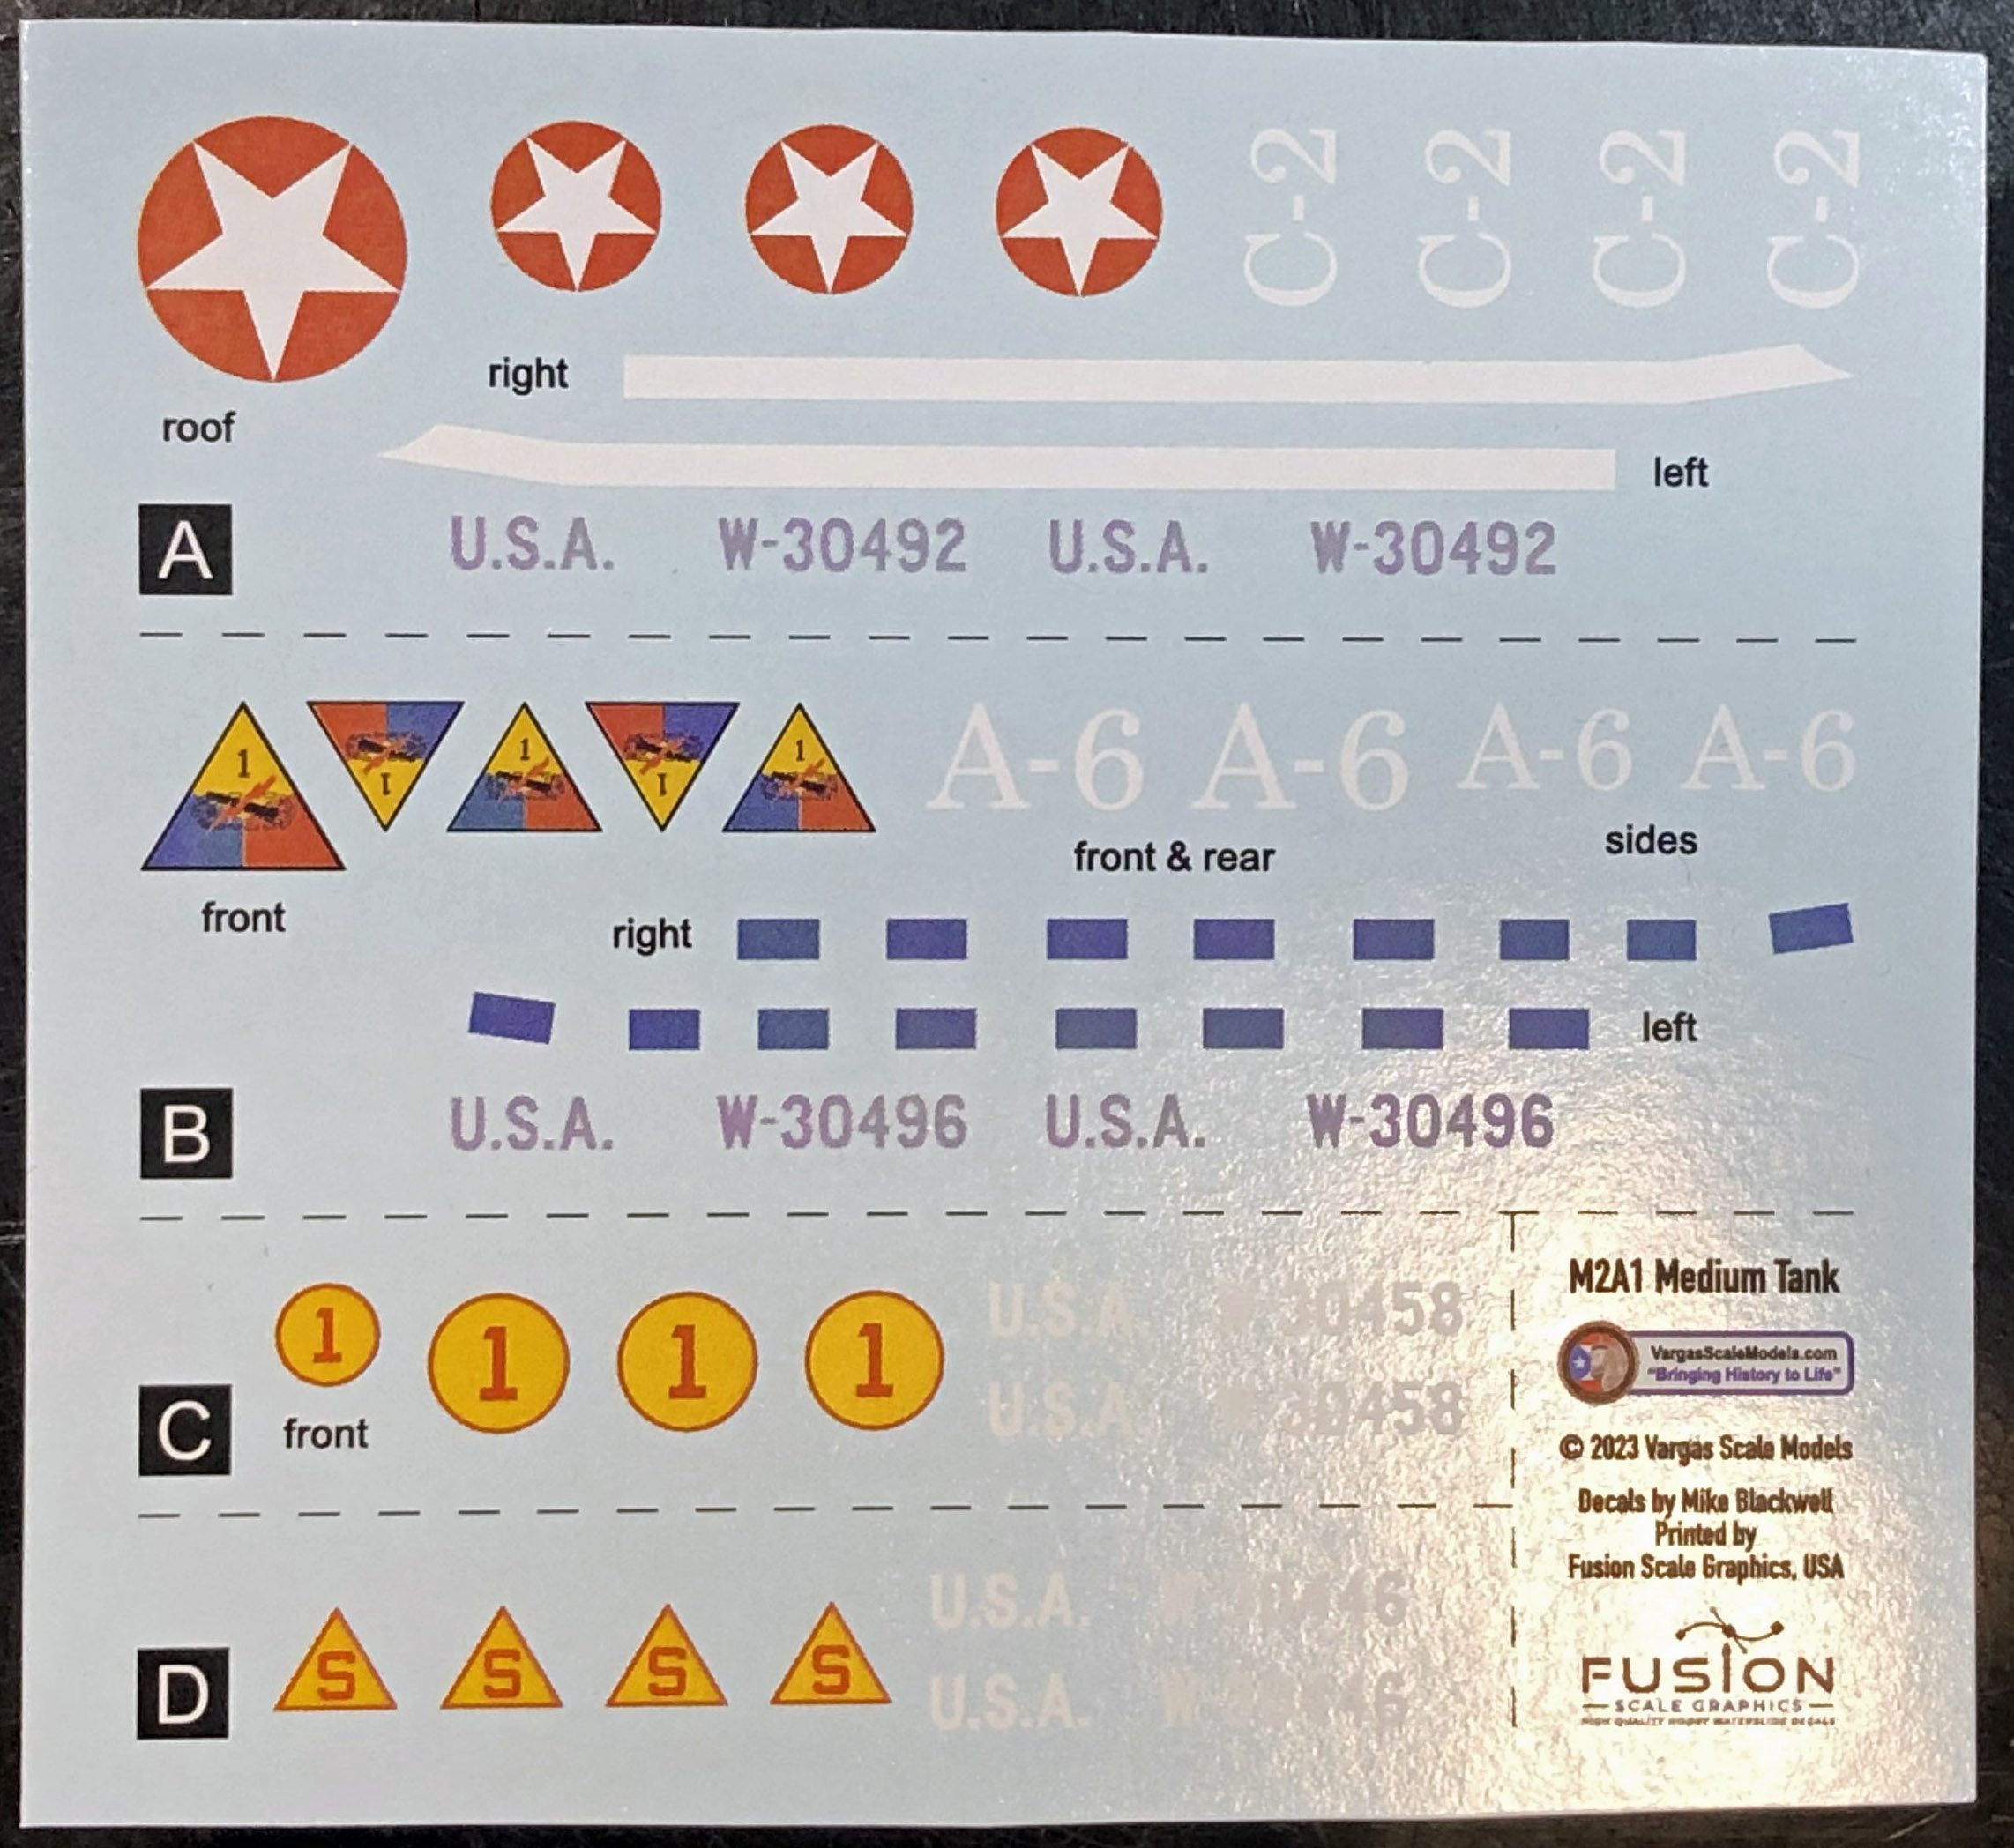
Decals
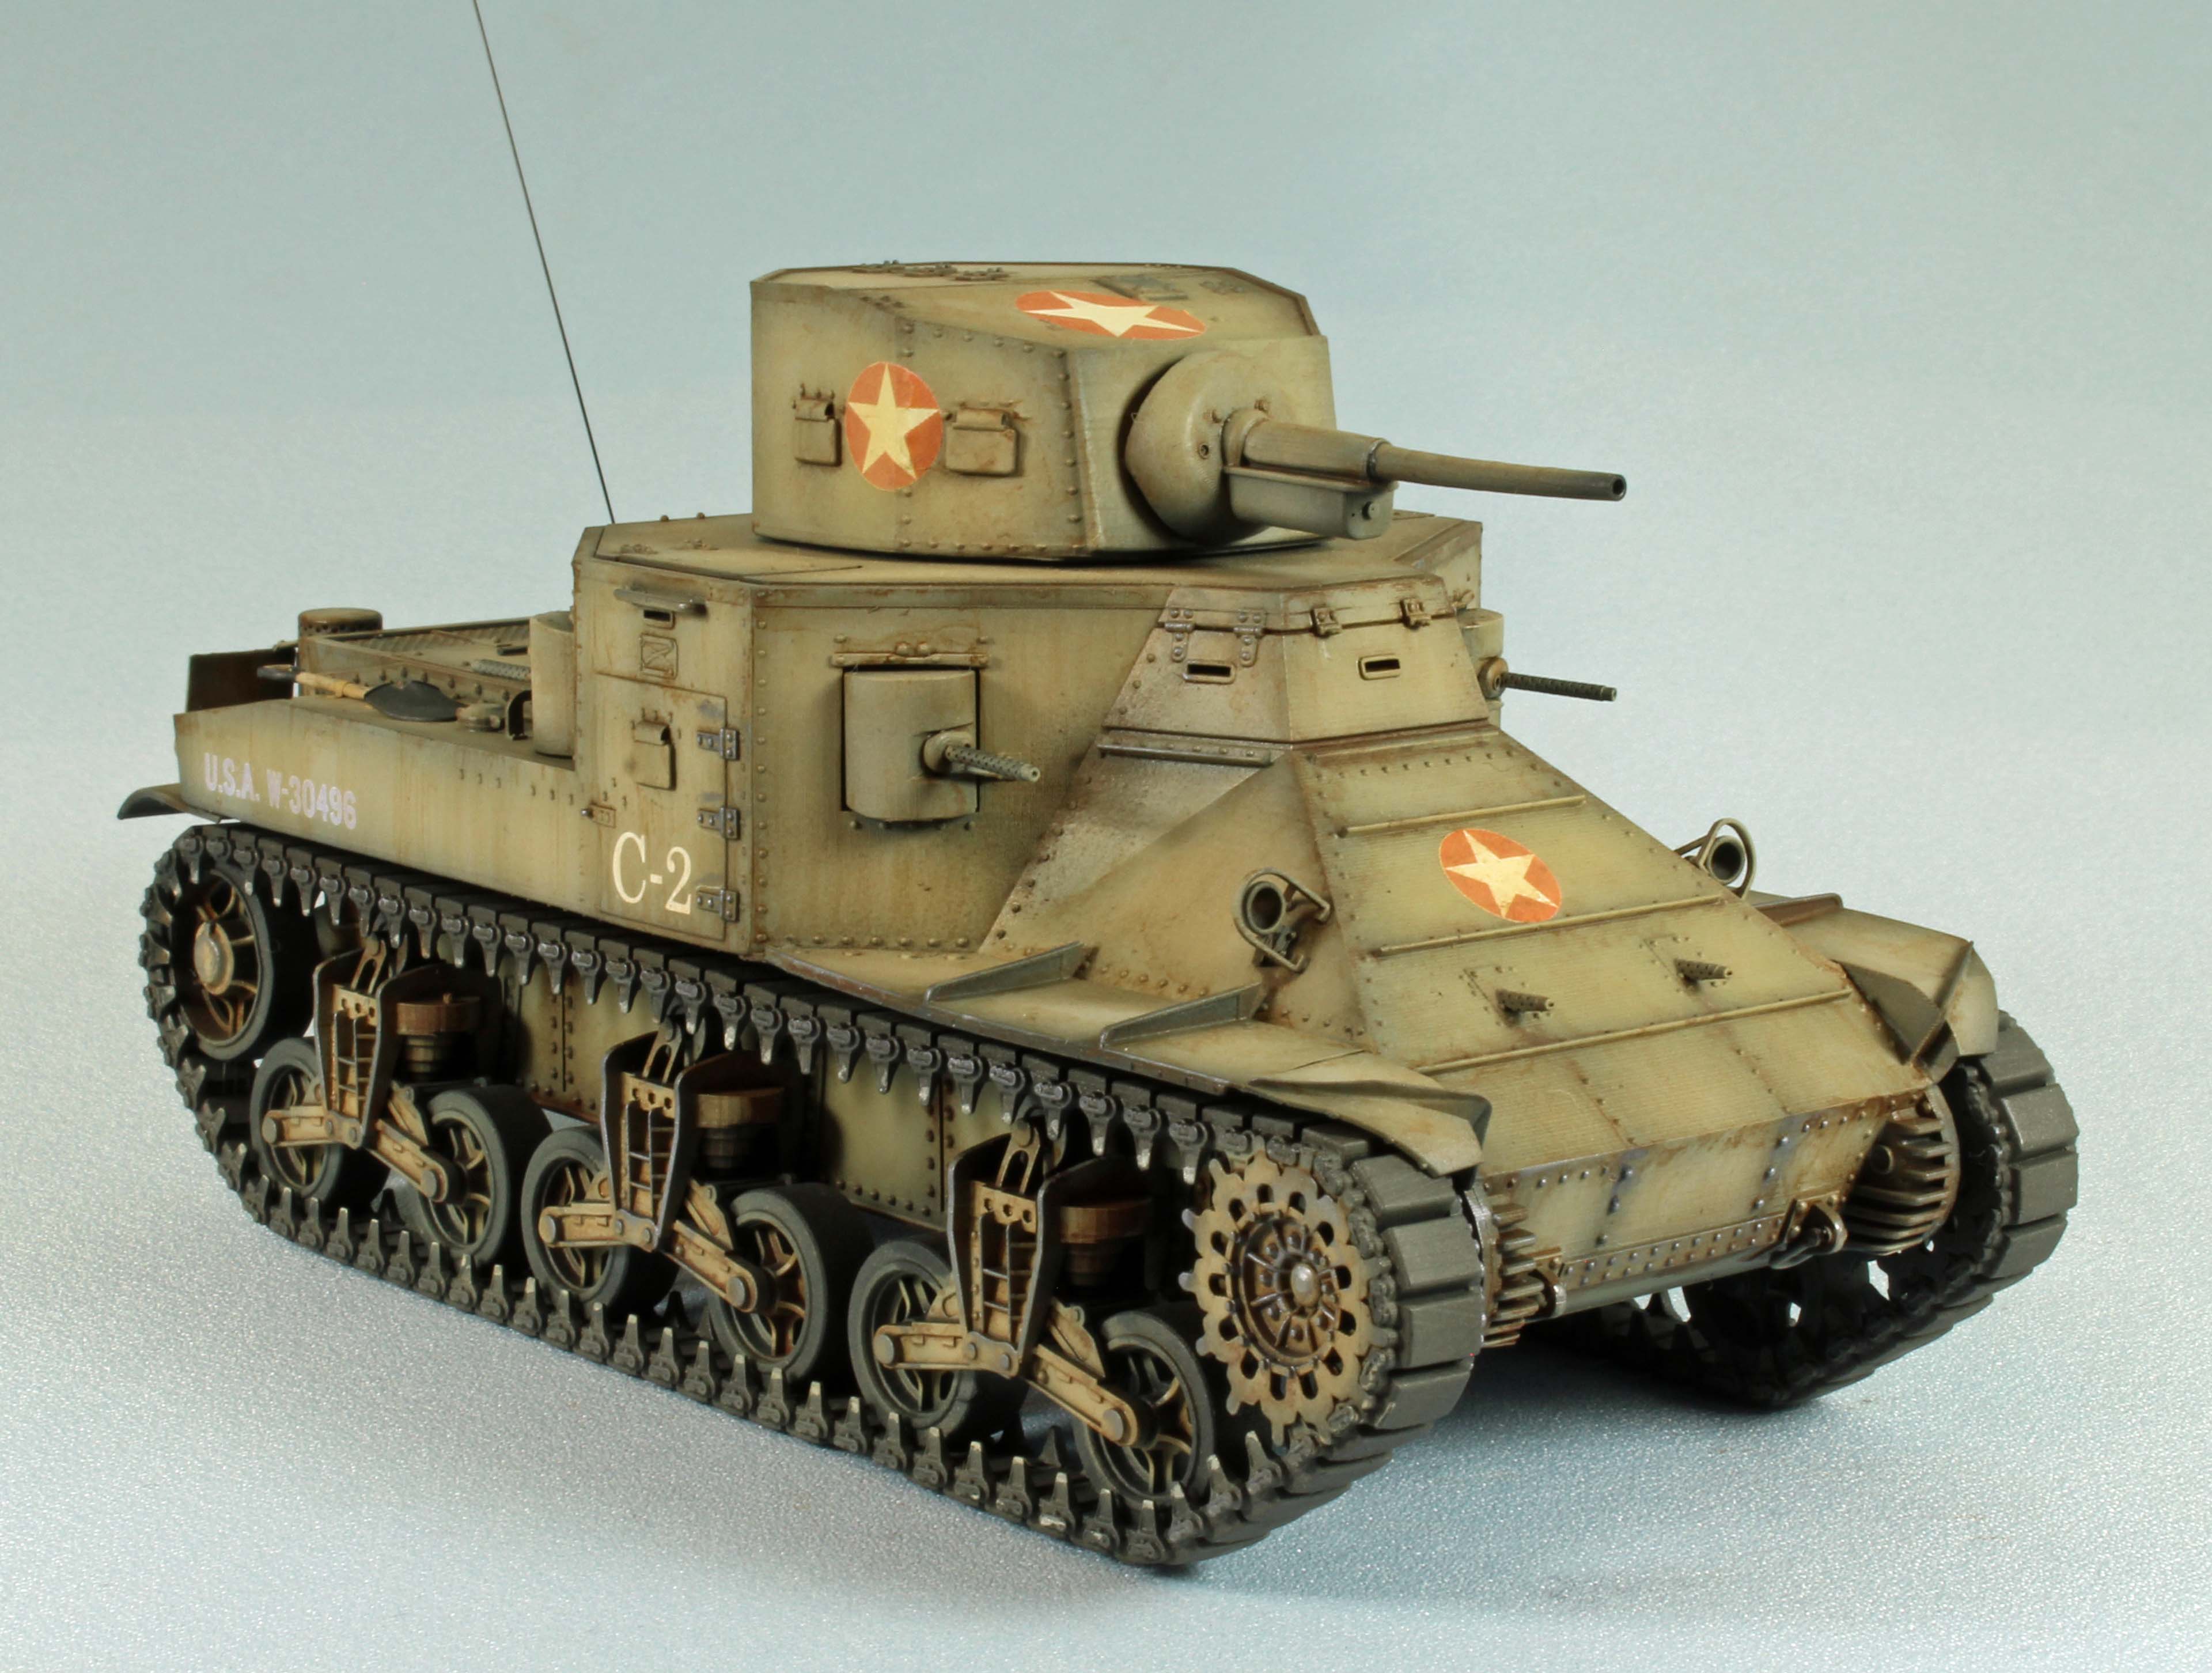
The decal sheet included in the Vargas kit were created by Mike Blackwell, an independent graphic designer based in Oregon, and printed by Fusion Scale Graphics. They are excellent, in perfect register, and depict four different units. One note: These decals are extremely thin and let go of their backing paper quickly, so care must be taken so that they do not fold back onto themselves during application. I really appreciate the effort Mike put in to ‘fade’ the bright colors of the markings to assist with scale effect.
Weathering
- While the surface was still glossy, I applied Mr. Hobby Mr. Weathering Color Enamels - Stain Brown to all surface detail, stumped with Mr. Hobby thinner.
- Once a flat coat was laid down, I added an overall application of ‘bling’, using Ammo Mig Gun Metal Powder.
Conclusion
This is my fourth 3D printed model from Vargas and again, the build was a breeze. Luis Vargas did a solid job researching the subject, and the design and engineering that went into the kit is readily apparent. As I said with the last (and every) Vargas project – each one makes me want to build more.
As with any all-resin project, this kit has its challenges, especially when compared to injection-molded models. I think the build was straightforward enough, however, for any modeler to finish. Having a solid working knowledge of alternative adhesives (CA Glue, epoxy, and/or ‘fortified’ white glues) would certainly be a plus.
I would like to heartedly thank Luis Vargas at Vargas Scale Models for providing this kit for review, and to IPMS USA for giving me the opportunity to build it.