Reviews
Aircraft
Lancaster Mk.1B – Part 3 of 3
by Eric Christianson
 Model: Lancaster Mk.1B
Reviewed by: Eric Christianson, IPMS # 42218
Scale: 1/32
Company: Hong Kong Models (HKM)
Price: $349.99
Product/Stock #: 01E010
Website: Hong Kong Models
Product Web Page: View
Product provided by: Hong Kong Model (HKM)
[This review is the third installment of a three-part series on building and finishing this impressive kit.]
Part One of this review can be found here:
[http://ipms-seattle.org/reviews/aircraft/2019-EC-HKM-01E010/]
Part Two of this review can be found here:
[http://ipms-seattle.org/reviews/aircraft/2019-EC-HKM-01E010-Part2/]
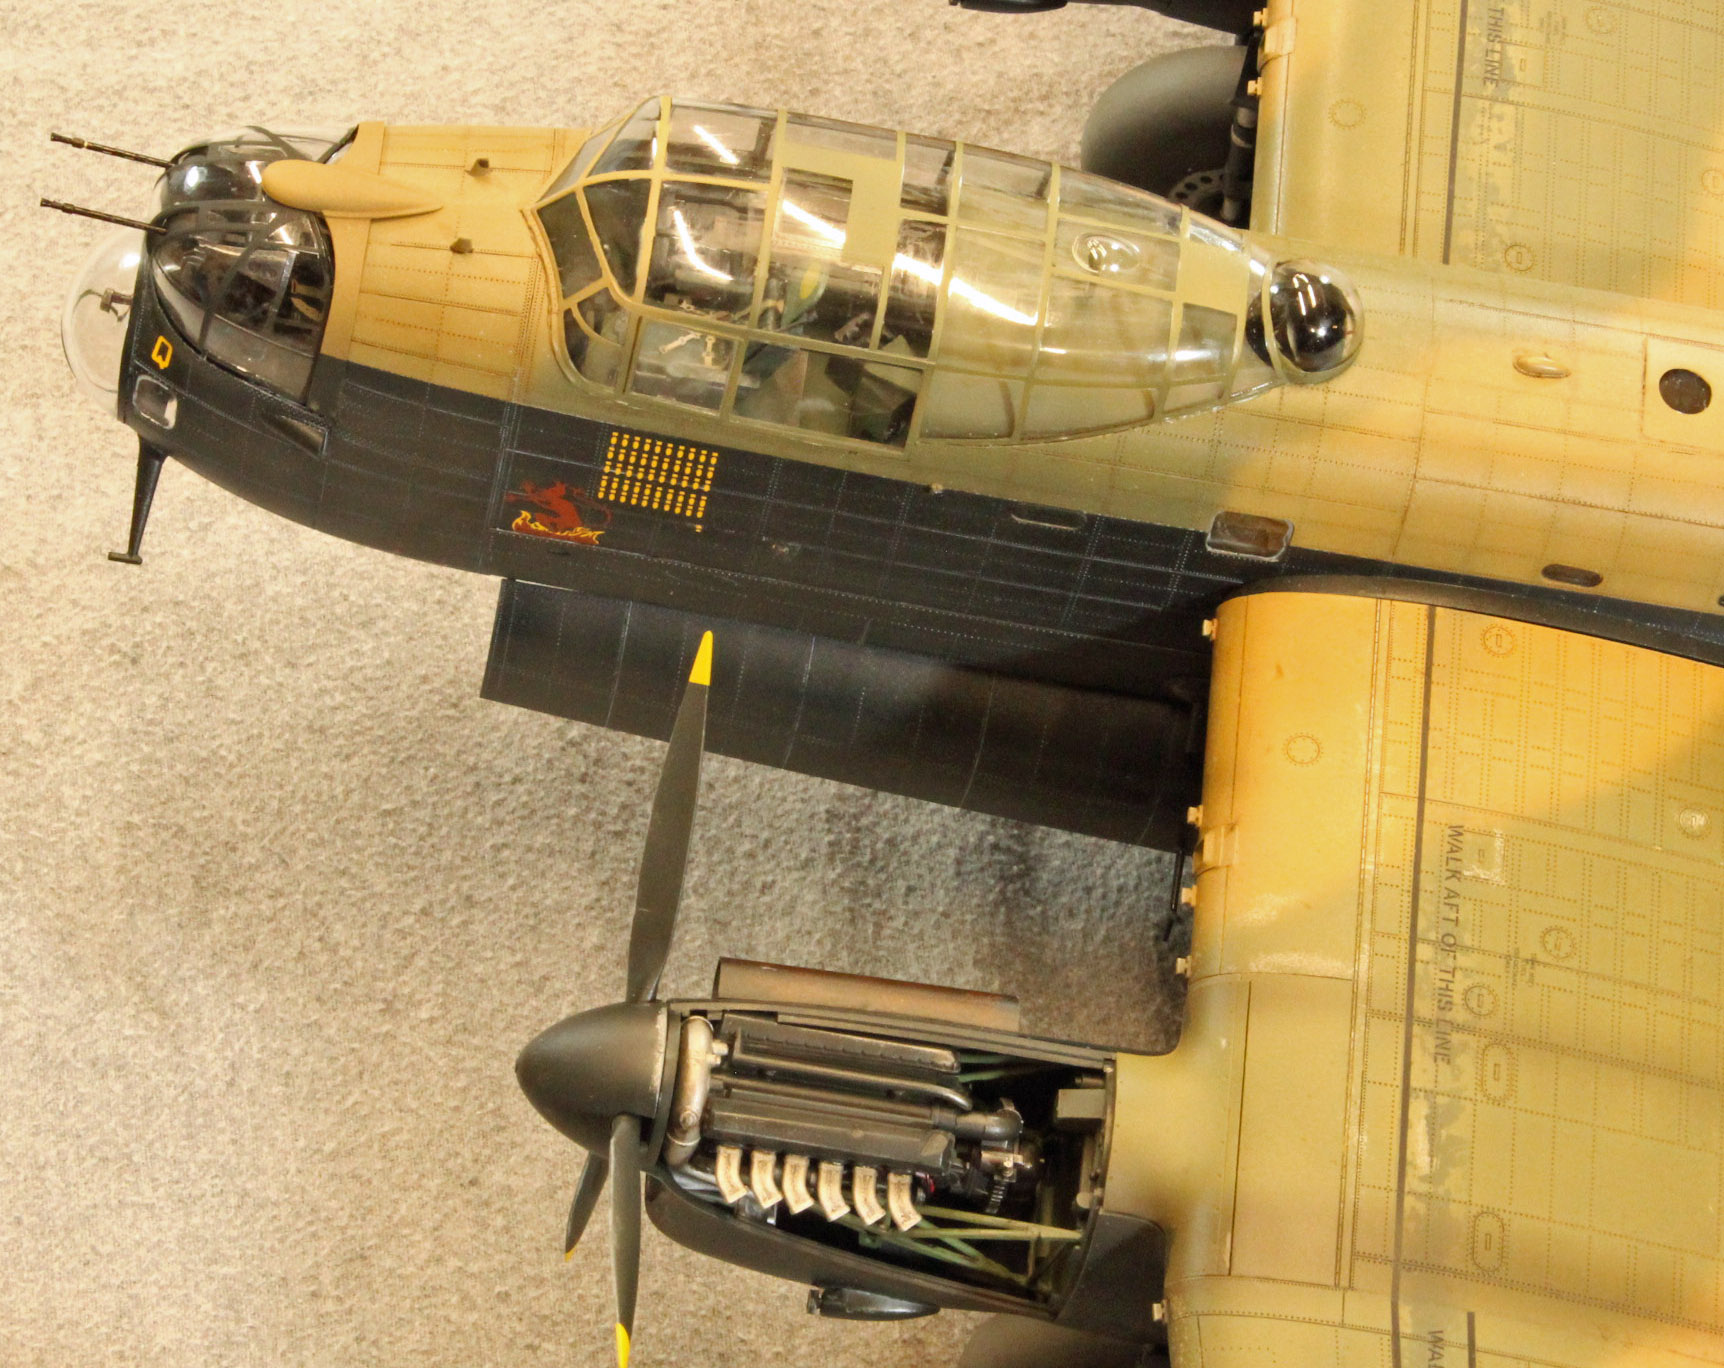
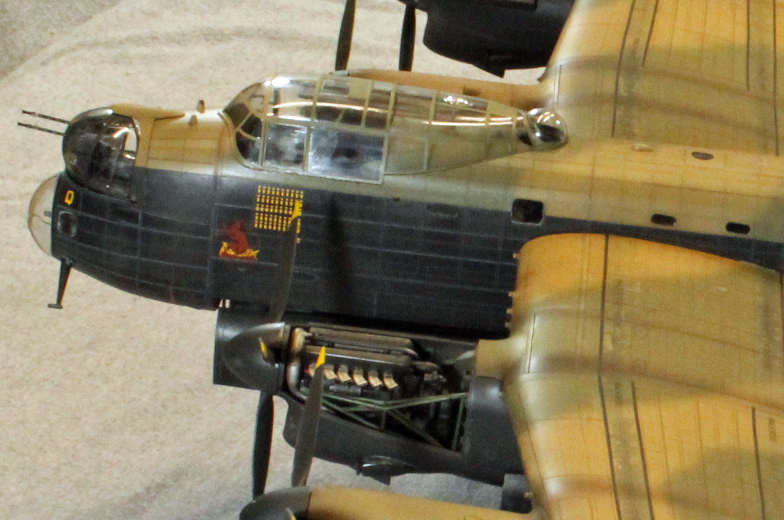
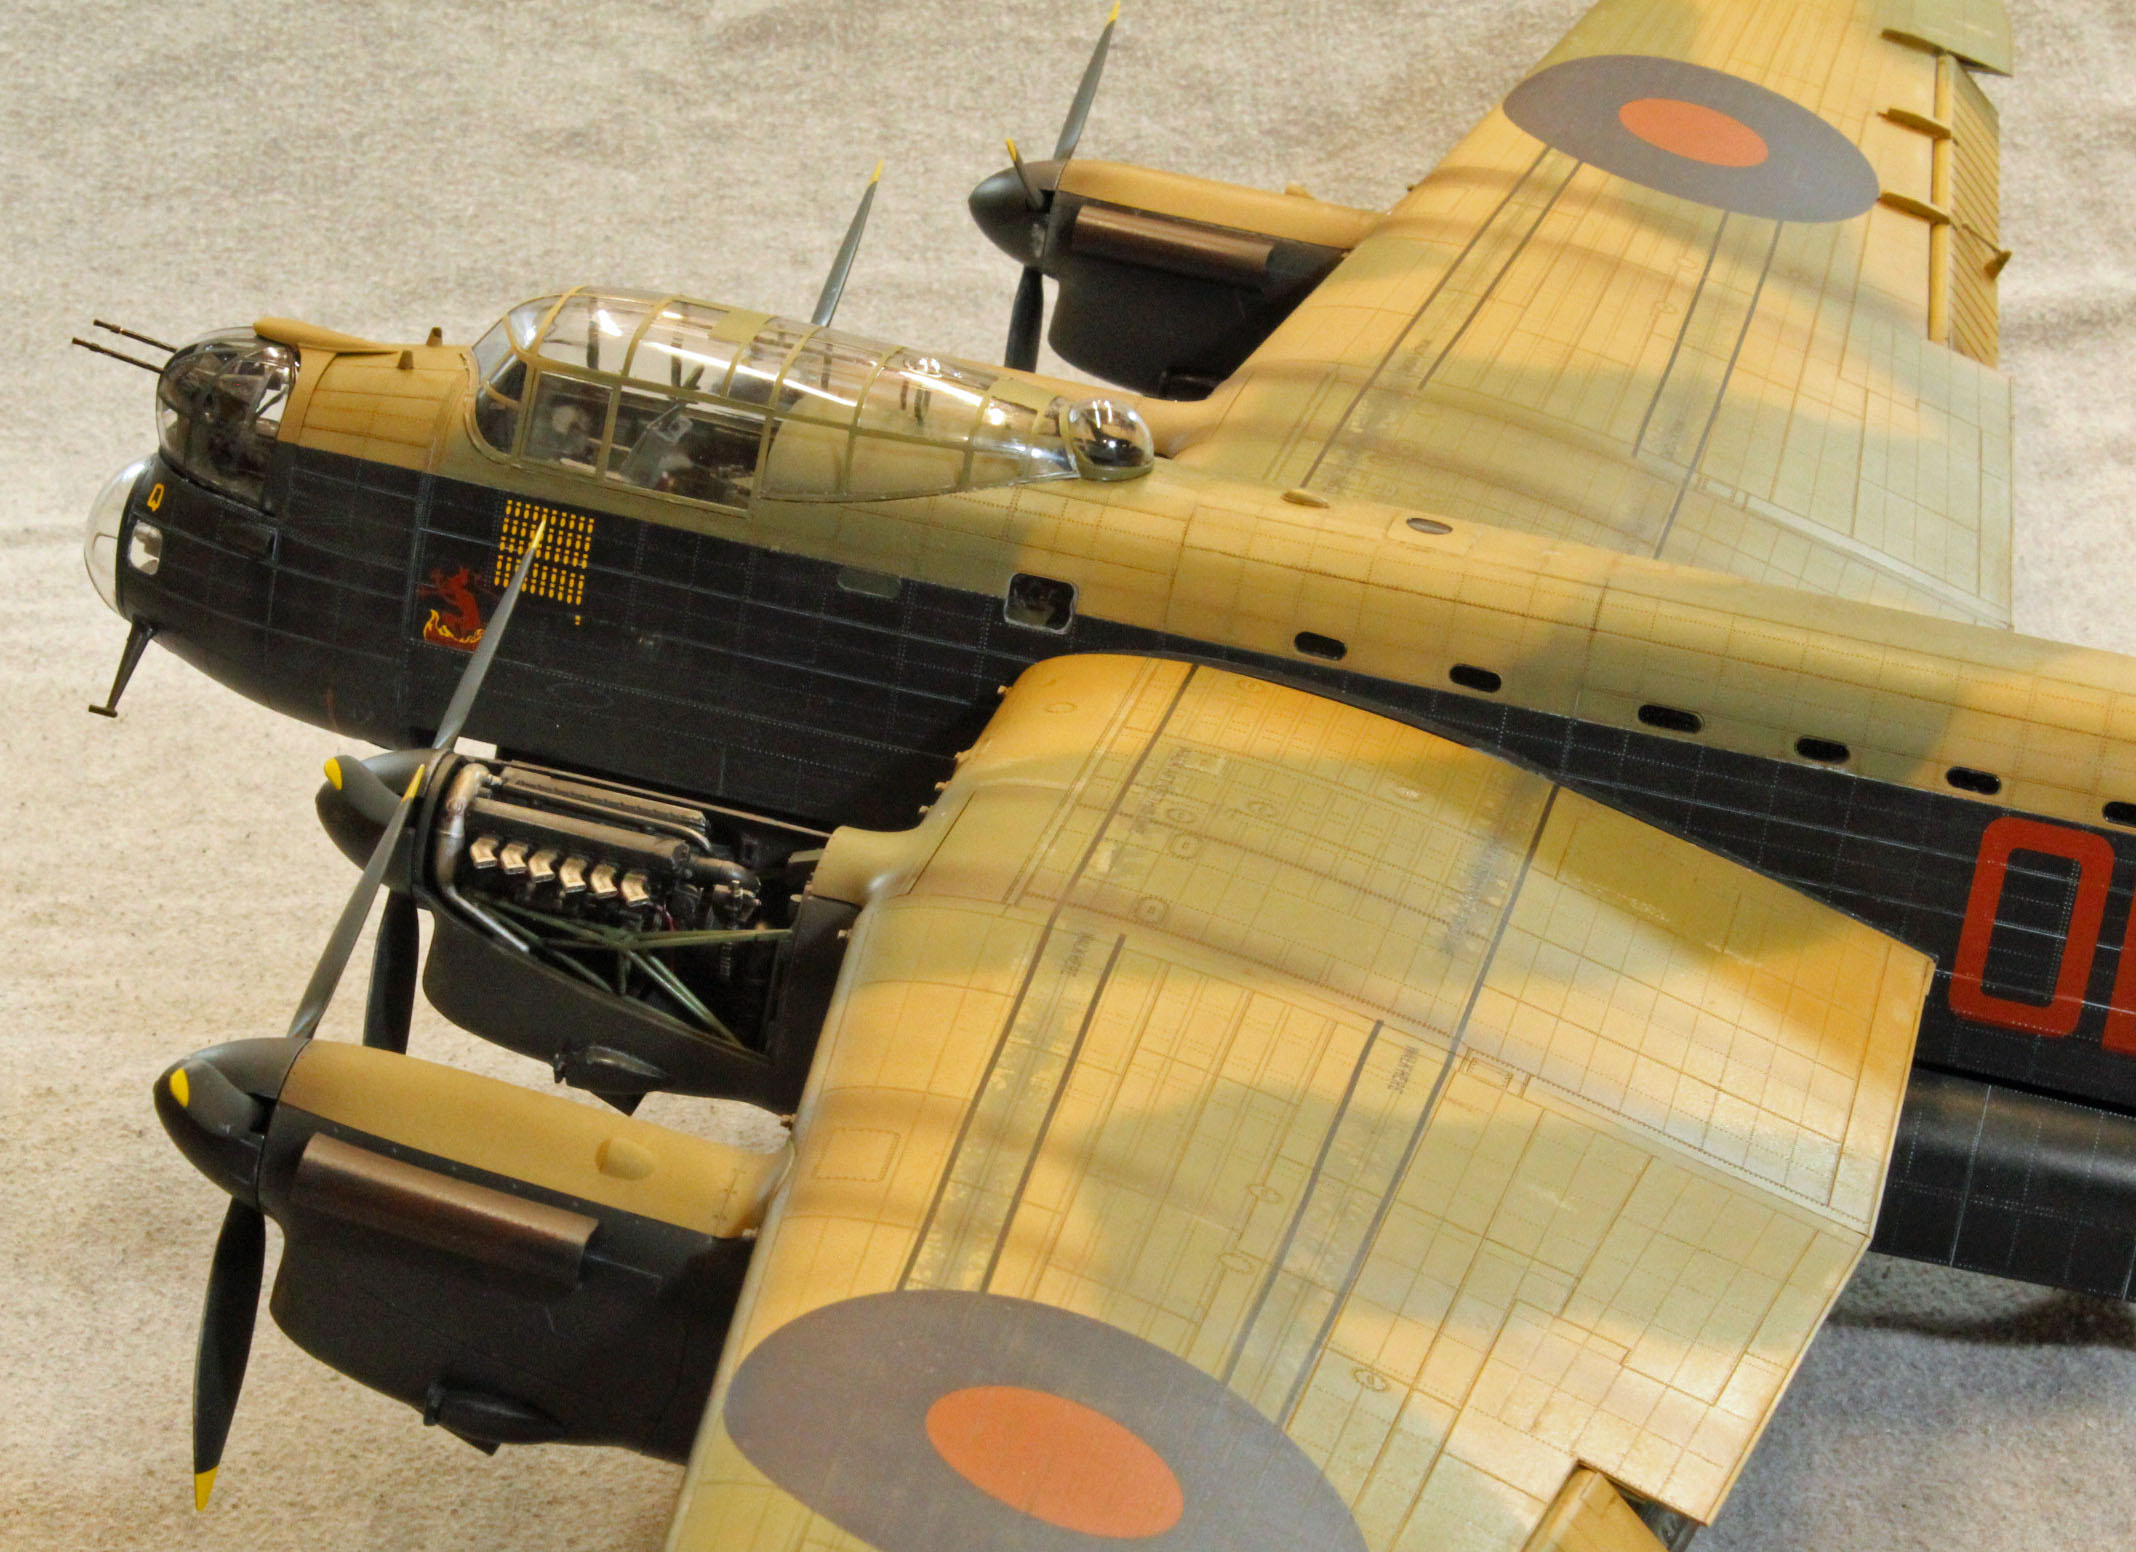
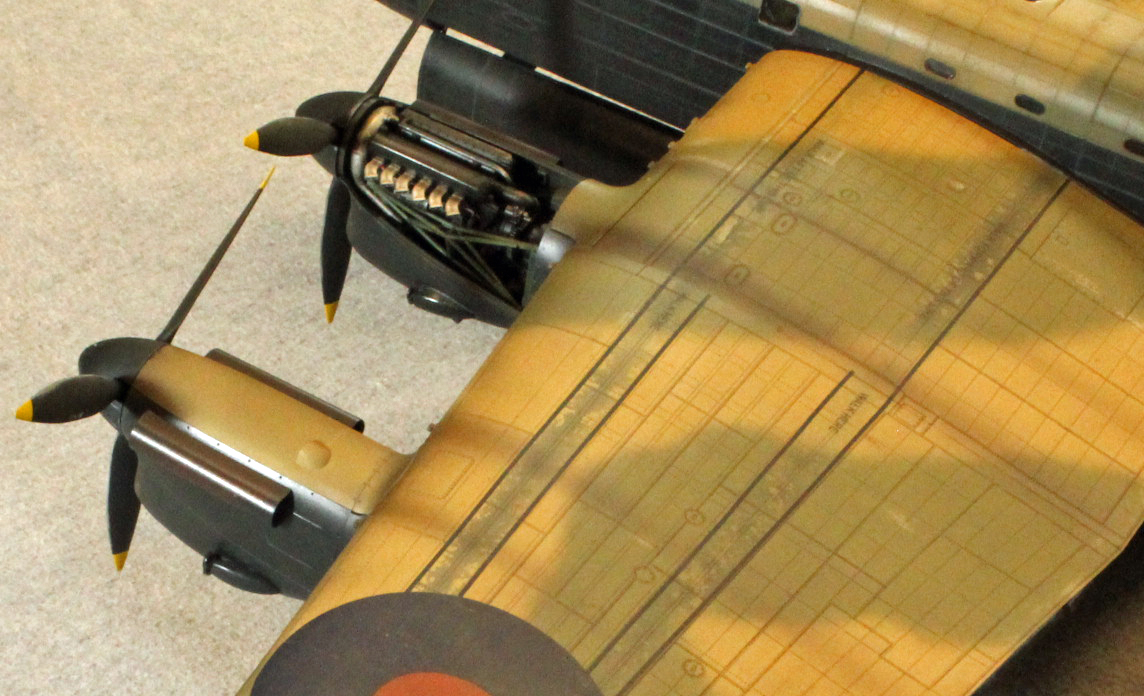
Down the home stretch! Last time we had just completed the wings, tail, fuselage, nose and wheel-wells, leaving just the final assembly and finish for the last segment of this three-part review. To recall: I chose to display only the port wing’s inboard engine detail, and to cover up the remaining three engines. Otherwise, the aircraft is built up from the box with the exceptions of a set of brass gun barrels, and a set resin control panels and accompanying decals. The brass barrels will be part of a separate IPMS review.
Things to consider before you start
The only real consideration at this point in the build was the sheer size of the different components. The wings and fuselage together could not fit in my airbrush booth, and as a consequence I had to depart from my normal modeling routine in many areas – first and foremost, completely finishing each component separately, right down to the final coat of semi-gloss. Once the nacelles (with the landing gear) were attached to the wings, handling even the separate wings became ungainly. A significant amount of planning was required to identify when and where I needed to depart from the instructions without the entire project going sideways. I kept a lot of lists, many of which changed on a daily basis. The only other consideration was to make sure I mixed enough paint for the job!
Continuing with Assembly
Before painting commenced, I had some loose ends that needed tying off, starting with…
Attaching the Canopy and nose section
All clear plastic parts from the kit had by this time been double-dipped in Future (SC Johnson Pledge Multi-Surface Floor Care Finish) and completely cured. For the most part, HKM tried their best to place the sprue attachment points in places that would not interfere with the smooth lines of each piece. The nose cone fit perfectly, but I had to clamp the main canopy down onto the opening of the cockpit to get a decent seal all the way around. This was not the challenge it could have been if the bomb bay was filled, and the doors in place, which was a departure from the instructions.
Bomb Bay Doors
Attaching the bomb bay doors in Step 33B did not go exactly as planned. The braces at each end did not want to fit into the sides of the bomb bay and still attach to the doors where they were supposed to. I checked to make sure the braces were on the right end (it matters, they are different) – they just didn’t want to line up – bowing in /out on one end. I ended up doing some minor surgery to the braces and using long pieces of strong masking tape to align things as well as I could while the Testors ‘black bottle’ cement did its work. Needless to say, every small part that had not snapped off by this time, did. And of course, a few more bombs dropped out to keep things humorous. Using hindsight, I think I should have added the doors at the very end of the build – because once they were attached, handling a model of this size became a different kind of challenge.
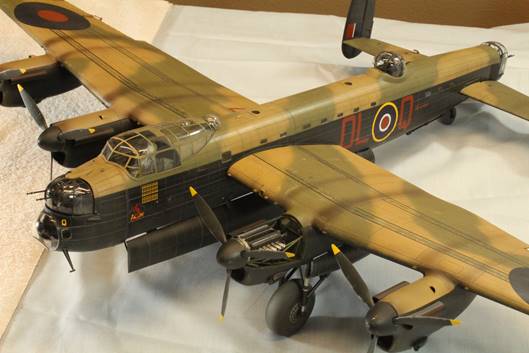
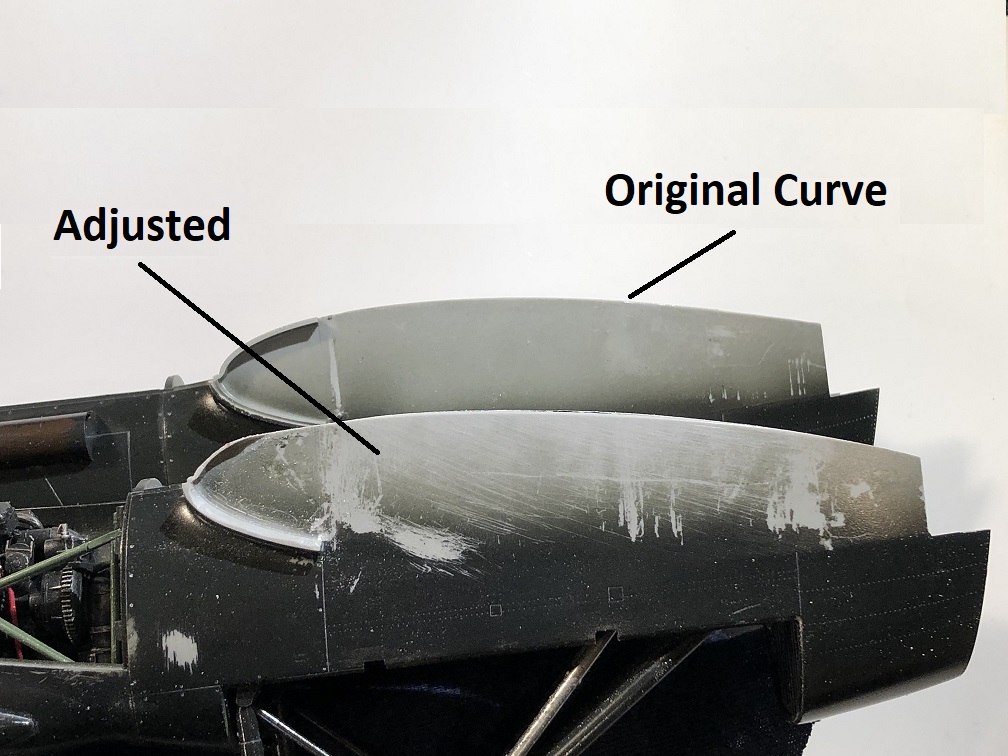
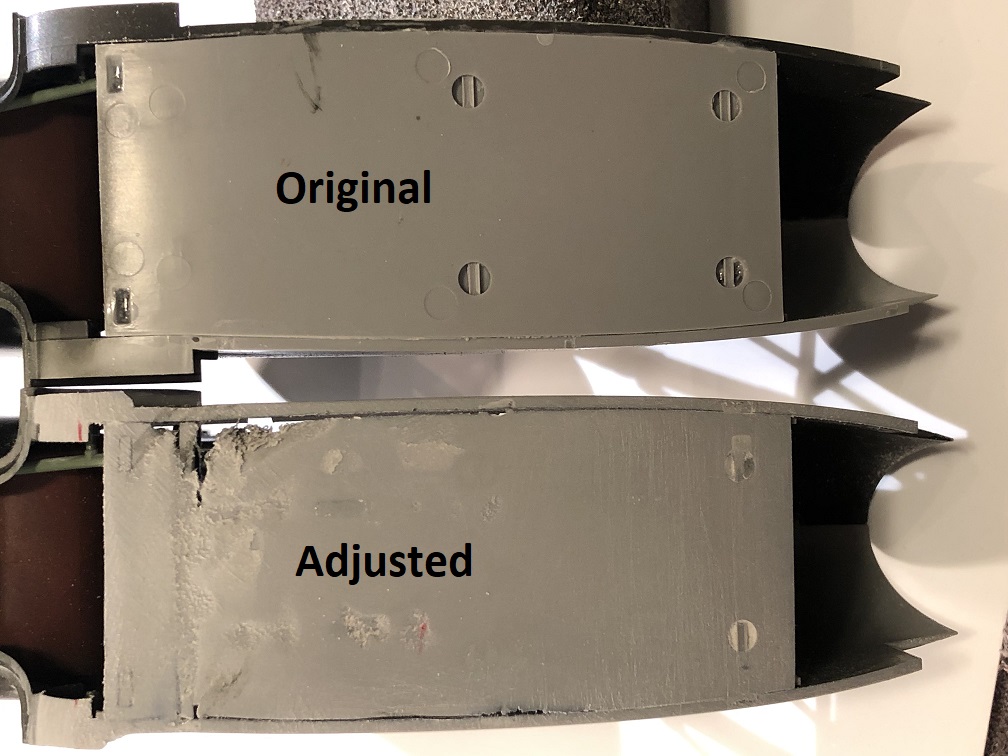
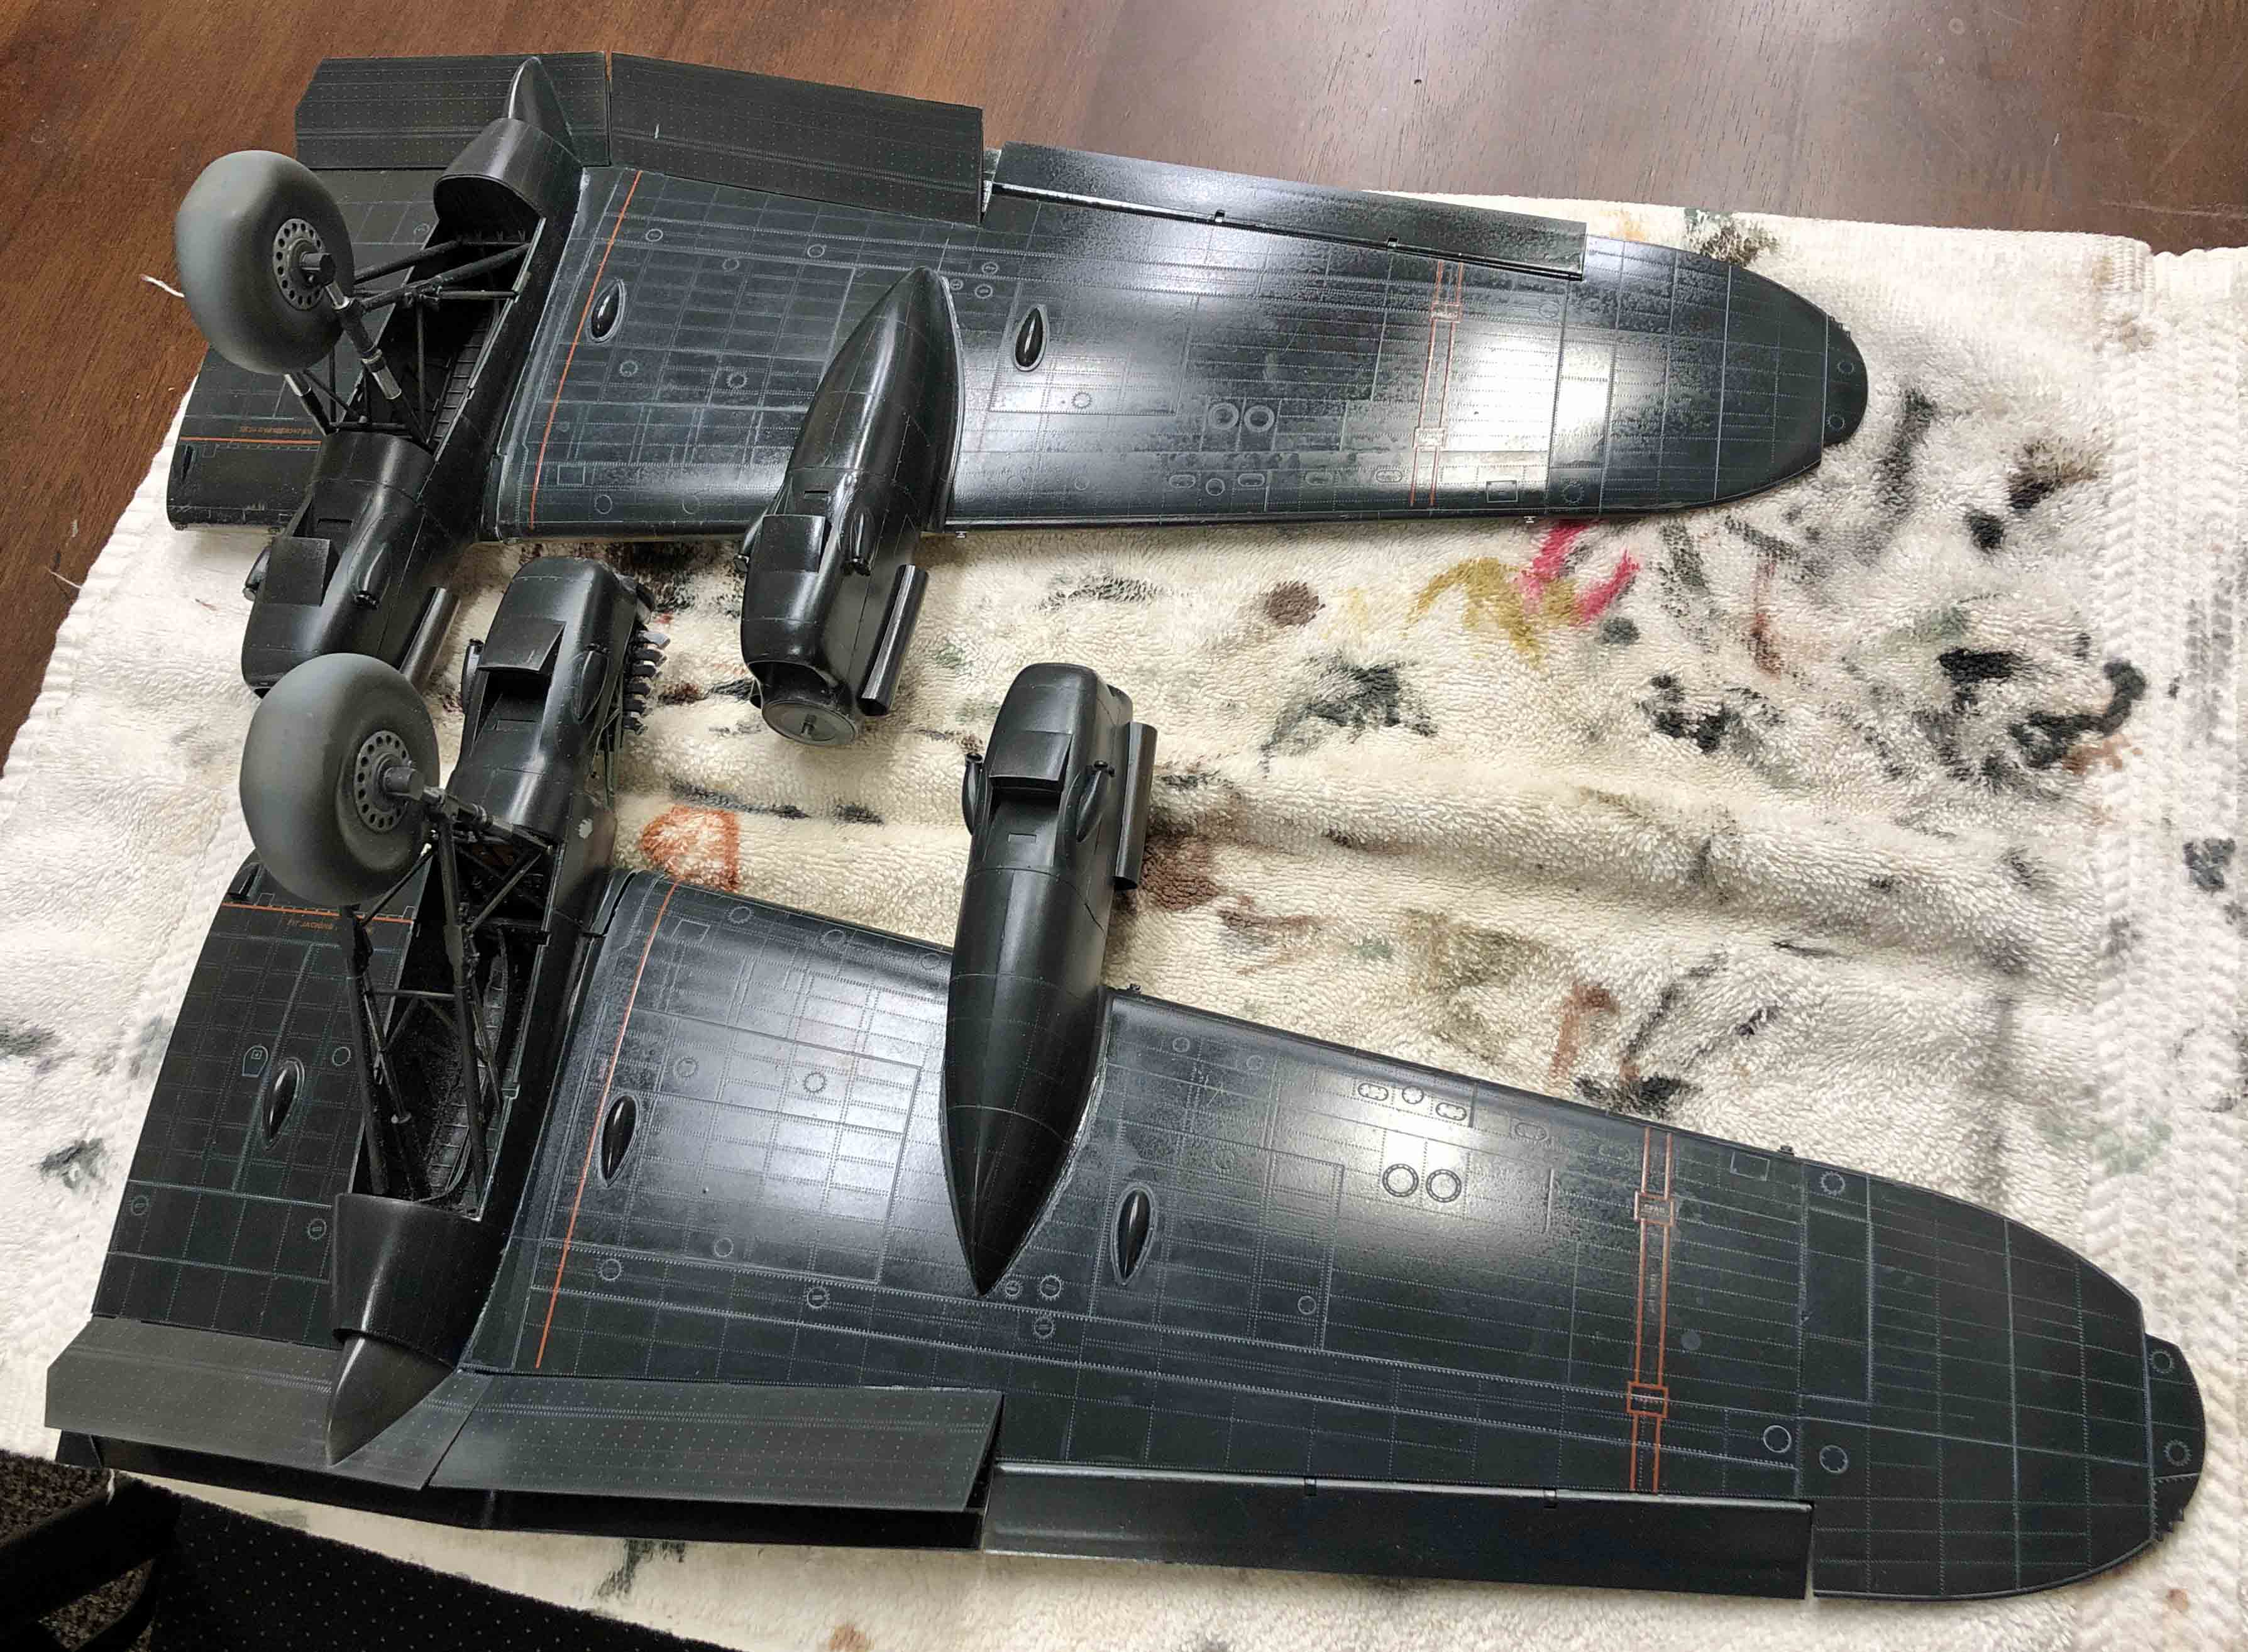
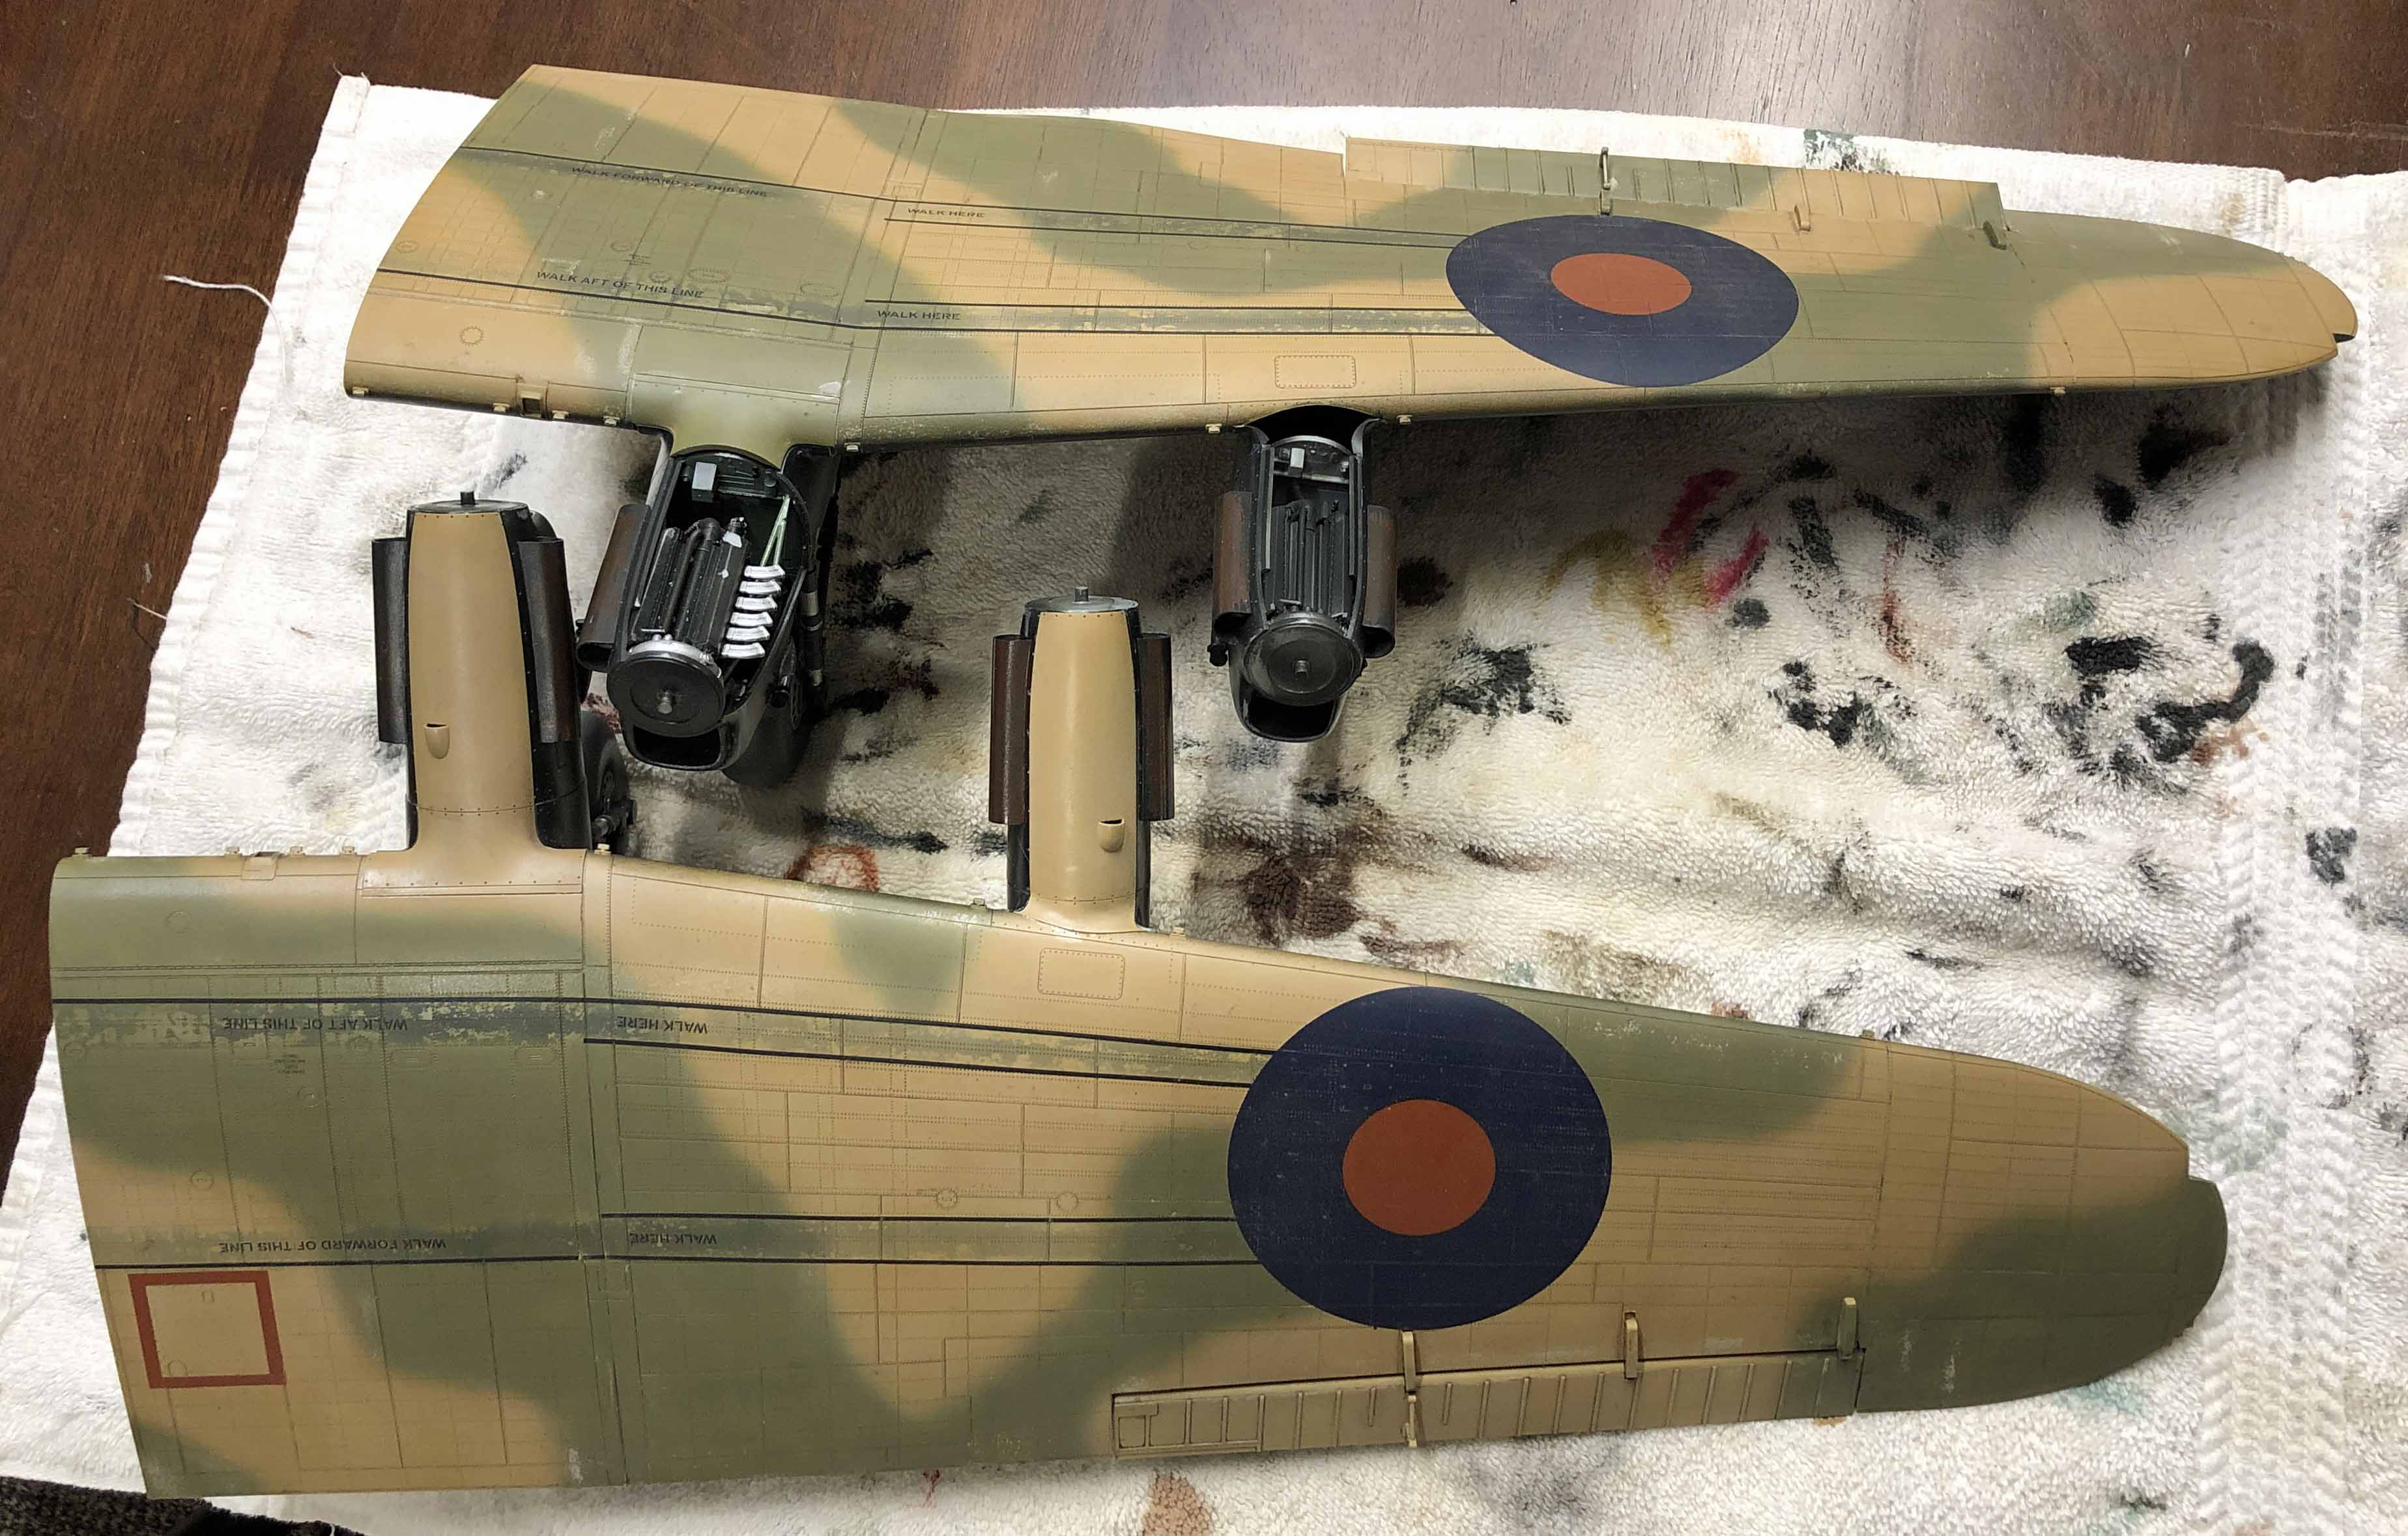
Poor Fit of the Main Engine/Landing Gear Nacelles
By the far the most significant assembly challenge was attaching the two inboard nacelles to the wings, due to fit issues. The upper convex curves of the nacelles were too severe for the inner curves of the wings – poor ‘spooning’, if you will. Seated properly aft, each nacelle stood proud of the leading edge of the wing. Seated correctly up front, the aft portion of each nacelle stood proud of the wing’s trailing edge. Consequently, I had to take a table sander to the ‘hump’ in the middle and front portions of each inner nacelle, shaving up to an eighth of an inch down in places, leaving a paper-thin layer of plastic to serve as the inner roof of each landing gear bay (see annotated images). The task was made more difficult by the fact that the nacelles, by this time, had been finished, painted and weathered. Luckily, I did not damage the struts or landing gear in the process. The second wing/nacelle required no less amount of work, although it went quicker since I knew beforehand what needed to be done. I used an old trick I learned years ago – I put a few drops of light machine oil on the top of the nacelle and then slid it into place under the wing, rocking it back and forth before removing it to see where the oil had transferred to the underside of the wing. I then marked each spot with a marker, wiped off the oil, and sanded the areas until I could no longer see any of my marks. I repeated this process a dozen times until I could achieve a decent fit.
It is a mystery – since everything else seemed to fit pretty well. I had carefully marked each nacelle and its matching bay long before, but even if the nacelles were accidentally mislabeled, the issue remained – I tried switching the nacelles to the opposite wings with the same results.
The two outer engine nacelles, thankfully, went on without any problems, pushing on perfectly.
I stopped here to paint and weather the main fuselage, wings, and subassemblies (flaps, ailerons, tail stabilizers, wheel well doors, etc. Once assembled I’d have to do everything else away from my airbrush booth and modeling desk.
Painting and Weathering
Painting this aircraft is a complex task, and you will need a plan to suit. Fortunately for me, writing this review gave me the opportunity to plan and record each step before I hit the paint booth – and I strongly suggest you do the same. I think I fell asleep each night for a week working through all the steps required.
My first big decision was what type of paint to use. I wanted to employ the ‘hairspray technique’ for chipping since just about every photograph of a Lancaster that (wasn’t) a restored aircraft showed significant combat wear. Fortunately, Tamiya paint, an acrylic-lacquer, is perfect for the job and Tamiya callouts are provided by HKM in the instructions, including the mixing ratios for the two main camouflage colors.
Next, I went through what was left and broke everything out into separate sticky boards of items that would receive like-treatment. As I moved through the rest of the build, I would apply the same paint and finish steps to what was on the sticky boards so in the end I would be bringing together completely finished subassemblies.
Top Side First
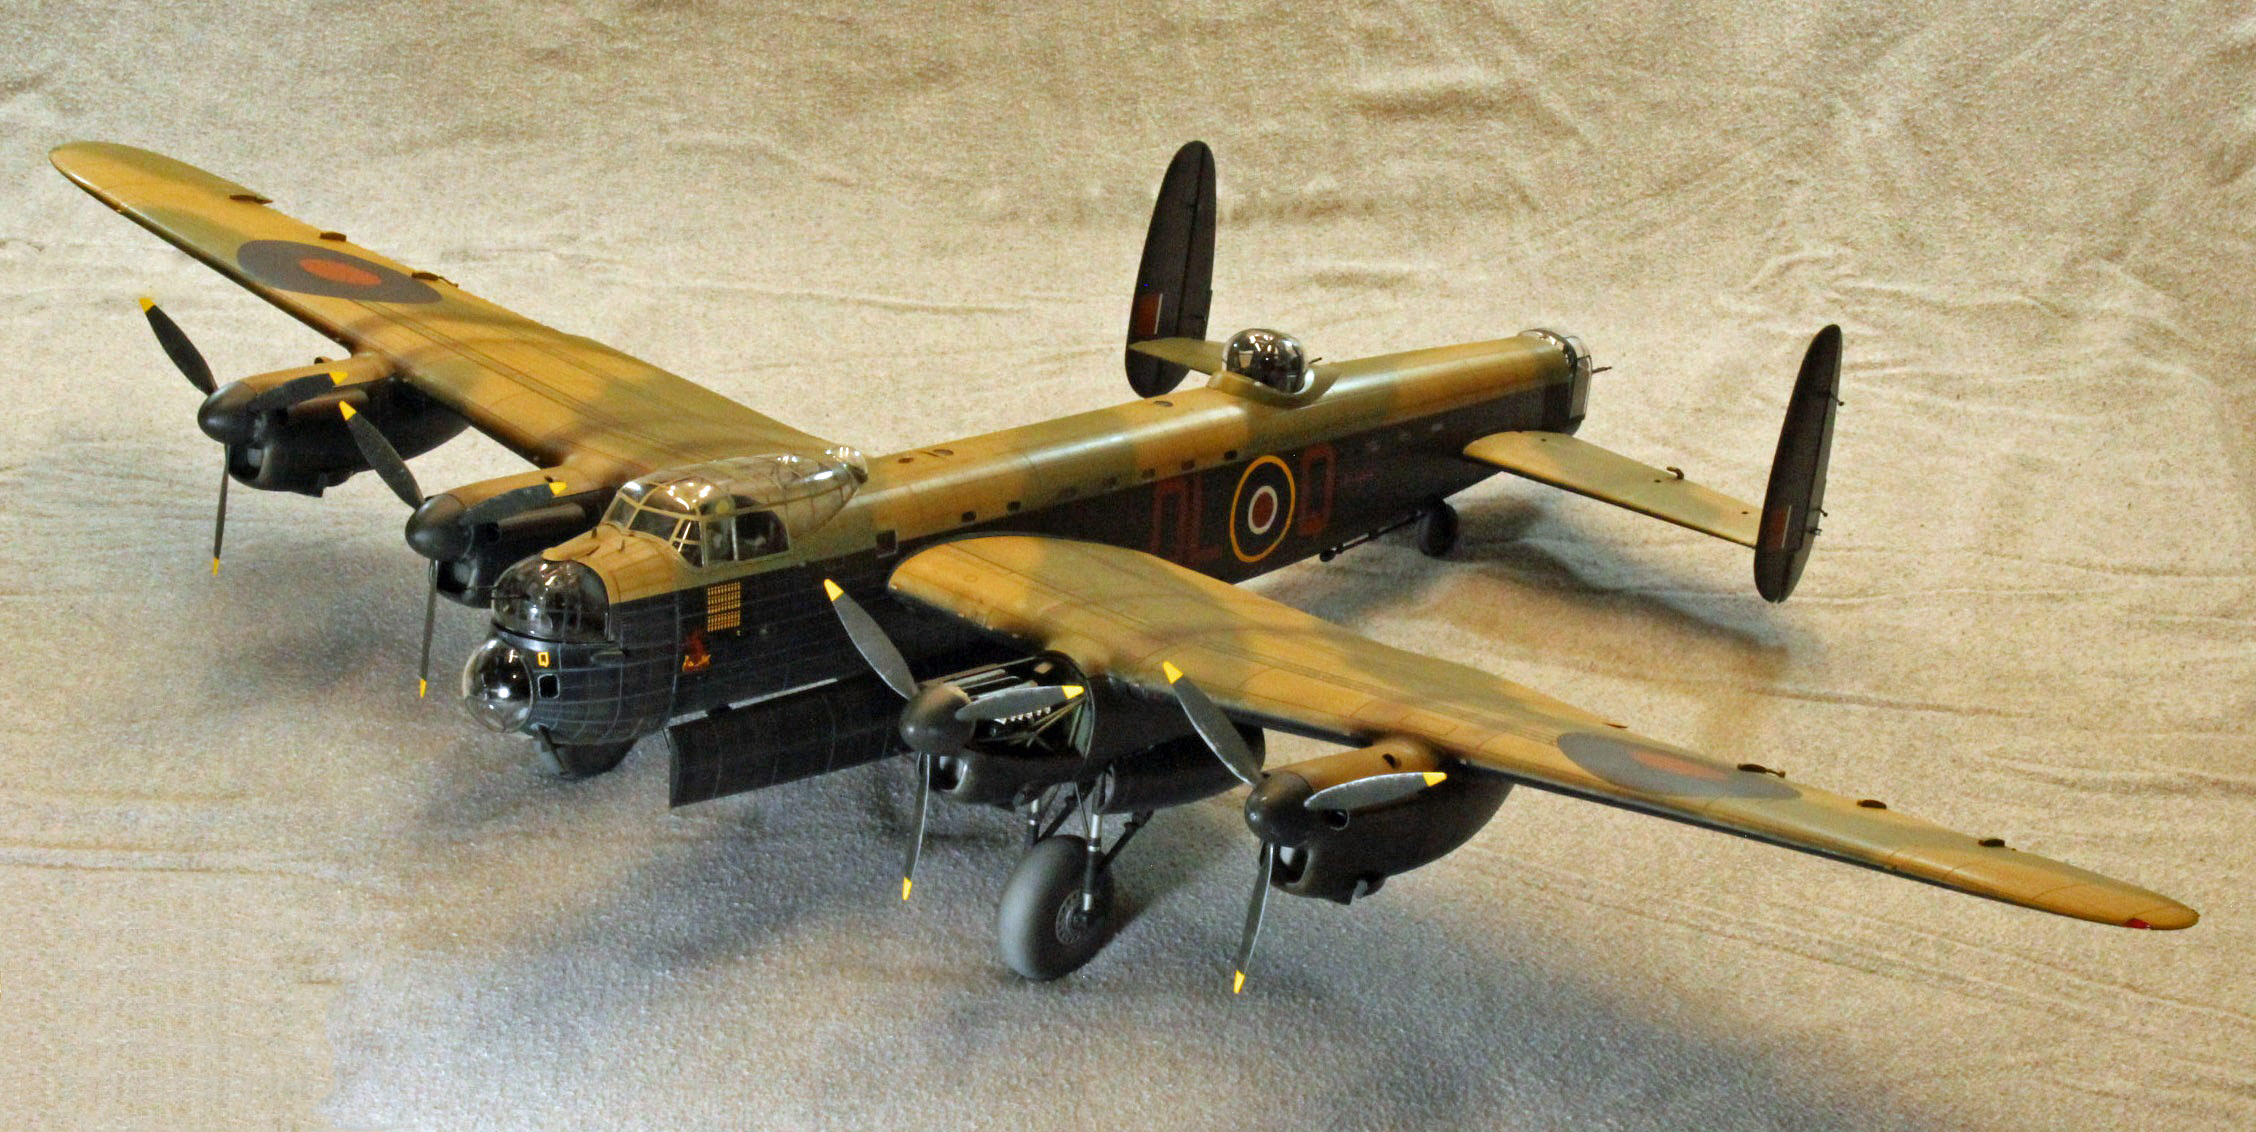
I wanted to provide depth to the finish, so I used NATO Black as a pre-shade color along the major panel lines, and for the long wing-walk rectangles that extended far out from the fuselage. I also took this opportunity to airbrush Tamia Flat Aluminum along edges of lower fuselage, wing roots, bomb bay doors, sticky boards and the propeller blades. These all encompassed areas that (I might) expose over under hairspray. Once dry, I sprayed everything with TreSemme’ and chipped up the wing-walk areas to start.
I used the mixing formulas provided by HKM for the RAF Dark Green and RAF Dark Earth, adding a little Deck Tan and Flat Yellow to both as a post-shade to lighten things up. All other colors were straight from the bottle, thinning everything 50/50 with Gunze Leveling Thinner (a lacquer).
Before laying down the camouflage, I had to figure out how I was going to seal the fuselage up, deciding to use the main canopy, the clear nose cone, and the bomb bay doors for closing off those areas, and masking tape for the remainder. Before seating the clear parts, I made sure to paint the edges with the appropriate color so that light wouldn’t reflect off the mating surfaces later. I also painted the area behind the cockpit opening that would be covered by the canopy with the mixed Green, and the outside of the canopy itself with NATO Black so the inner canopy frames would appear black when viewed through form the outside.
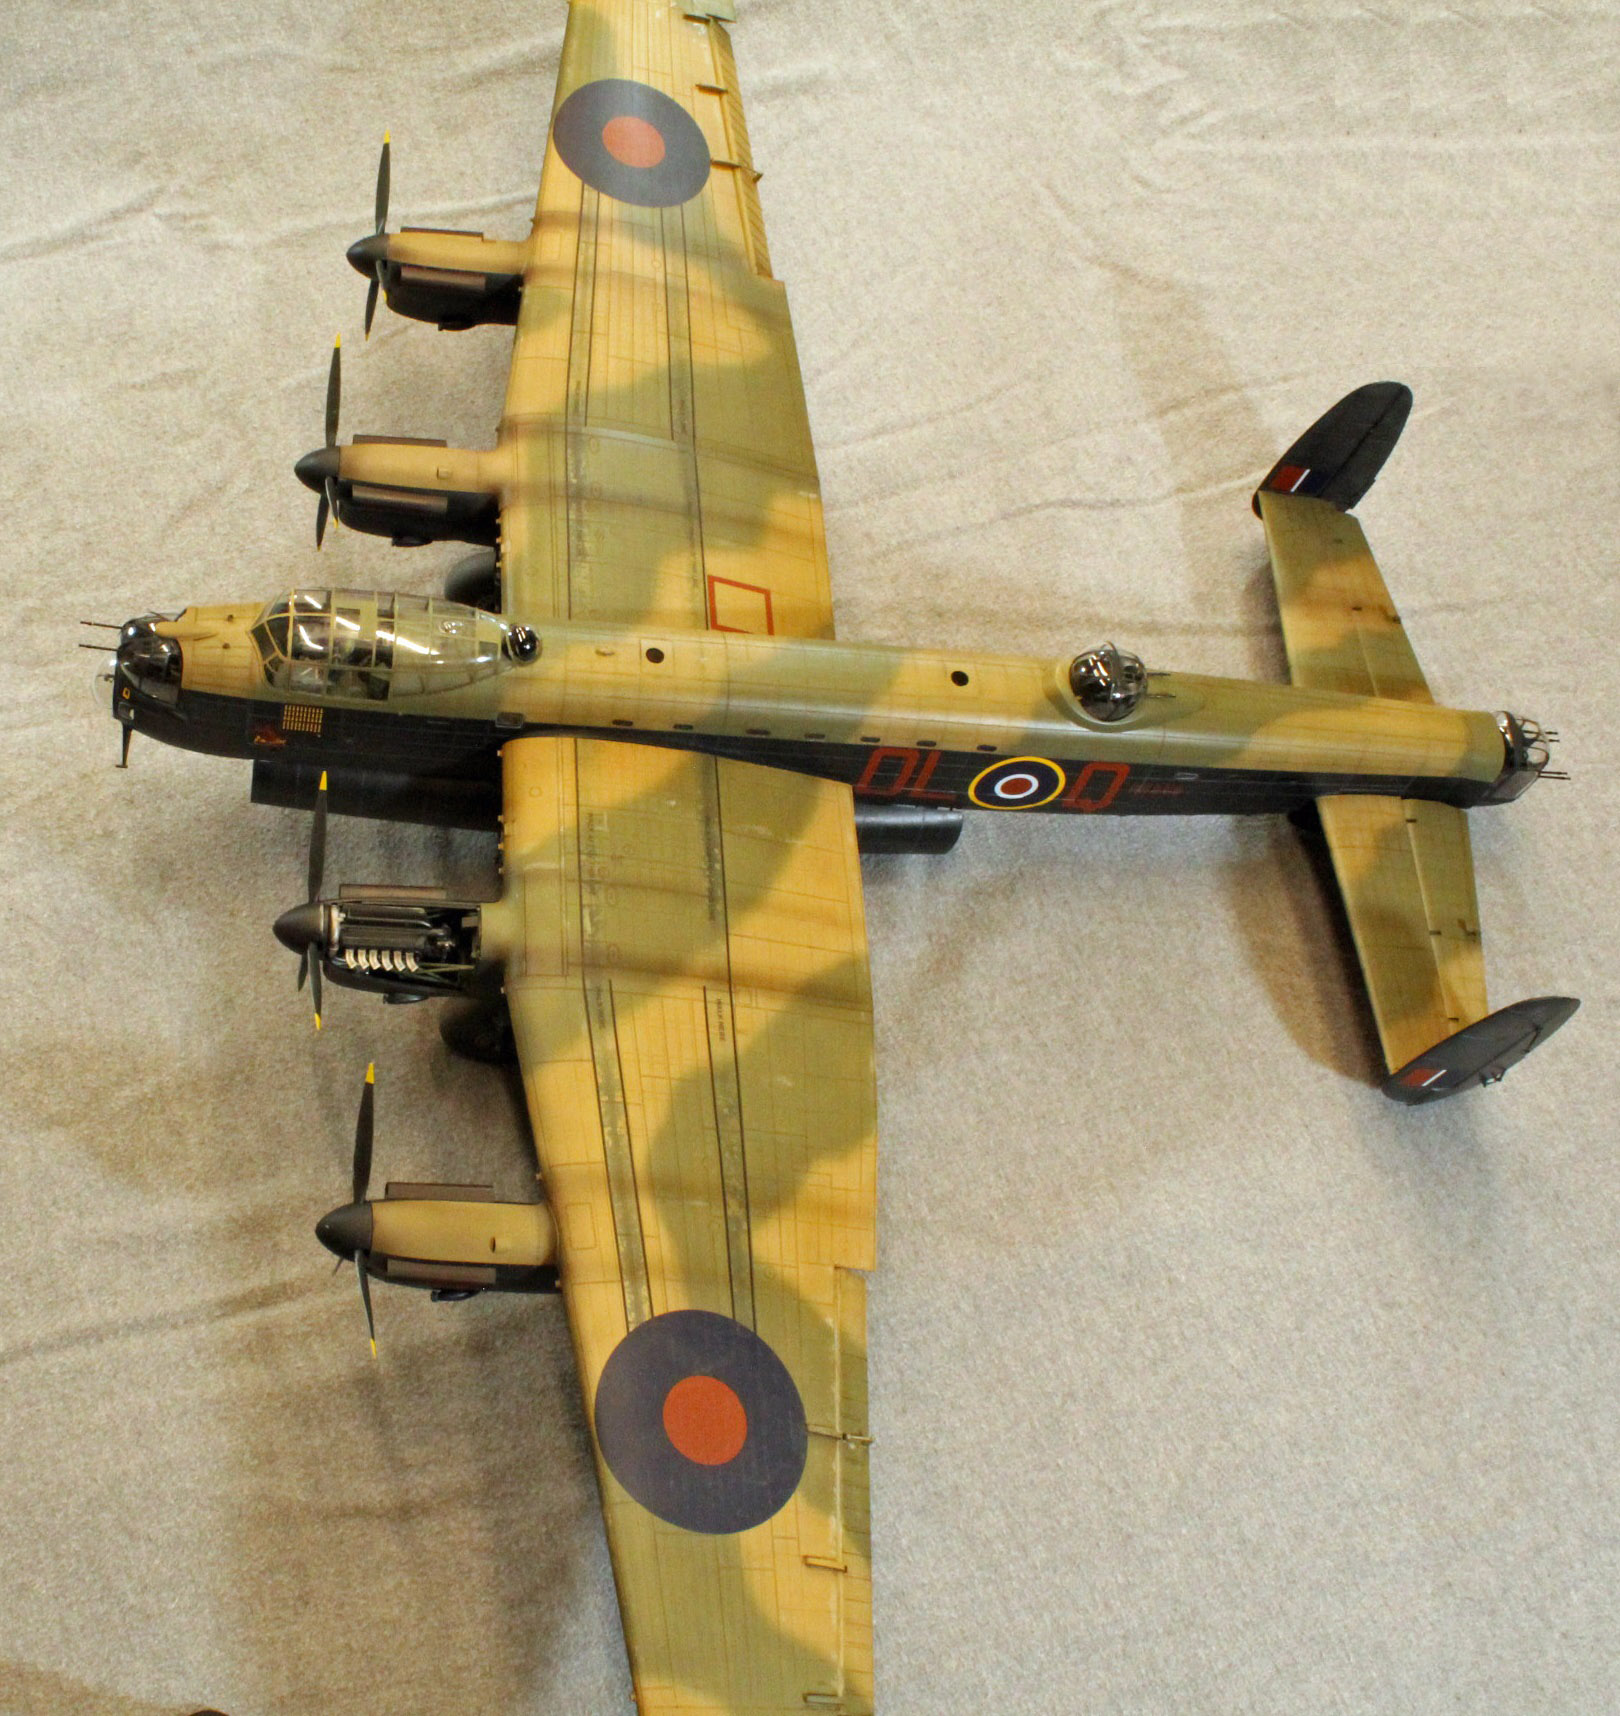
Once everything was in place, I followed the three view drawings in the instructions and lightly drew the outlines of the camouflage pattern with a pencil and painted the appropriate upper portions of the fuselage and wings with the RAF colors. To keep these colors true, I did not lay down one color (the tan) and then paint over that with (the green) – I laid down only a single color on all areas, working carefully as to not build up too much paint where the colors bordered each other, nor over the chipped wing-walks and pre-shaded panel lines that I wanted to peek through.
Before the camouflage coat had a chance to cure, I again went about with a brush and water and chipped things away here and there to show wear.
I knew I would have to mask the upper fuselage off for what came next, and unfortunately, with the (wartime) Lancaster, the tape for the demarcation lines would run directly over the 30 or so fuselage windows which were already covered with a third- party masking set. This meant that when (my) masking tape was pulled up, the (existing) window masks would come up as well, complicating the layers of finish (gloss and semi-gloss) to come later. As a result, the upper portion of the fuselage had to be finished and weathered – and then completely masked off before the lower portion could be painted.
So, after the camouflage colors had dried, I applied a thin filter of Mig 502 Abteilung Mig Wash Brown oil paint over the entire upper surfaces of the fuselage and wings by hand before spraying everything with Future to set the surfaces up for decals and pin washes. After applying the decals (see the section, below, for more information), I painstakingly applied a sludge pin wash to all the panel lines using Windsor Newton Raw Umber heavily thinned with Mona Lisa thinner. As you can imagine with an aircraft of this size, that was quite a job!
Once satisfied, I sprayed everything I had painted with three light coats of Mig Ammo Lucky Varnish (Semi-Gloss), a new acrylic product that is airbrushed undiluted from the squeeze bottle, before masking it up.
Painting it Black
I wanted to figure out a way to break up the black areas on the Lanc, while still staying true to the night-combat scheme. After masking off the camouflaged fuselage, I started by airbrushing a coat of Tamiya NATO Black as a base. Once dry, I sprayed a very thin layer of Tamiya Medium Grey into the larger panels and other areas, creating a mild patchwork on the surfaces. I followed this with another thin layer of Tamiya Flat Black to bring the two colors together. As with the upper fuselage and wings, before the black coat has a chance to cure, I chipped the heavy-wear areas with a brush and water to show wear. Next, I applied a thin filter of Mig Brown Wash by hand. After the gloss coat and decals were added, I applied a sludge pin-wash using Mig 502 Abteilung German Grey Highlight to ‘pop’ the panel lines. I thin Tamiya paint 50/50 with Gunze Leveling Thinner and Mig Oils with Mona Lisa White Spirit (10/90). Once the pin wash was dry, I again finished the job using Mig semi-gloss varnish.
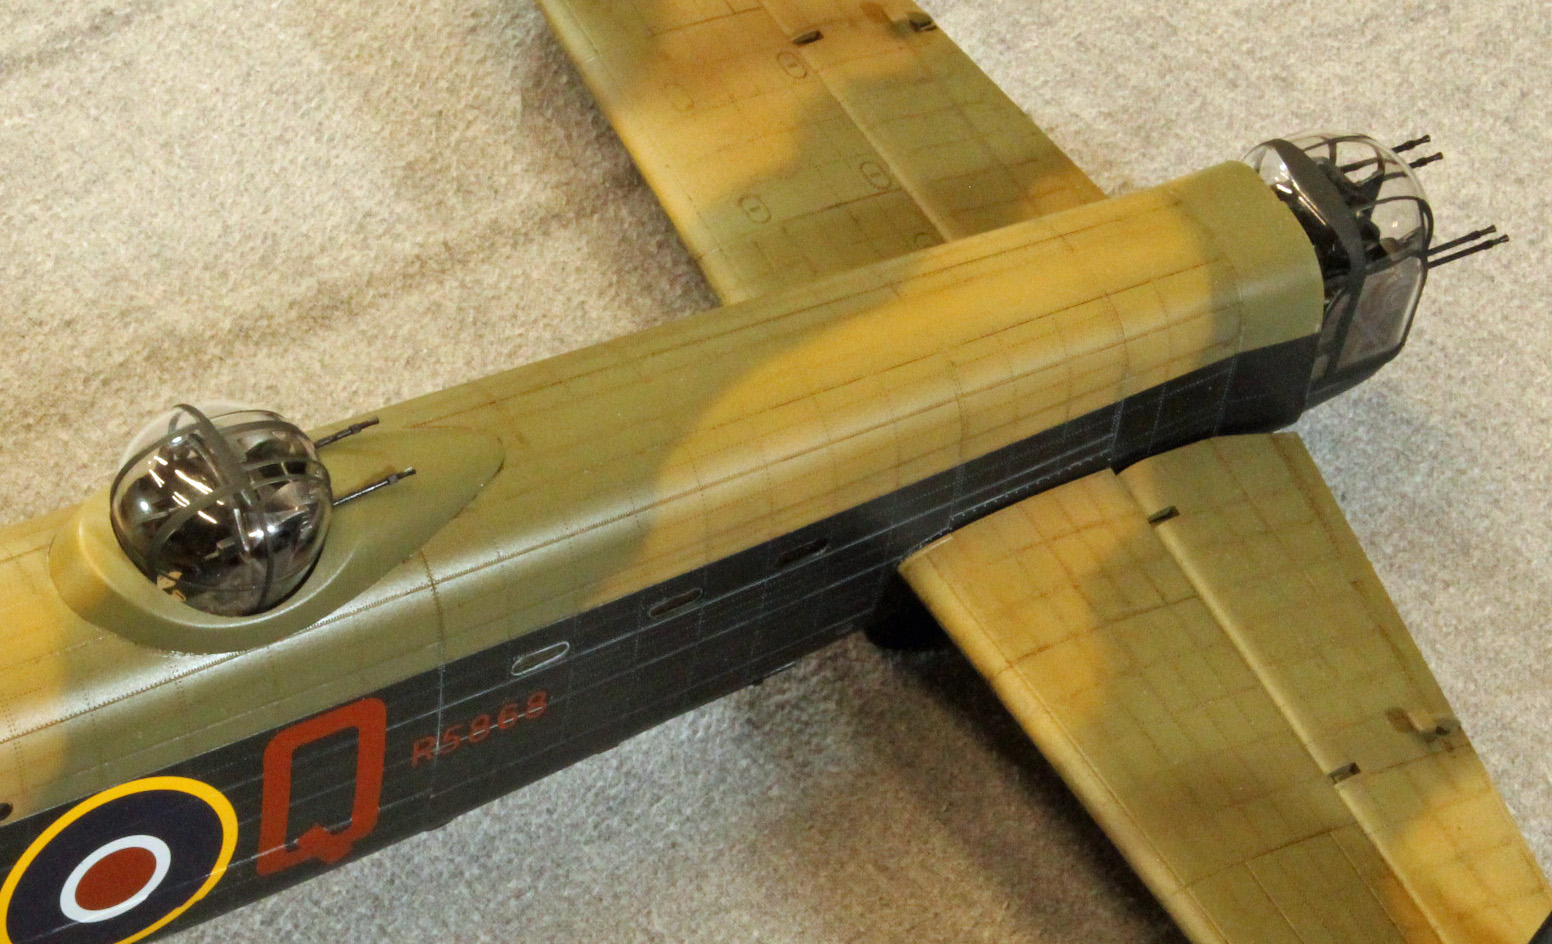
Decals
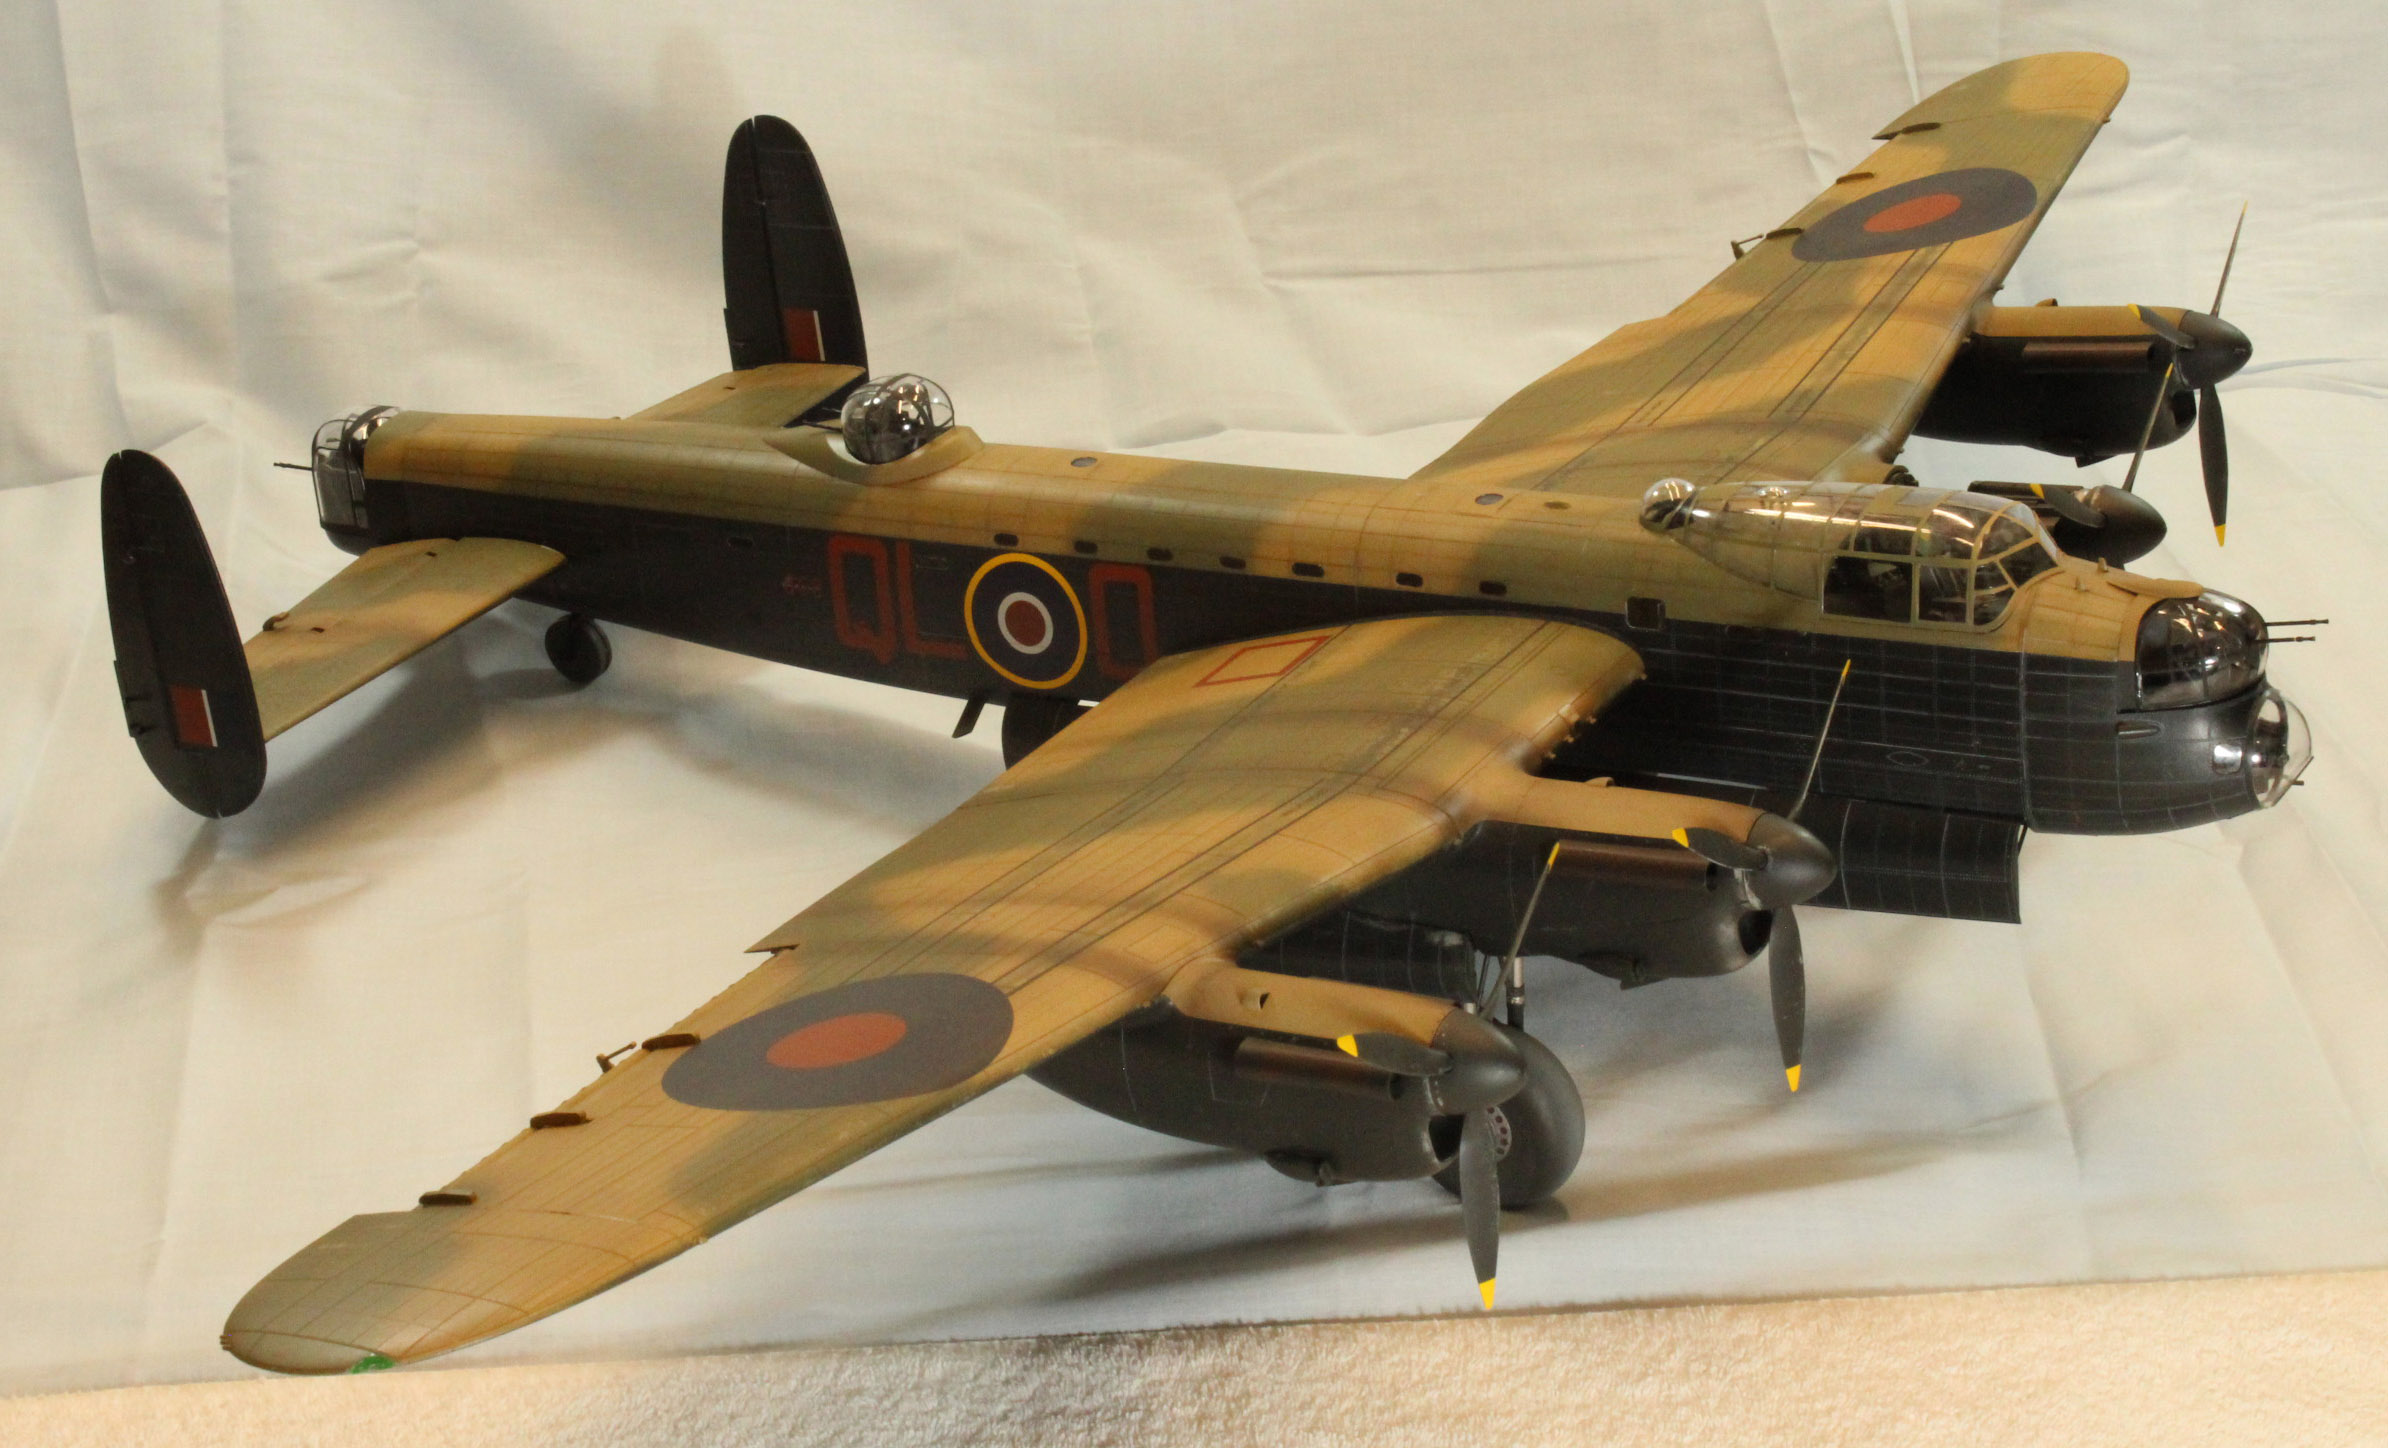
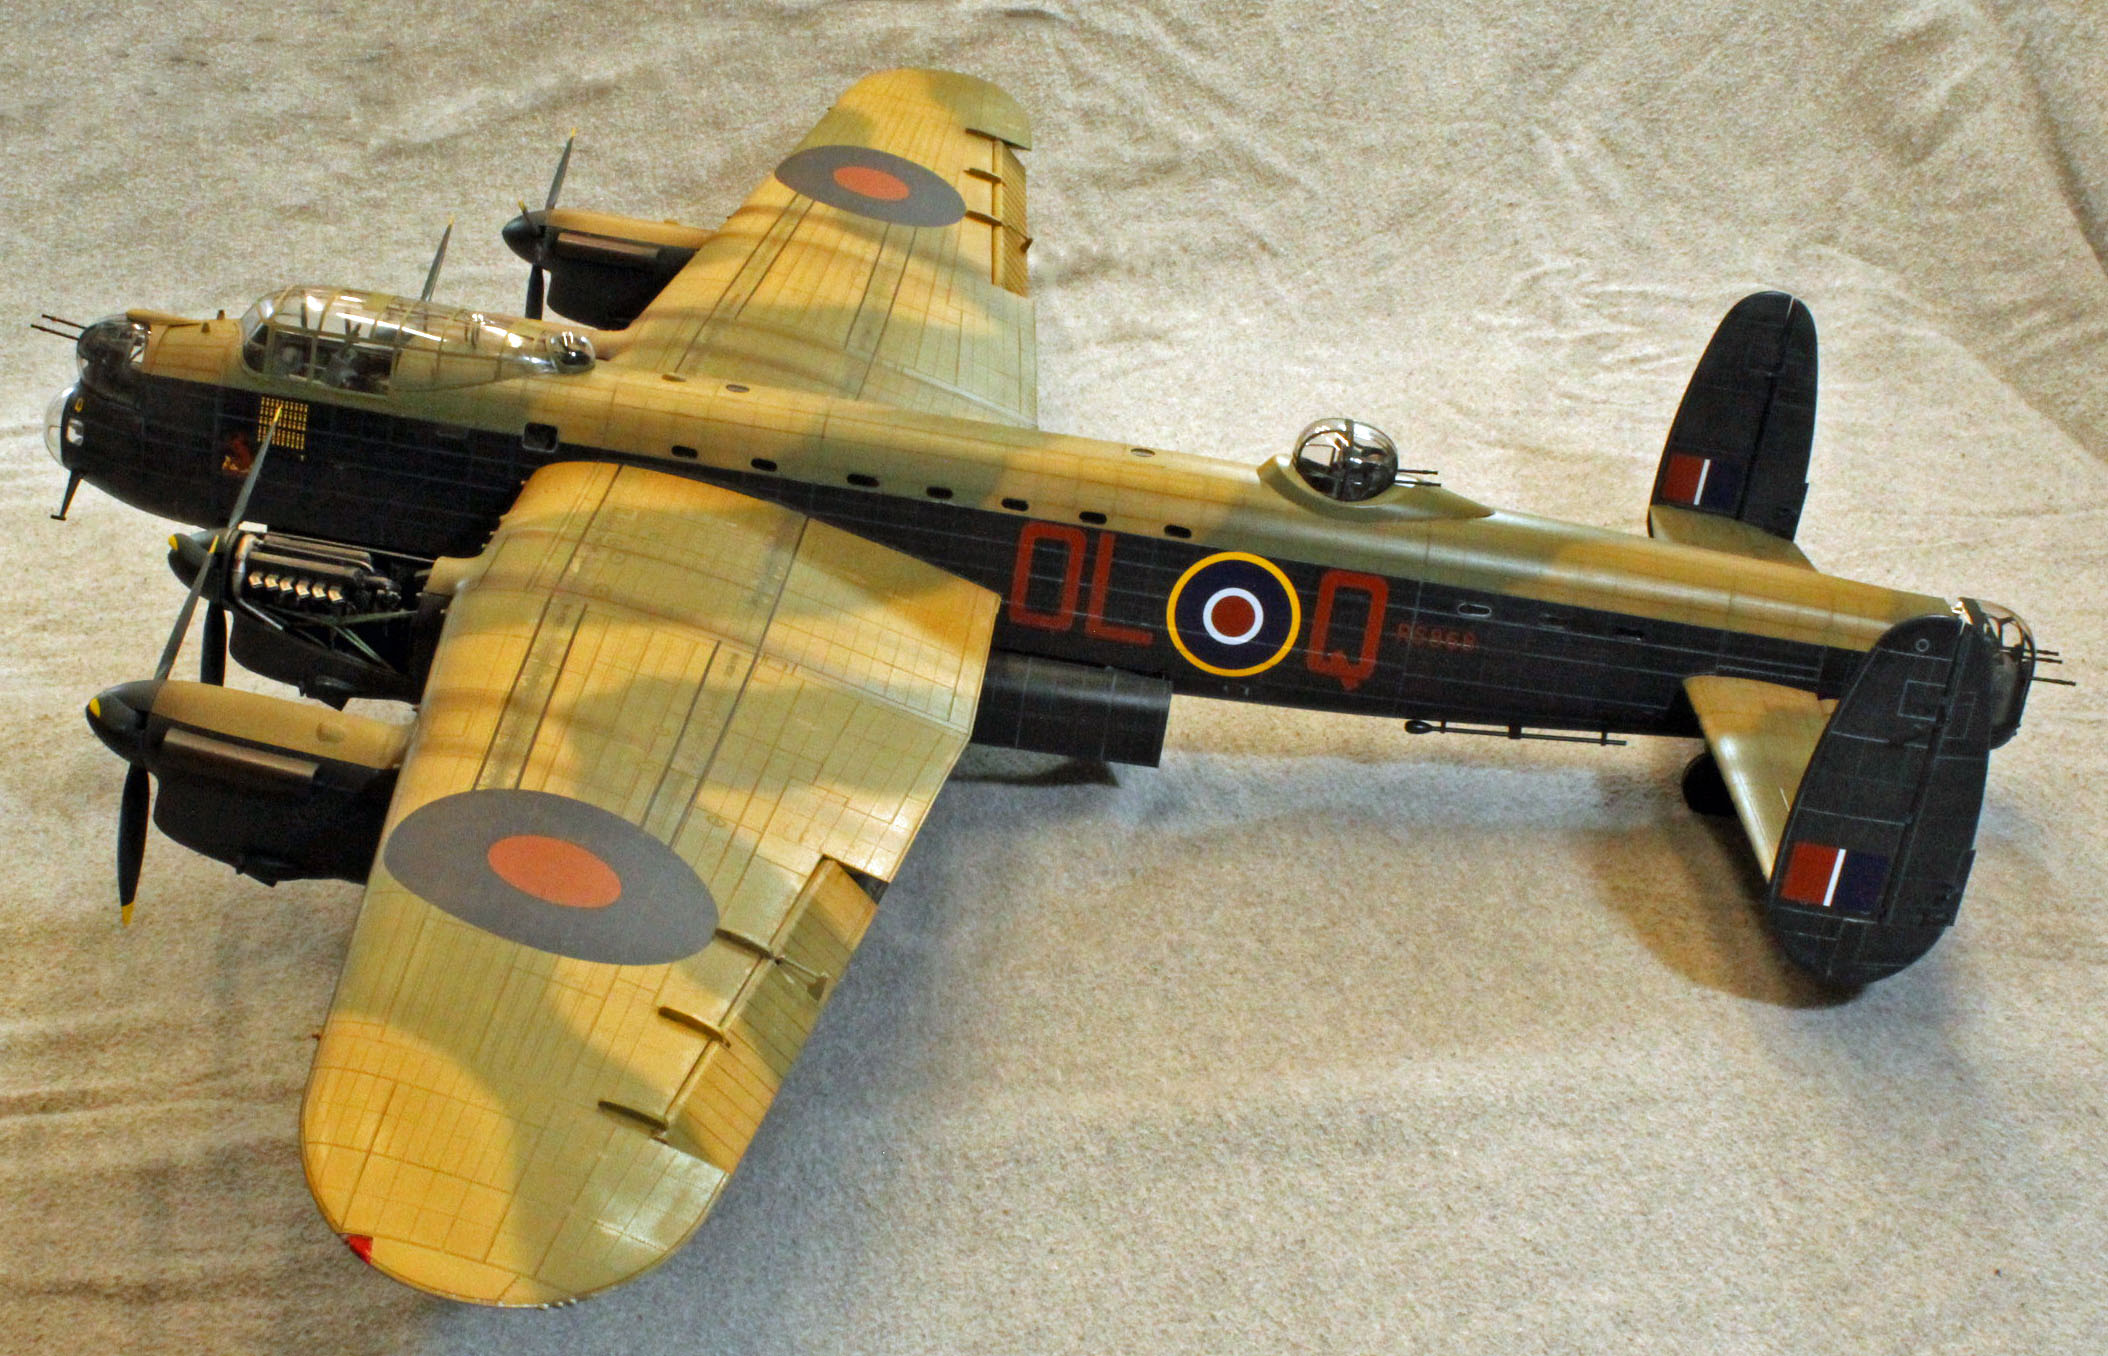
The decals provided by HKM are in perfect register and come on two large, separately-bagged sheets. The colors are vibrant, with the yellows and the reds not too bright. The decals are a little on the thick side, which, in this scale, is a good thing since you’ll want to use the extra time to position the large markings, lettering and stencils. No trimming is necessary as the clear portions are very tight around the edges of the images. The huge wing roundels are easy to handle, and the yellow areas completely cover the dark shades underneath with no bleed-through. There is a good amount of stenciling provided, and wing walks are included if you choose not to paint them. Even though the decals are thick, the edges disappear when applied to a glossy surface.
After shooting the surfaces with a healthy coat of Future, I used the Blue and Red Microsol/Microset system without any problems. The decal thickness required repeated applications of the (Red) MicroSet over some of the more prominent detail, but soon relaxed and snuggled down just fine. Once dry, I gave everything a second coat of Future to seal the decals and prepare the surfaces for a pin wash.
One final note: after all of my precautions in regard to sealing up the fuselage before painting, something, and I’m not sure what, crept up into the fuselage and attached itself to places on the interior of the main canopy, probably adhering to the layers of Future and possibly some Goo-Gone applied to shine things up. In some areas it looks like paint, and in others, like sanding dust. As a result, while this model may have great curb-appeal, an up-close examination of the cockpit prevents it from entering competition. I could pop off the canopy and address the problem, but with the bomb bay doors in place, and a dozen other reasons, I wouldn’t be able to get it back on with a good seal. Lesson learned: you need to SEAL things up and be mindful of what you’re doing throughout the build for anything that could affect the inner surfaces of the model.
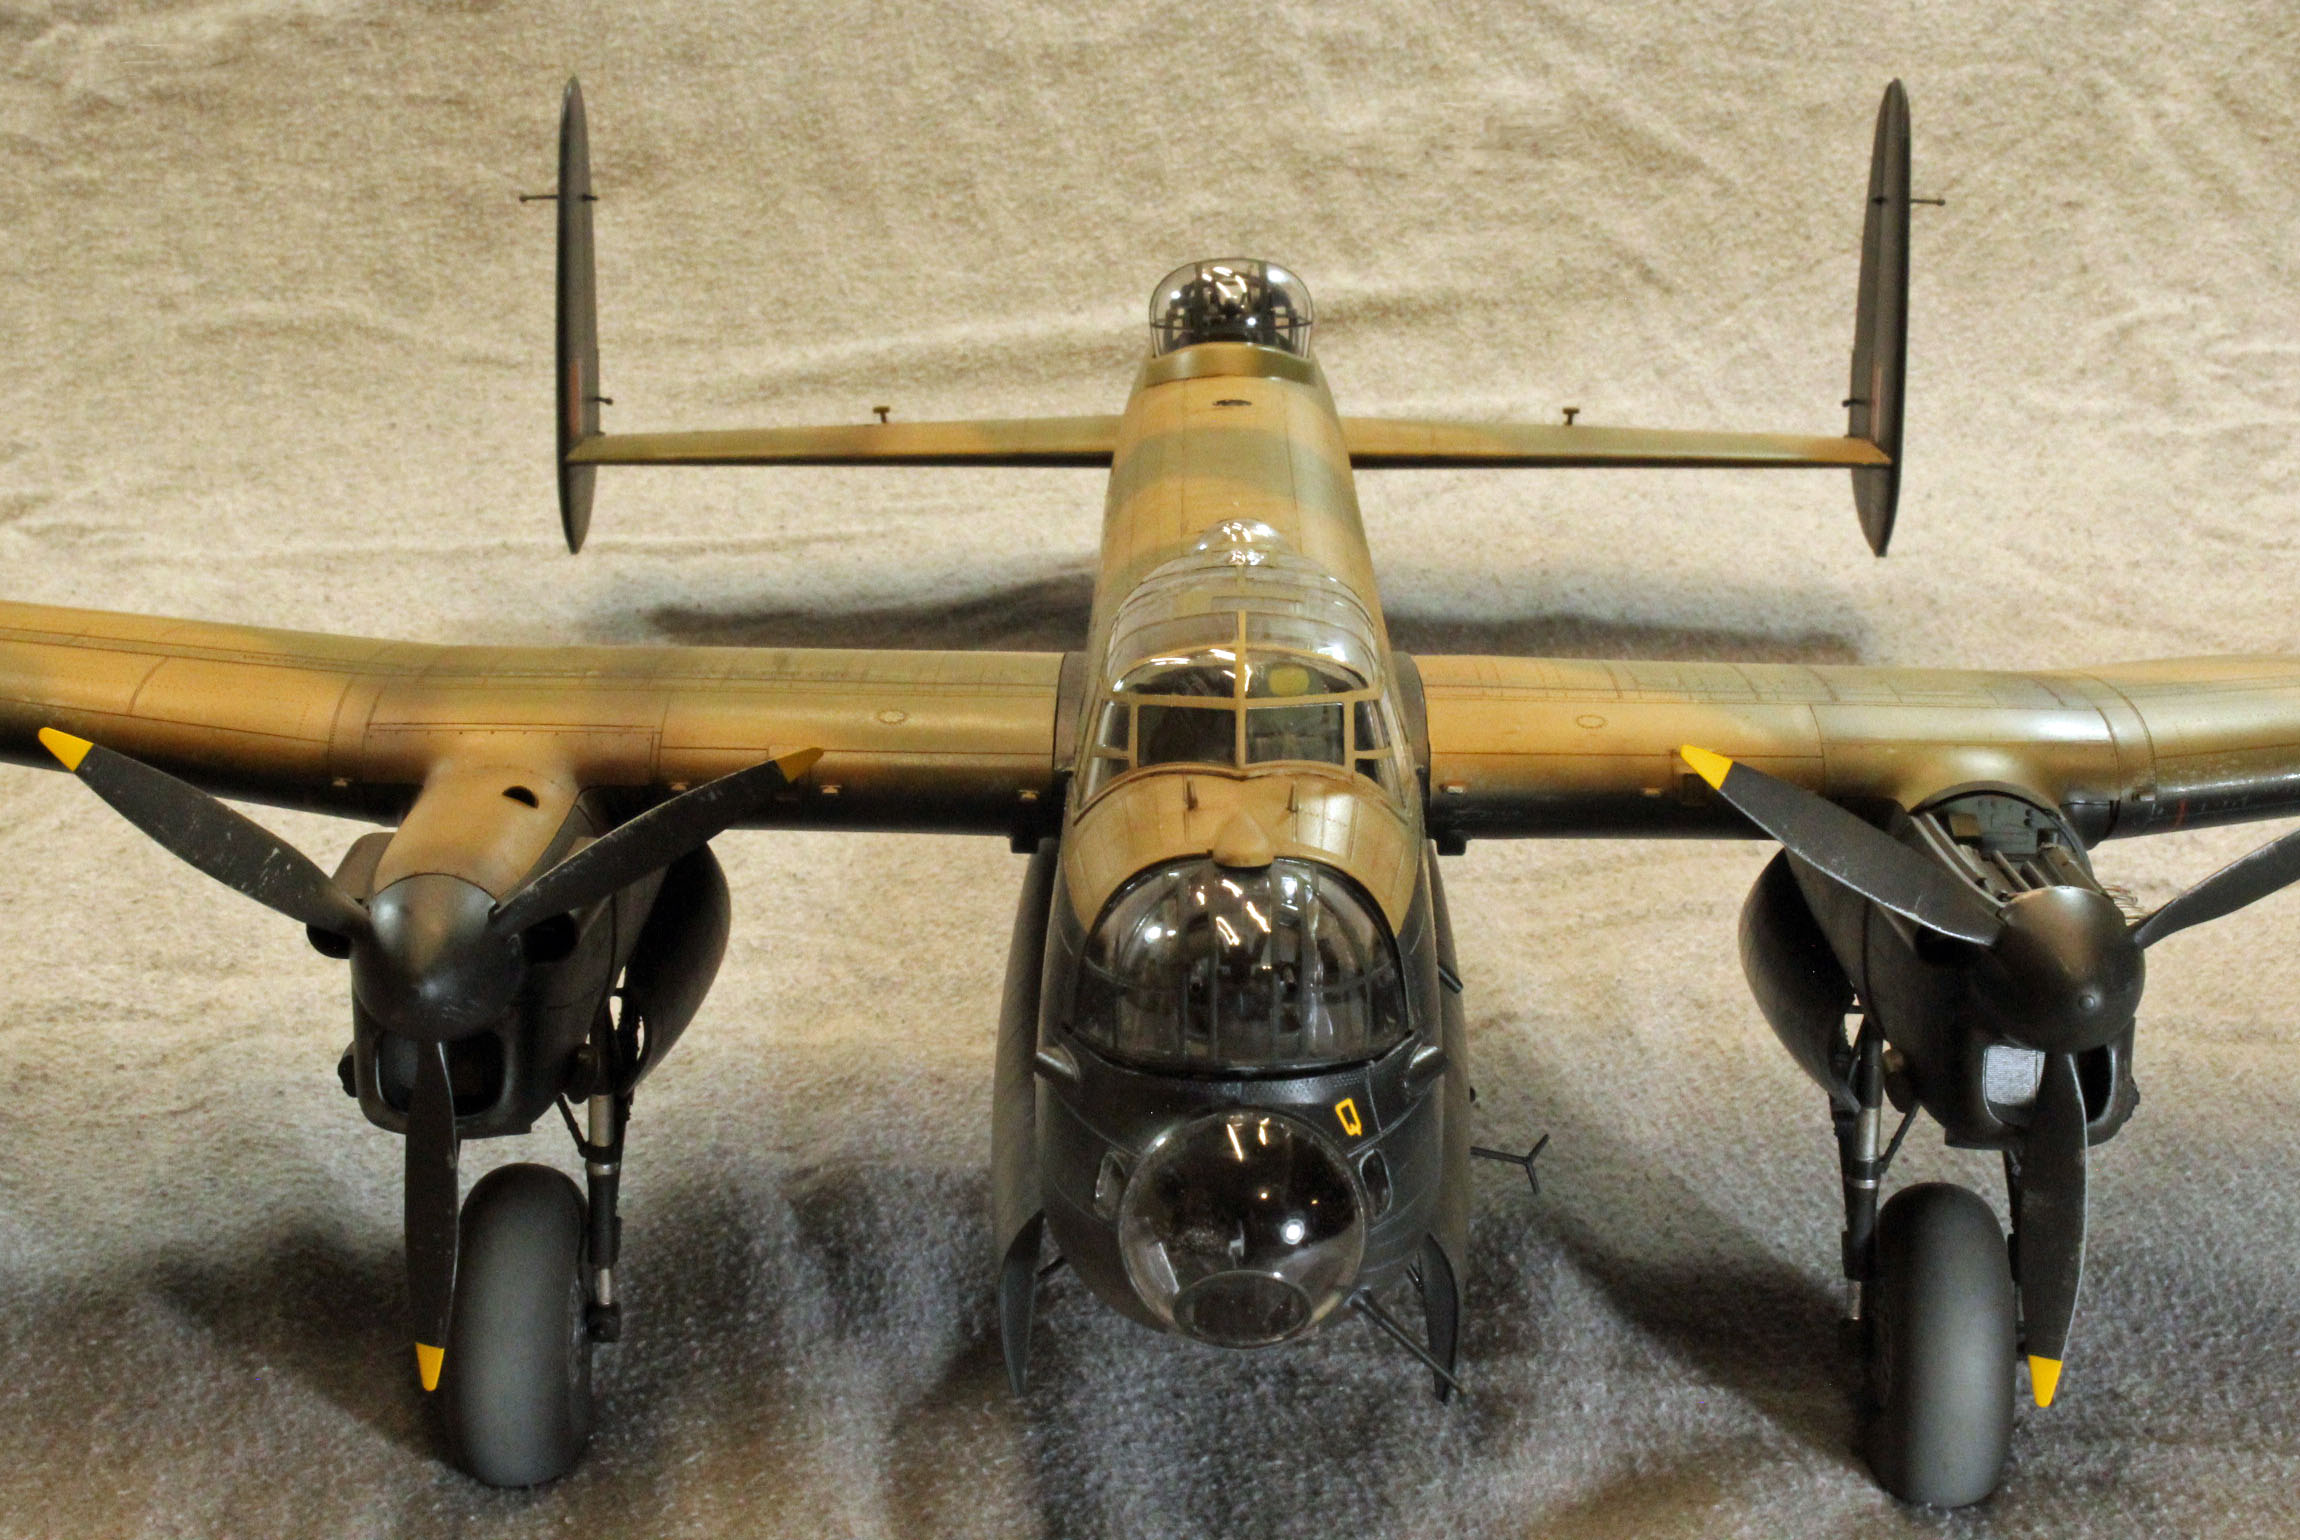
Final Assembly
Once all the main structures had been painted and weathered, it was time to bring this beast together.
Attaching the wings and Tail
I started with the wings since I felt that if I ran into problems, I wouldn’t break everything else trying to fix things. As it turned out, the wings went on ok, but only after I heavily sanded the connection points and applied a little oil to help them slide ‘back’ into place. As I said in my two previous reviews, HKM has designed the wings to be removable for transit and storage, but with the delicate nature of many of the attached parts, ultimately, I cannot see myself trying to remove them once they were on. Just too risky.
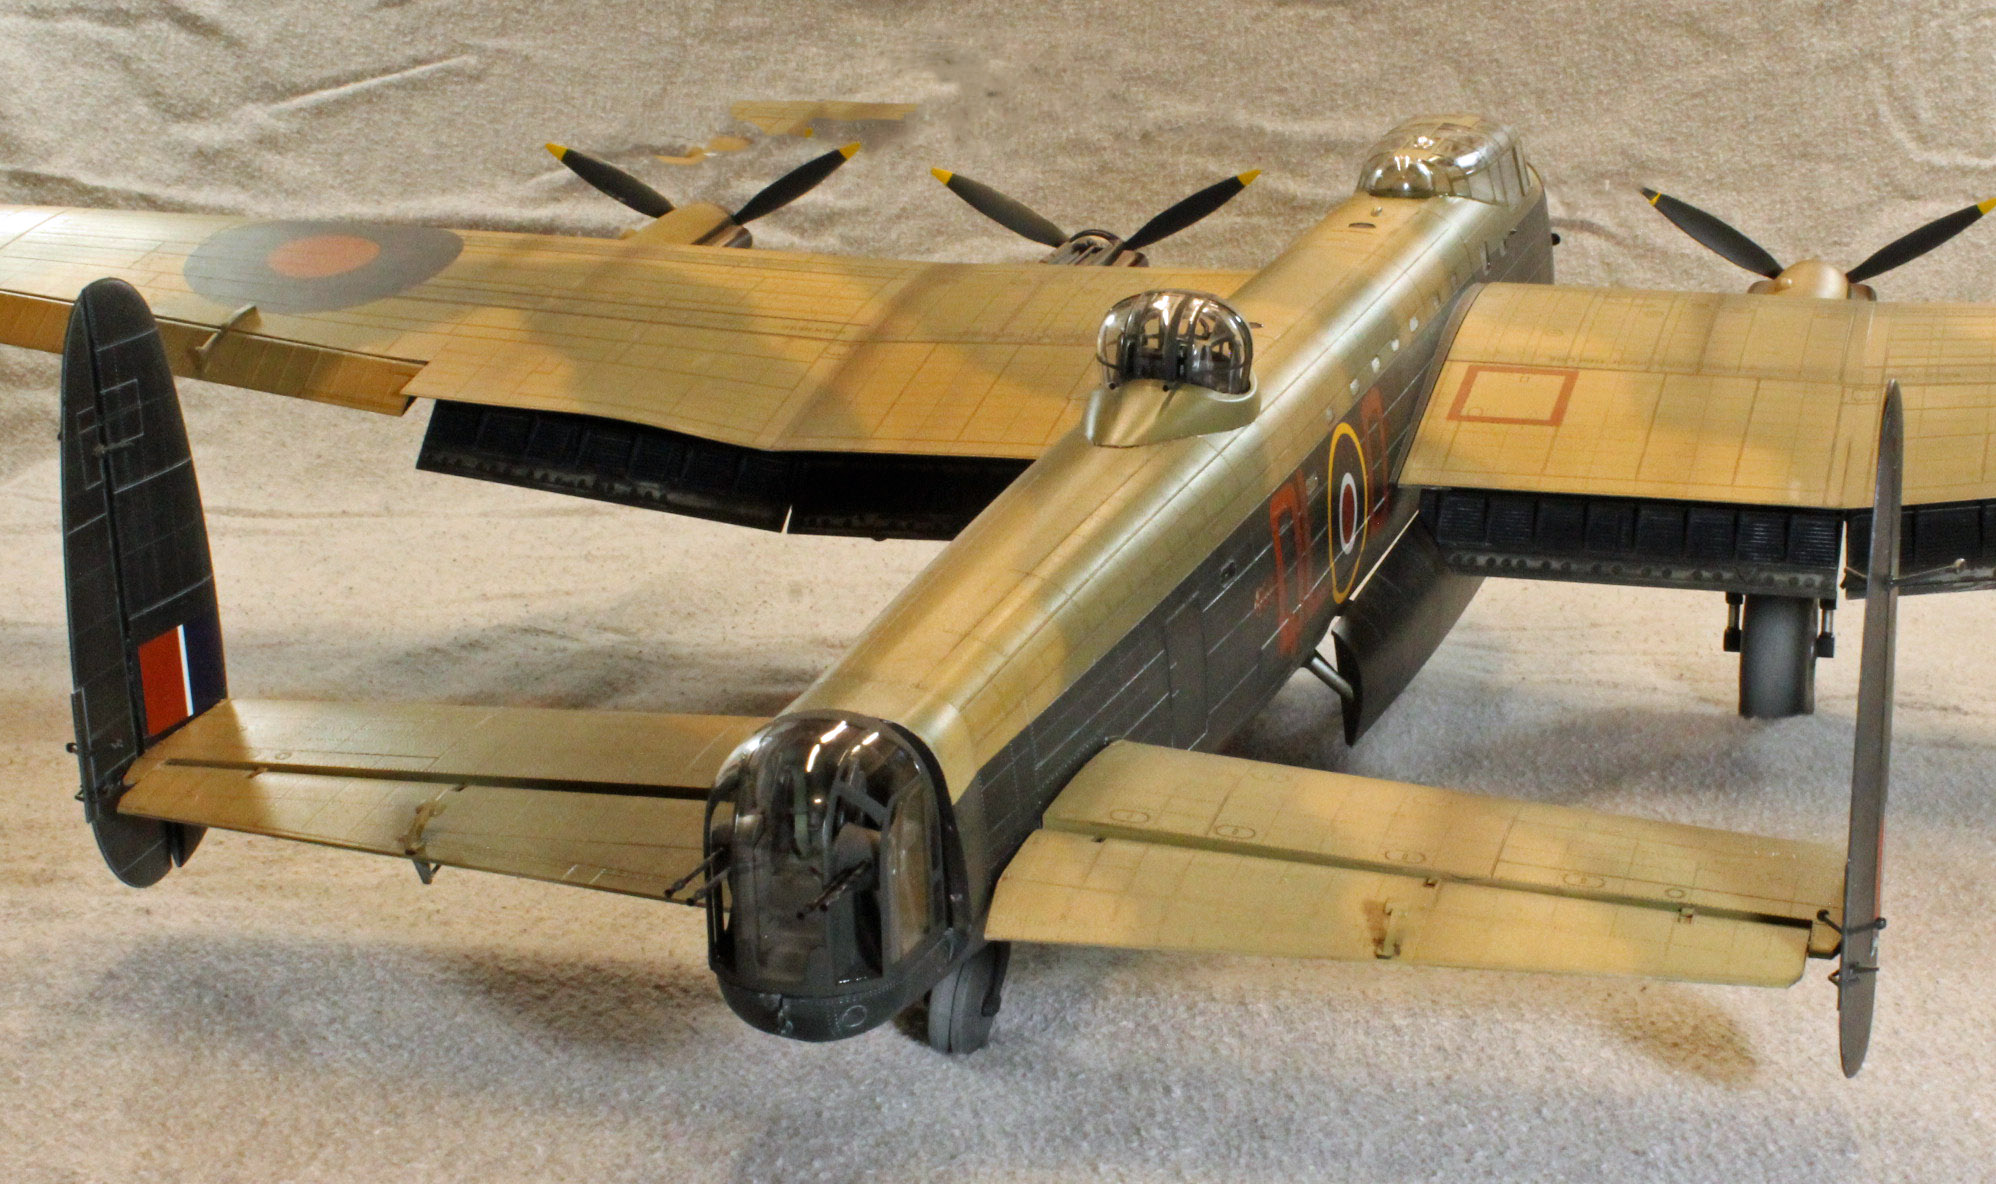
The twin tail stabilizers ‘chunked’ in perfectly, although in my sample copy the starboard stabilizer appears to drop just a little below the horizontal plane. Too bad; the connection for these heavy assemblies is solid, and for good reason – fixing would require some significant surgery to make things perfect.
Everything left up underneath:
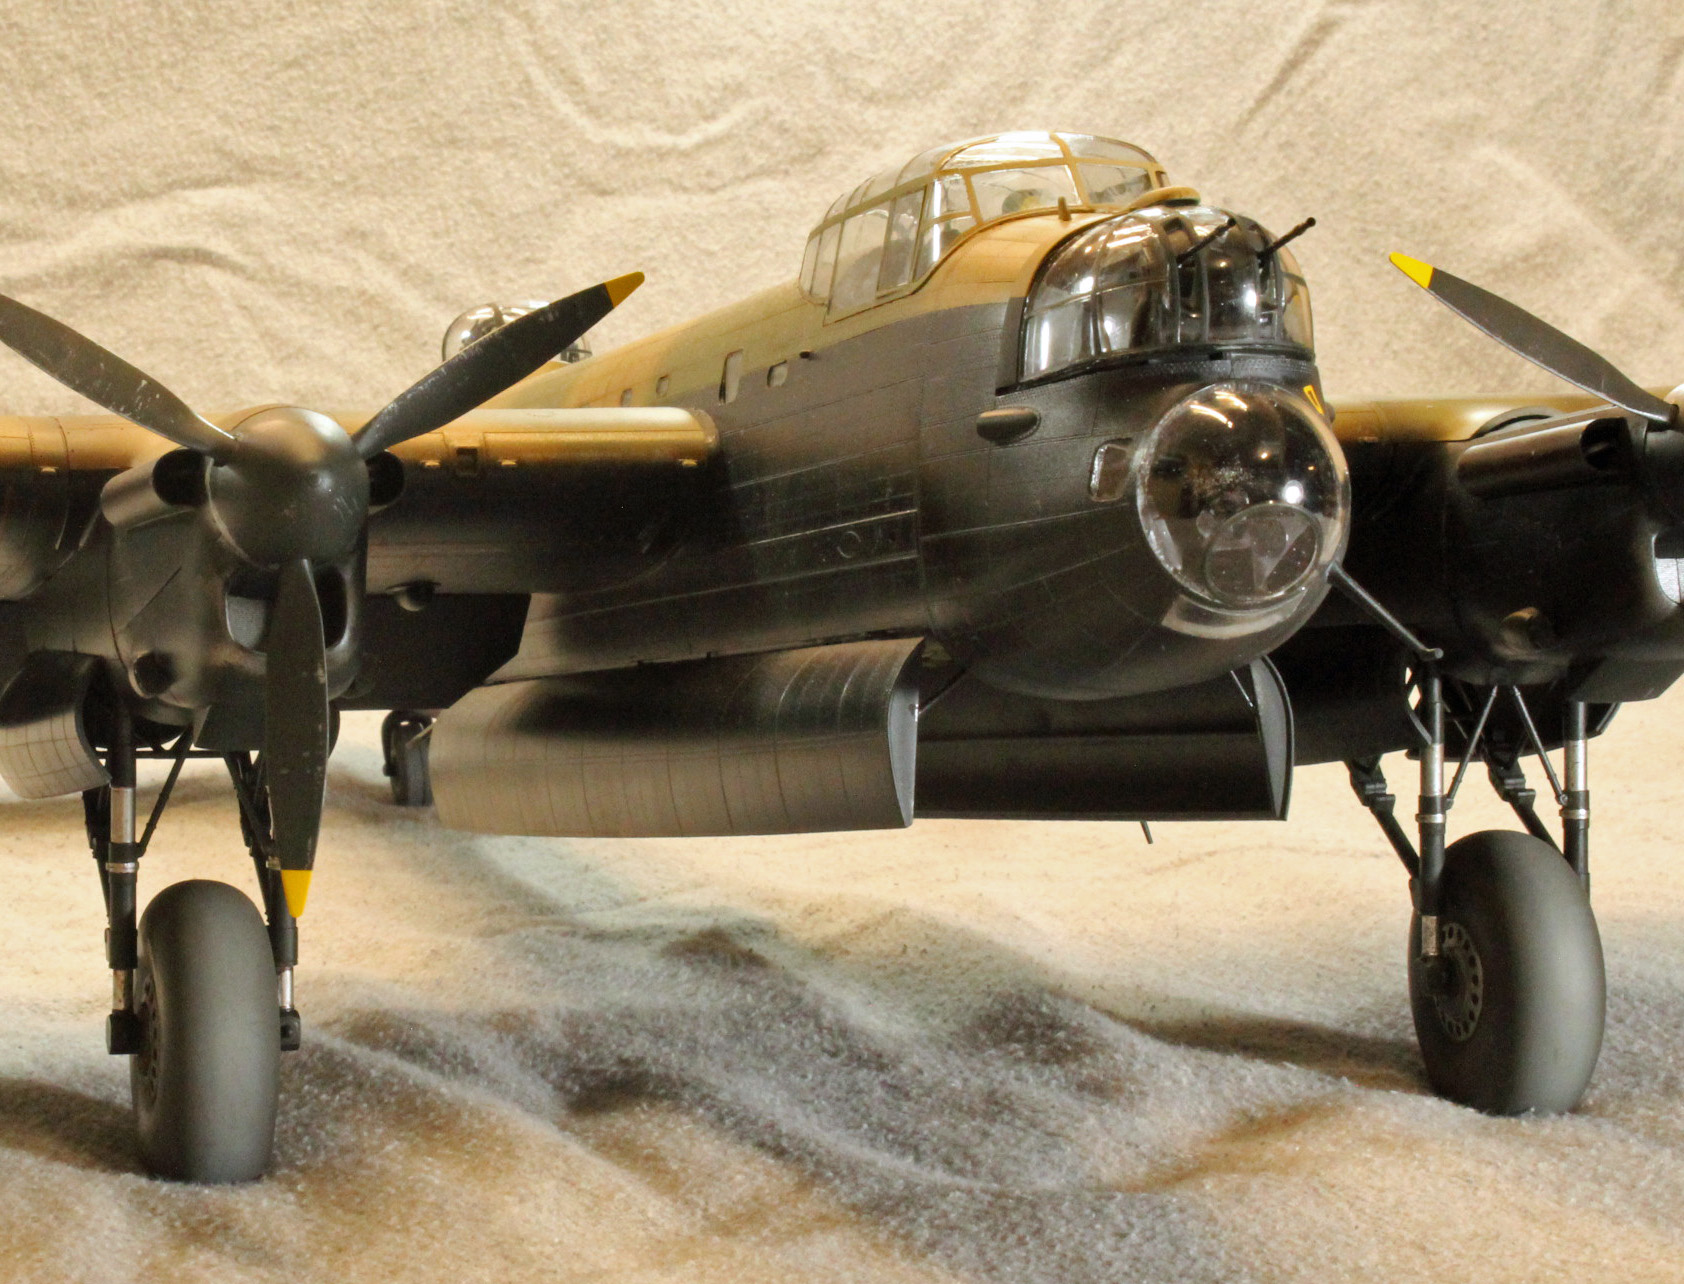
Before continuing, I flipped the aircraft upside down and placed it on a pile of beach towels so I could attach the wheel well doors, the dropped wing flaps and the tailwheel. I then rolled my Co2 tank over to the big table so I could touch up areas with my airbrush - this would be the last time I would see the Lanc on its back so it was now or never. Satisfied I put it back on its three wheels and marveled again at my creation. This model IS HUGE.
Machine Gun Turrets
All three machine gun assemblies are different from each other on the Lanc, and the clear plastic portions are as well. HKM did their homework here as the fit of everything was spot-on. The clamshell clear portions of the front and top turrets fit together perfectly, and the rear turret’s clear portion slid down to meet the base without any gaps whatsoever. Previously I had installed assembly 19-3 (Page 7) upside down, so when it came time to seal the glass I had to snip off the two gun-‘governors’ that protrude out the front of the turret lest they sit right in the gunners view! Not my finest moment.
Part P5 over the nose turret
This little part caused me some consternation. On top and up front, it will be seen by all who look at the finished model, and yet it can only be put in place after everything else is done. Every step in the finishing process that was done to the upper fuselage had to be likewise performed on this little piece, and in that process, I managed to snap the little guy in two – several times! It has to fit over a significant ‘hump’ in the front turret, so the fit is not perfect unless coaxed with some good glue and masking tape.
Wing Navigation lights
There is a small plastic stub representing the light bulb on each of the outer red and green navigation light recesses that interfered with the fit of these triangular, clear plastic parts. I carefully removed the stubs and painted the inside of the plastic parts before seating them perfectly into their reworked receptacles.
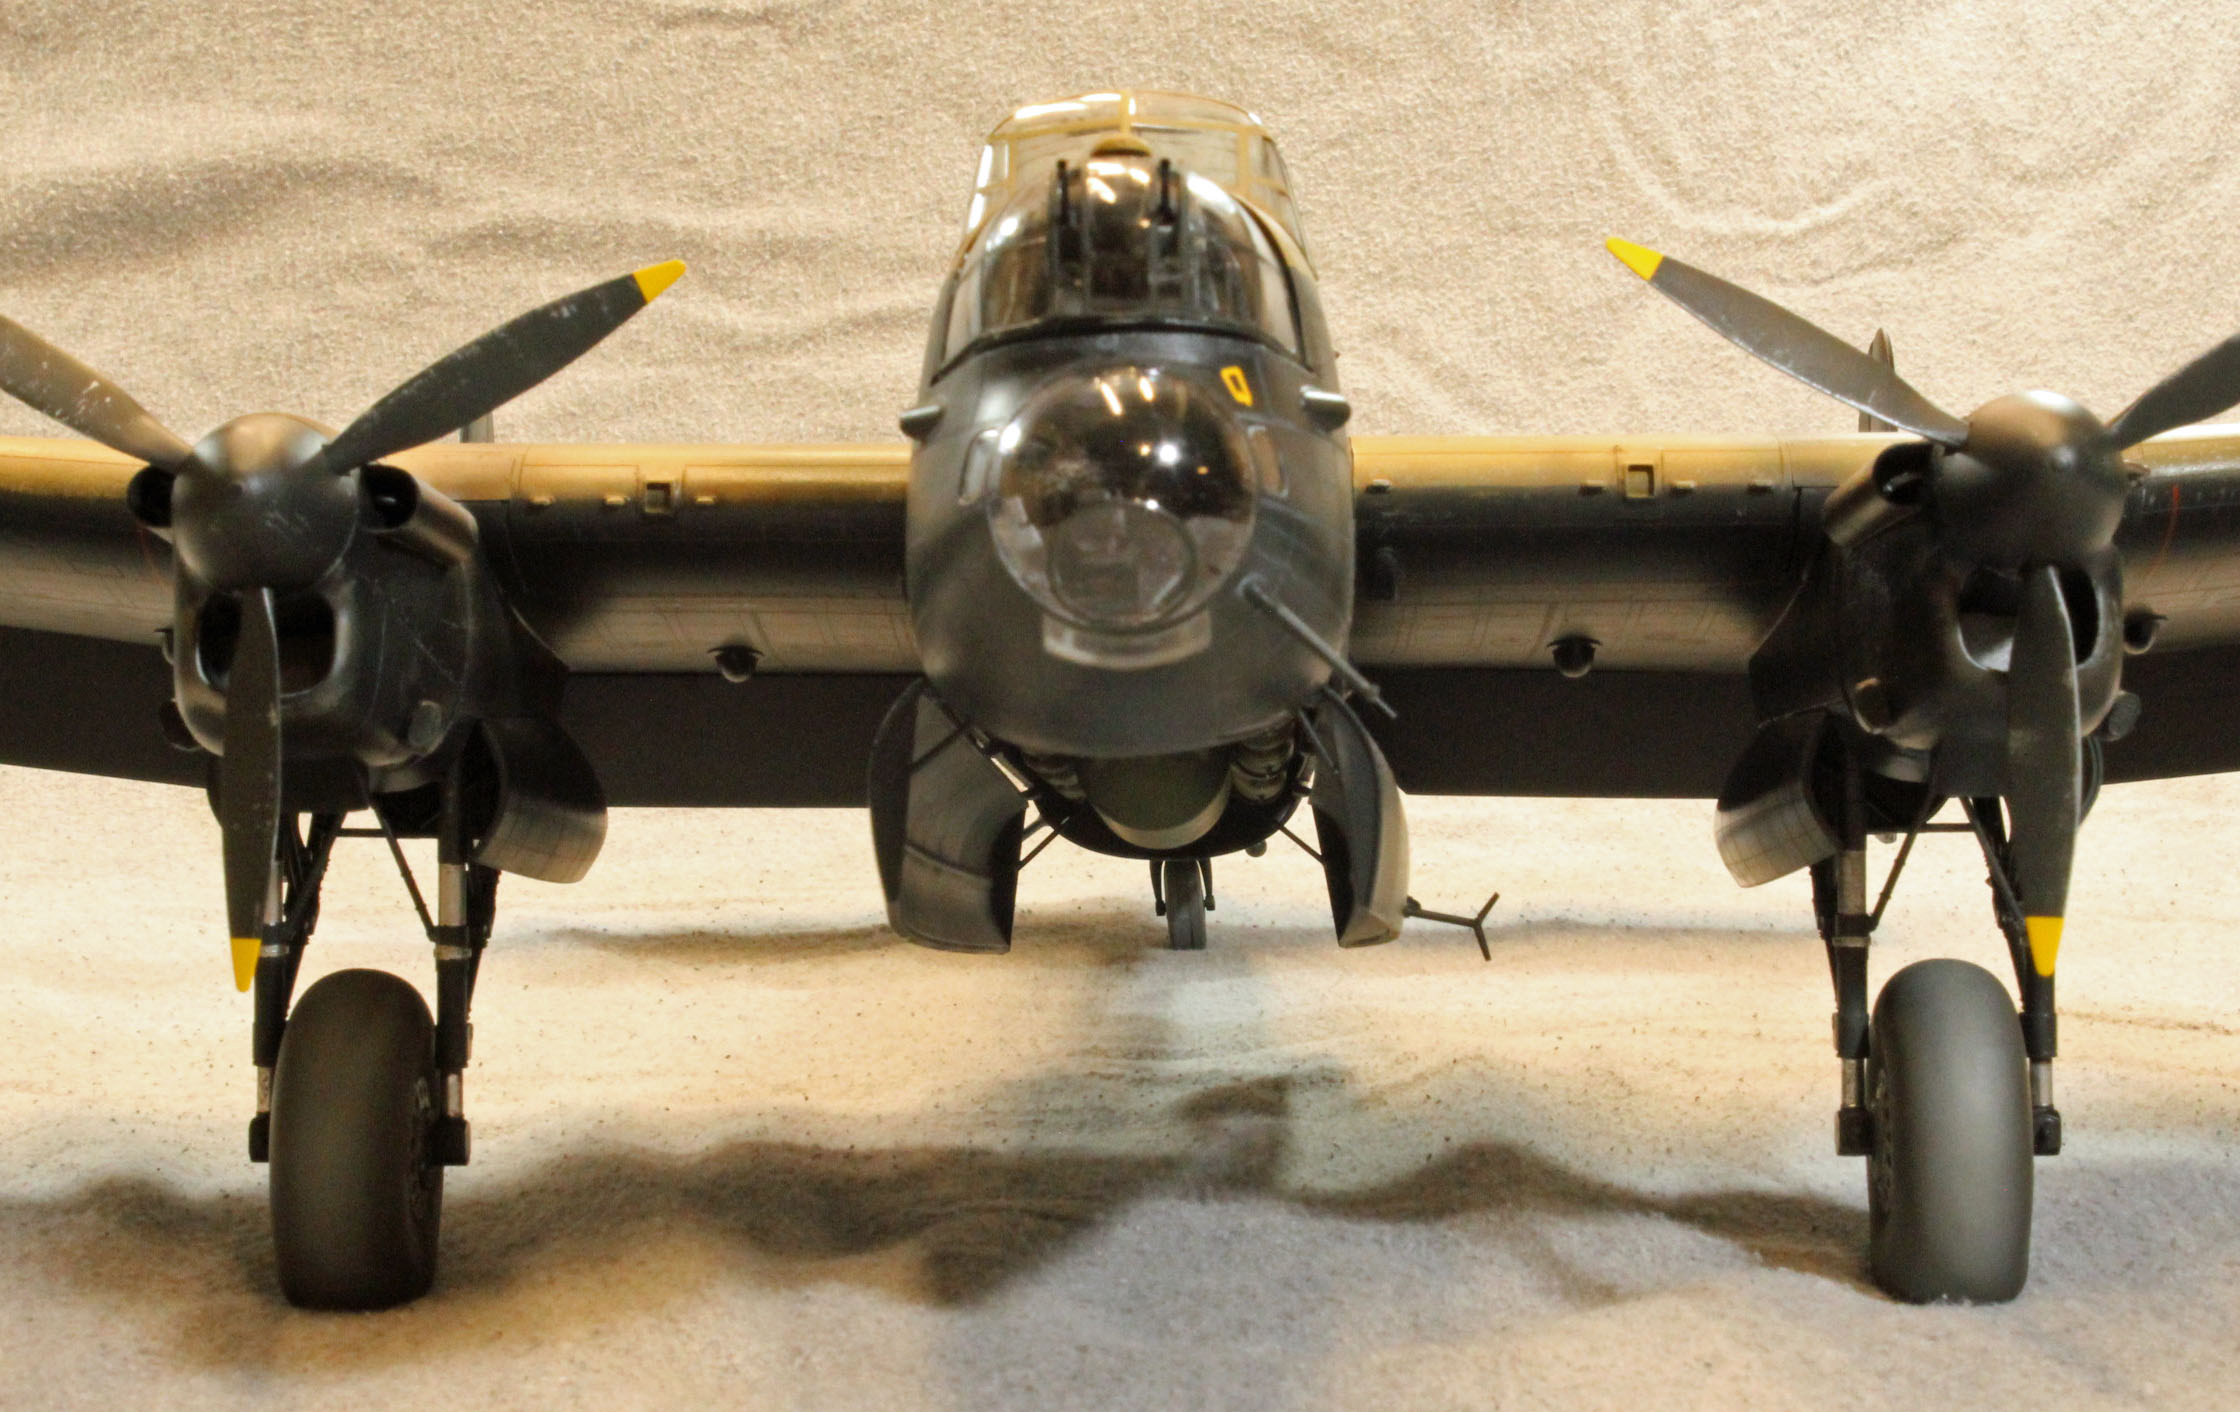
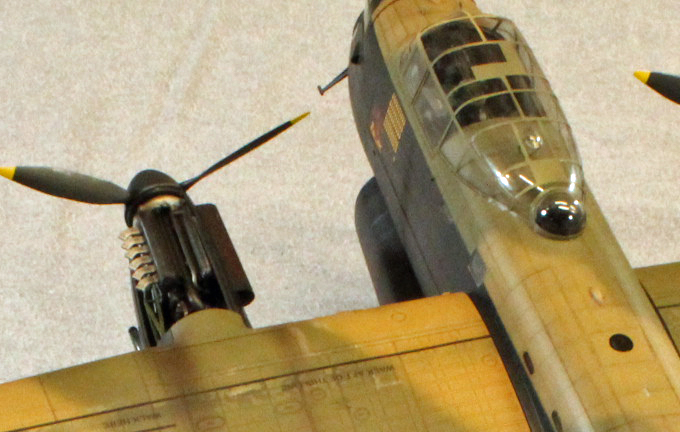
Propellers and Hubs
The last step (!) was adding the four propellers. Two types of propeller blades are provided by HKM, (a slightly pointed set and a set of more angular ‘paddles’), the former being correct for this kit. The blades are designed to fit only one way, and the hubs push on without a hitch. The completed assemblies also push on to the nacelles so well that no glue is needed.
Conclusion
Looking at my hand-written notes across the 43 pages and 83 steps of instructions, I remember now what a considerable project this was, start to finish. HKM did a great job with the instructions – I never once felt lost or overwhelmed. With a few exceptions, the fit was flawless and the assembly and finish brought forth all the positive energy I look for when I build a model – the big HKM Lancaster was never once a chore.
That said, I had two significant problems; the first was with the fit where the parts came together above each inner engine nacelle of the aircraft. I cannot guarantee that this was a flaw in the design and engineering of the kit, or simply an error on my part. The second problem was all about working with a model of this size (which was definitely not a flaw in the kit). Working through each of these challenges, however, forced me out of my comfort zone, and therefore helped to improve my skillset, which is always a good thing.
If one was able to get through these two issues, a novice could build the rest of the kit. Assembly is straight forward, the plastic is workable and forgiving, there is very little photo-etch or other quasi-exotic materials used, and as I said, the instructions and images are excellent. What’s more, the decals are high-quality, thick, and go on with ease. After-market products have now emerged to assist in some of the more tedious tasks, such as cockpit detailing and canopy masks. After-market landing gear is also available, but I feel the design and parts provided in the kit by HKM themselves are up to the task.
Painting and finishing the Lancaster is another matter, and apart from some unusal examples, all Lancs are finished the same. Fortunately, every modeler is different and can take that part of the project as far as they want to go with it. The sheer size and weight of the model takes some getting used to - properly designed jigs are a must-have. The other key to a nice finish is planning. I suggest you do as I did – write out all the steps required in detail, starting with dipping the canopy in Future though pushing on the four propellers at the end, moving steps around as you go. The extra work will really pay off in the saved time and effort. One thing is certain - when you are finished you will have an awesome model of an awesome airplane on your hands, combined with a huge sense of accomplishment.
I recommend this kit to all modelers, but only if they are up to the small challenges that a kit of this size, with so many parts and options, has. As always, I suggest that you make your big decisions up front. Build some nice jigs, spend the time to carefully clean the parts thoroughly once separated from the sprues, and dry-fit everything. Try to remember to slow down, use your references, and by all means enjoy yourself. This is a great kit, and a great hobby!
I would like to warmly and heartily thank Hong Kong Models for providing this kit for review, and to IPMS USA for giving me the opportunity to review it.