.jpg)
Reviews
Armor
M36B1 Jackson
by Eric Christianson
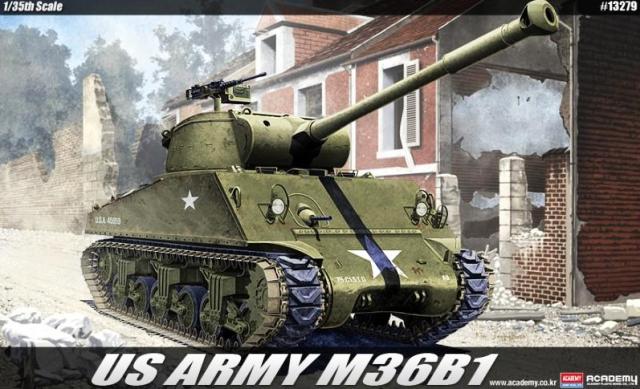 Model: Academy M36B1 Jackson
Reviewed by: Eric Christianson, IPMS # 42218
Scale: 1/35
Company: Academy Models
Price: $55.00
Product/Stock #: 13279
Website: Academy Models
Product Web Page: View
Product provided by: Stevens International
Summary
Academy is back again with another version of the venerable M36 Jackson, proving they are still the go-to source for models of late war U.S. tank destroyers in 1/35th scale. This kit contains parts for the M36B-1, which has been redesigned to be equipped with a 90mm turret on the vehicle body on the M4A3 Sherman, a new sheet of photo etch for the light guards, a new engine deck, VVSS suspension and T48 caterpillar track. As with all of their tank destroyers, Academy provides a lot of detail inside the open turret, as well as hatches that can be posed in the open position, with interior (hatch) detail.
Background
The M36 Jackson, formally ‘90 mm Gun Motor Carriage, M36’, was an American tank destroyer used during World War II. American soldiers usually referred to them as TDs for 'tank destroyers'. The M36 first served in combat in Europe in September 1944, and served until the end of the war; it also served during the Korean War, and in the armies of several other countries.
With the advent of heavy German armor such as the Panther and Tiger, the standard U.S. tank destroyer, the 3in Gun Motor Carriage, M10, was rapidly becoming obsolete. Its main armament, the 3in M7 gun, had difficulty engaging these new tanks past 500 yards. Like all US tank destroyers, the turret was open-topped to save weight and provide better observation, with a large bustle at the rear of its turret which provided a counterweight for the main gun. Eleven additional rounds of ammunition were stored inside the counterweight.
It was not until September 1944 that the vehicles first began to appear in the European Theater of Operations. The need for 90 mm-gunned tank destroyers was so urgent that, during October–December 1944, 187 conversions of standard Medium Tank M4A3 hulls, designated M36B1, were rushed to the European Theater of Operations and used in combat alongside standard M36s. The M36 was well liked by its crews, being one of the few armored fighting vehicles available to US forces that could destroy heavy German tanks from a distance. In an engagement with a German Panther tank at 1500 yards, a M36 of the 776th TD Battalion was able to penetrate the turret armor. Crews of the M36 found that it was better to target the turret rather than the glacis plate. In addition, crews found the Panther tank to be vulnerable when hit from the side
What's in the Box
- 10 sprues of soft, dark green plastic
- 2 lengths of black, one-piece ‘rubber-band’ track
- 1 piece of white twisted cotton string
- 1 small sheet of decals
- 1 small sheet of photo-etch containing optional headlight grates
- Separate upper and lower turret, and lower hull, individually wrapped
- Two separate instruction sections, totaling 12 pages with 20 steps, printed in black and white ink.
The slightly thick decals are printed by a company out of Korea, and are in perfect register. Two three-view drawings are included, representing two color schemes, both described as ‘Unknown area, early 1945’. Paint product callouts include Humbrol Enamel, GSI Creos Acrylic, GSI Mr. Color Lacquer, Life Color, Testor/Model Master Acrylic and Enamel, Revell Acrylic and Enamel, and Vallejo Model Color and Model Aire.
Things to consider before starting
Academy provides a lot of wheel options, including optional drive sprockets and return rollers. I suggest you separate what you want to use and move everything else far away. Things can get confusing otherwise. Academy thoughtfully provides the rubber portion of the wheels as separate parts to help with painting and finishing. If you choose to paint them separately, however, you will need to consider several painting steps before assembly, and then mask the bogies before painting the rest of the vehicle (or leave them off until the end). I did not paint the wheels and tires separately in this build.
In Step 6, you will need to widen the M4A3 turret ring to accept the larger M36 turret. What seems like a lot of work goes by quickly since Academy does half the job for you by providing a deep cut-line on the inside of the turret. I suggest you do this first thing out of the box to get it out of the way.
The Instructions
Academy is generally pretty good with their instructions, with some exceptions which are pointed out where appropriate below. Since this kit is a re-release with some new parts, the instructions came in two parts, which was awkward. I separated all the pages and stapled them together to compose a coherent assembly sequence. On the good side, there is an excellent parts map, and a comprehensive set of paint callouts is included.
Construction
Lower Hull and suspension
Construction begins with the lower hull and suspension. Academy includes two options for the wheels (both early ‘wagon wheel’ types and later, solid types), and two options for the return rollers and drive sprockets as well. No surprises here; each bogie comes together well and the fit is perfect. The bogies assemble and attach in a way that allows them to be articulated for uneven surfaces.
Main Deck
In Step 8, you can choose to use the five, over-scale plastic headlight protection baskets or photo-etch replacements. Because of the odd shape of the baskets, the PE versions are no simple affairs. I went with the original plastic versions to save time but in the end, I wish I had gone with the PE; the plastic baskets are really thick and boxy and don’t look very good.
Academy provides detail on the inside of the two front hatches, and they can be posed in the open or closed position. There is no detail provided inside the hull, however.
There are ‘cheat lines’ all over the model to assist in placement of various parts. Most are ok – the parts that fit there hide the lines. There are four squares (2 in the center of the front hull to the left of the machine gun and two in the upper corners), however, that don’t receive any parts and should be sanded off before painting.
Turret
Academy includes some nice detail inside the open turret, and a good start for those who wish to super-detail it. There are two noticeable ammunition racks that have holes for the rounds but that’s all. I went to my spares box and found six PE ‘ends’ and glued them over six of the holes, leaving the rest empty.
Likewise, there is a wire spool attached to the inside of the turret that comes empty in the kit. I wound some ‘hairless’ string from my spares box to the spool to simulate cable.
I stopped at Step 15 to paint the inside of the turret before joining the top and bottom sections. See the ‘Painting’ section, below, for what paints were used.
Two barrel options are provided; both are two-piece ‘split down the middle’ affairs, one with a flash suppressor and one without.
In Step 18, the instructions show to attach Part O36 – but that part does not show up on any of the drawings and looks a lot like the rear end of the turret cover that adorned the M36 post-war (also not called out in the instructions). The same goes for Parts O31 and O32 – except that these two parts don’t fit around the turret provided in this kit. They come close, but are clearly made for another version. I skipped Step 18 altogether.
Academy ‘Accoutrement’
One thing I always like about Academy kits is that they include a variety of extras that are optional in the build, and this kit is no exception. Three different pedestal machine guns are there (two 50cal and one 30cal), four fuel cans, three water cans, at least five ammunition boxes, one crate, and a tow cable (made of twisted cotton string). I used one of the 50’s, two ammo cans and the crate, and tossed the rest into my spare parts box.
The Track
The two runs of track in this kit are made up of black, rubber-band style plastic with attached outboard grousers. Strangely, every 2 inches or so on the outside of the track there is a small rubber ‘bump’, or a clearly visible hole left behind by the bump – probably due to some manufacturing issue. Some modelers will want to replace the track with an aftermarket product simply for this reason alone, since filler is not practical with this material. I decided to ‘weather’ my way to a solution and did so.
Academy track is the kind that you must melt rubber ‘pins’ with a hot knife or screwdriver to attach the two ends of the track together. The problem is, with the high track tension common to American tanks like the M36, the connection will invariably fail. If not when you first stretch the track around the drive sprocket, then later, when your model is sitting on the bench. I had to take out my trusty stapler I keep around for just this type of repair and add two big staples to keep things together - which means this model won’t be entered into any competition no matter how good I am at hiding the staples. There are just too many options for track these days to continue to rely on this outdated design. In my opinion.
Painting and Finish
The M36 is going to be green, U.S. Army green. I wanted to try a whitewash, however, so my Jackson will sport a white winter coat over that green.
Track
I started out with a primer coat of Gunze Mr. Finisher 1500 Black followed by a filter coat of AK Interactive Track Wash that I applied by hand. Once that was dry and de-gassed, I highlighted the teeth, track edges, and the wheel paths with a Q-tip soaked with Model Master Dark Anodonic Grey enamel. Finally, I added Mig pigments to dirty them up a little.
Turret Interior
After finishing Step 15, I stopped to paint the turret interior. After giving everything a pre-shade coat of Gunze Mr. Finisher 1500 Black, I sprayed a light coat of the Vallejo Model Air 71.016 U.S. Dark Green, and then went about detailing the interior using Vallejo Model Color and Panzer Color Paints. (Note: For hand-brushing Vallejo paints, I put a drop of Vallejo 597 Slow Dry and a drop of water onto an old CD and then single drops of all the colors I will need. I mix the colors with the water and slow dry until the paint flows smoothly off a red sable brush.)
I painted the wooden portions of the seats and cushions 312 Leather Belt, and then dry-brushed them with Model Master 2103 Afrika Dunkel Grau. I painted the fire extinguisher 73.605 German Red Brown Surface Primer. The rolled up tarp was painted 314 Canvas. I then gave everything a filter coat using Mig Wash Brown and Mig Dark Brown. After the detail was painted, I went over the edges with a silver quilters pencil to bring out the metallic ‘bling’, focusing especially on the floor and breech block. Once I was satisfied, I stuffed the turret opening with tissue to protect the work done so far and carried on with the build.
Machine Gun
I started by hand brushing the gun Tamiya Flat Black - the only time I ever use flat black. I then painted the wooden parts with Vallejo Panzer Aces 312 Leather Belt. Once the paint was dry, I dipped an artist’s color shaper into some metal polishing powder from a company called USCHI (www.uschivdr.com) and rubbed it into the surface. The more you rub, the higher the shine.
I painted the ammunition case Model Master Faded Olive Drab and used a silver quilters pencil to highlight the edges of the case.
Finally I gave everything a filter using Mig Wash Brown thinned with Mona Lisa.
The rest of the model - Primer and Pre-Shade
I started by airbrushing a primer/pre-shade coat of Gunze Mr. Finisher 1500 Black to give the plastic and PE some grip for the following coats, and to fill in the recesses and create a shadow effect near the flat surface edges, adding depth for the subsequent coats to come. Since I would be using acrylics, I gave the Gunze lacquer plenty of time to de-gas.
Using Vallejo Paints with a (syphon-feed) Pasche H Airbrush
In my continuing transformation over to true acrylics I chose to use Vallejo Model Air colors on my Jackson. I went through a bit of experimentation up front, but eventually found them to spray beautifully once I added a single drop of Liquitex Flow Aid and a good squirt of Vallejo Air brush Thinner to each cup. I found that this recipe works well for any type of Vallejo paint, not just the Model Air line.
Camouflage and Decals
I followed the pre-shade coat with Vallejo Model Air 71.043 Olive Drab camouflage as a base for white wash coming later. This color has a little more brown in it than green.
Once the acrylic coat had dried, I hand-brushed a coat of Future on the areas that would receive decals and applied them using the Red and Blue Micro Sol/Set system without any problems. I sealed the decals with another hand-applied coat of Future. Once dry, I knocked down the shiny areas by spraying Vallejo Matt Varnish to prepare the surfaces for the whitewash and filters.
On-Board Tools
Next, I painted the wooden portions of the onboard equipment using Vallejo 310 Old Wood and the steel portions using Vallejo 70.865 Oily Steel. To give the wooden parts of the tools more depth, I brushed on a little Mig Wash Brown Oil straight from the tube and let that set overnight. In the morning I carefully removed most of the oil paint using a Q-tip dampened with Mona Lisa, leaving the areas near the buckles and metal parts darker than the wooden shafts. To give the steel parts more depth, I drop a single drop of Mig Black wash onto the flat surfaces – I feel this gives them a good ‘used’ look. I painted the two ammunition boxes Vallejo 71.044 Light Grey Green and the steel crate Vallejo 71.016 U.S. Dark Green.
Whitewash
The whitewash was achieved by dabbling on Mig Winter Camouflage Wash straight from the bottle, working in sections and making sure nothing looked even or symmetrical. I then mixed some Windsor Newton White Gouache with water and dabbled that in places to create areas that were more opaque. I like the gouache product for its chalky texture and versatility. The rough surface is perfect for dry-brushing highlights later on.
Dry Brushing and Pigments
Once the paint was thoroughly dry, I went to work using Old Holland Warm Sepia Extra to dry-brush the entire vehicle, focusing on the edges and protruding detail. Old Holland’s oil paint, which I learned about reading Tony Greenland’s excellent book, ‘Panzer Modeling’, is the perfect hue and the pigment for this kind of work, and its pigment is as fine, or even finer, than Mig’s products.
After highlighting the track and road wheels with Mig pigments, I stuck it with a fork – this beefy tank-killer was done!
Conclusion
The M36B1 version of the Jackson is a welcome addition to the excellent line of Academy American tank destroyers. The assembly went together without any surprises and the fit was excellent. Academy kits are a hit with beginners because of the low part counts and the little extras, like providing very feint raised lines identifying part placement. By including a PE alternative to the thick, over-scale headlight covers, they are also targeting the more experienced modelers.
If there is one drawback to the kit, it is the use of old-style rubber-band track, which contained a number of manufacturing flaws, which, while minor, would be hard to rectify. Still – the kit looks great, goes together well, and was fun to build. I can recommend this kit to all levels of model builders.
would like to thank Academy Models and Stevens International for providing this kit for review, and to Internet Modeler for giving me the opportunity to build it.
.jpg)
.jpg)
.jpg)
.jpg)
.jpg)
.jpg)
.jpg)
.jpg)
.jpg)