.jpg)
Reviews
Armor
Dragon Flakpanzer T-34(r)
by Eric Christianson
 Model: Flakpanzer T-34(r)
Reviewed by: Eric Christianson, IPMS # 42218
Scale: 1/35
Company: Dragon
Price: $59.99
Product/Stock #: 6599
Website: Dragon Models
Product Web Page: View
Product provided by: Dragon Models
Summary
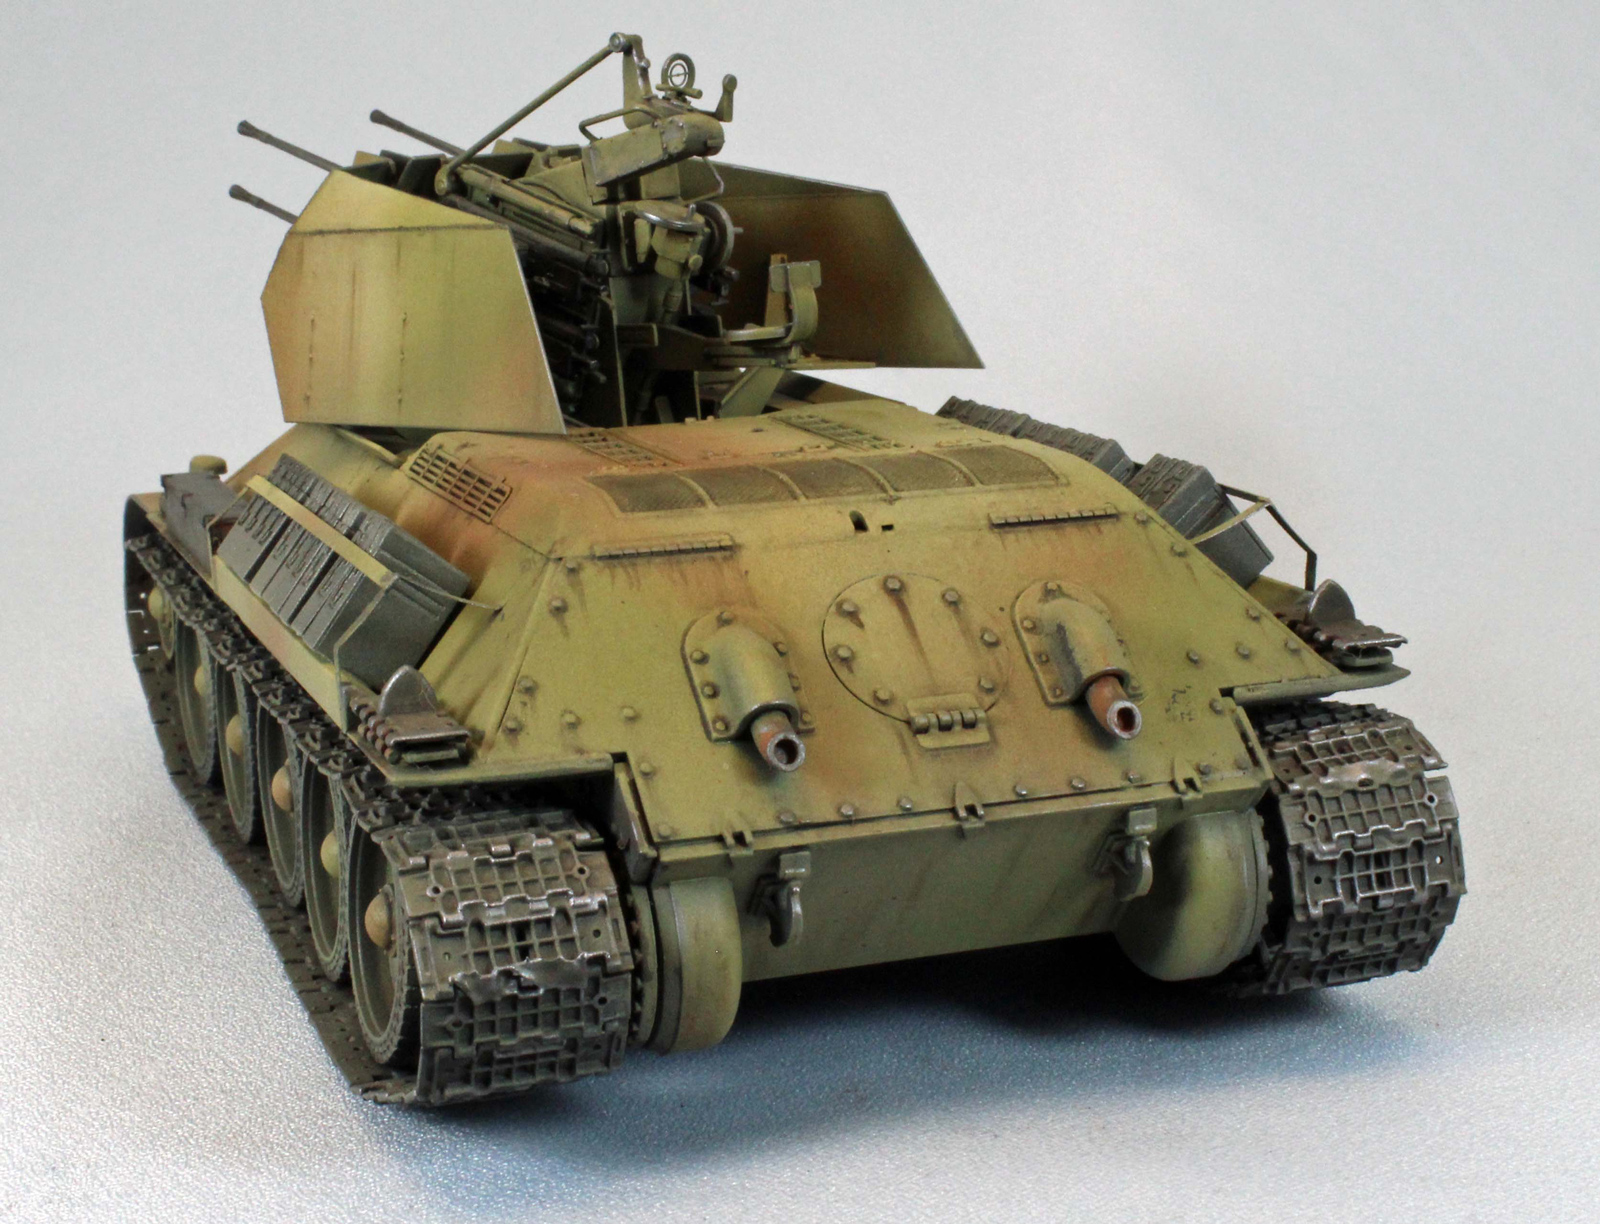
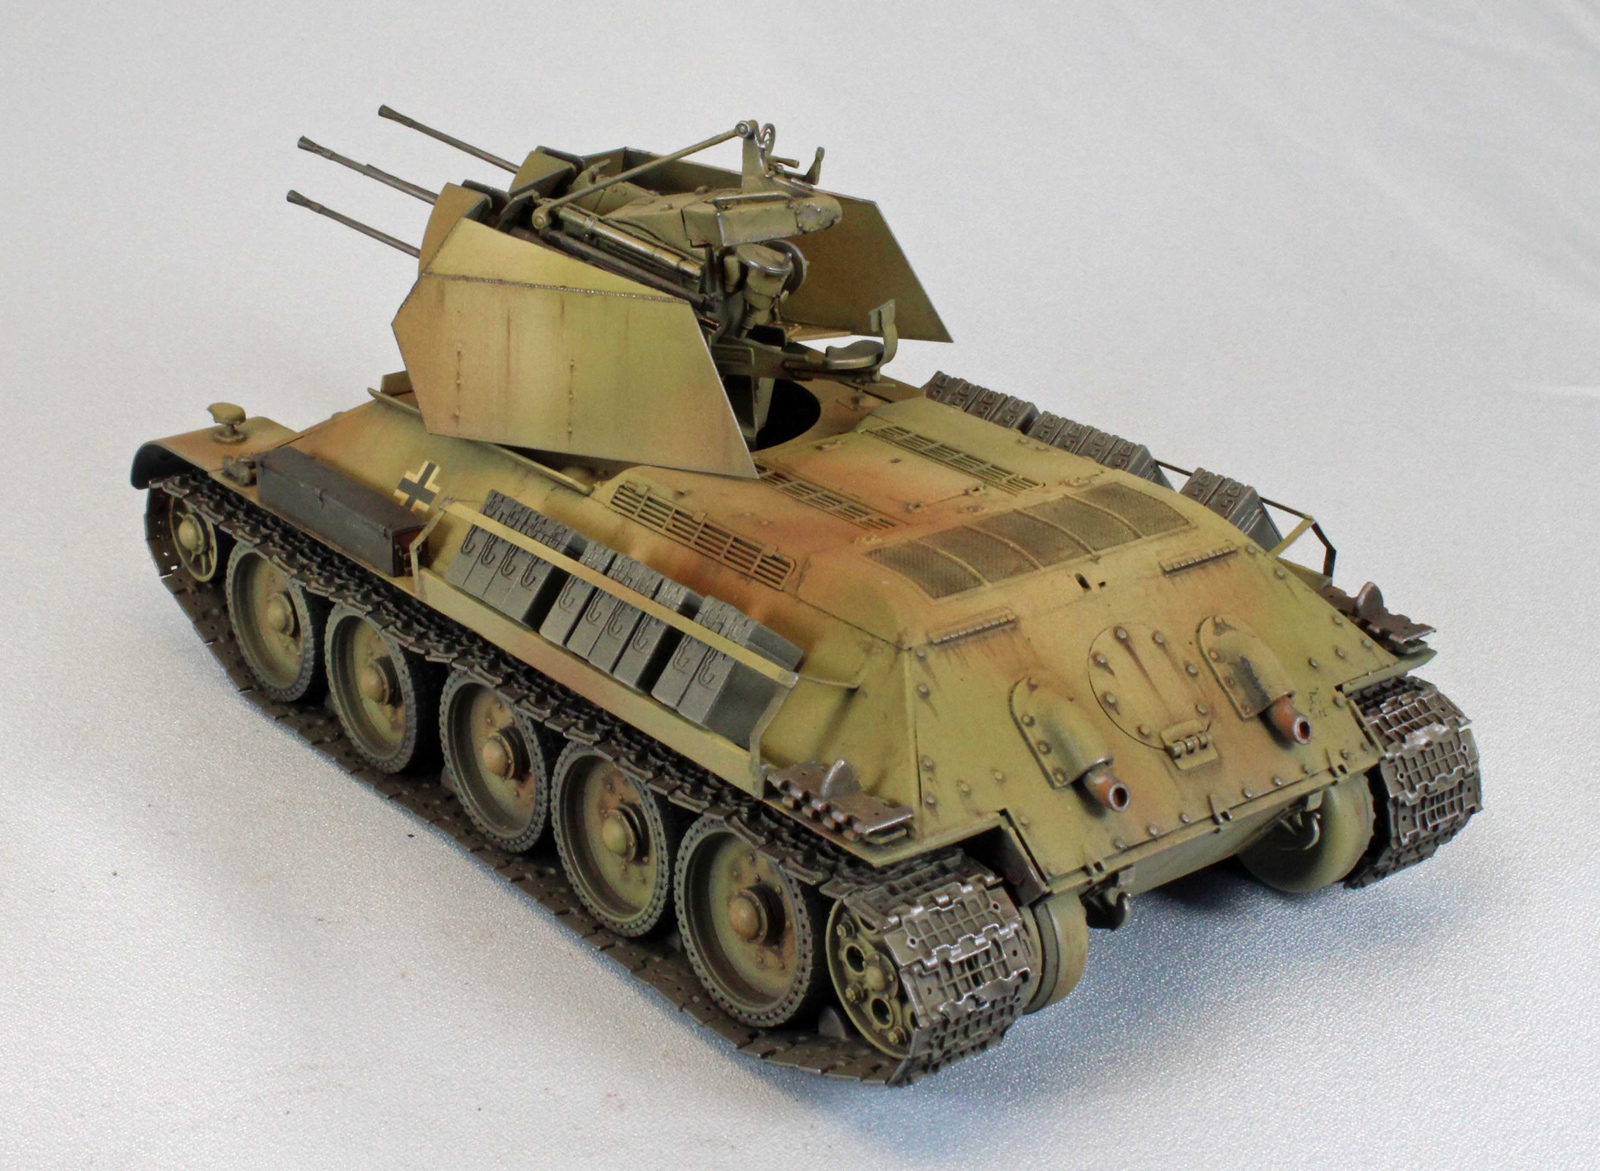
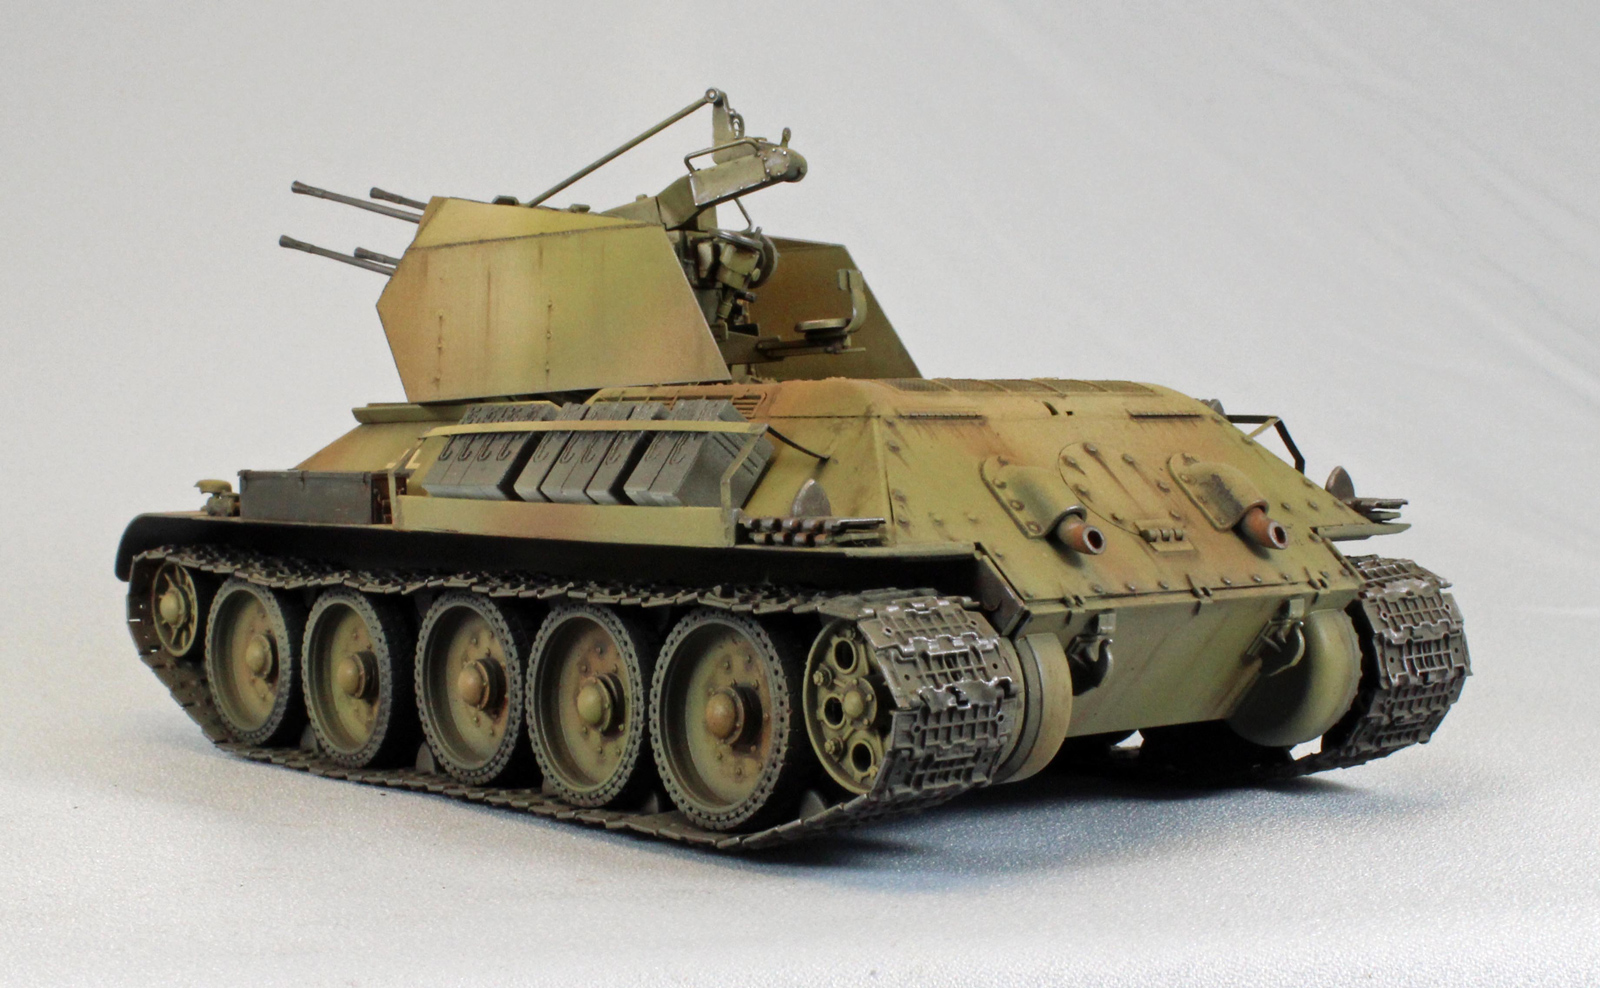
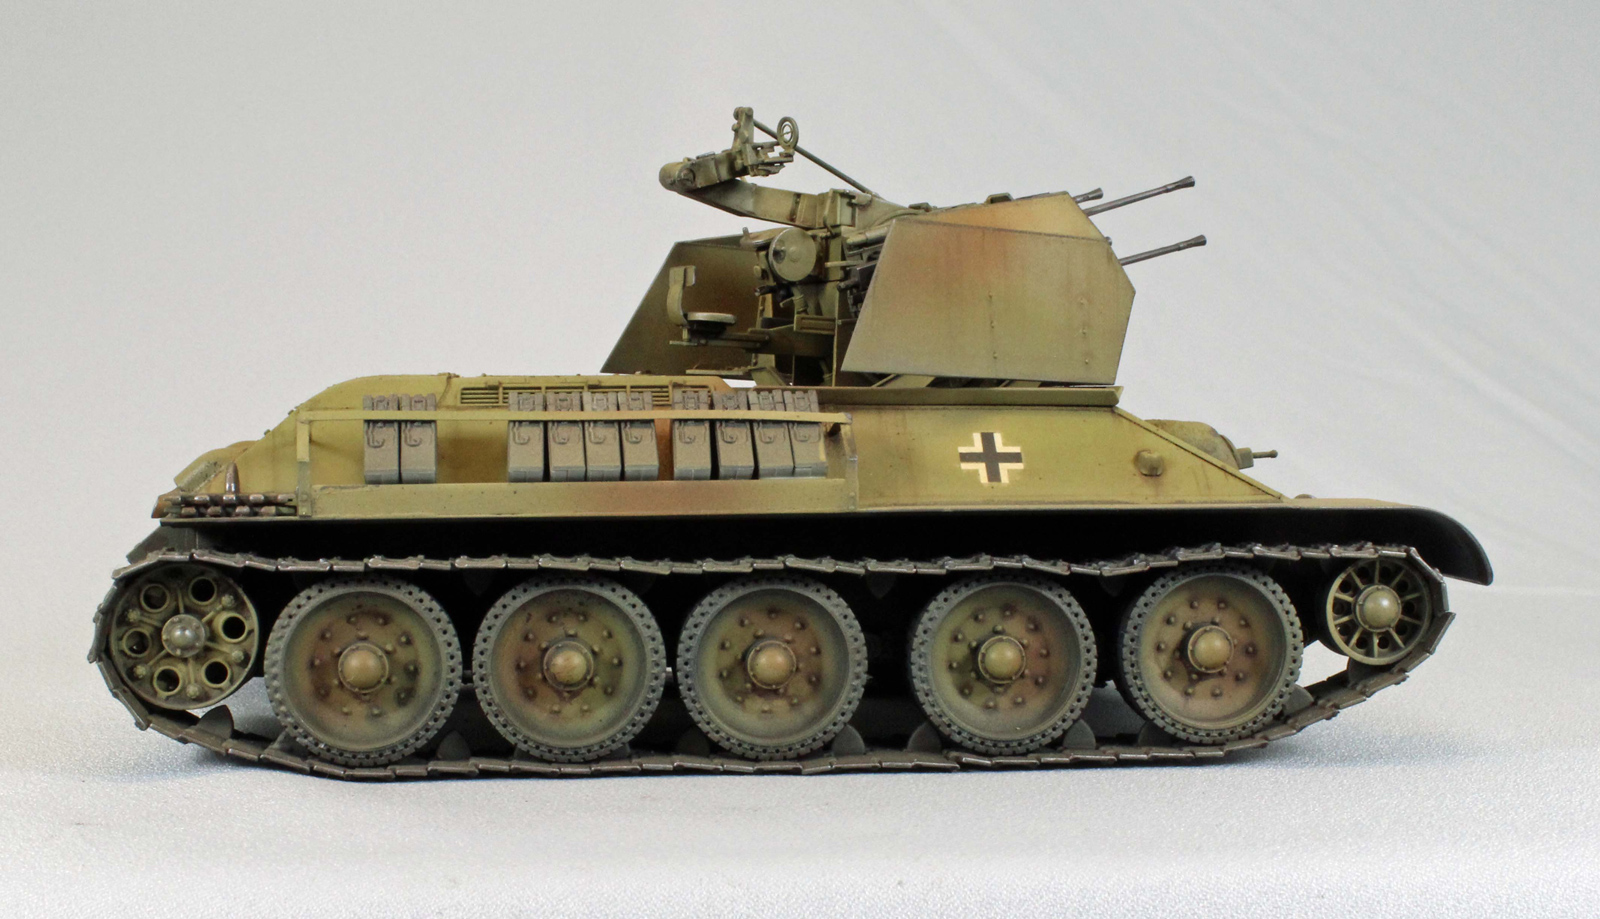
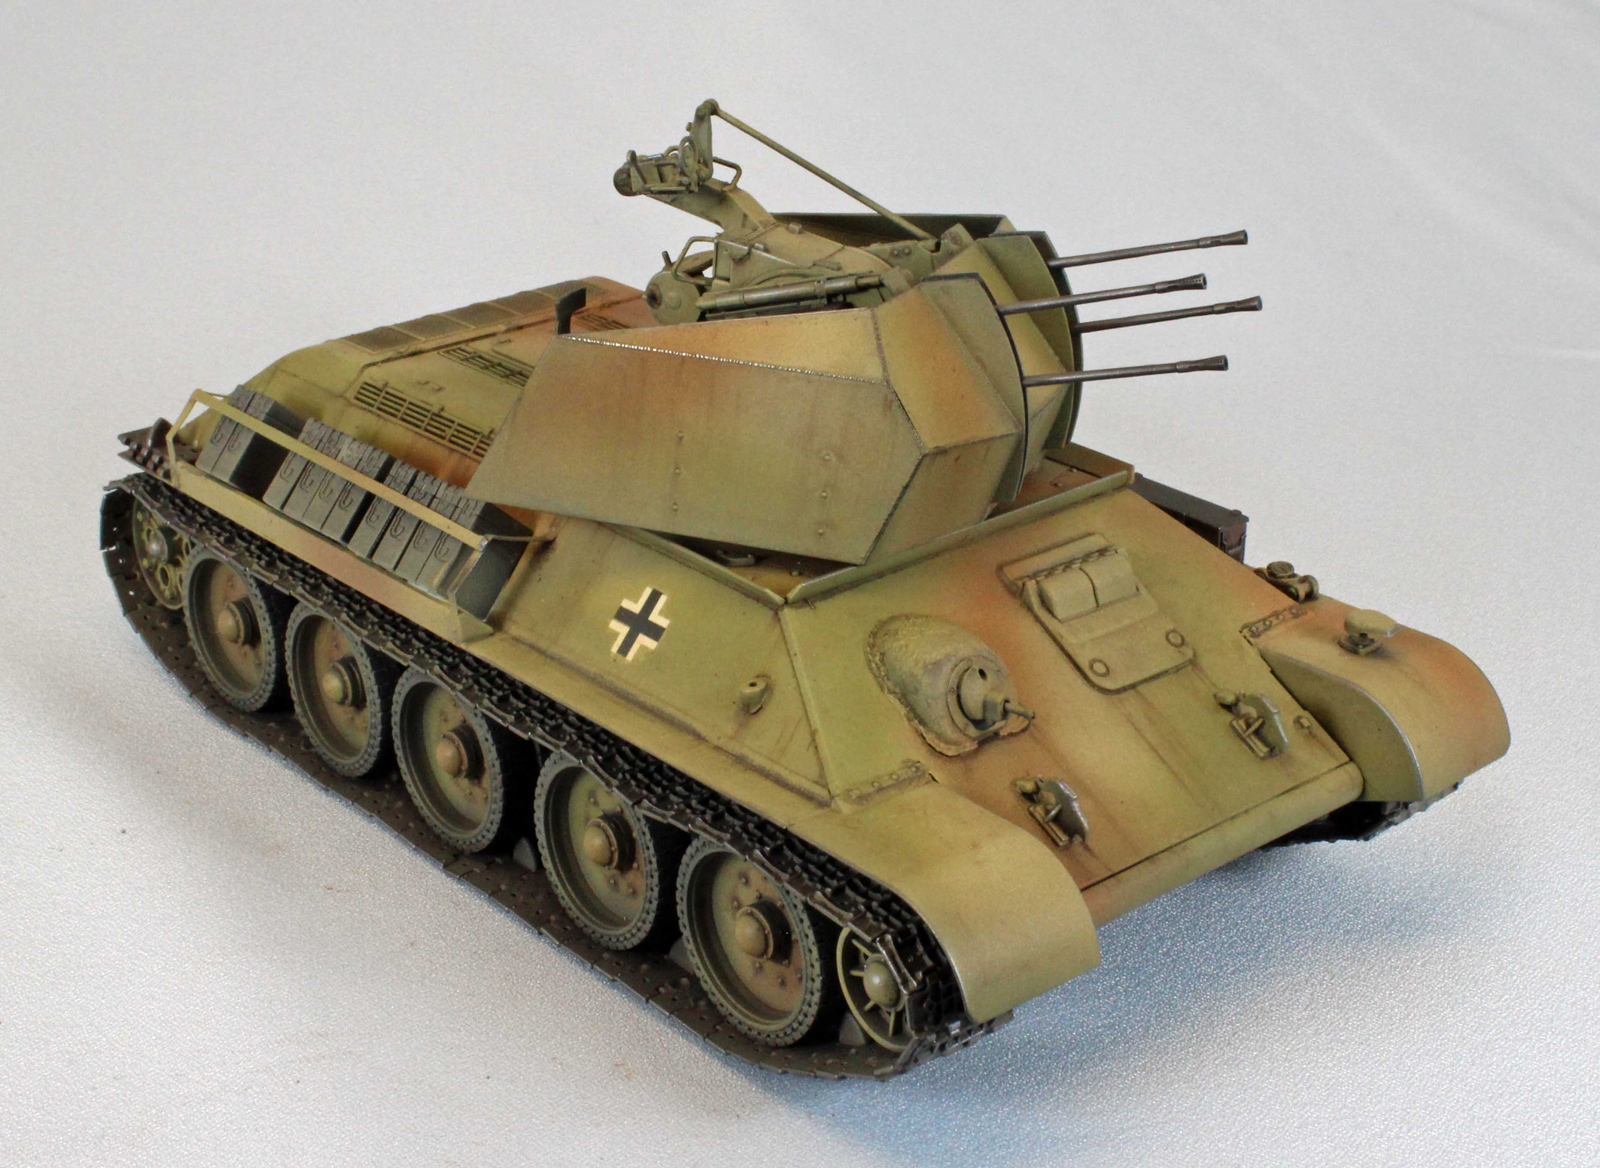
With its 76mm gun and well-sloped armor, Germany’s armed forces were shocked when they were confronted by the Russian T-34 tank’s superior qualities. Due to desperate shortages in their own armored units, the hard-pressed Germans often adopted captured Russian tanks into their ranks, especially the T-34. One of the more unusual adoptions was the Flakpanzer T-34(r). Based on a T-34/76 Model 1943 chassis, German field workshop technicians replaced the original turret with a quadruple mount for a 20mm Flakvierling 38 antiaircraft weapon. The makeshift turret was constructed from armor plates removed from damaged halftracks. This Flakpanzer vehicle was then used by the headquarters of Schwere Heeres Panzerjaeger Abteilung 653 on the Eastern Front in mid-1944.
Opening the Box
There are a lot of parts in the box – nearly two thirds of which go unused in the build! To Dragon’s credit, no parts arrived broken or damaged, and I managed to get through everything without breaking anything myself.
The contents of the box include:
- Lower hull, packaged separately
- 21 sprues in soft, light grey plastic, packaged separately
- 2 photo-etch sheets, including mesh engine exhausts
- 1 set of Dragon MagicTrack individual links in two bags
- 1 6-page blue and white instruction sheet with 11 steps
Things to consider before building:
The hull sides and fenders on the Flakpanzer are completely smooth, which means all that nice, molded on T-34 hull detail must be removed and sanded flat. This task is best done before you begin, since doing so later (as the instructions will have you do) is problematic.
The main weapon is designed in such a way so you can paint the guns and ammunition cases separately and put everything together at the end.
The lower hull allows complete access to the track so it can be added at the end of the build, if desired, but I usually add Magic Track early so I can paint it with the rest of the vehicle.
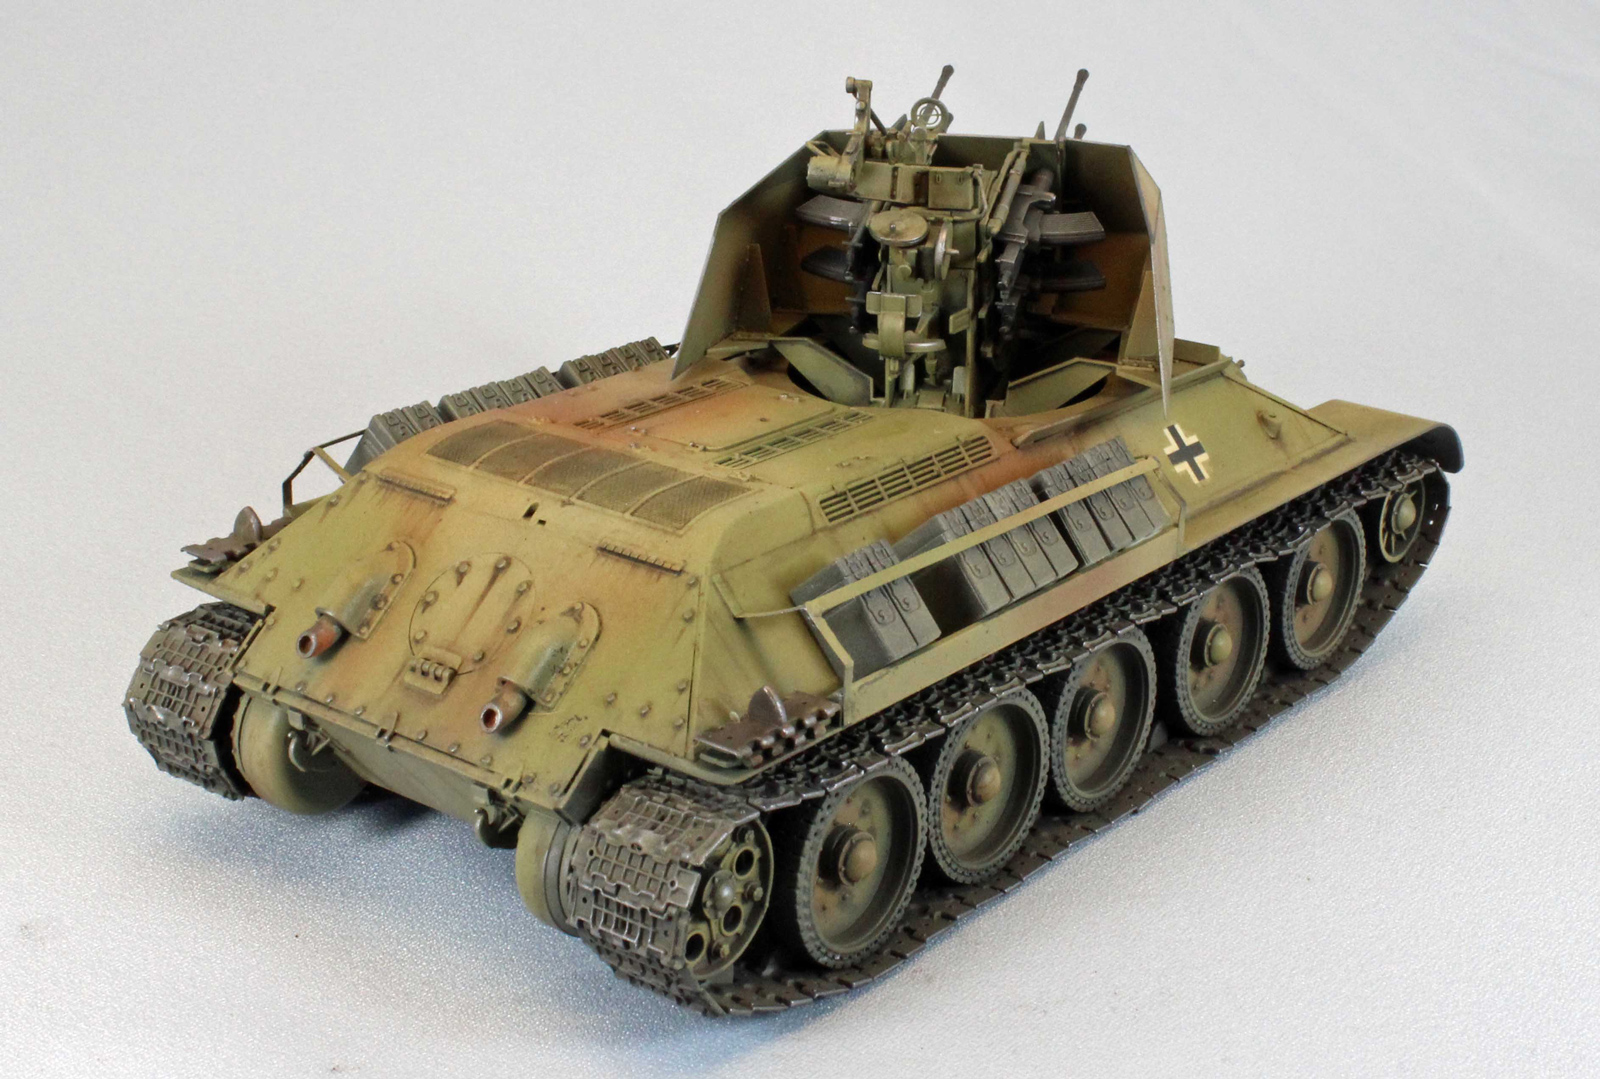
One of the great things about Dragon models is that there are always options to open things up to expose detail, and this kit is no exception. You can open a nice driver’s hatch up front (with interior hatch detail), a rear escape hatch, as well as the main hatch covering the engine compartment.
Construction:
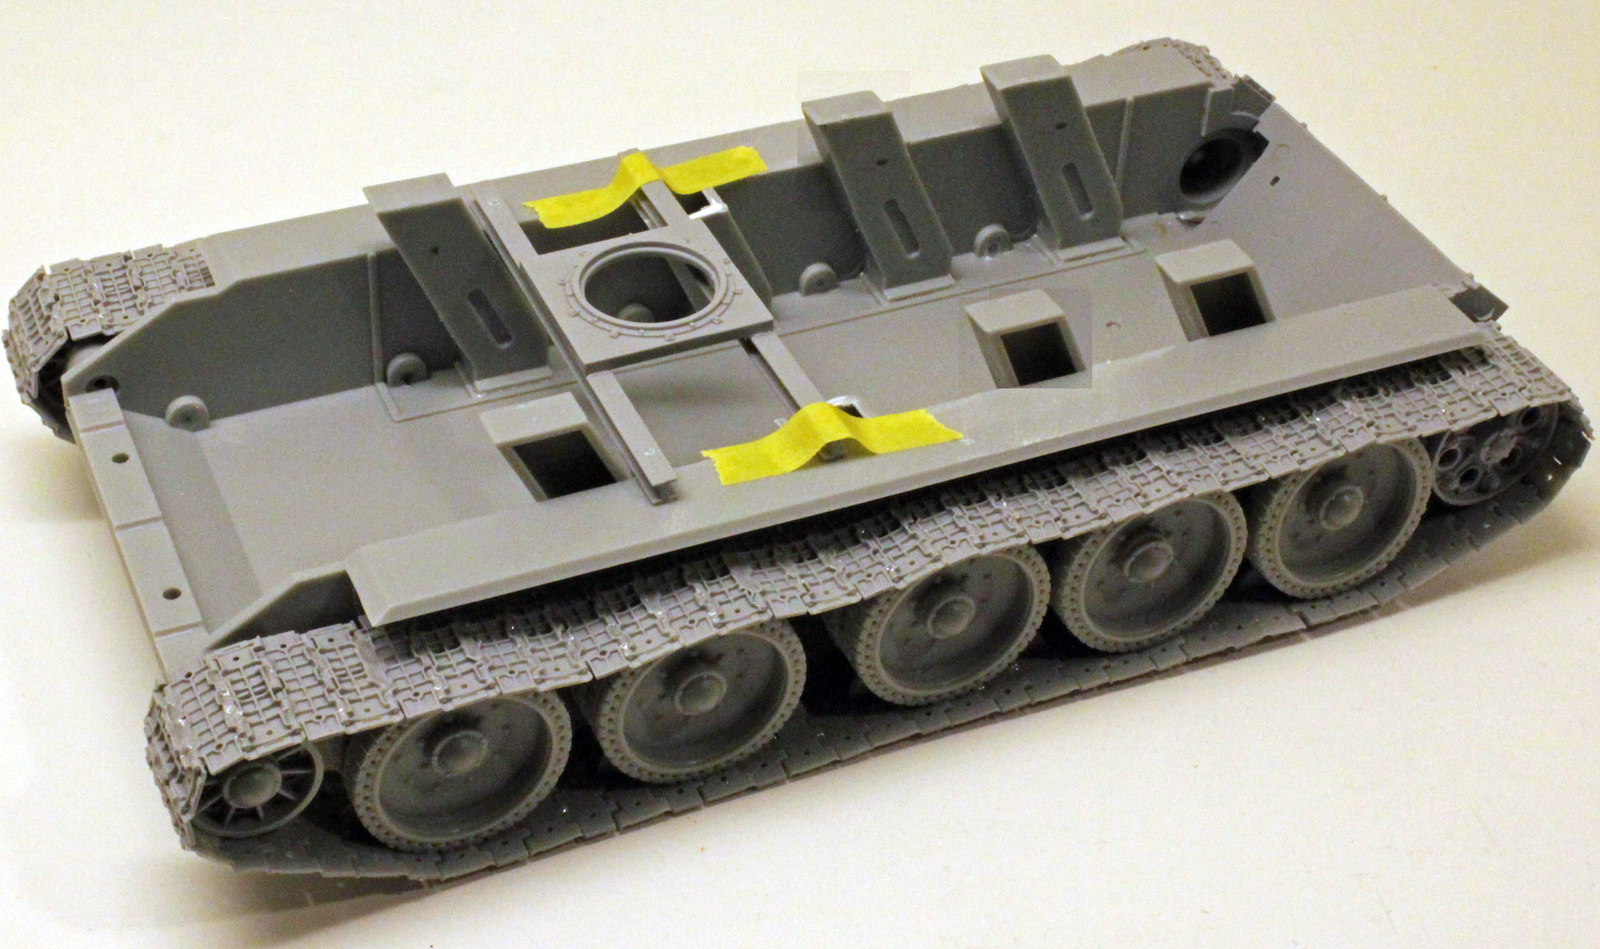
The assembly of the lower chassis went well. The front drive wheel can be moved forward or backward to adjust the track tension, and the large main wheels ‘chunk’ on with a positive, tactile feel. Once assembled and set, my entire chassis would not sit squarely on the table top, which was when I discovered that the lower hull was badly warped on my copy – very unusual for Dragon. Two 10-second dunks in boiling hot water, a twist, followed by a cold rinse fixed that issue right up.
NOTE: Leave the second row of shock absorber covers (Parts N1 and N2) off – they interfere with the fit of the turret ring later on (see image). I had to cut mine off with clippers when I realized this in Step 11.
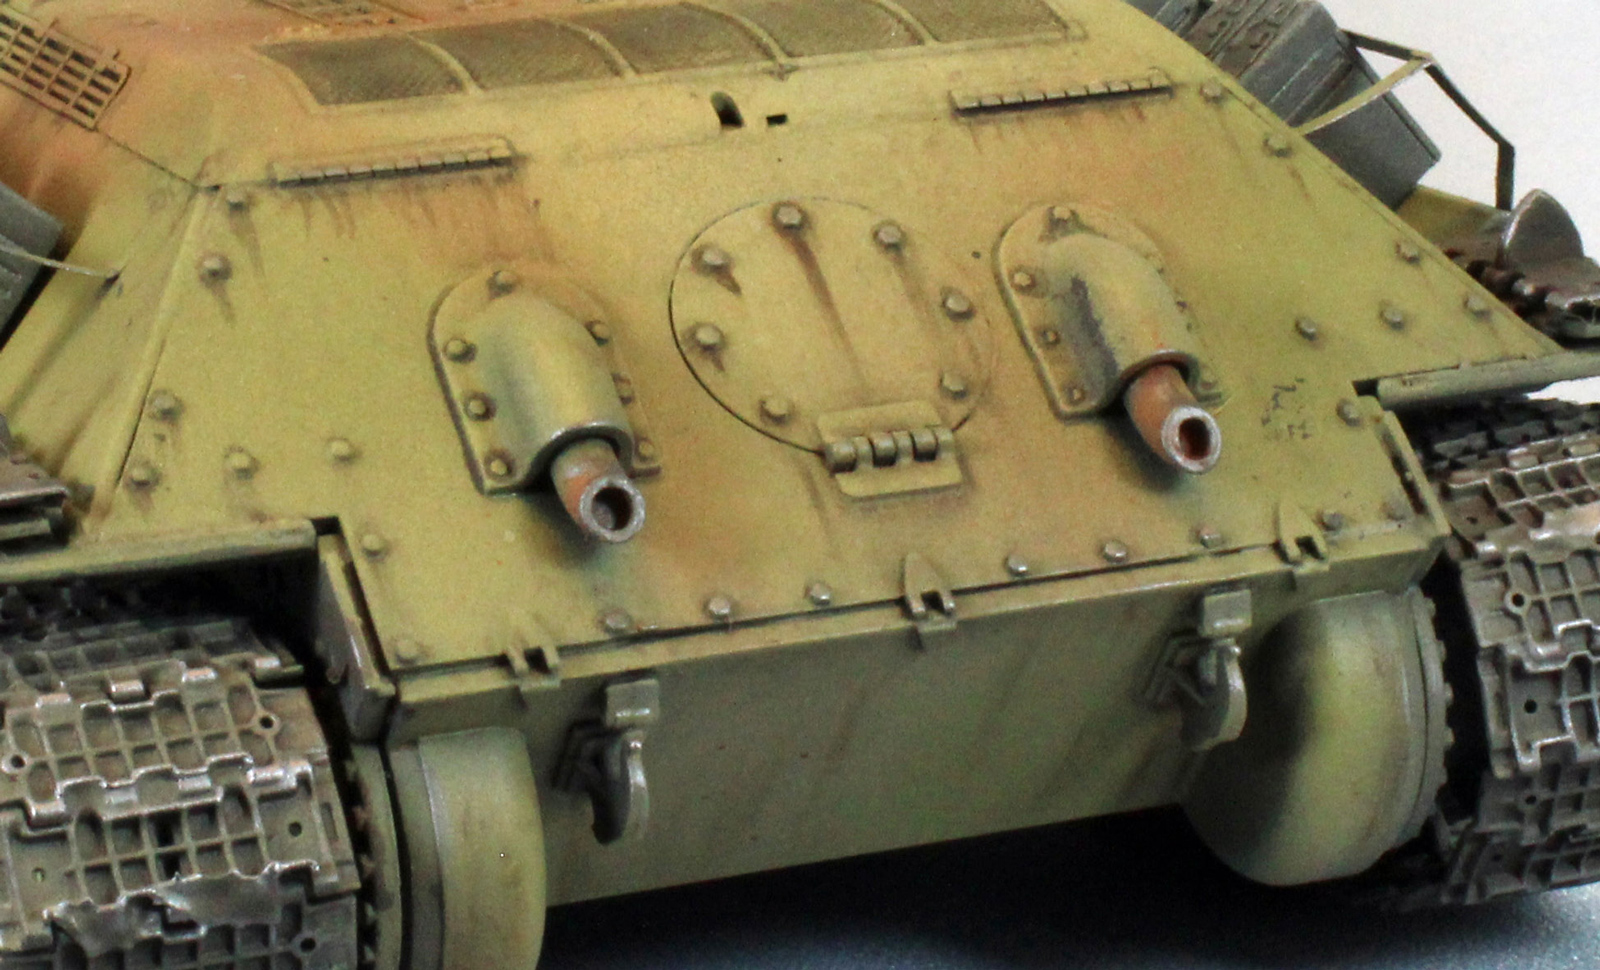
As mentioned above, all the detail on the sides of the main hull and the fenders must be removed and sanded smooth, a simple enough task if you get to it early enough. There is a nicely detailed driver’s hatch that can be left open to uncover some interior hatch detail if you choose to do that. Most of the 7-piece hull machine gun is hidden once installed. Dragon gives you the option of doing a little surgery to improve the main engine access hatch with some PE detail, but I felt the alternative plastic parts are good enough to skip that step. The rear hull has a round access hatch that you can leave open, but it does not have any interior detail to speak of. The two exhaust pipes you are supposed to use have a heavy, visible seam that would need to be filled; I used alternative parts among the many, many unused parts that looked nearly identical, and they lacked the seam.
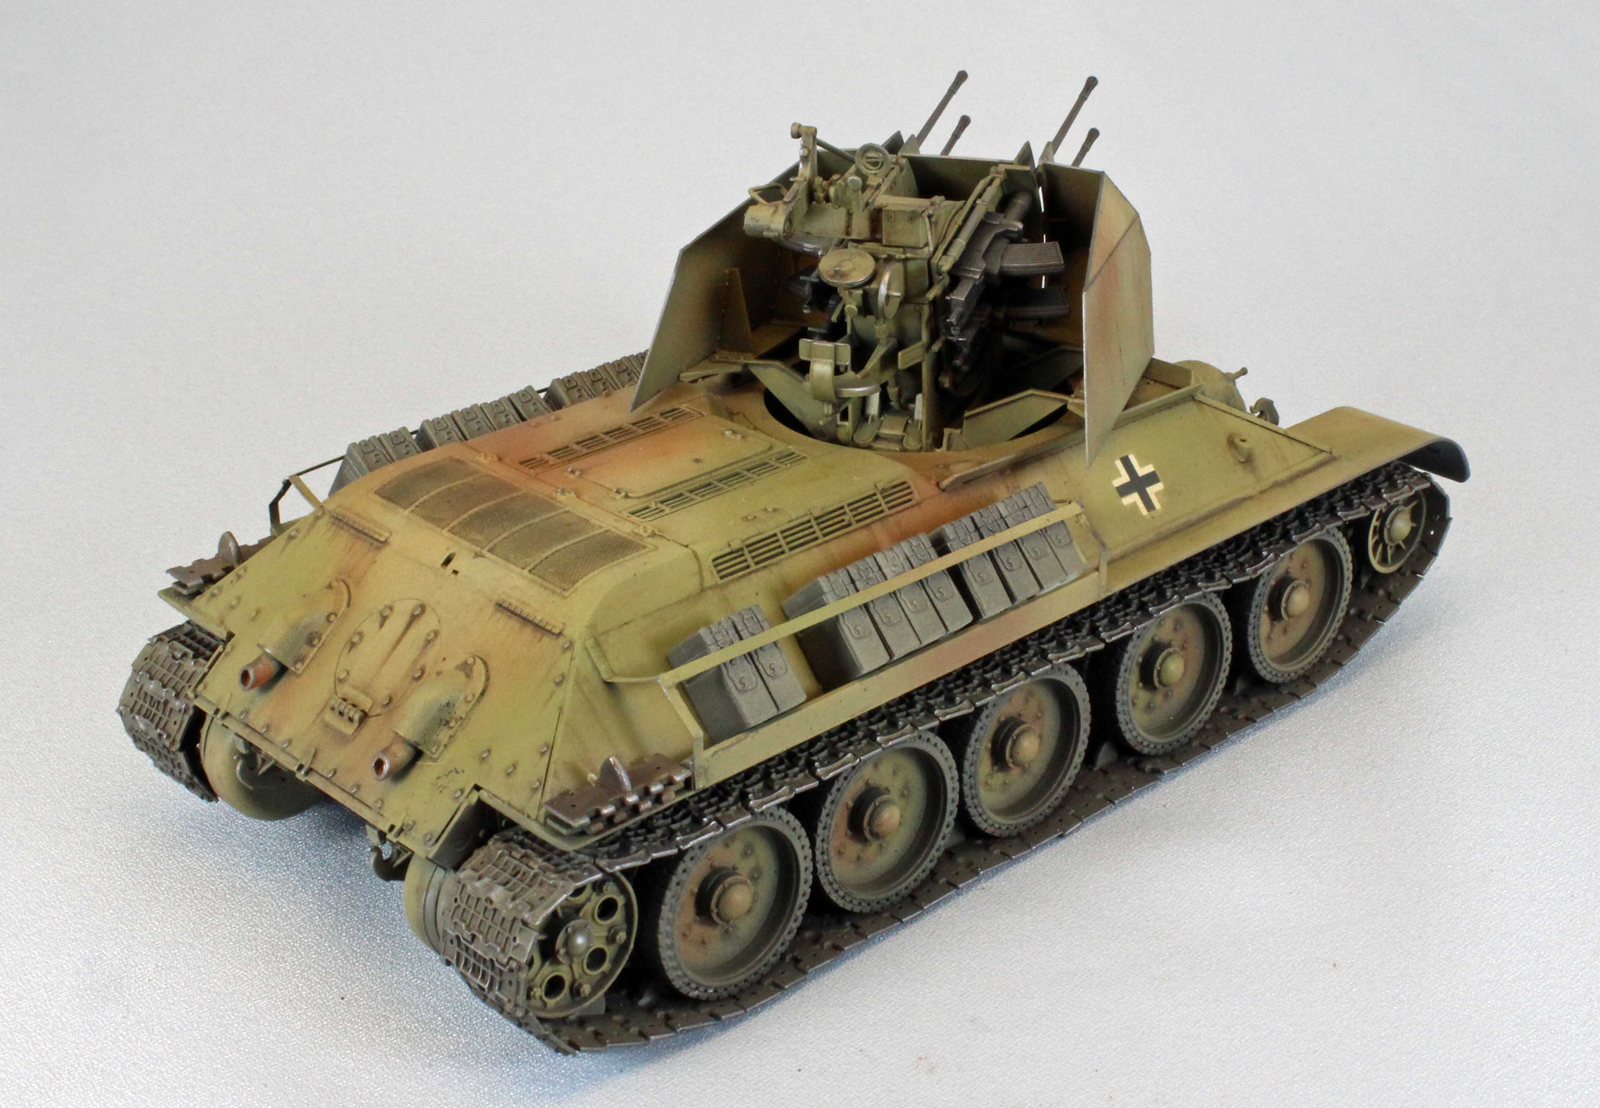
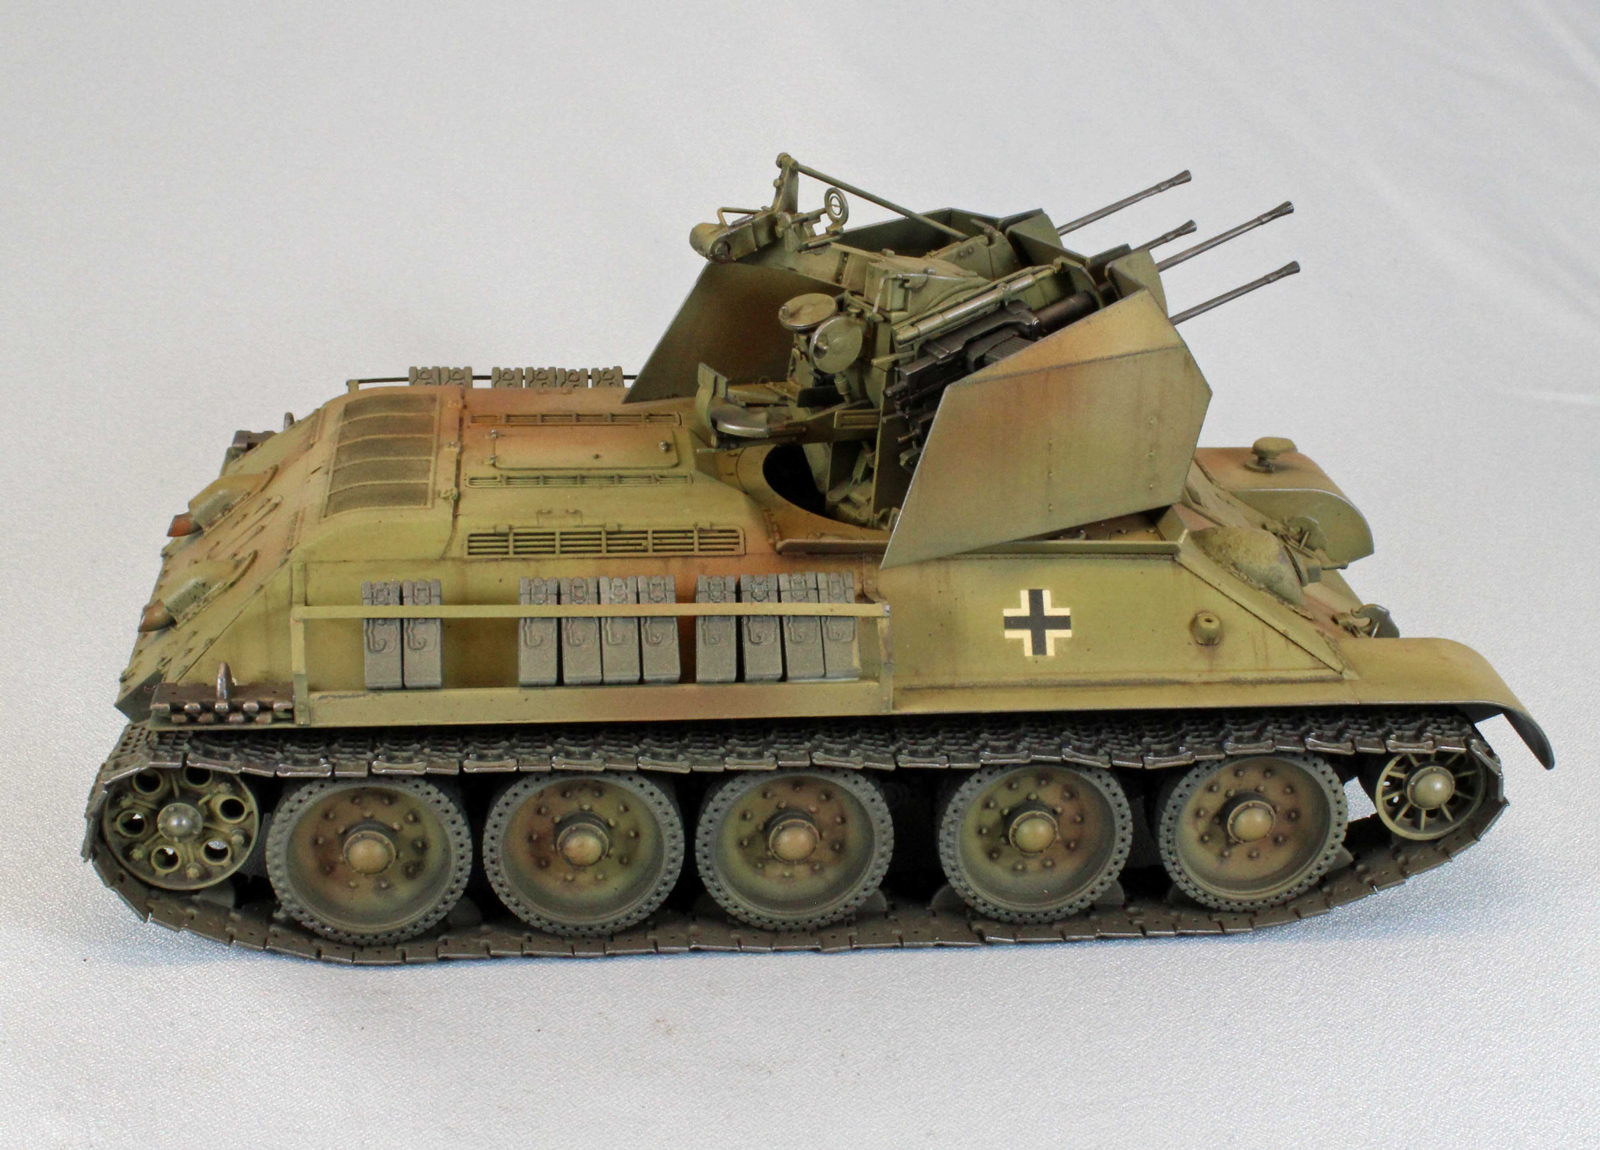
Dragon houses their excellent Flakvierling 38 within an interesting new turret – the only new sprue in the box. Putting the turret together is a little fiddly unless you leave the four attachment plates (Parts D6-D9) off until the superstructure is assembled and dry. You’ll need to spend a little time nursing the two beautifully slide-molded turret parts together; they are very thin and delicate.
Dragon includes a complicated PE skirt that runs along the bottom of each side of the turret. Each side is made up of a long thin PE rectangle that must be bent into a cup shape to perfectly match the curved bottoms of six tiny clam-shaped PE parts – a task that was beyond my skill level. I left them off – I know my limitations!
Steps 11 and 12 were the most challenging. The biggest issue involved the placement of the turret ring and the two delicate PE ammunition racks.
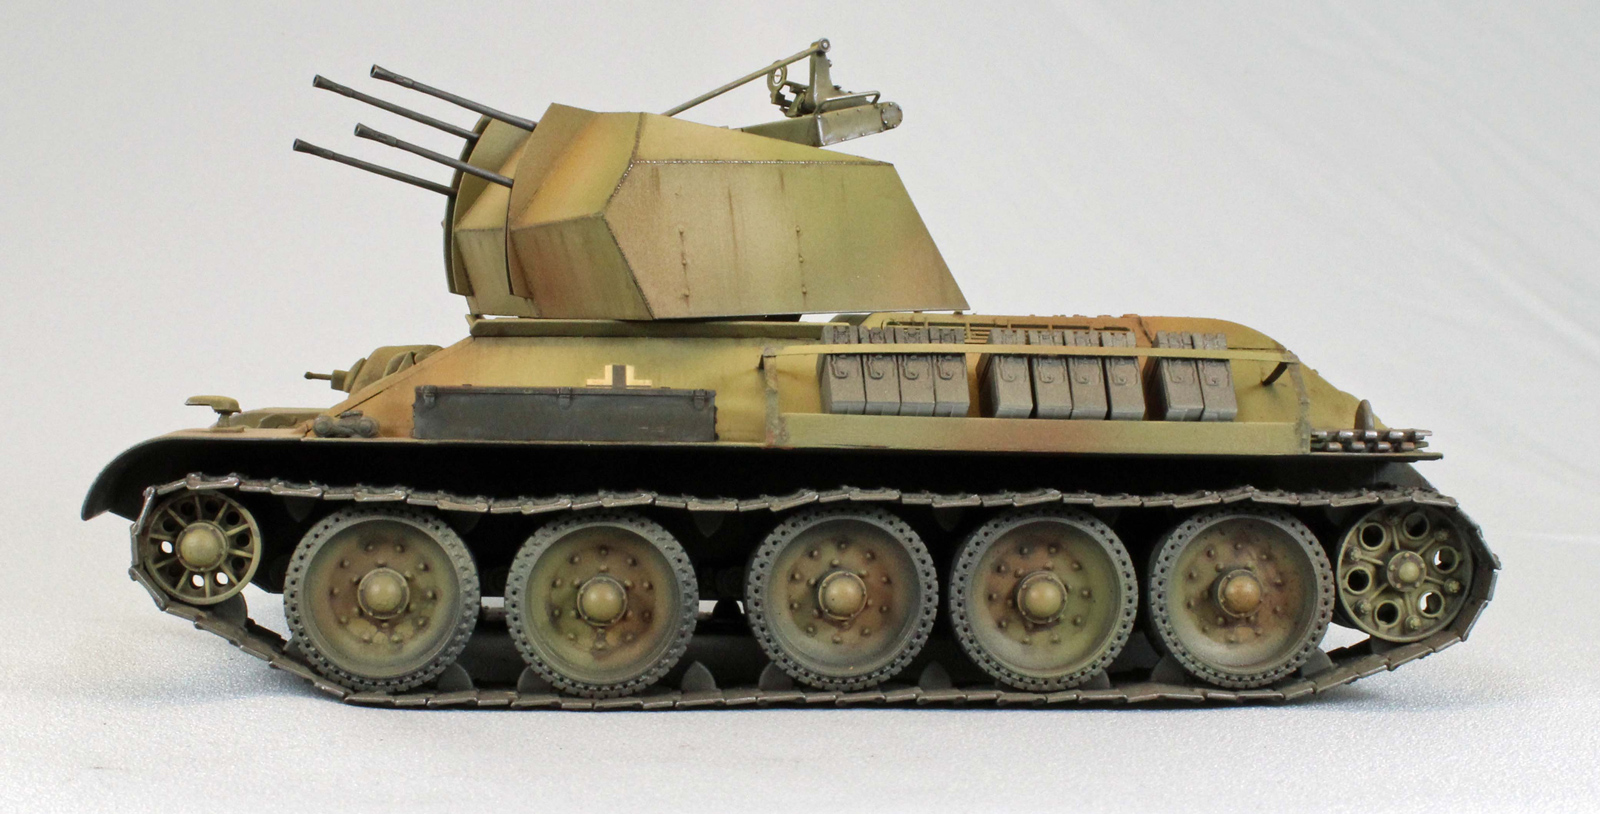
The ammunition racks are part PE and part plastic, a combination that rarely works well for me. I considered leaving them off but felt that the smooth sides of the vehicle needed something to add visual interest. Using hindsight, I suggest attaching them last (just before painting) so you don’t repeatedly break them off at every turn like I did. Curiously, Dragon only provided four ammunition cans… for racks that can easily hold 30. I scrounged through four other Dragon kits to come up with sixteen more cans so the racks would look reasonably full.
There are three PE ‘blades’ that represent armor surrounding the turret base (Parts D10, D13, and D14) that attach on-edge at an angle that is not really addressed in the instructions. I set them leaning outward and (luckily) the turret just clears them when swiveling.
The instructions will have you dropping the Flakvierling assembly down into the turret in Step 10, but I suggest that this step be skipped until after painting and weathering is completed.
This brings me to the only part of the build that had me scratching my head. The location of the all-important turret ring and horizontal support bars is vague at best, which is unusual for Dragon. And they won’t fit at all without removing two of the shock absorber casings installed waaaay back in Step 2. Once those are cut off, there is still no positive (fore/aft) position provided for the turret ring. I ended up taping the turret and Flakvierling assembly together (no easy task) and dropping the whole thing down into the turret hole to positively locate the correct placement (see image). Apart from that exercise, however, everything came together relatively well.
Construction ends with the track, which is beautifully executed. I used 35 ‘large’ links and 34 ‘small’ links for each side – Dragon gives you plenty of extra track so you can decide how much sag you want. The relatively large size of the links requires two drops of glue per link connection - otherwise they really want to come apart when draped on the model. I use Testor’s Model Master ‘black bottle’ slow drying liquid cement for this because it gives me plenty of working time. After about 30 minutes the track comes up from a glue-proof surface in a single, nice, bend-y piece that can be worked around the wheels, sprocket and return rollers, secured with more Testor’s glue.
Painting and Finish
The Flakpanzer T-34 offers some tricky steps in painting and weathering, especially if you want to leave the four guns in metallic paint and any panels or hatches open. I painted several parts separately (see image), and attached them after painting but before weathering. Otherwise, the kit can be completely assembled before painting, including the track.
I started by applying a primer consisting of Krylon Color Master with Durable ColorMax Technology rattlecan (Flat Black) lacquer paint. This is the third rattlecan primer I’ve tried, and I’m glad I kept going because this stuff is a superior product, drying super thin and very tough (not to mention cheap and quick). Once the lacquer paint degassed overnight, I touched things up back in the paint booth using Alclad (lacquer) Black Primer and Microfiller – also very quick, and no thinning required.
The primer/pre-shade coat gives the plastic and PE some grip for the following coats, and fills in the recesses, creating a shadow effect near the flat surface edges. This will add depth for the subsequent coats to come.
Except for my primer coat, I now exclusively use Vallejo paints in my continuing transformation over to true acrylics, which has taken (not a small amount of) experimentation. First, I push the pressure up to 20lbs - Vallejo recommends 12-15lbs, but I think I need the higher pressure because I use a siphon-style airbrush (Pasche H) as opposed to a gravity-feed airbrush. Next, I added Liquitex Flow-Aid to an equal ratio of (Vallejo Airbrush Thinner and paint) which works well and (almost) never clogs. Not too much Flow-Aid: one drop to every ten drops of thinner. For example: in a typical paint session I would put two of drops flow-aid, 20 drops of thinner, and 20 drops of (any Vallejo) paint into a plastic, disposable cup and swish that around until it is mixed, and then pour it into the Pasche cup. Also, and this is important: I keep the airbrush and the model moving as I spray, holding the model in such a way that I can see the reflection of the (nearly invisible) paint actually hitting the surface of the plastic. If I simply spray thinned acrylic paint until I see the color change on my dark primer, it will be too late - the paint will run. This is one mistake I made for a long time when using acrylic paint. The color is built up slowly on the surface of the plastic with consecutive passes.
Vallejo paints come in a huge variety, are odor-free, and allow me swap my heavy, uncomfortable distillate (vapor) mask for a simple painters (particulate) mask. I am sold. Now on to the model!
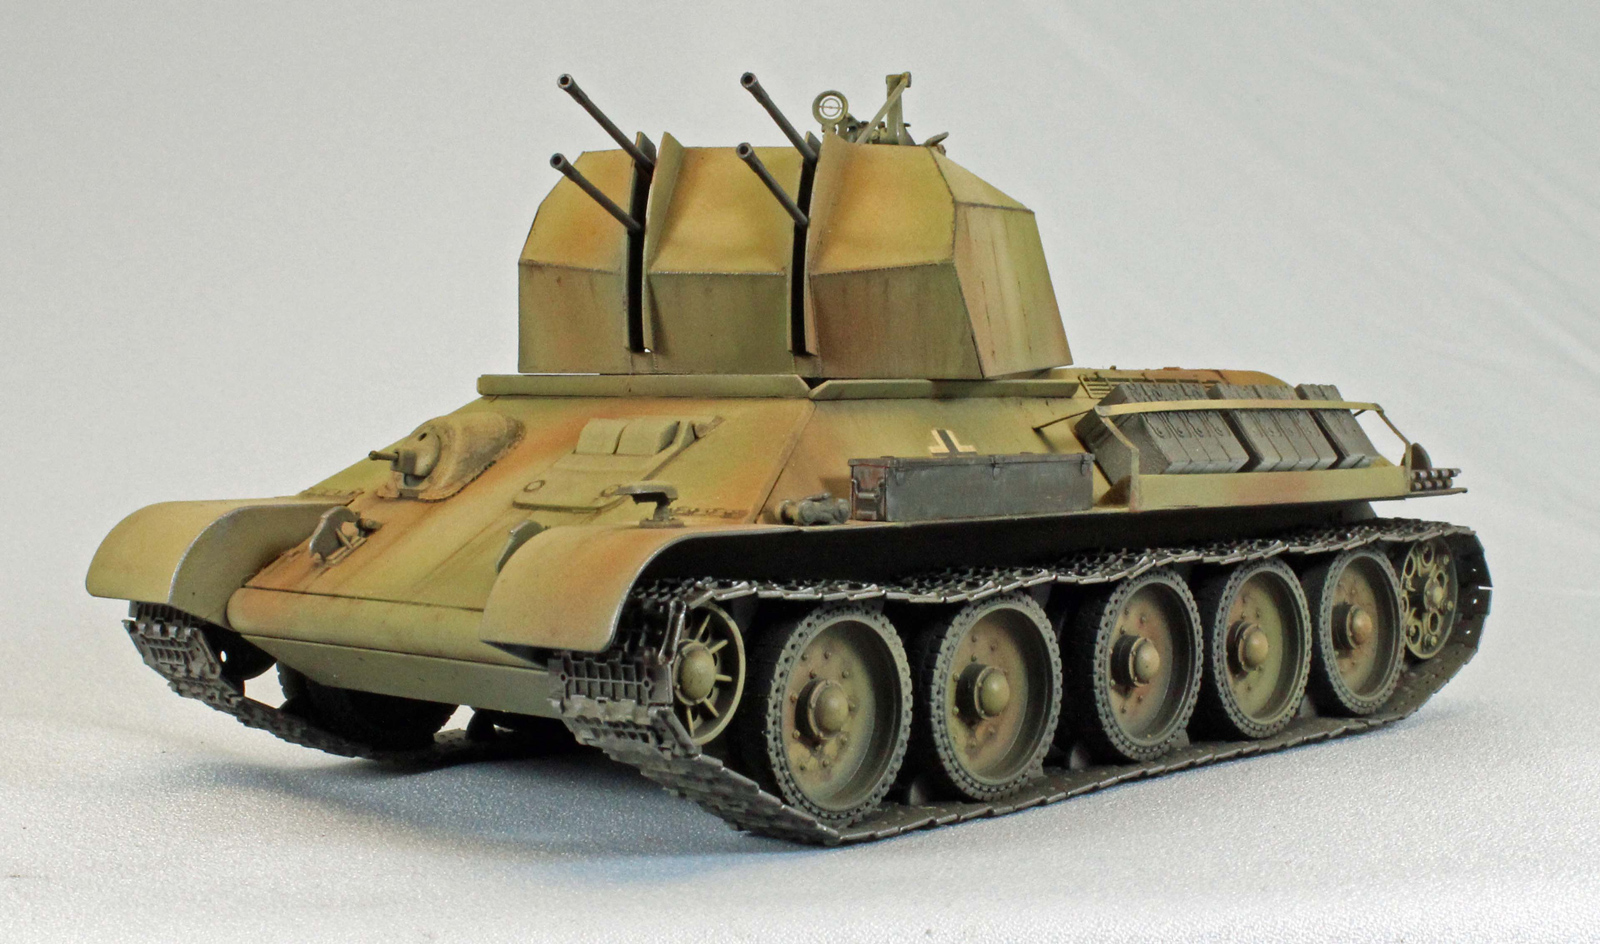
I followed the primer/pre-shade coat with Vallejo’s three-color German Yellow recipe of Dark Yellow (71.025), Sand Yellow (71.028) and Sand (Ivory) (71.075), applied in that order. What starts out looking yellow-green ends up as a nice, light, German yellow. I worked each color from the center of the panels outward to preserve some of the pre-shade showing through from underneath. Some parts I left the original dark yellow and some parts were nearly ivory-white, depending on where I thought the sun would hit, achieving sort of a forced-color perspective (called ‘color modulation’ now in the industry).
I followed this with (first) a mix of 2/3rds Vallejo Panzer Green and 1/3rd Yellow Ochre, and then a mix of 2/3rds Vallejo Burnt Umber and 1/3rd Yellow Ochre, applied in a loose pattern. I felt the Yellow Ochre blended well to tie the darker camouflage colors with the light yellow base. The light finish would be toned down with weathering later.
I painted the ammunition cans using Tamiya X-10 Gun Metal thinned with Gunze Leveling Thinner.
I then used AK Interactive’s Track Wash to color the track by hand, being careful to miss the wheels and surrounding painted areas.
I hand-brushed Future acrylic on the areas that would receive decals to give them a smooth surface to set up on. I then applied the two German Balkenkreuze using the Red and Blue Micro Sol/Set system without any problems, followed by an additional layer of Future to seal them. Once dry, I carefully slipped the 20mm guns into the Flakvierling assembly and dropped that into the four base plates of the turret, a somewhat clumsy process. Once I had everything lined up however, it swiveled freely on the turret ring. I then airbrushed all the shiny areas with Vallejo Matt Varnish to prepare the vehicle for filters.
With all the surfaces sporting a flat finish, I started the weathering process with two or three overall filter coats of Old Holland Warm Sepia Oil paint, heavily thinned with Mona Lisa thinner. Old Holland’s oil paint, which I first learned about from Tony Greenland’s excellent book, ‘Panzer Modeling’ (Osprey), is the perfect hue for this kind of work, and its pigment is as fine, or finer, than products made specifically for modelers.
I applied this to the entire vehicle, including the guns and wheels. I next added a (Mig 110 Black Oil) filter to the engine intakes and Mig Light Rust Brown to the rear exhausts pipes.
Now that the filters were applied, I sprayed an overall coat of un-thinned Future floor polish to prepare the surfaces for washes and streaking, which are easier to control when applied over a smooth, glossy surface.
Once the Future was dry, I added some very light, vertical streaks along the hull sides, rear, and front using AK Interactive’s Streaking Grime. I tried to limit the effect, drawing downwards from protruding detail, like what might accumulate from rain washing off a dirty surface. I let the streaks dry, and then worked them downwards with a long soft-bristled brush, lightly dampened with Mona Lisa thinner, until I had what I was looking for. Next, I used Mig Dark Wash thinned with Mona Lisa for highlighting the panel lines, bolts, air intakes, wheels, guns and any other areas with detail needing a little attention.
Once the oil-based products had a chance to dry, I added the 20mm ammunition cans to the hull side racks and applied a ‘road-dusting’ coat consisting of Vallejo Model Air 71.027 Light Brown, followed by a coat of Vallejo Flat Varnish to kill any shiny spots still remaining. I cut each of these 50/50 with Vallejo Airbrush Thinner to improve flow. The last touch was to go over some of the edges and the weld seams with a graphite pencil and Uschi Chrome Metal Polishing Powder. Done and done.
Conclusion
Building this kit should have been easier than it was, since it is based on an excellent T-34 kit and the ubiquitous Dragon Flakvierling Anti-Aircraft set. The Magic Track for the T-34 is relatively large making the track easy to assemble, and the fit of nearly everything was up to Dragon’s excellent standards. At the same time, I felt that the removal of detail from the hull sides, the vague location of the turret ring, the fiddley Plastic/PE side racks, as well as the design of the turret base was enough to recommend this kit only to modelers with some experience in solving problems. That said, if you go slow and take care of some tricky issues up front, anyone should be able to produce a fine and interesting addition to their display-case arsenal.
I would like to thank Dragon Models for providing this kit for review, and to IPMS USA for giving me the opportunity to review it.
Photos