Reviews
Armor
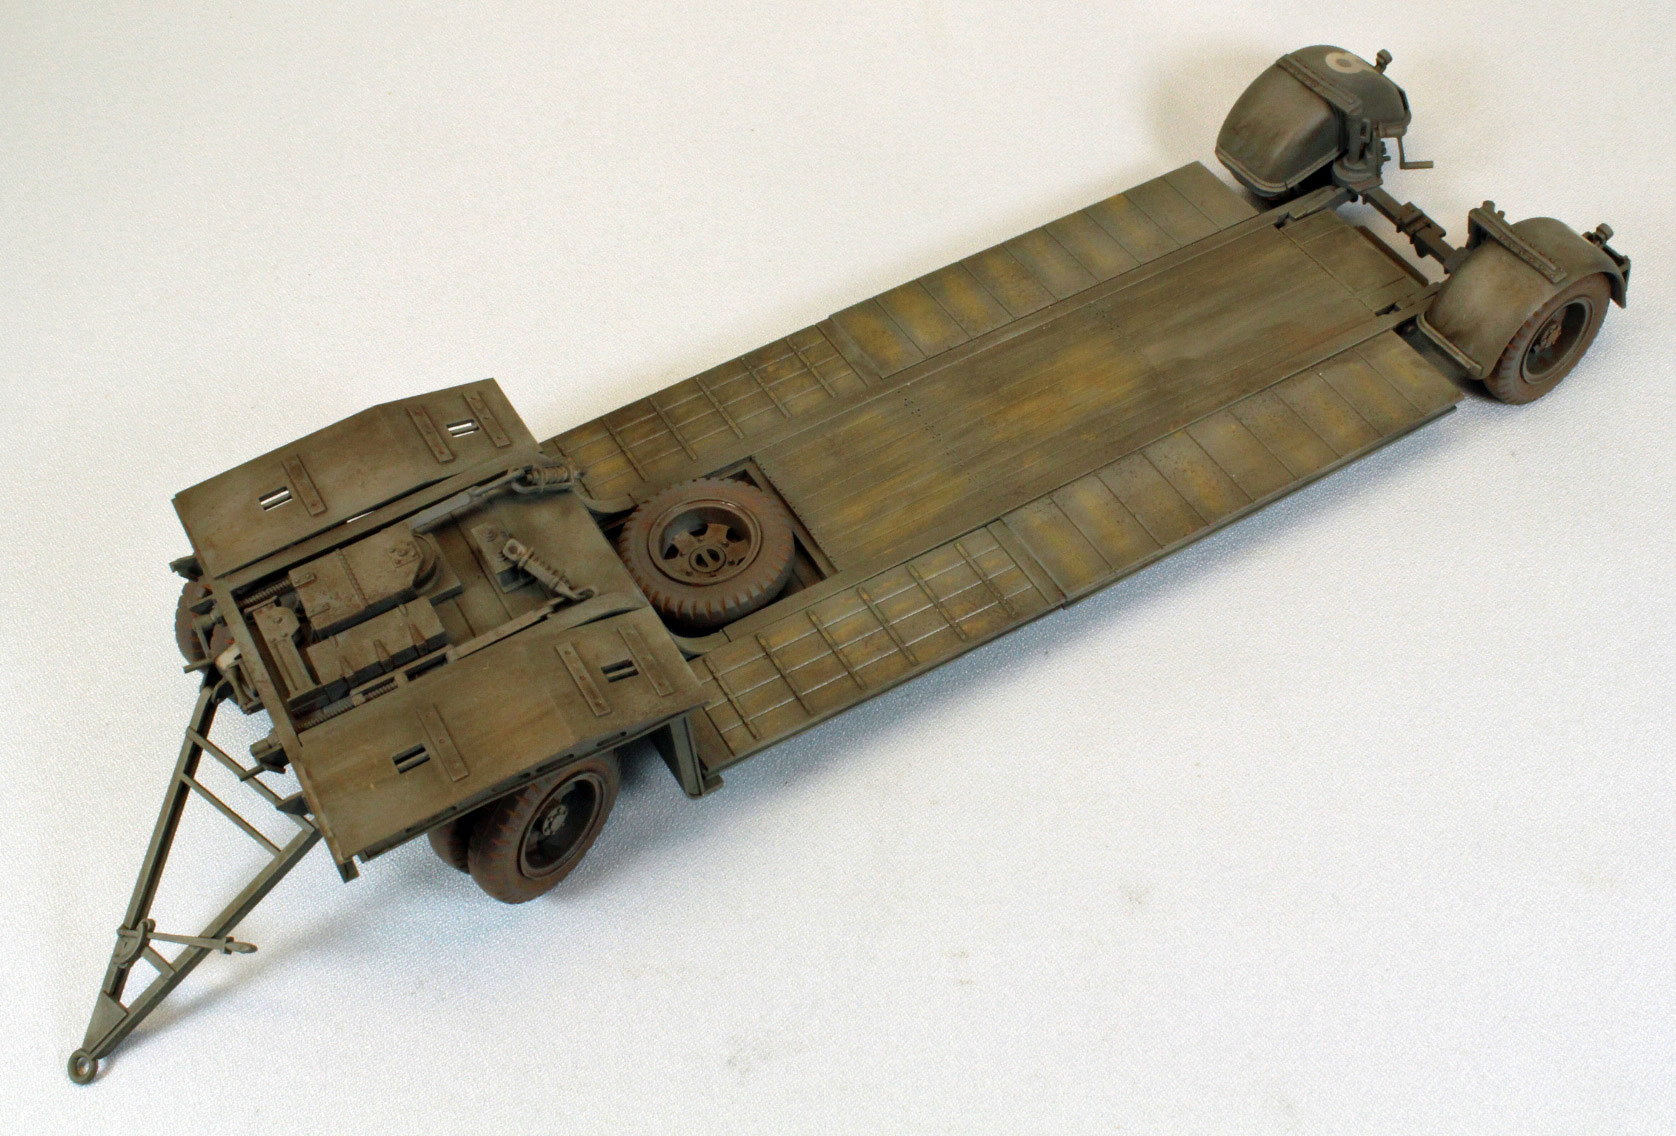
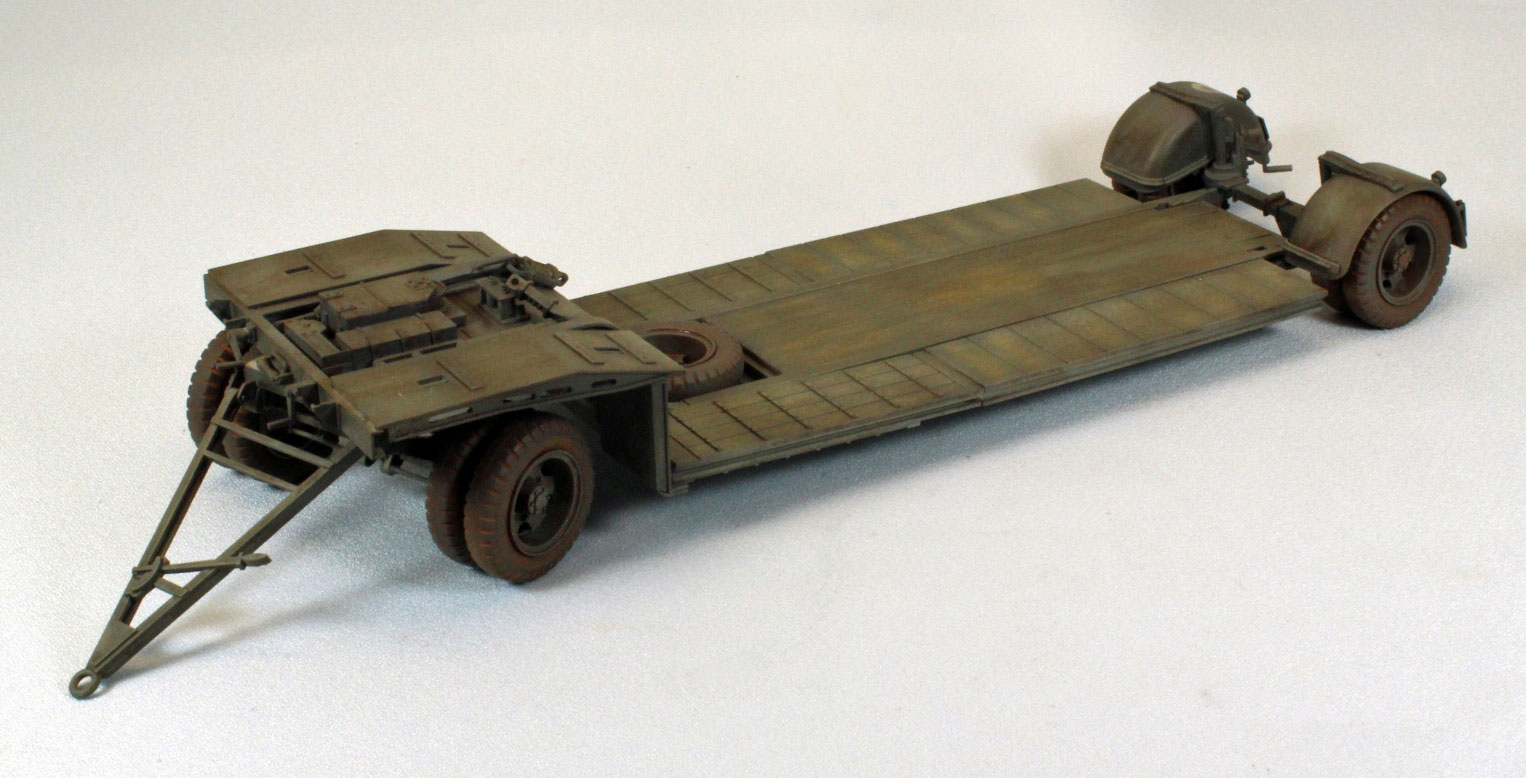
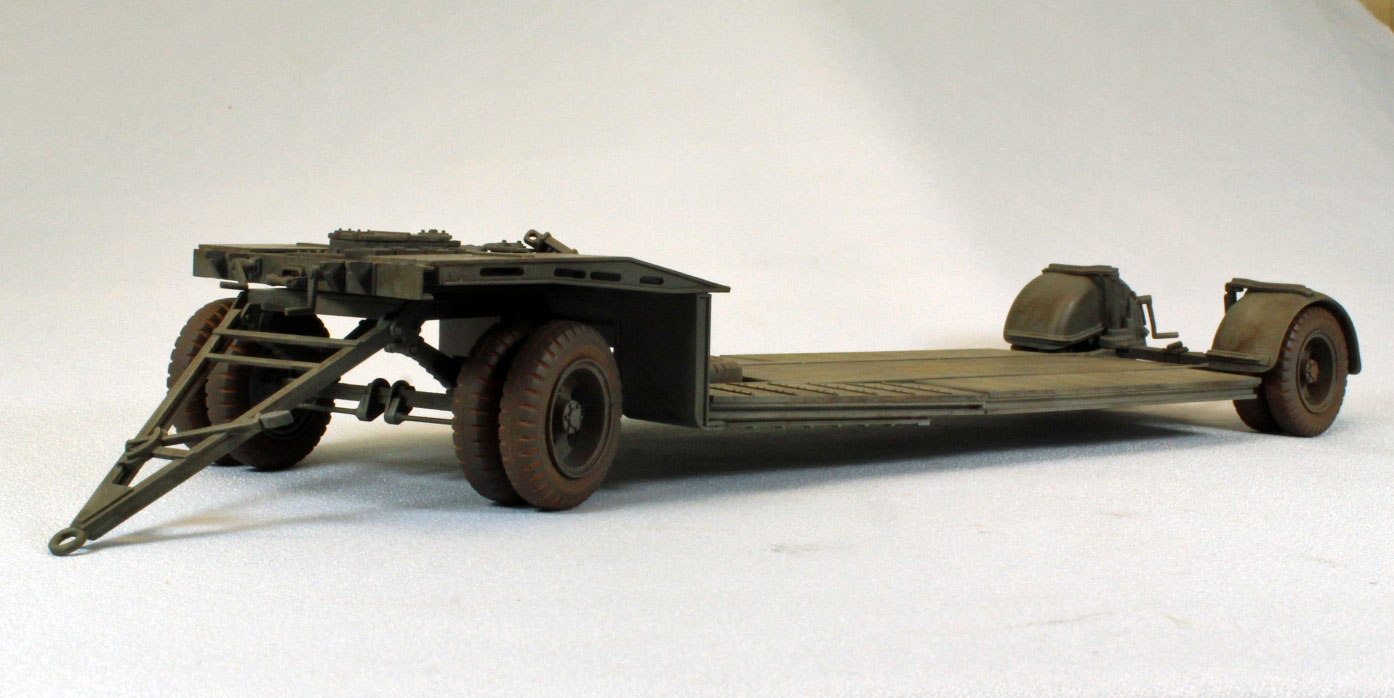
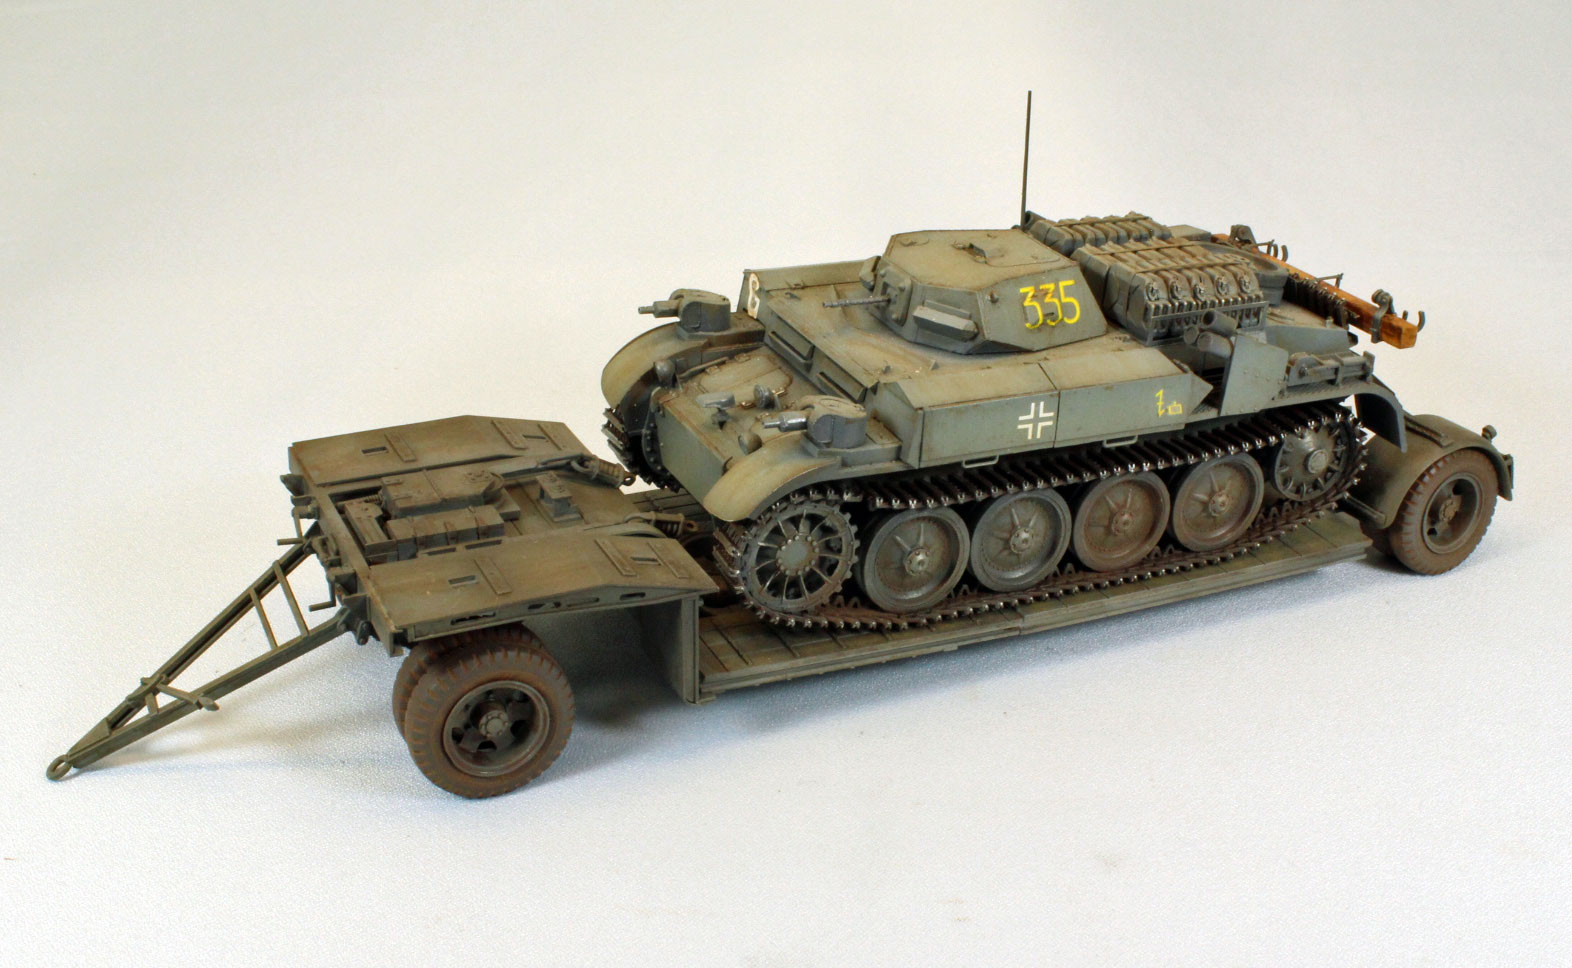
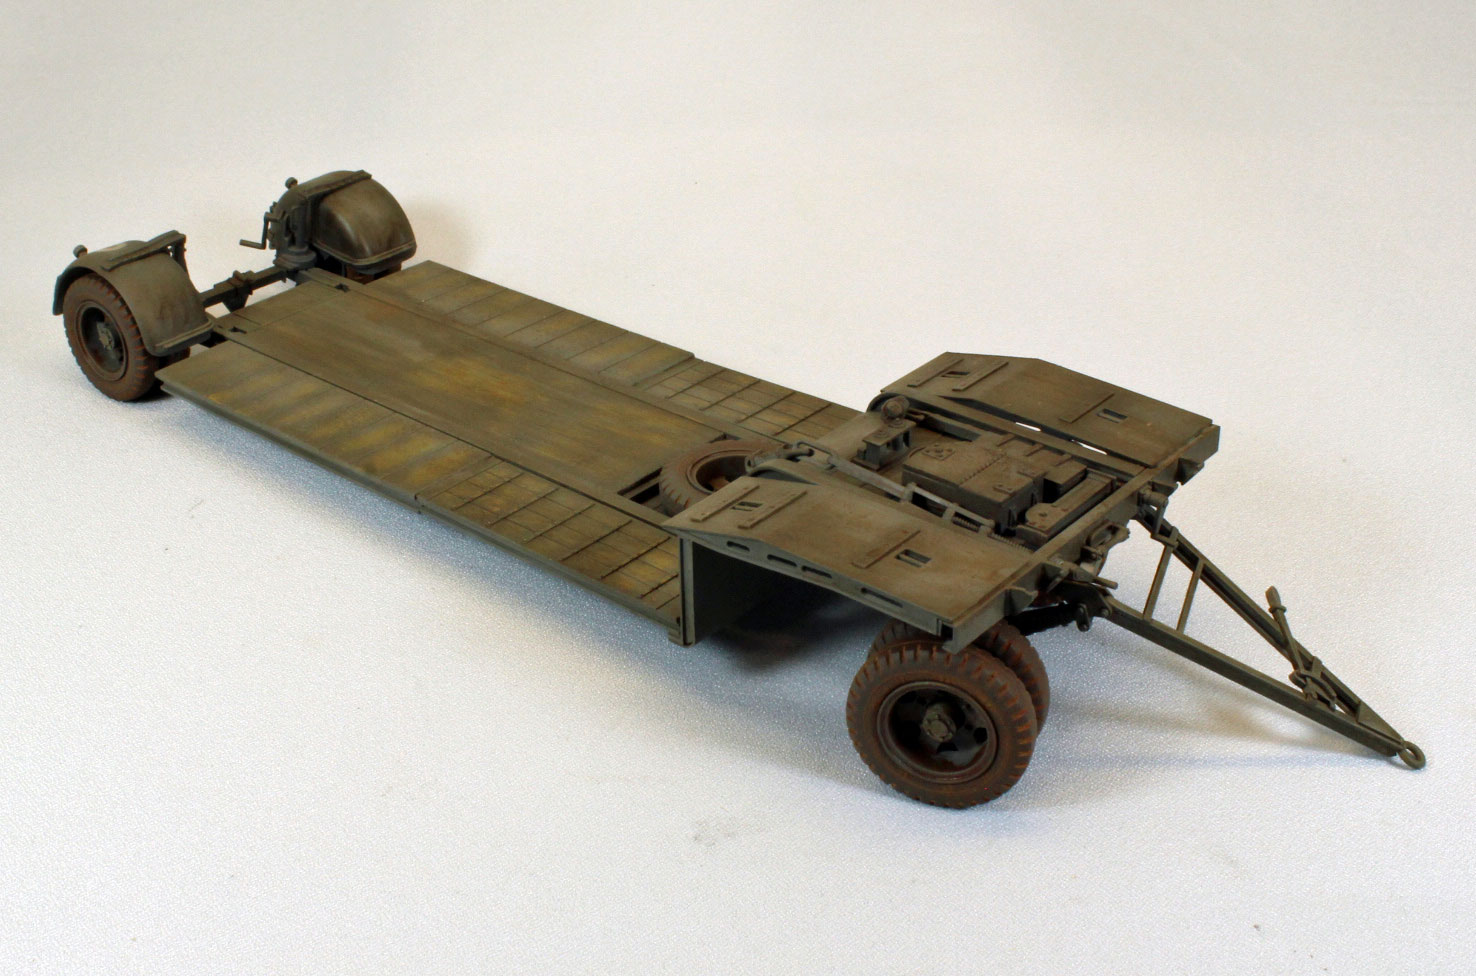
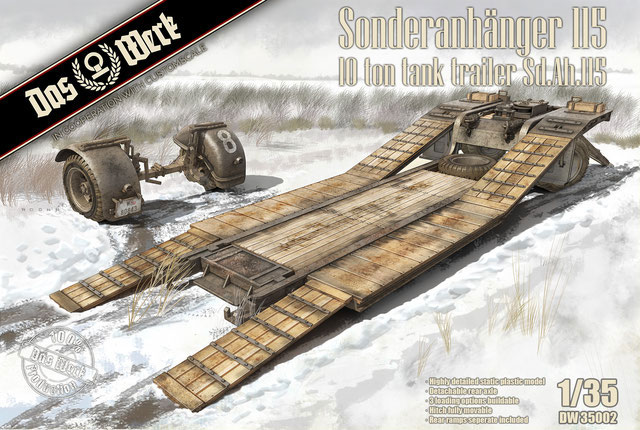
Sonderanhänger II5 10-ton Tank Trailer Sd.Ah.II5
by Eric Christianson
 Model: Sonderanhänger II5 10-ton Tank Trailer Sd.Ah.II5
Reviewed by: Eric Christianson, IPMS # 42218
Scale: 1/35
Company: Das Werk
Price: $34.74
Product/Stock #: DW35002
Website: AFV Club
Product Web Page: View
Product provided by: Das Werk and MBK
History
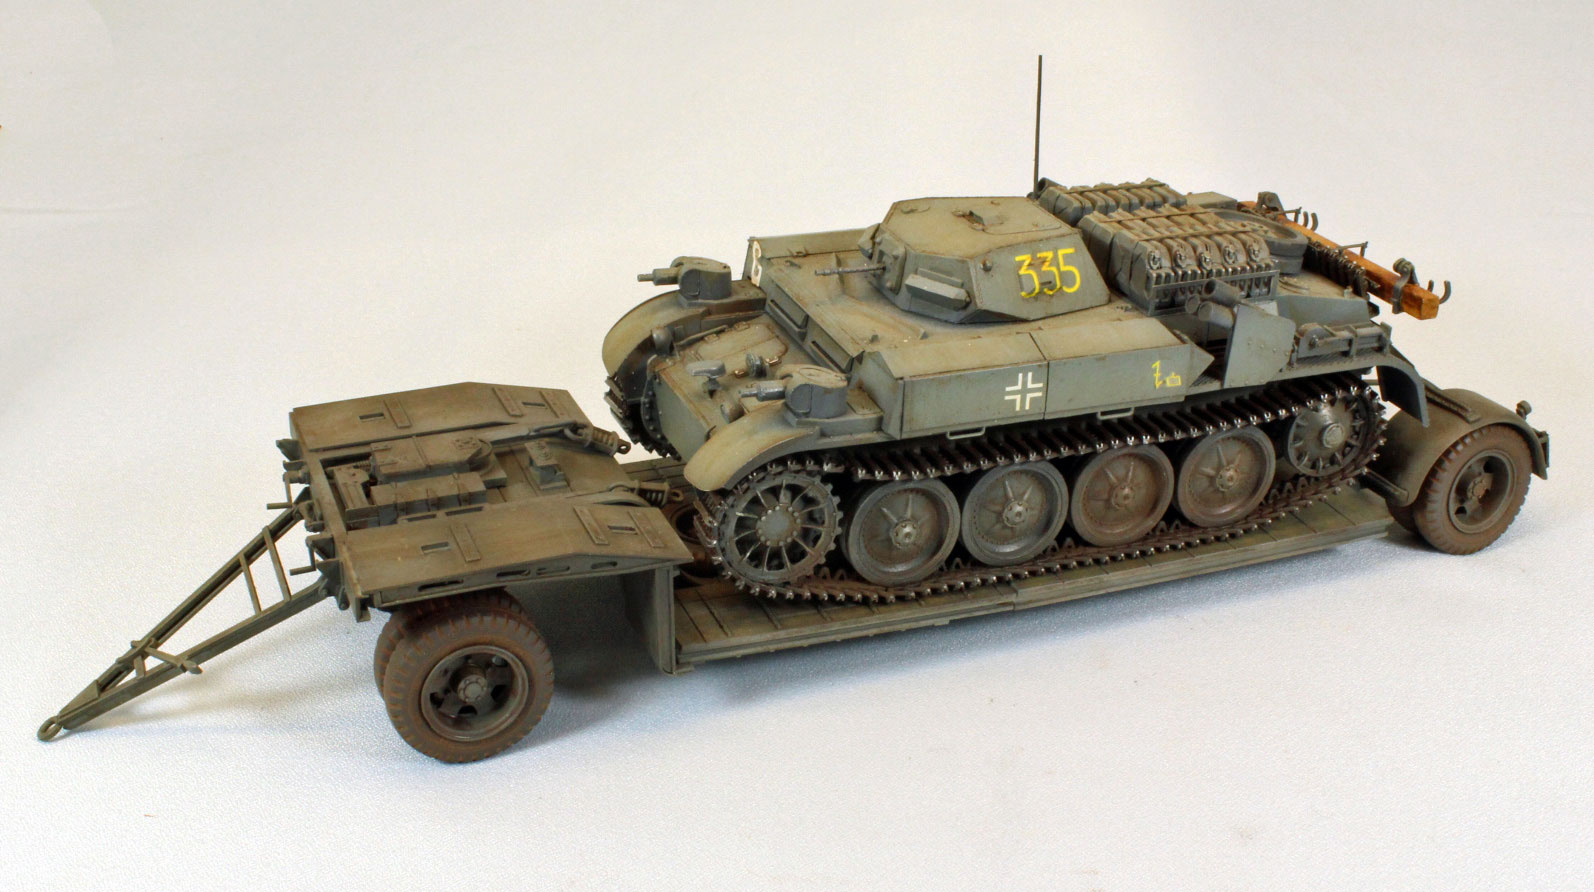
Frankfurt, Germany-based Das Werk has been busy in the ‘cool and unusual’ department as of late, providing model kits not usually covered by other manufacturers. I was initially attracted to their work by their high-quality boxing and the beautiful artwork that adorned their kits. Not satisfied with the run-of-the-mill subjects, DW continues to stick to its roots of providing interesting and imminently buildable kits for a good price. Their stunning Faun-based truck and trailer offering is the first I’ve seen in injection-molded plastic, and this review specifically covers the lowboy Sonderanhänger (‘special trailer’) 10-ton Sd.Ah.115. The Sd.Ah.115 was a light tank transporter tasked with transporting light tanks and other vehicles such as armored cars. The total weight of the trailer itself was just over 11,000lbs, and it sits about 30 feet long.
Initially developed in 1937, the Sd.Ah.115 first entered service the following year with widespread use throughout the Polish campaign. Standardized for carrying light vehicles, it retrieved damaged and knocked out vehicles for repair and/or cannibalization.
The Kit
Das Werk has gained a reputation for using only the best of materials and packaging, and this offering is no exception. The double-folded, sturdy box is large considering that the kit inside is made up of only four sprues. Once open, all parts are bagged and the decals are slipped inside the instruction booklet. The plastic is soft but not too soft, and the molding is excellent with no noticeable flash or sink marks. The detail is crisp and the number of attachment points and nodes, while many, are located in areas that are easily addressed. The sprues themselves are lettered with large, easy to see capital letters punched out of the plastic – a feature that may not be a big deal in this specific kit (with only four sprues), but a god-send for larger kits with many sprues.
The contents of the box include:
- 4 sprues of parts molded in light-grey plastic
- 9 vinyl tires
- 1 decal sheet with markings for one trailer, German Army WWII
- 1 15-page, full-size color instruction booklet, including a five-view CAD color painting and decal guide. All text is translated into English.
The Instructions
The instruction booklet is excellent. Printed in color on high-quality, satin-finish paper, it starts off with a short history and a symbol guide to use for assembly and painting. At the end of the booklet is a color reference grid and a section for painting and decal information, with call-outs for standard RAL colors, Tamiya, Mr Hobby H-series, Ammo, Vallejo, Humbrol, and Mission Models paints. Unfortunately, no parts map or list of un-used parts is included, nor are there page numbers or step numbers – which is fine for the builder (but makes things a little difficult for the reviewer!) Images are rendered from several angles so the modeler is never forced to guess about how things go on ‘the other side’. There are numerous images of, for example, the completed assembly for a given step, and other images of where to put glue to allow free movement of some parts, etc.. And - for the first time in modeling (for me at least) - there are QR codes presented that bring up an on-line video of someone actually building a particular assembly; an idea which I think is absolutely brilliant. Gut gemacht, DW!
The last two pages show different build options and a single, full-color five-view drawing showing an early-war German grey finish and decaling scheme.
Das Werk has invested heavily in making an excellent set of instructions, and the quality shows through. Good job.
Things to consider before starting:
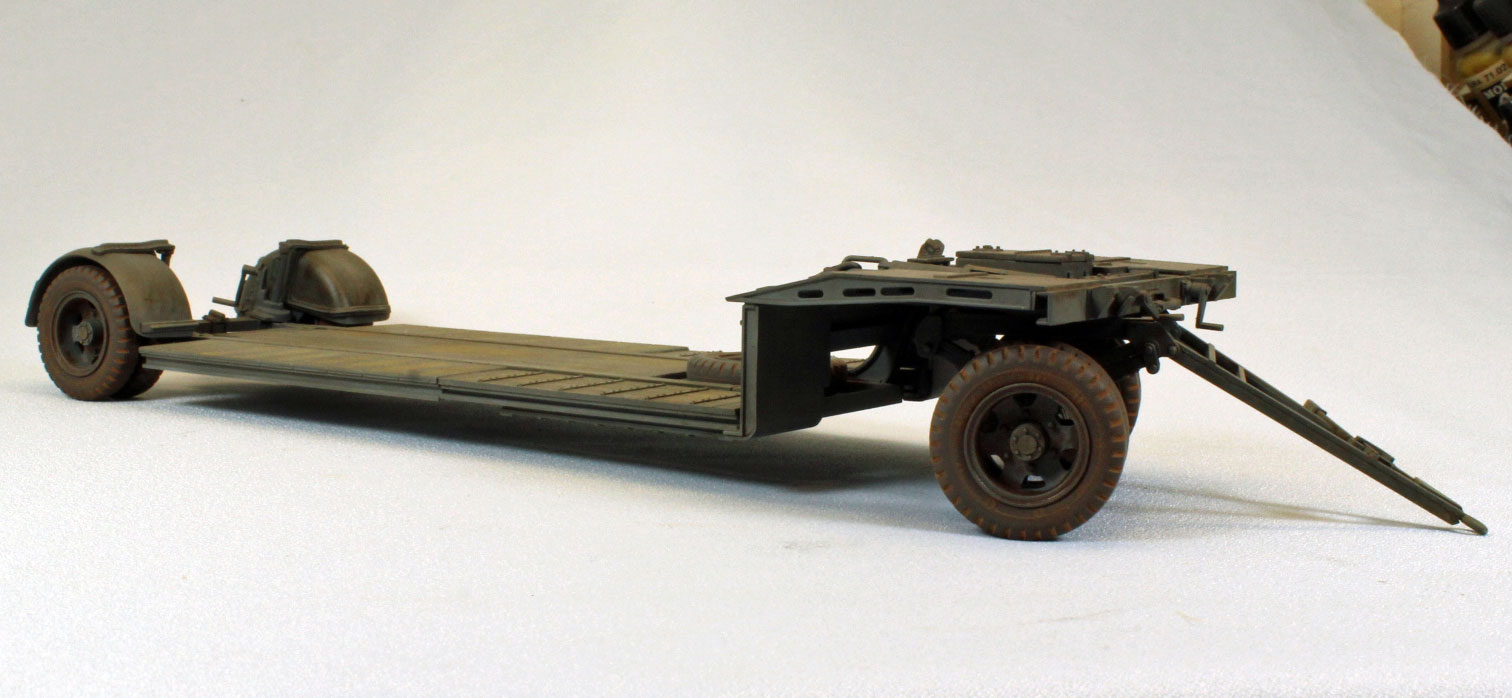
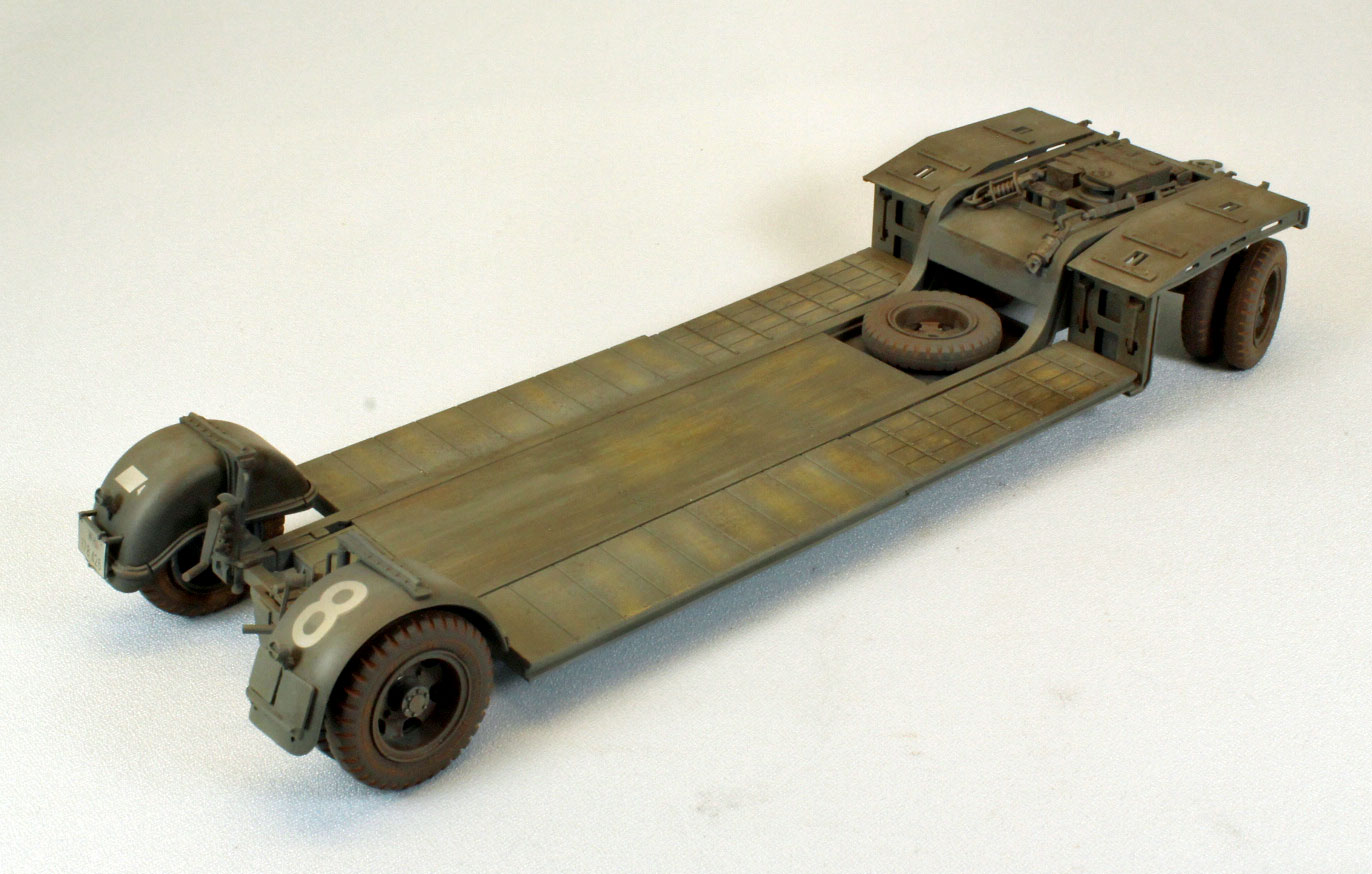
There are several options for building the trailer; 1) as a normal low-boy, in a standard towed configuration; 2) as a modified ‘front ramp up’ configuration for hauling larger vehicles (there is an image of the trailer hauling what looks like an SdKfz 7 Halftrack in the instructions); and 3) in a ‘loading’ configuration with the rear loading ramp, sans rear wheels, set down to the ground and ready to receive a rolling vehicle.
The rear wheel assembly is removable (for Option 3, above) and the various panels and ramps can be left un-glued to re-configure the entire trailer for any of the options, on-demand.
The inner wheels can be assembled and attached without the tires, but I recommend against this. Access is not perfect, and pushing the rubber tire over the fixed wheels resulted (in my case) with four wheels broken off their axles. I suggest that you treat all the wheels and tires off the vehicle, and attach everything at the end. (I made quick work repairing the axles by inserting steel pins into each wheel, with corresponding holes in each axle – again, this can be avoided by not attaching any wheels until the very end).
Otherwise, that’s it. This build was about as problem free as they get. Have fun!
The Build
Assembly starts with the front set of wheels. The entire assembly, along with the tow frame, is movable when finished when you carefully glue part H37 in place, later. Parts A2 and A4 can be assembled and set aside – the tires can be easily pushed over the completed wheel – as long as it is not already attached to the trailer!
The carriage, hitch, and frame assemblies come together effortlessly, even though there are two QR codes pointing to videos to assist with the frame, if needed. When assembling the fenders, the detail fits snugly but doesn’t line up as well as it could, exposing slight gaps between the three pieces (Parts C9, C36, and C45).
While there are identical pre-drilled ‘pseudo’ holes on the interior of each fender to assist the modeler, one fender (port side) receives five holes, while the other only one. I accidentally drilled all 5 holes in both and, rather than fill the extra holes in, I simply added some extra detail to that fender from my spare parts box.
The steps that cover the low-boy itself assist the modeler through some interesting engineering here to allow all three versions of the trailer to co-exist via moveable parts. You also have the option, of course, to glue things down, which is what I did (otherwise, I am sure to lose important pieces over time).
In the second box labeled ‘Frame Assembly’, you have the option to cut away part of the two lower frames (Parts A7) so that the horizontal panels to each side can be raised to haul larger loads (like the halftrack) mentioned earlier. If you choose the option that represents a standard low-boy configuration, you do not have to cut away any parts. During final assembly you attach the front and rear wheel and cable assemblies.
And that’s it! The rest of the instructions show how you can display the model in its various representations.
Painting, Decals and Finish
Before finishing you might want to consider an after-market item created specifically for this trailer. Das Werk teamed up with another German company that sells wood-grain decals (among other modeling products) called Uschi to produce a set of wood grain decals that add a beautiful wood finish to the wooden panels in the trailer. This product can be found here: Faun and Sd.Ah.115 Accessories - Das Werk Scale Models (das-werk-models.com).
I decided to paint my Sd.Ah.115 in the same overall German Grey scheme that will adorn my Faun prime mover. I used paint and finishes from a variety of manufacturers, listed below.
Before painting, I made a sticky board for the five (external) wheels, four wooden boxes and two wheel-chalks. (Note: two of the boxes and the chalks are not mentioned in the instructions, but they are nicely molded and I thought would look good scurried away somewhere.
I weathered the nylon wheels in a novel way, picked up in an old magazine article. I dumped a little Mig PO28 Europe Dust pigment into a plastic baggie, dropped in the nine tires, and shook it up for a few seconds. In just that amount of time the tires were evenly (and completely) coated in pigment – cutting the time usually taken with the pigment-thinner-slurry approach considerably. From that point on, it was simply a matter of removing the excess pigment with a short-haired brush, and using facial oil to get the dull sheen I was looking for, which is what I would have to do anyway, after letting a slurry dry overnight.
The other benefit of applying pigment to rubber tires using this ‘shake and bake’ method was that I could recover a good amount of the pigment to use again, since I brushed off the excess onto a piece of glass where it could easily be collected.
The painting and finish of this kit essentially followed the steps taken by Andy of Andy’s Hobby Headquarters on his YouTube build-video of this kit. That video can be found here: [Part two Building the Das Werke Faun L900 with trailer including painting and weathering - YouTube]. I strayed only by applying Tamiya NATO Black to the lower chassis and underneath the main bed as a dark, primer/pre-shade coat under the grey.
Once the paint and various washes were dry, I used Micro-Sol/Micro-Set decal solutions to apply the three decals for the trailer. The Das Werk decals went on without any problems. I followed this with a ‘road-dusting’ coat of Vallejo Model Air Light Brown and then shot the whole thing with Vallejo Flat Varnish to kill the shine.
I held off my normal weathering step involving pigments until I could mate this trailer up with its prime mover, when I’ll be a be better able to judge what’s needed.
Conclusion
This build came together very quickly, mainly due to the sheer buildability of the model. It is apparent that this aspect is where Das Werk puts their focus on with their products. The terms ‘German’ and ‘Engineering’ go together like salt and pepper for good reason, and it shows in this kit.
From the packaging, to the sprues, to the assembly sequence, to the QR-Code online tips – everything is geared to make the build a success, and the result is that I want to build more. Indeed, I have requested another Das Werk kit to review, and purchased the Faun L900 truck on my own. I am really looking forward to sitting down with these kits when they arrive.
I recommend the Sonderanhänger II5 10-ton Trailer for modelers of all levels. With all the assists provided by Das Werk, anyone should be able to produce a decent replica of the real trailer if they go slowly and follow directions.
I would like to thank Das Werk and MBK for providing this kit for review, and to IPMS USA for giving me the opportunity to build it.