Reviews
Armor
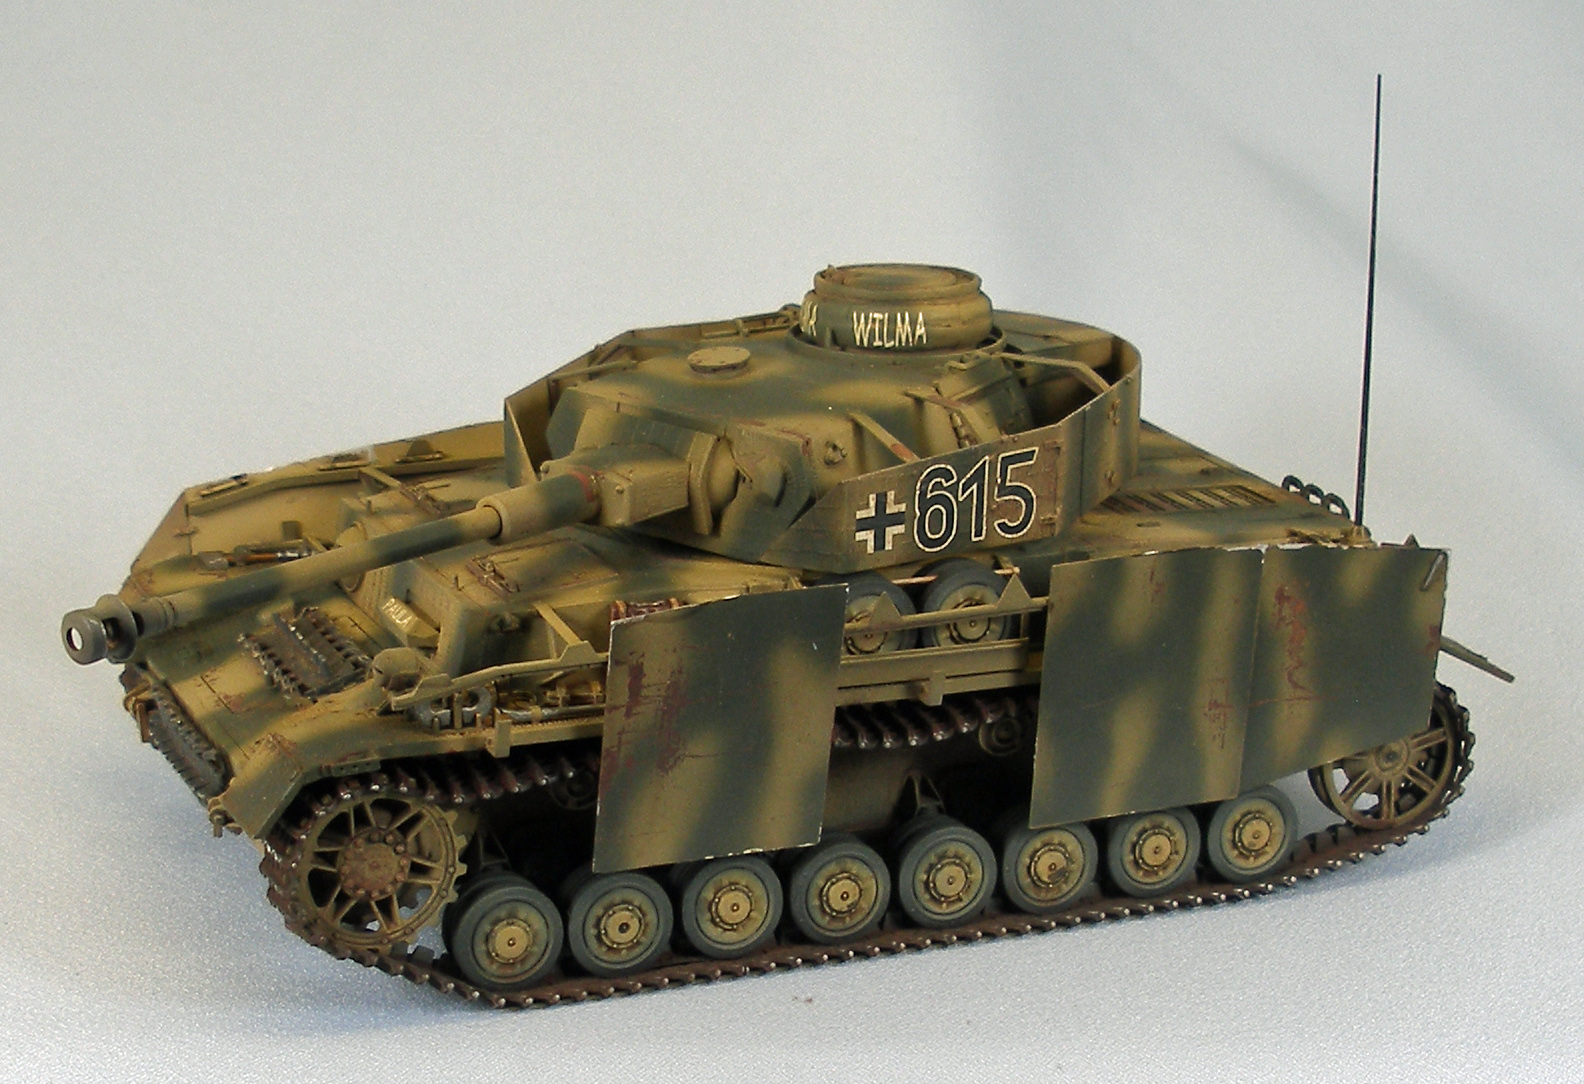
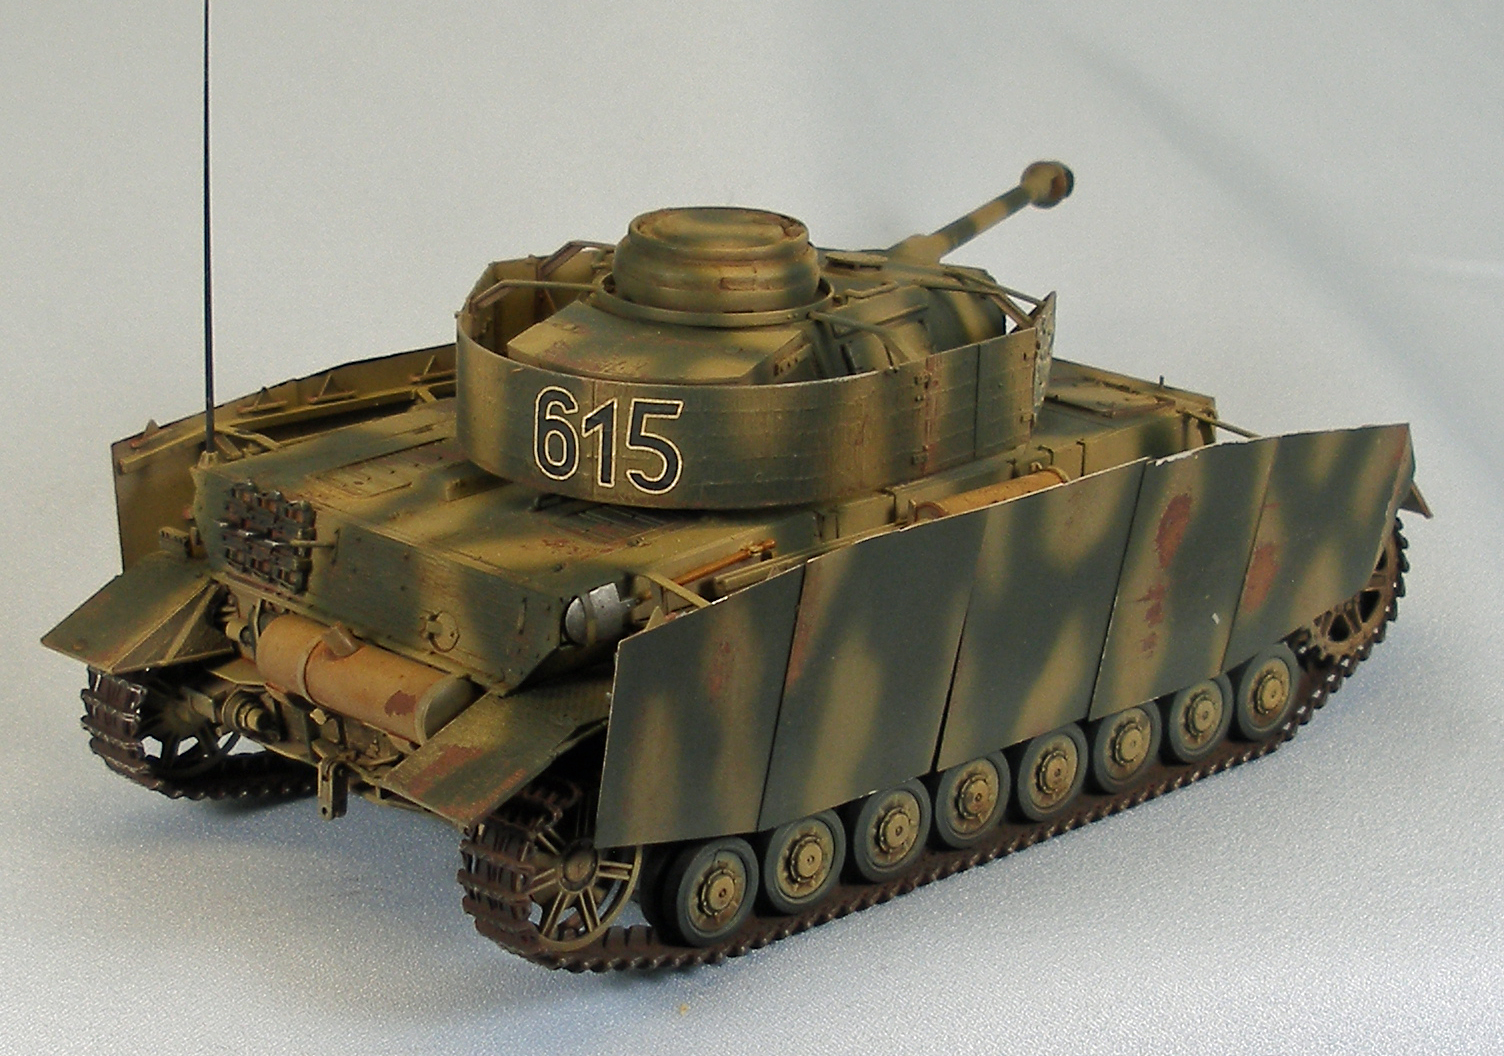
Pz.Kpfw.IV Ausf.H w/Zimmerit, Mid-Production, HJ Div. Normandy
by Eric Christianson
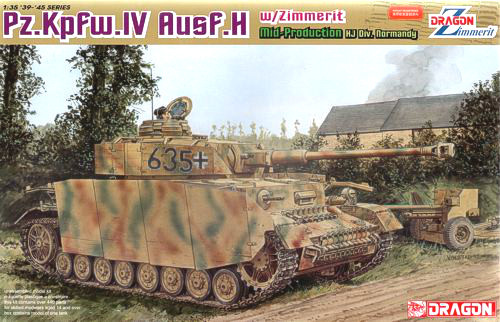 Model: Pz.Kpfw.IV Ausf.H w/Zimmerit, Mid-Production, HJ Div. Normandy
Reviewed by: Eric Christianson, IPMS # 42218
Scale: 1/35
Company: Dragon Models
Price: $66.00
Product/Stock #: 06611
Website: Dragon Models
Product Web Page: View
Product provided by: Dragon Models
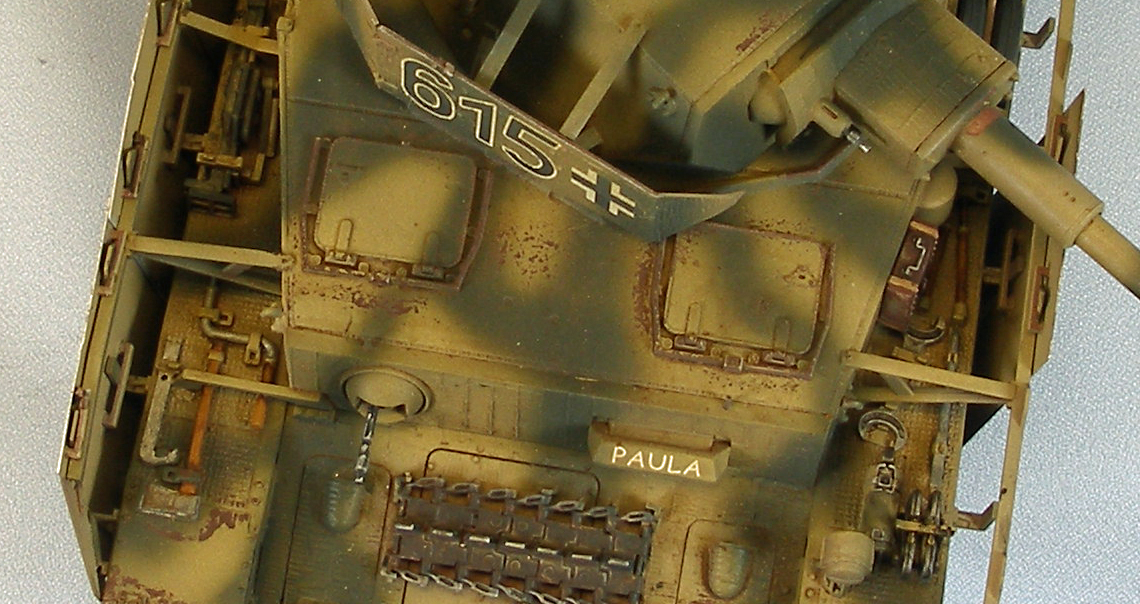
Dragon Models offers a complete lineup of the Pz.Kpfw. IV family tree in 1/35 scale. Following on the footsteps of their (Late Production) H released four years ago, their new (Mid Production) H represents a specific vehicle in the 12th Panzer Hitlerjugend Division, fighting in the defense of Caen, June, 1944. Like the earlier release, the Mid-Production H comes with molded-on Zimmerit and one-piece DS tracks. New to this kit, however, are turret side skirts with Zimmerit as well as a brand new frontal armor plate containing the steering-brake hatches. The only other change is that Dragon has replaced the aluminum barrel in the original kit with a slide molded one in the update. For fit and finish, I prefer the latter, so that's also a welcome replacement.
Opening the box
All of Dragon's Mk IV's come with enough parts to completely fill the somewhat sturdy box and then some. There are extra parts on every sprue, many of which are zimmerit replacement versions. There is an optional axe (with and without a molded-on bracket) but otherwise the single set of pioneer tools come with molded on fittings, with no PE replacement options. There are three (!) extra antennas and a set of Mg34 tripod parts that won't be used. A single PE sheet sports exhaust louvers and drive-sprocket rings, but is otherwise somewhat sparse for Dragon. There are two sturdy aluminum sheets containing separate schürtzen sections and a set of beautifully thin DS track with enough extra length to represent the ubiquitous track-sag common to this vehicle.
The contents of the box include:
- Lower hull and turret, packaged separately.
- 27 sprues in soft, light grey plastic, packaged separately.
- 1 clear plastic sprue
- 2 pre-cut sheets of sturdy metal schürtzen, separated into sections.
- 1 small photo-etch sheet, including exhaust louvers and hatch ring detail
- 2 runs of yellow-tan DS track
- 1 10-page blue and white instruction sheet with 19 steps
The kit comes with eight color schemes represented, using blue-and-white ink three-view drawings; and a small (but perfectly registered) sheet of decals from Cartograph of Italy. These include:
- Hitlerjugend Division, Normandy, 1944 (3 vehicles)
- 8th Panzer, 3rd Regiment, 2nd Panzer Division, Normandy, 1944
- Panzer Lehr Regiment 130, Normandy, 1944
- 20th Panzer Division, 1943 (2 vehicles)
- Unidentified Unit, 1943
The Instructions
This is a 'fortified re-box', so there are sprues from no less than six different Dragon kits included in the box. I was able to identify two Ausf. H kits (with/without zimmerit), two Brummbär kits (with/without zimmerit), a PzKpfw G with zimmerit, and one just labeled PzKpfw IV (no Ausf. version). As a consequence, I found three significant miss-labels in the instructions:
- One of the two sprues labeled 'R' in the instructions (and in the box) is not included in the parts map.
- All sprues labeled 'Z' in the parts map and in the instructions are actually stamped with 'T' in the box. There are several of them.
- All sprues labeled 'B' in the parts map and in the instructions are actually stamped with 'S' in the box.
If you make the mental adjustments, however, things will go pretty well. Curiously, when I compare the older Ausf. H (Late production w/zimmerit) instructions with this new version, the new set is completely reworked. While the parts are the same in most cases, the images are slightly different, like they were drawn from a different angle, which leaves me with the impression that Dragon worked mightily on trying to improve things for this kit.
Assembly sequence varies by modeler but the general flow of things go pretty much as Dragon intended. The exceptions I made are identified in the text below.
Things to consider before starting:
There are a whole lot of assembly options to choose between and you can save yourself a lot of time by making those decisions up front, annotating the instructions, and removing all the parts you won't need from the sprues. In addition, there are several places where the options are called out for a specific (Normandy) vehicle and options for vehicles with schürtzen or not, so you might want to note those carefully as well. Also, since many of the parts are mislabeled with incorrect sprue letters, marking up those will help when searching the 27 sprues for the right part.
There are several 'gotcha' areas that, if you don't do things in the right order, you can end up with problems. Fortunately, these are all in Step 7, so take care when you reach that part of the build (see the separate section on that step, below).
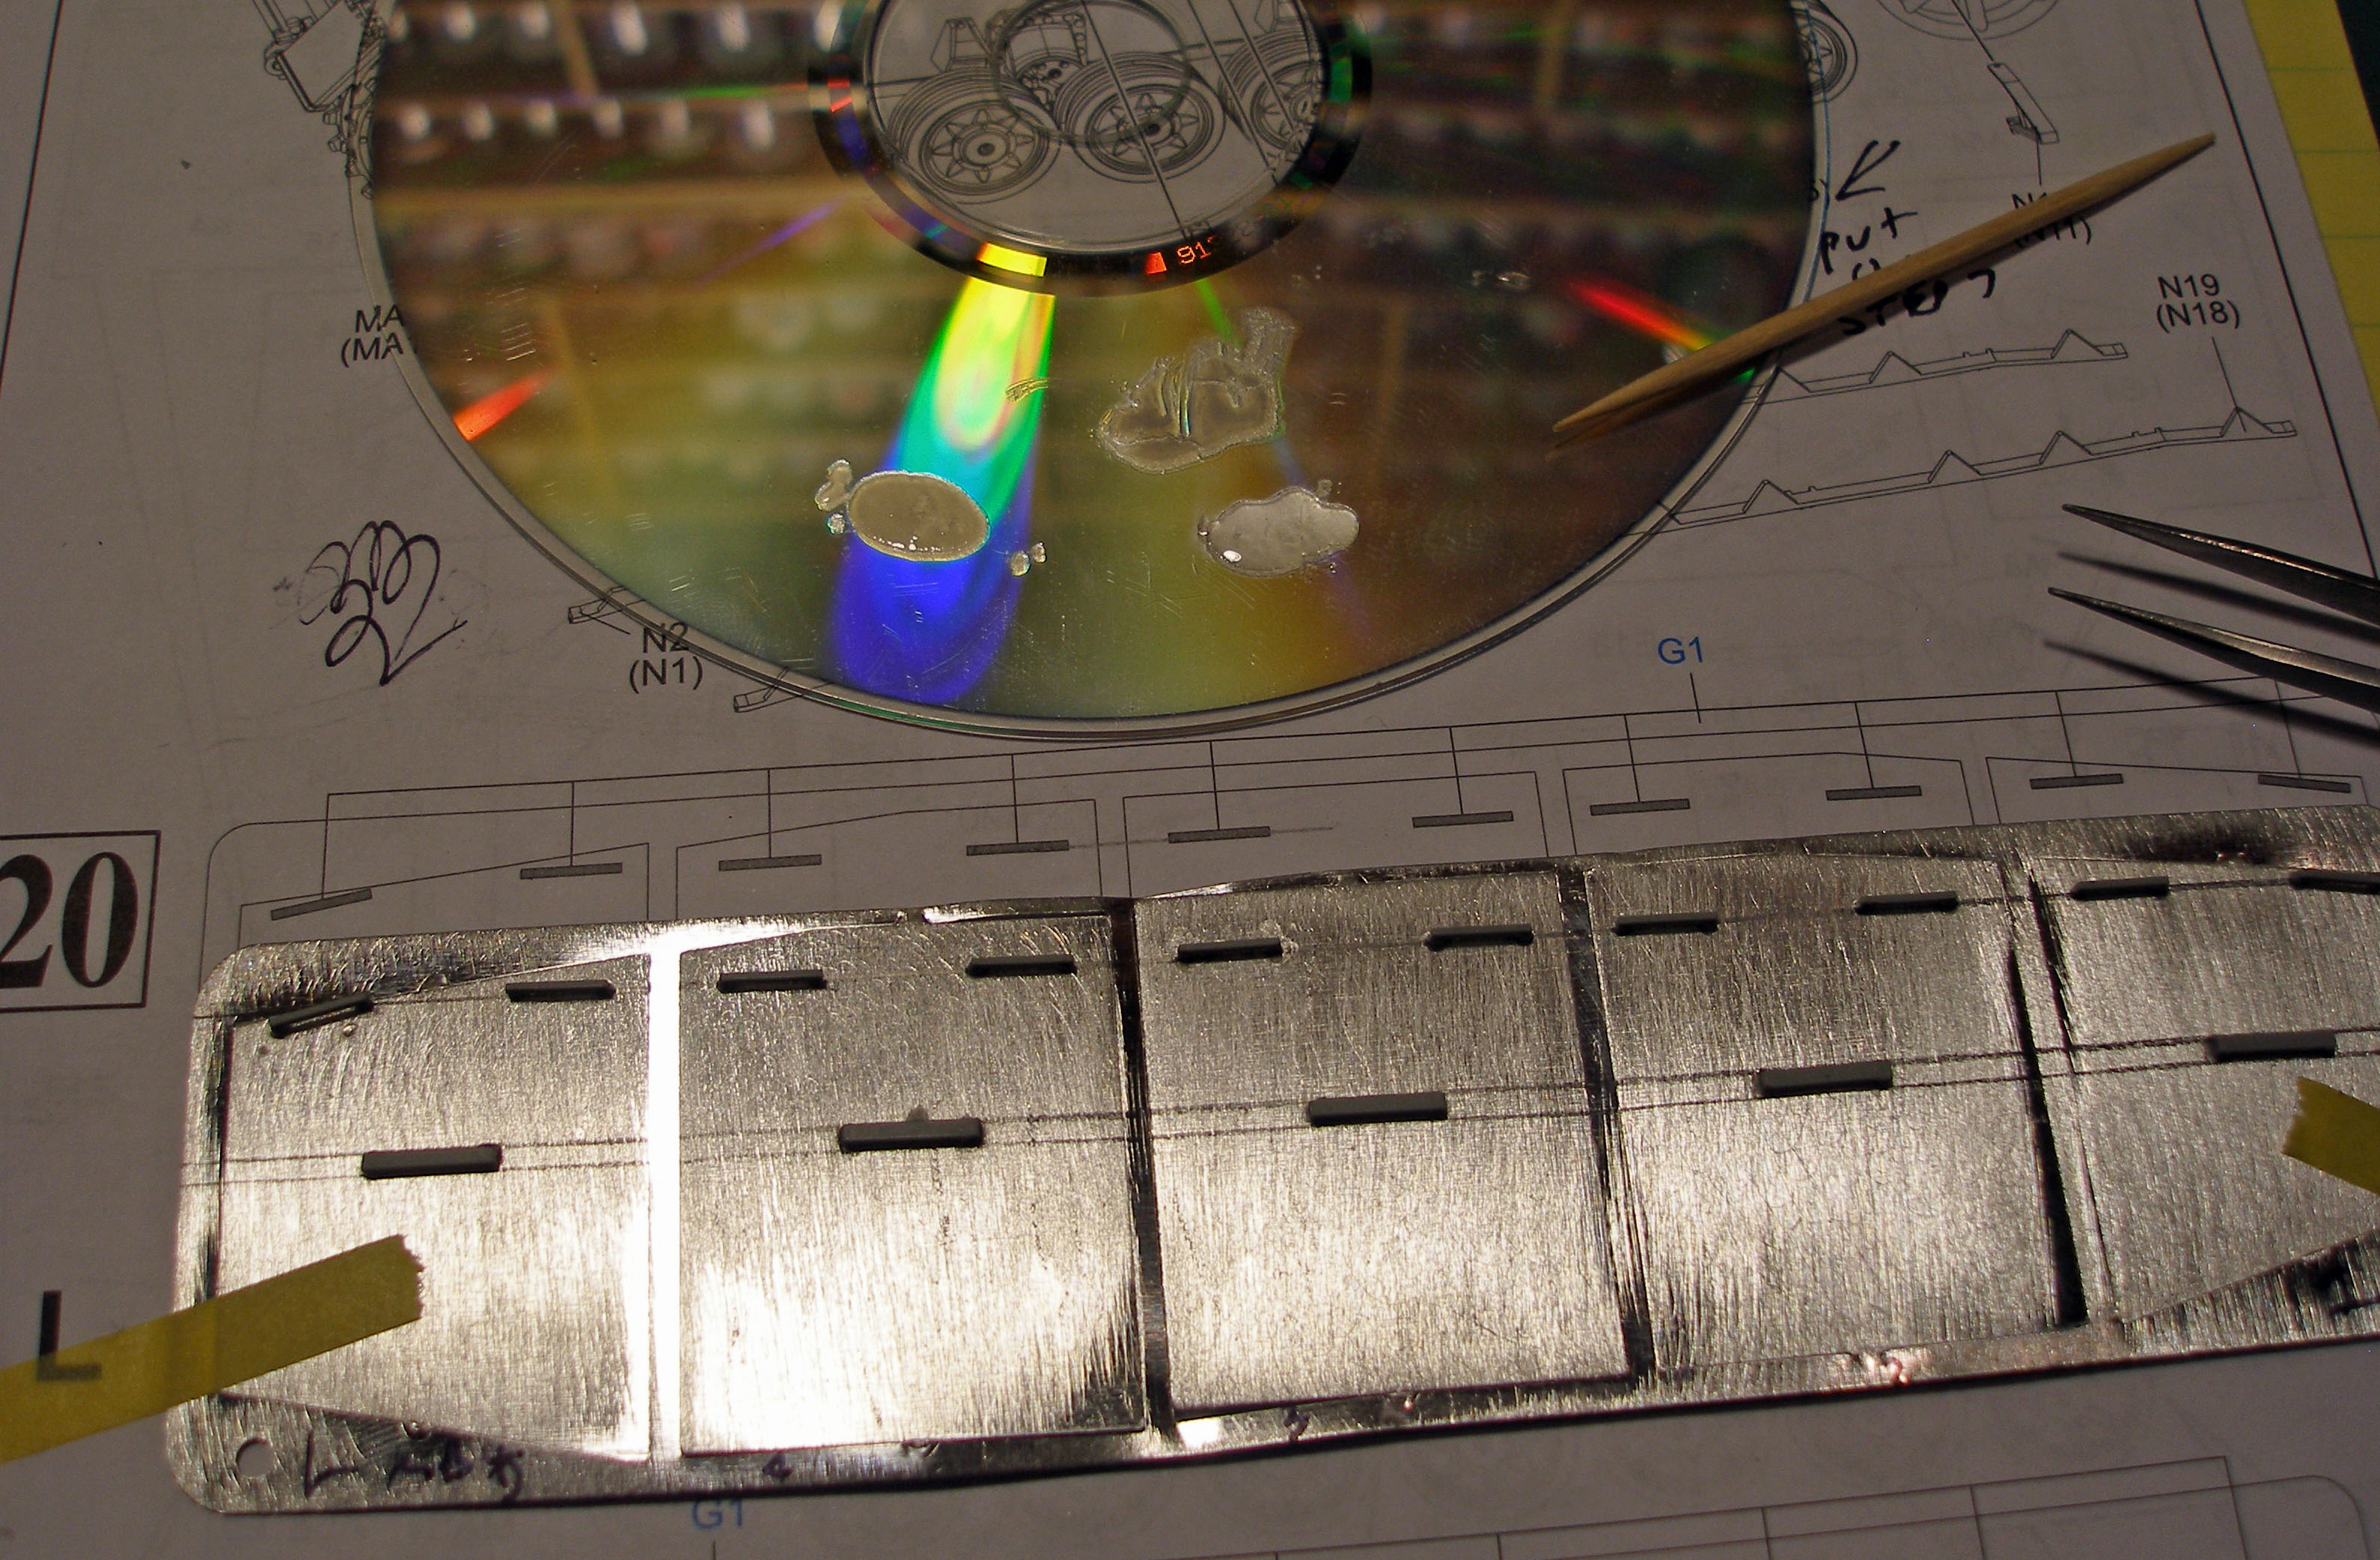
Finally – the two sets of side skirts are cut into two aluminum sprues. I suggest that you leave these sections on the sprue for treatment, paint, sealing and finish since it will help you to keep the different sections in the correct order. Refer to the images below.
The Build
Lower Chassis, Running Gear, and Main Deck
The assembly of the lower chassis went together very well; the overall detail and fit is excellent. Curiously, you are instructed to make six sets of hooks in Step 2 (labeled assemblies E and R), even though these won't be used until Steps 10, 16 ad 17. More importantly, these are easier to assemble if you attach the baseplates (Parts A50 and A51) to the hull or turret before slipping in the hooks (Parts A53). I suggest you wait until when they are needed to put these things on the model. In Step 5 there is an overly-complicated procedure (in my opinion) for assembling the length of spare track to drape across the hatch on the upper-front hull plate. Having built these before I knew what to expect, but I suggest that you snip, clean and label each piece carefully since it's kind of a puzzle. I laid all the pieces out on a stick board before assembly.
The four bogies on each side fit well, but still have a little wiggle room and the wheels on the Mk. IV really need to line up perfectly. I used a small steel ruler set along the slot between the wheels to do this.
This step contains several areas that can cause you problems. Some are inherent to all Dragon PzKpfw IV kits; others appear to be unique to this kit.
Remove the six, thick pour tabs that protrude upwards from the main lower hull. The instructions don't tell you to do that anywhere, but the side fenders will not fit otherwise.
Leave off the part labeled C8 and clip off the nubs from parts C4 and C6. Later on in Step 10, when you attach this side panel to the main chassis, you can snap part C8 into its receptacle, and doing so will set it flush with the two parts C4 and C6.
Attach the side fenders (Parts K1 and K2 in the box but labeled parts K3 and K4 in the instructions) first. Once these are in place and dry, attach the rear sloping fender pieces (parts S4 and S5 in the box but labeled parts B4 and B5 in the instructions). The rear fender pieces will not drop over the axles – they must be stuck on from behind AFTER the main fenders are in place.
You are instructed to use Part C7, but if you want to attach the schürtzen, you will need to drill out four holes, 2 sets of 2, that will take the schurtzen brackets later on. The instructions do not mention drilling these holes out and I did not discover the problem until step 19, long after the hull side was on the vehicle. I don't know if the part C7 has four holes partially made on the inside for you to drill out, or if you will need to use one of the parts labeled as 'not used' in the parts map (either Part Z14 or Part E28). But you need those four holes. As it was, I had to guess. I scraped off the male nubs from the two brackets and placed them as close to where the holes would have been.
Attach the schürtzen bracket (Part N5 from Step 19) before part C9 (C9 should be placed OVER and partially covering Part N5). Otherwise, if you wait until Step 19, you will have to cut up the bracket to fit around the rail, and these brackets need to be pretty sturdy to receive the schürtzen.
In Step 9 you are asked to shave the hatch guards off from the upper deck and replace them with parts F1 and F2. This is done easily enough since the plastic is very soft and shaves easily. Once glued, however, I found that I had to trim away some of the new material to fit the two hatches (parts E22 and E23) down securely. Lesson: before the new guards are dry, test fit the hatches to make sure you have room for them to seat properly.
Also, the twin posts (Part A52) in Step 9 that hold the tow cables on the back of the vehicle are not up to the task, being too fragile and without a sturdy connection to the hull. An alternative might be to affix metal replacements made of wire. I chose to leave the cables off the hooks (and the vehicle) altogether.
In Step 10, the front glacis plate (Assembly L) does not extend down far enough to meet the main deck once glued in place, most likely due to the zimmerit. I cut and fit a small shim of plastic card along the bottom edge to fill in the gap. Step 12 brings (yet another) new design for the ubiquitous German jack assembly. I like it!
Turret and Main Weapon
In Step 13 you assemble the commander's cupola and hatch. I don't know why Dragon went with this particular design, but whether you choose to have the view ports open or closed, the fit is not good. I test fit everything several different ways and found the whole assembly to be a real headache. Going very slowly and deliberately, clamping each piece as I went, I still ended up with enough gaps and protrusions to prevent this build from ever seeing competition. I ended up having to sand and fill the flaws like an old Frog kit. Grrr.
On the other end of the spectrum, the multi-part, double hatches on each side of the turret went together perfectly and fit snug into the turret.
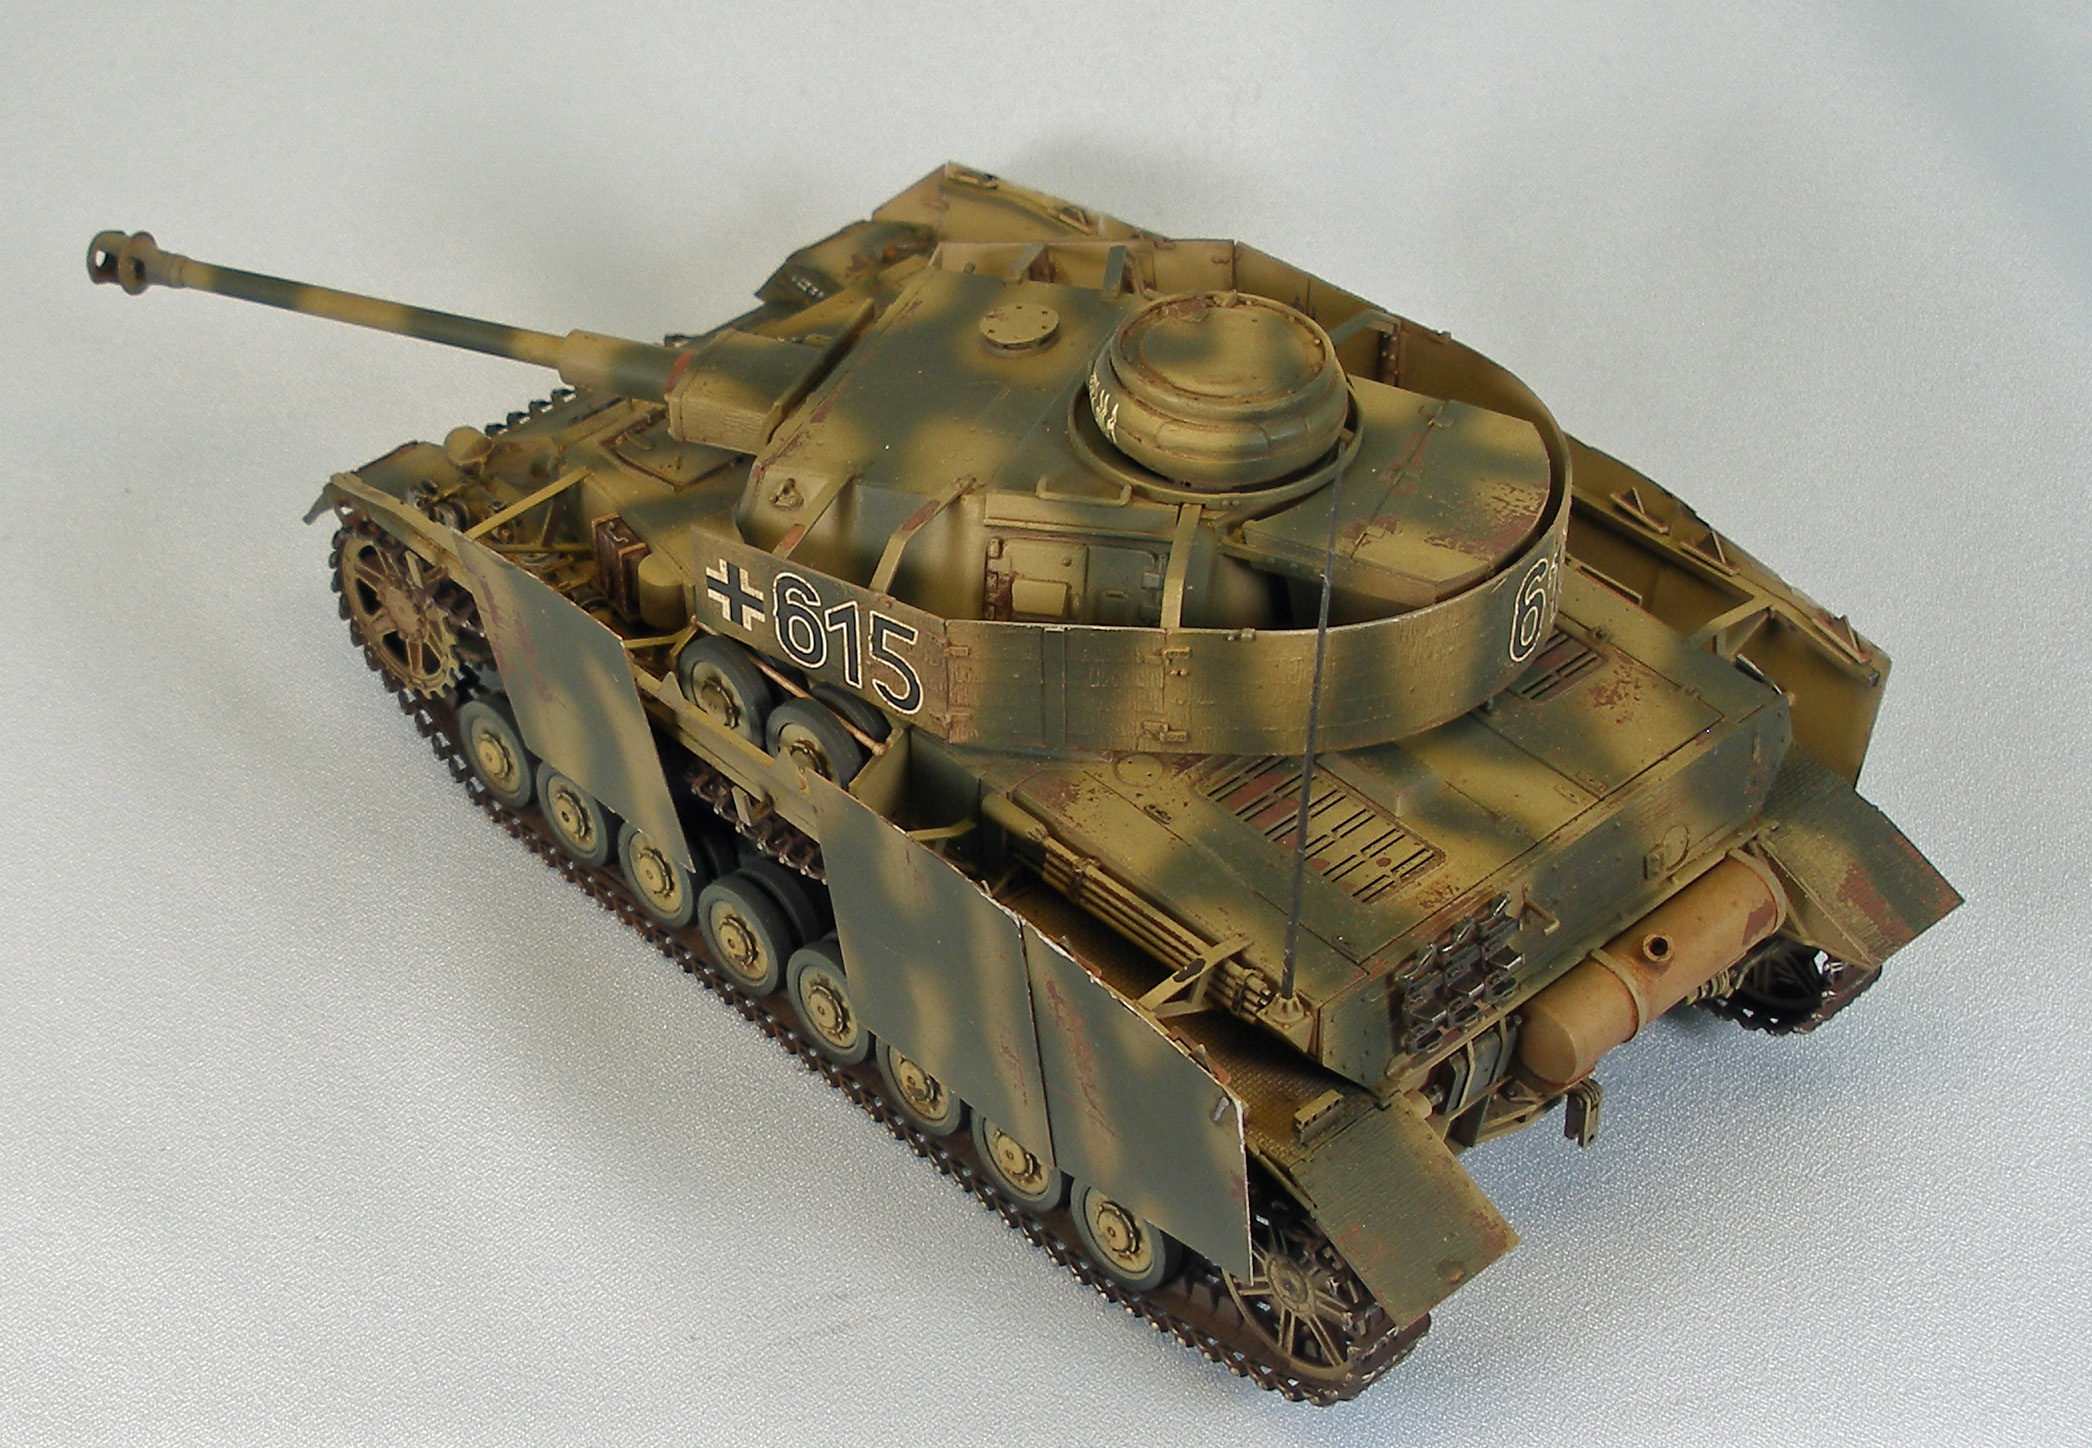
And I must say: there are fifty ways for the turret base and schürtzen brackets not to fit right, but Dragon solved every one of them. Every part can fit only one way, and the joints are solid. Hands down, this is the best design and engineering I've seen on a Mk. IV for this complicated set of interconnecting parts.
The Track
At one point in time DS track runs were thick and difficult to work with, tending to 'bow' outwards when installed. Replicating 'track sag' involved a lot of effort and rarely looked right. Not anymore. The two runs of DS track in this kit are very thin and beautifully detailed. [Note: Please see the paragraph labeled 'Track' down in the Painting and Finish section to see how I painted the track before attaching it to the tank.]
Assembly was a snap. I connected the ends using Tamiya 'green top' thin cement and installed them without any problems. I wanted to leave several of the schürtzen side panels off and (thankfully) Dragon left enough slack in the DS track to adequately reproduce the sag common to the Mk. IV. I dabbed a little Testors 'black bottle' liquid cement to the wheels and return rollers, pulling each section down on the upper portion of the track just a little as the glue set. Perfect.
Painting and Finish
The Mark IV is a stand-up tank. Tracks, bogies, turret, big gun – it's all there. You can build it all and then paint it if you wish, which is the approach I always take. You do have to make some choices in sequence since you have schürtzen and DS track to paint and weather, but otherwise everything else is pretty straight forward.
(Note: I thin all Tamiya paint and primer products 50:50 with Gunze Mr. Color Leveling Thinner, which has its own retarder for airbrushing. If you haven't tried this thinner with Tamiya paints, you really should. I use a Pasche-H Single-Action airbrush, Number #3 tip, at 20 lbs. pressure for everything. I use Vallejo's own thinner for all Vallejo paints.)
Schürtzen
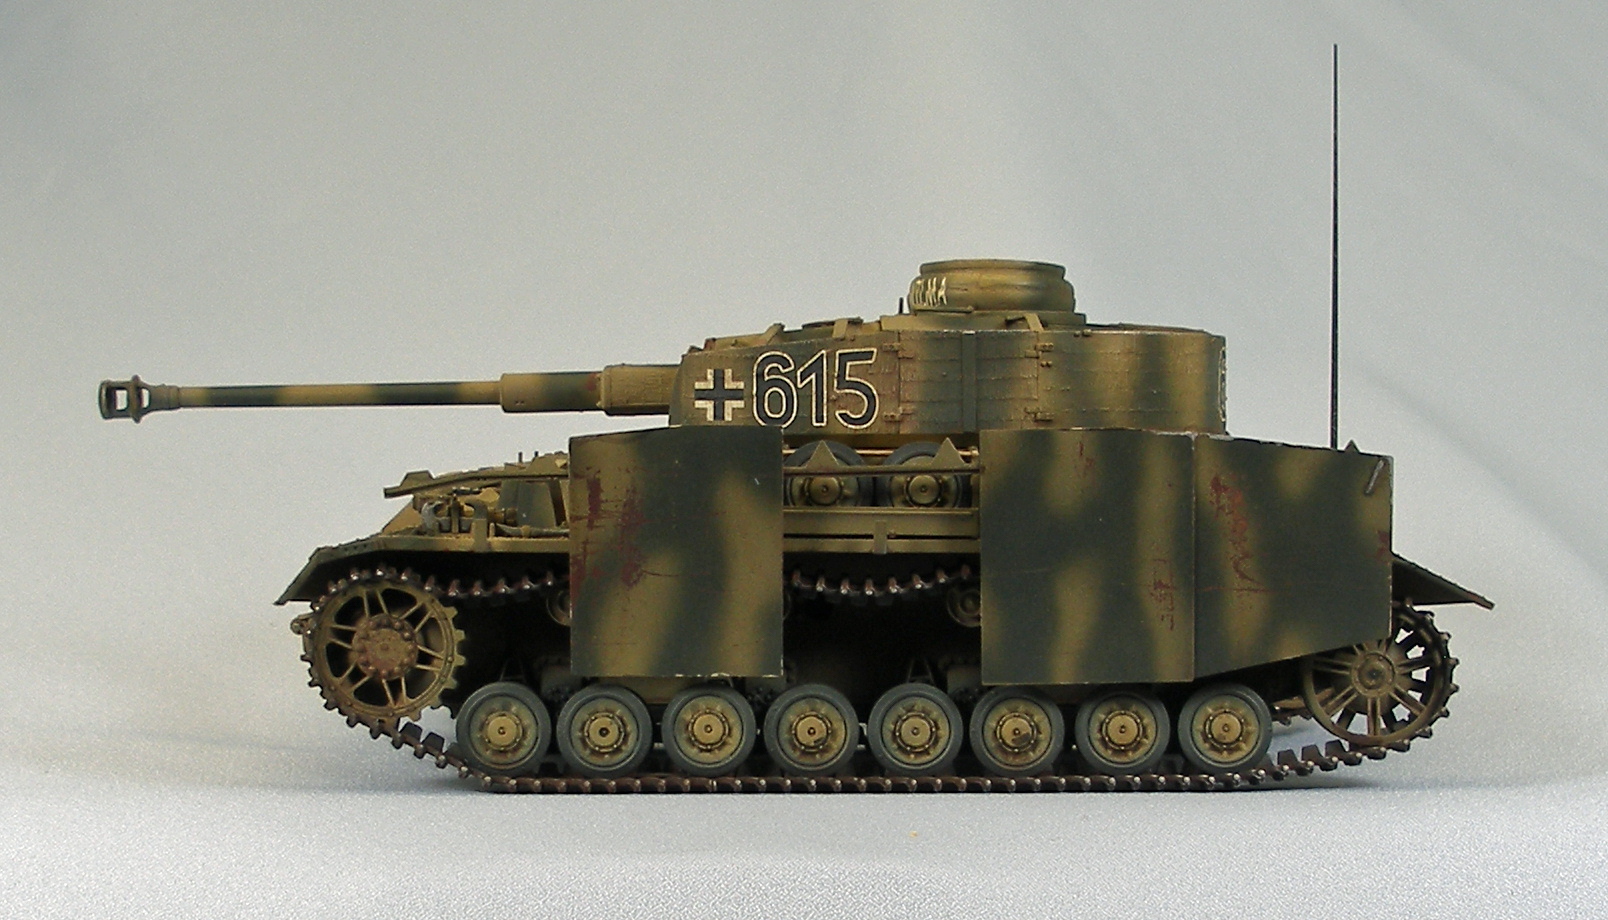
For the schürtzen, I created a sticky board for the five plastic pieces of turret plating, and I used a coarse drywall sanding block to rough up both surfaces of the two aluminum sprues containing the side plates. These plates would remain on their sprues all the way through painting, sealing, and weathering. After wiping off any aluminum powder residue left over from sanding, I sprayed a primer coat of Gunze Mr. Surfacer 1200 on both sides of the two aluminum sprues and set them aside to dry and de-gas.
Track
Before the track went on the vehicle, I painted both sides of each run the same color as the main vehicle's pre-shade base - see Step 1, below. Once the flat brown base coat was dry, I used a 'Mini' Q-tip to apply Model Master Dark Anodonic Gray Buffing Metalizer to the centerline posts of the tracks. This smaller, tighter (and cheaper) Q-Tip can be found at any drug store. It is less fluffy and works great at getting into tight spots.
Before the side schürtzen went on, I put a little Gamblin Artists Oil Silver paint straight from the tube onto my pinky finger and rubbed it over the cleats and track edges to bring out a metallic glint where I needed it. The shine would be knocked down a little by dry pigment and flat varnish applied later on.
The Main Vehicle
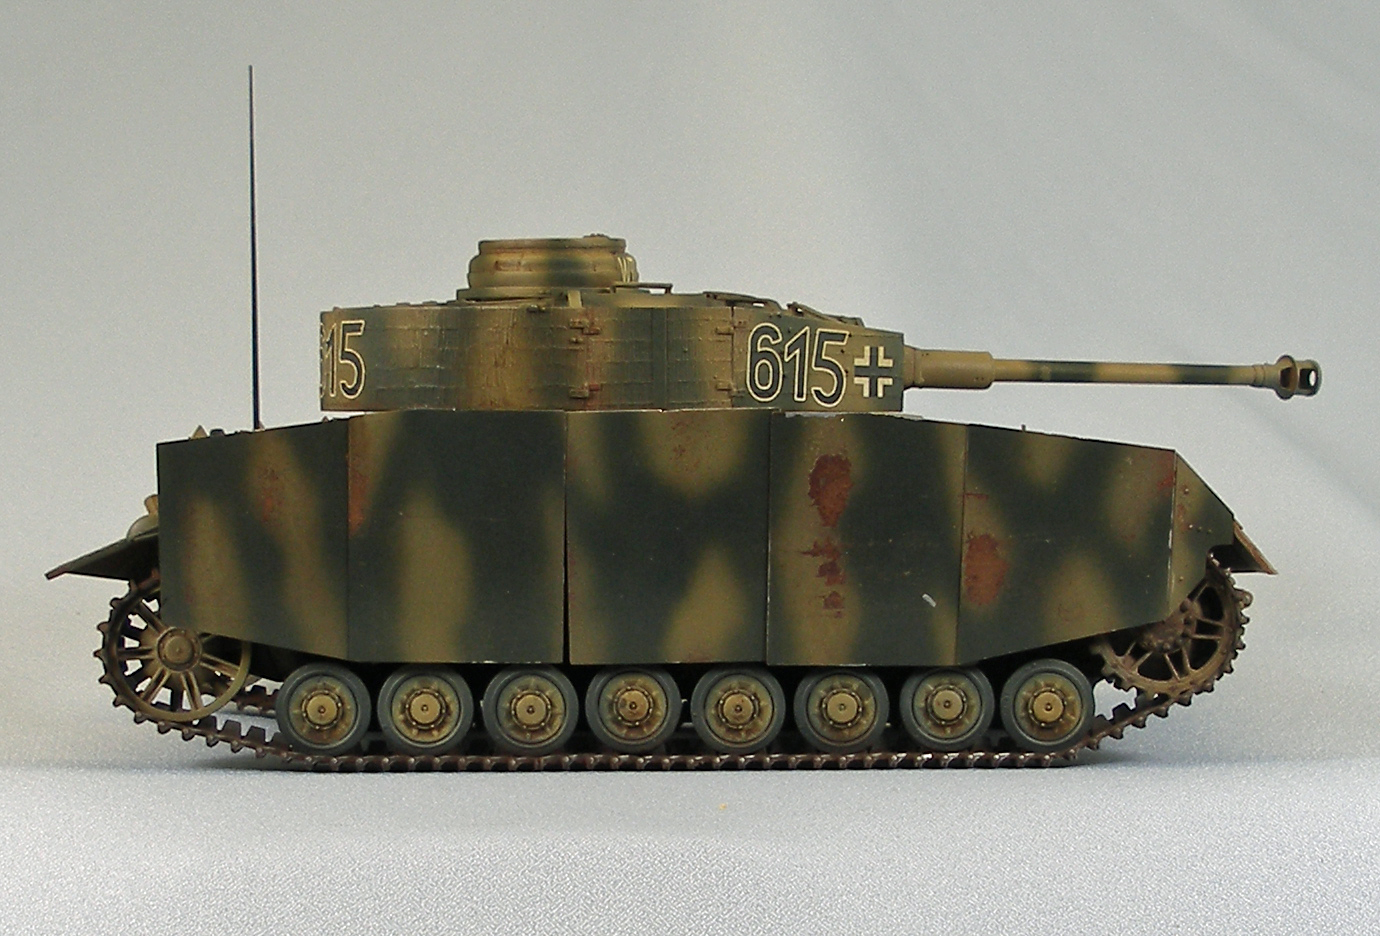
I decided to use one of the summer Normandy schemes for my Mk. IV, so I started by airbrushing a primer/base coat of Tamiya Flat Brown (XF-10) over everything, including all the schürtzen and track. I used a dark brown because I wanted that to be the color that would show up when I scraped away the subsequent layers of paint over a barrier coat of hairspray.
Once the brown had dried, I sprayed the entire vehicle and both sides of the schürtzen with a generous coat of hairspray. I use TreSemme #4 Extra Hold, but I really don't think it matters.
Next came the first camouflage coat consisting of a mixture of Tamiya Desert Yellow (XF-59), Deck Tan (XF-55) and Flat White (XF-2), which results in a color that is close to Tamiya Buff, but a little more yellow than brown. I sprayed it carefully, allowing some of the brown to show along the edges and in the dark recesses.
I followed this with a second wavy camouflage coat of Tamiya Black Green (XF-27), leaving just the insides of the schürtzen, the wheels and the lower hull behind the bogies the original yellow color. Once the main pattern was down, I opened the nozzle and sprayed a light dusting coat of the same color to blend both camouflage colors together.
Before the paint had dried too much, I took a long-bristle red sable brush, dipped it in distilled water, and wet the surfaces that would receive chipped paint, including the outsides of all the schürtzen. After a few minutes, I used a wet, stiff, short horsehair brush to gently rub off the camouflage paint along the edges of the surfaces and high-wear areas like hatches and footfalls. I also rubbed some paint away from flat areas here and there to give the vehicle an overall worn appearance.
Once I had what I wanted, I loaded some Future into the airbrush and gave the two aluminum sprues a heavy coat on both sides. The Future will seal the paint along the edges and allow me to separate the aluminum panels later without flaking off any paint. I learned how to do this the hard way during a previous 'Dragon schürtzen' build. While the Future was still loaded, I shot the areas that would receive decals as well.
While the Future was drying, I painted the wooden portions of the pioneer tools Vallejo Acrylics New Wood and all the steel parts Tamiya Metallic Grey (XF-56). For Vallejo paints I mix a tiny bit of Vallejo Slow Dry and water with each color until it flows smoothly off a red sable brush. I painted the hull and turret machine guns Tamiya NATO Black (XF-69) and highlighted them with Gamblin Silver Oil paint.
To give the wooden parts of the tools more depth, I brushed on a little Mig Wash Brown Oil straight from the tube and let that set overnight. Don't let this paint leach out its oil beforehand, like you would when you are using oils for detailing. The oil helps it stay workable. In the morning I carefully removed most of the oil paint using a brush dampened with Mona Lisa, leaving the areas near the buckles and metal parts darker than the wooden shafts.
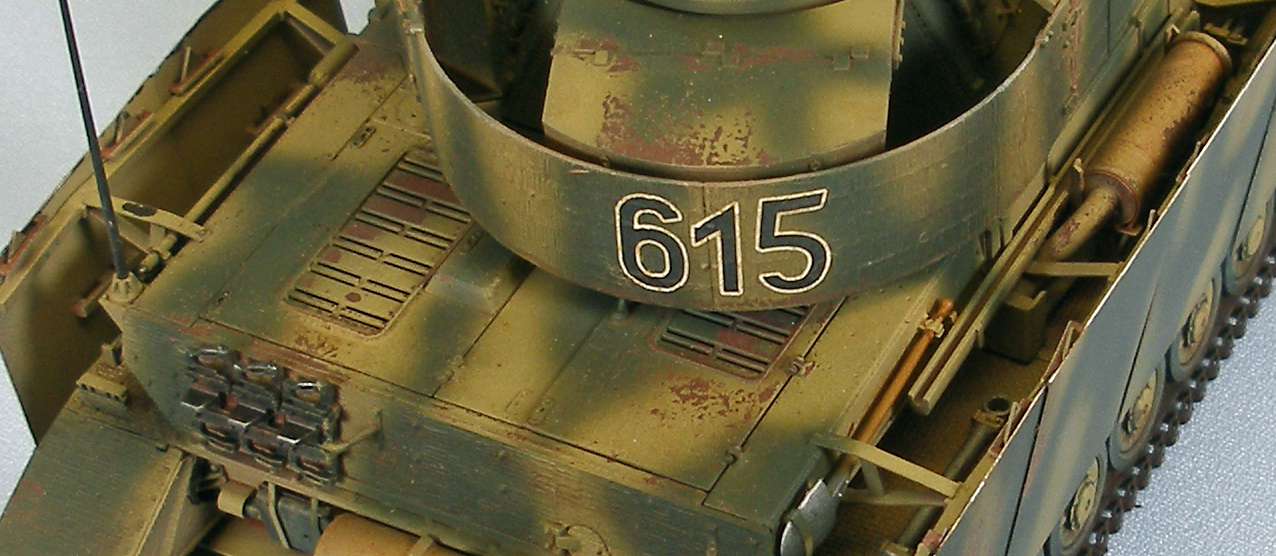
I applied the decals for my scheme next using the Red and Blue Micro Sol/Set system without any problems, even though they were mostly placed over zimmerit. I get the decals to set into the rough texture by using a cotton make-up remover pad to press the decal into the zimmerit after the blue solution is somewhat dry. I then lay on a coat of the red solution and everything remains hunkered down nice and tight. This approach replaces the much more tedious one of buying and using dry transfers that I used to use.
Next, while I still had a flat coat on the model, I applied several filters to enhance the colors. I first gave the whole vehicle and schürtzen a filter of MIG Wash Brown. I then gave the jack and spare track runs a filter of MIG Black. I applied a filter of MIG Dark Rust to the rear exhaust filter and turret-traverse exhaust cylinders on the starboard side. Finally, I used several filter applications of Paynes Gray and Dark Rust on the track sections. I heavily thin all of my washes and filters with Mona Lisa White Spirit.
Once dry, I hand-brushed another coat of Future over the decals to seal them.
For years I used to give the surface of my model a glossy coat of Future acrylic at this point in the weathering process to prepare it for an oil-based pin wash and possibly some streaking. With experimentation, however, I found that the filters I applied gave the surfaces a slightly satin finish that assisted in spreading a pin wash like it should, using capillary action. Furthermore, using the very mild Mona Lisa thinner with MIG Oils did not disturb the underlying paint and/or finishes, no matter how thick I slathered stuff on. This approach saves time and, with this particular model, removes one more layer of junk from clogging up the fine zimmerit detail. So - I gave the vehicle a pin wash using Mig Dark Wash (aka Raw Umber) straight from the bottle, paying special attention to the wheels and various latches.
Once dry, I flipped the hull over and applied a mix of MIG Old Rust and MIG Black Soot pigments to the track.
I followed this with a 'road-dusting' coat of Vallejo Model Air Light Brown and then shot the whole vehicle with Vallejo Flat Varnish to kill any shiny spots still remaining. I cut each of these 50/50 with Vallejo Airbrush Thinner to improve flow.
I replaced the over-scale kit-supplied antenna with an excellent (and inexpensive) brass antenna from OrangeHobby.com. To darken the brass I let it soak in some Blacken-It (from A-West) for a few minutes, and then attached it to the receptacle using thin super-glue.
Conclusion
The PzKpfw IV Ausf H with side skirts is one of the iconic tanks of World War II, and it is no wonder that Dragon has taken on this family of AFV's to produce some of the very best models on the market. The build is challenging – there are a lot of parts and several areas require a little experience in problem solving. Still – the parts fit and are beautifully detailed; together making these kits a lot of fun to build.
The design of the schürtzen and the hardware to support its various pieces is simply brilliant, and in my opinion, the very best available. I've built the 'H' from three manufacturer's now, and Dragon sets the bar here.
The thin DS track has evolved into an excellent alternative to the Magic Track, which itself was a wonderful product (and still is). I just wish the DS runs would come in a more 'military' color since they are such a chore to paint.
The slide molding, included in all Dragon kits now, has really improved the detail and build-ability of their kits. This is nowhere more apparent than with their tank barrels which are, in my opinion, a vast improvement over the ill-fitting and hard-to-paint aluminum versions.
And last but not least, Dragon thoughtfully designs their models so that every hatch, door or access panel can be built in the open position, with more than enough interior detail to get you started if you roll that way. One of these days, when I have more time...
On the downside; while Dragon has been improving their instructions as of late, and what you get with this kit appears to be another rework toward that end, there are still enough errors to cause a novice to become frustrated. I breezed through most of the problems simply because I've already made the mistakes in prior Dragon Mk. IV builds and learned from them. With such brilliant engineering and design, however, it is a shame that the instructions and related quality control issues detract from what otherwise would be a perfect build experience.
Still - I can recommend this kit to all modelers who are up to the small challenges that a kit with so many parts and options will offer. If you mark up the instructions beforehand as suggested, and go slow, you shouldn't have any problems.
I would like to thank Dragon Models and Dragon USA for providing this kit for review, and to IPMS USA for giving me the opportunity to build it.