Reviews
Armor
Dragon Pz.Kpfw.III (F) Ausf.M w/Schurzen Smart Kit
by Eric Christianson
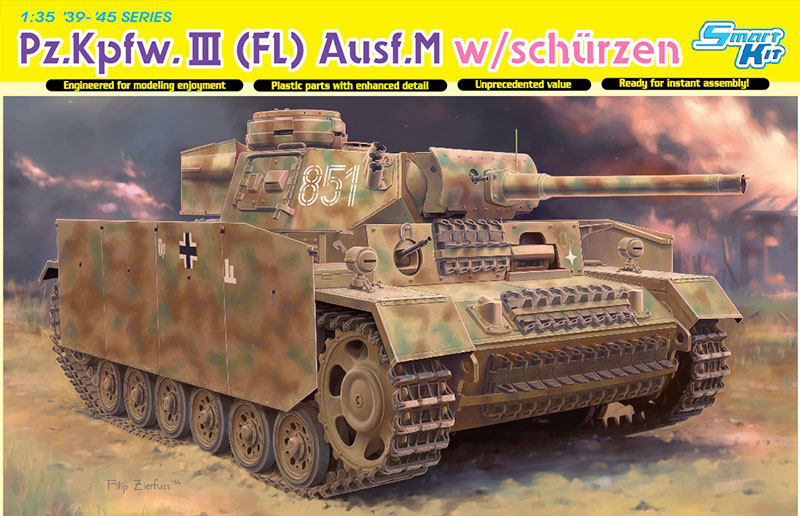 Model: Dragon Pz.Kpfw.III (F) Ausf.M w/Schurzen Smart Kit
Reviewed by: Eric Christianson, IPMS # 42218
Scale: 1/35
Company: Dragon Models
Price: $64.99
Product/Stock #: 6776
Website: Dragon Models
Product Web Page: View
Product provided by: Dragon Models USA
Dragon Models offers a complete lineup of the Pz.Kpfw. III family tree in 1/35 scale, including several new kits in this last year alone. The subject of this review is the Pz.Kpfw.III (F) Ausf. M (w/Schürtzen), from their “’39 to ‘45” Smart Kit series. The [F] stands for FlammenPanzer, or ‘flame tank’.
A flame tank is a type of tank equipped with a flamethrower, most commonly used to supplement combined arms attacks against fortifications, confined spaces, or other obstacles. The type only reached significant use in the Second World War, during which the United States, Soviet Union, Germany, Italy, Japan and the United Kingdom (including members of the British Commonwealth) all produced flamethrower-equipped tanks.
A number of production methods were used. The flamethrowers used were either modified versions of existing infantry flame weapons, or specially designed weapons mounted externally, or replacing the tank's main armament as in the subject of this review. Unlike some of the Allied flame tanks, fuel for the flame weapon in the Pz.Kpfw.III (F) was carried inside the tank itself.
Only 100 units were produced, based on the (then) current production model of the Panzer III Ausf. M chassis. The majority of those that saw action were used in the battle of Kursk and Stalingrad. The remainder were mostly converted to Stugs over time. Only one example of a Flammpanzer III exists today. It was captured by the Americans in Italy, and is currently on display at the Koblenz Museum in Germany. Dragon originally released a Flammpanzer III Ausf M in their Imperial Series line back in the 1990s, and re-released it in their Orange Box line several years ago. This model is based on their newer Panzer III molds that started appearing in 2007.
Opening the Box
All of Dragon’s Mk III's come with enough parts to completely fill the sturdy box and then some. There are extra parts on nearly every sprue for your spares box, including pioneer tools and an MP40 submachine gun.
- Lower hull, packaged separately.
- 16 sprues in soft, light grey plastic, packaged separately.
- 2 clear plastic sprues
- 1 photo-etch sheets, including sprocket ring detail.
- 2 runs of yellow-tan DS track
- 2 stamped sheets of thin steel schürtzen.
- 1 small baggie of 22 loose track links.
- 1 8-page blue and white instruction sheet with 23 steps.
The kit comes with two color schemes represented, using blue-and-white ink three-view drawings; and a small (but perfectly registered) sheet of decals from Cartograph of Italy. These units include:
- 6th Panzer Division, Eastern Front, 1943 – German Tri-color, mottled
- Unidentified Unit, Eastern Front, 1943 – Whitewash over German Grey
This is a ‘fortified re-box’; there are sprues from no less than five different Dragon kits in the box, including 3 (!) ‘A’ sprues:
- PzKpfw III Ausf M/N (Sprues R, H)
- PzKpfw III Ausf M (Sprue A)
- PzKpfw III (Sprues A, C, D, E)
- StuG III Ausf C (Sprues A, B, D, G)
- PzKpfw IV (Sprues F, G)
Things to consider before building:
The Mark III is a pretty straight-forward tank. Chassis, fenders, main deck, turret, gun, hatches – it’s all there. There are relatively few options (for Dragon) so there are few up-front decisions to be made. The area beneath the fenders is un-obstructed so the DS track can be attached at the very end without any problems. I built the entire vehicle before painting, with the only exceptions being the wooden block and wooden rail (which are attached over other in-board equipment), the antenna, the extra track runs and the two spare wheels, which were painted separately.
The Build
The design and fit of the running gear in most of Dragon’s armor kits is excellent, and this kit is no exception. Pay attention to the callouts, as parts fit only one way if they are where they are supposed to go.
There is a little play in the wheels after they are attached and the large, visible wheels on the Mk. III really need to line up perfectly. I used a small steel ruler inserted along the slot between the wheels to do this while the glue was drying.
The unusual exhaust system on the (F) version (Step 4) was new to me and fit well. Once attached to the rear plates, it will determine the angle between Parts A4 and A19, which is not clearly identified in the instructions.
I’ve had issues with the fenders in other Dragon Mark III and IV kits, but none were found in this kit. Everything fit well and went together as expected.
Part B15 appears ‘magically’ in the image in Step 7 – don’t overlook it. Parts A6 (2) are shown as ‘Not Used’ on the Parts Map but will be used in Step 10.
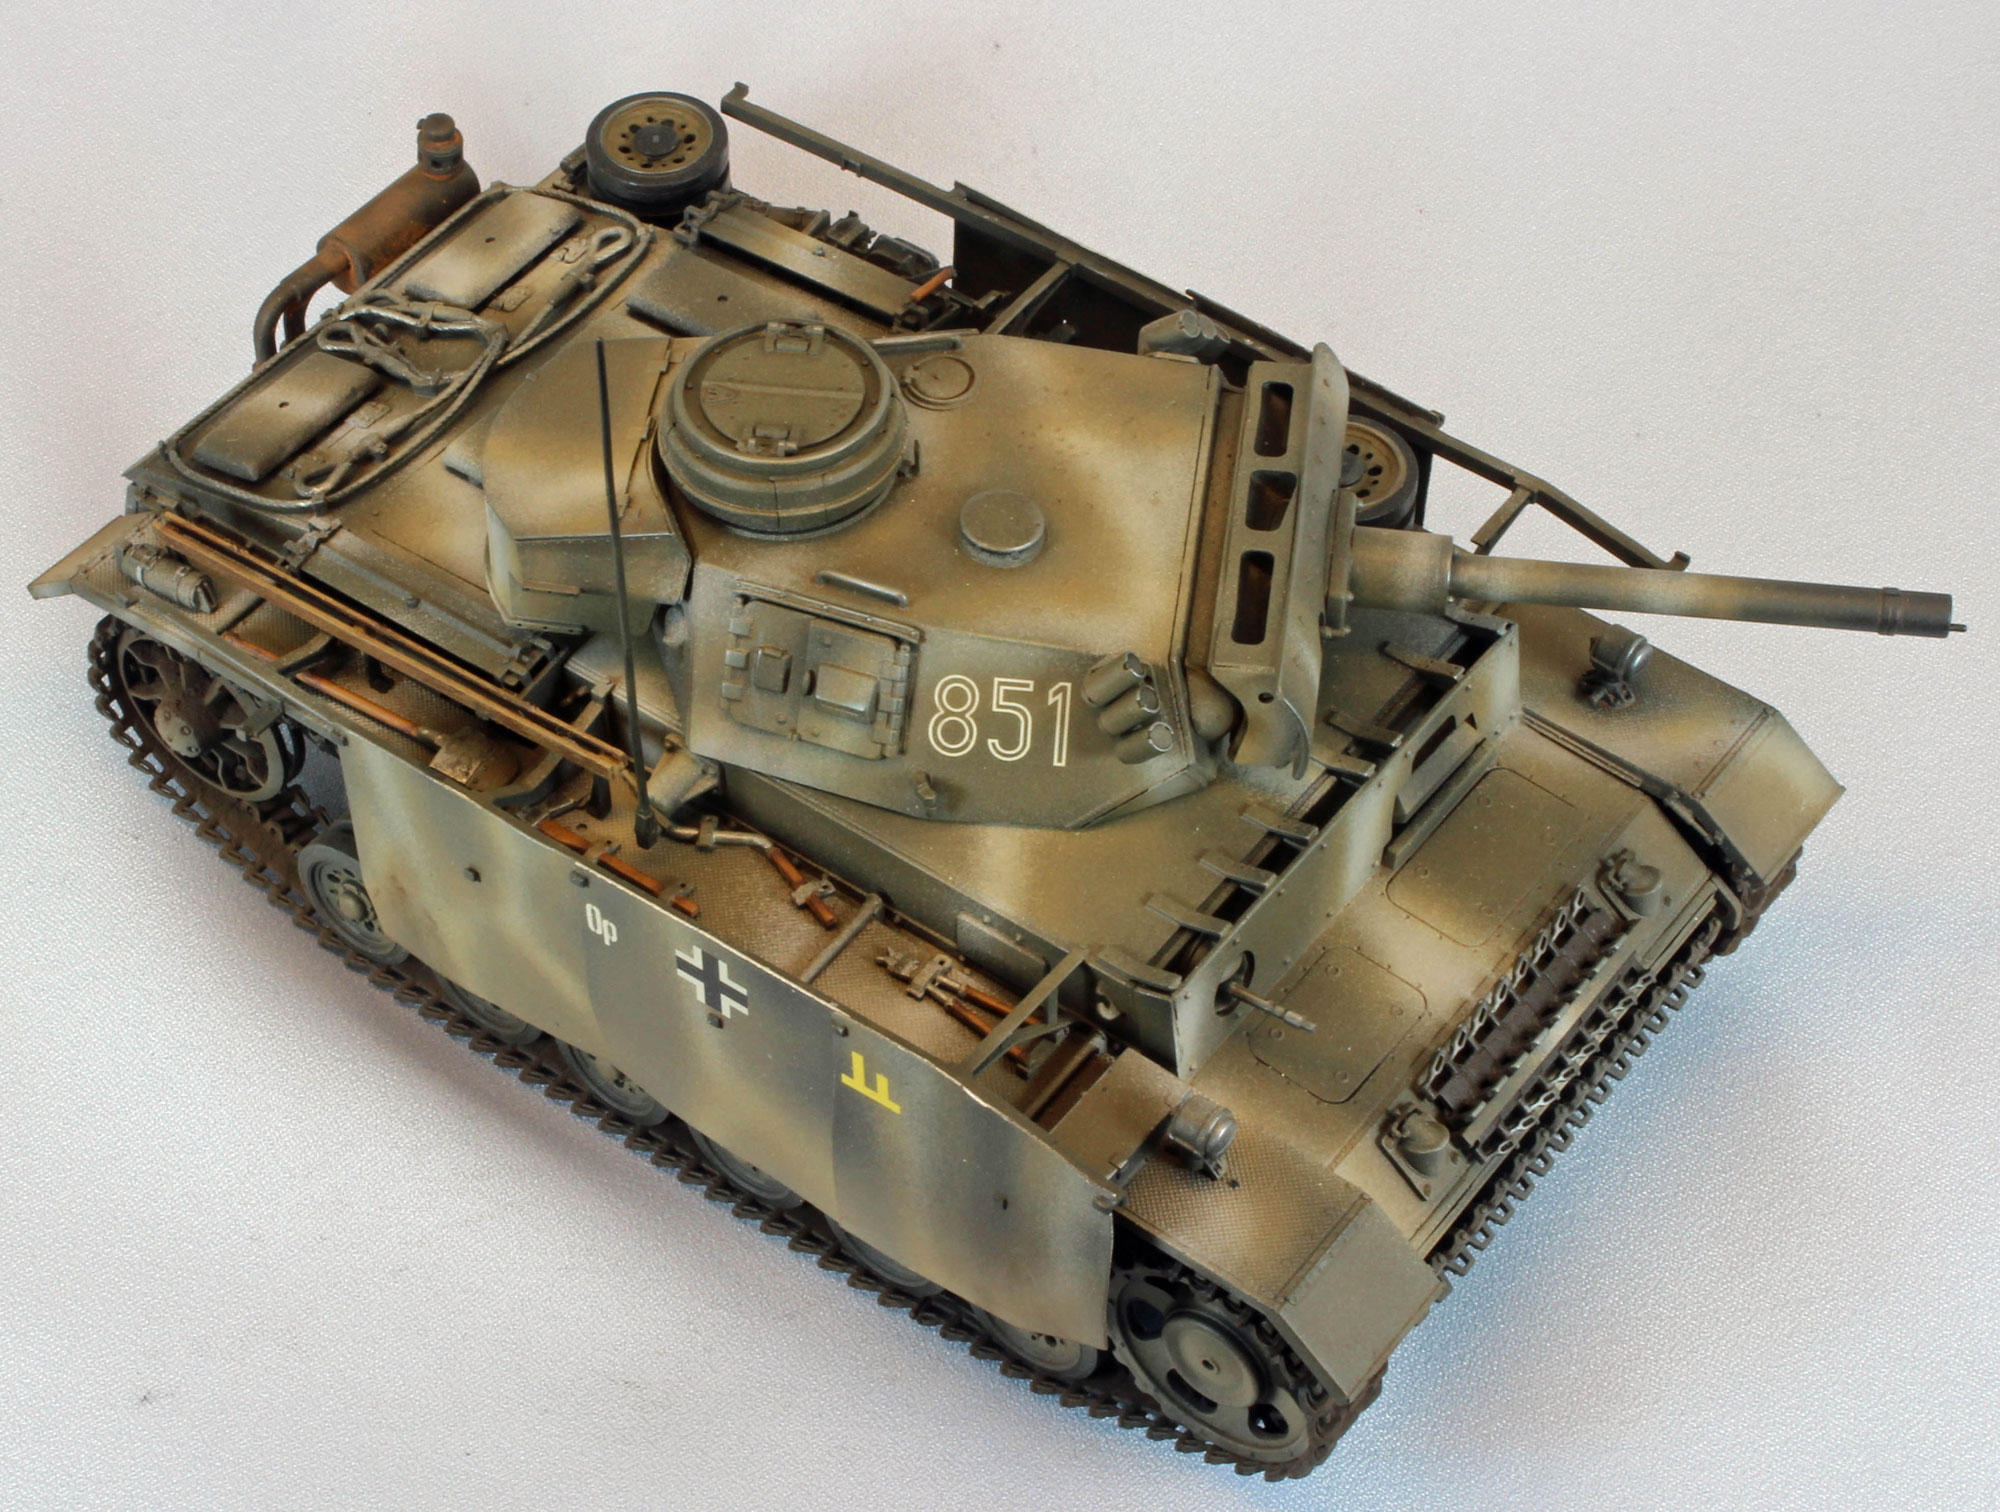
The front and rear decks of the Mark III are covered with hatches that can be assembled open or closed (six in all). The detail on the inside of the hatches is limited to the underside of the air intakes that adorn each hatch.
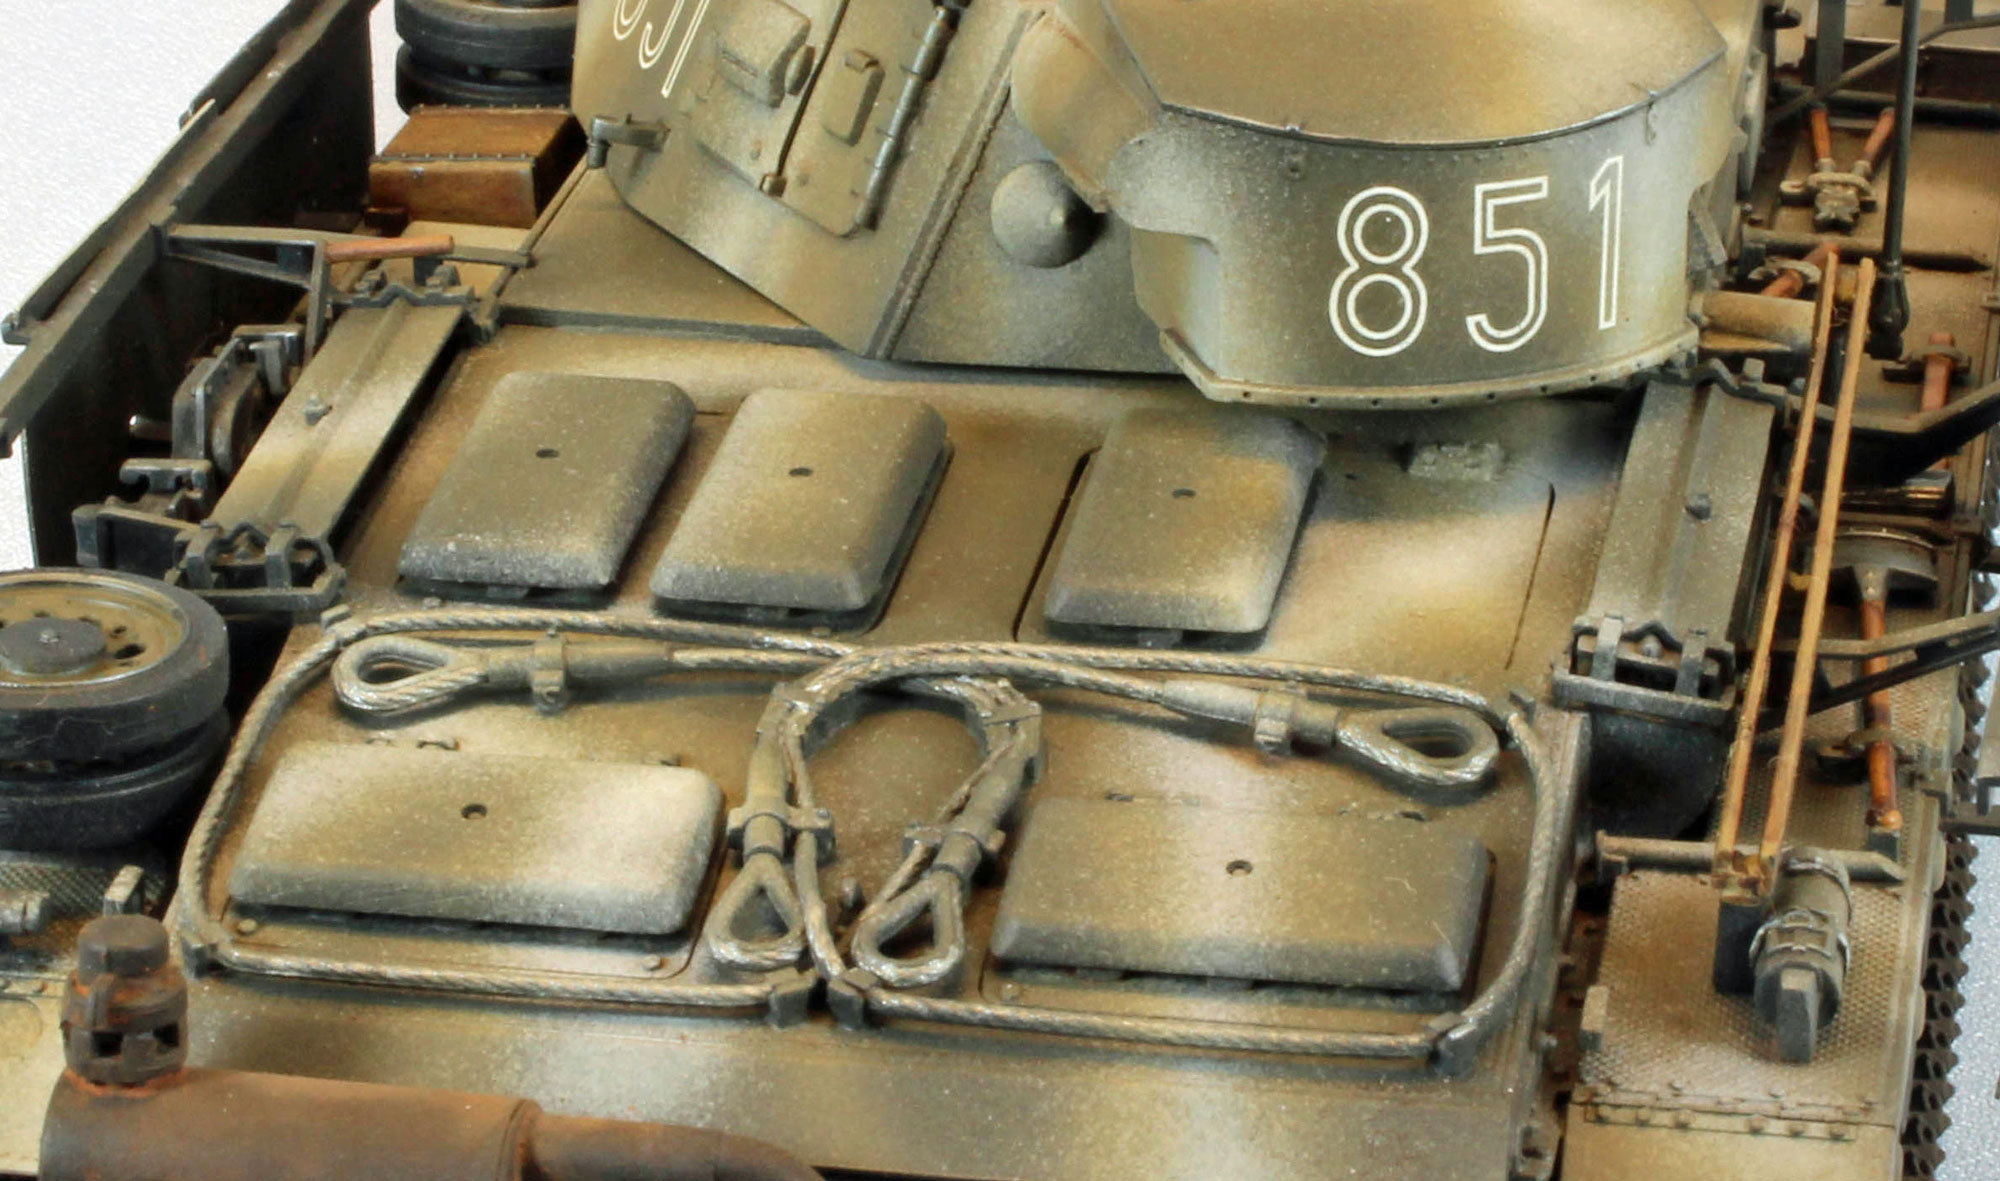
The front glacis plate has options for up to two runs of track links that act as spares and as extra armor for the vehicle. Dragon provides 23 links, which are enough for both runs. The instructions call for 14 links for the lower run, but 15 will fit, and 15 are provided (?). The turret ring section of the superstructure has several options and should be completed before attaching it to the main deck.
Everything comes together in Step 16. The order in which the major assemblies are added matters, even though the instructions don’t tell you that.
I attached the front deck first, followed by the left and right fenders. I then attached the rear deck and finally the turret ring section.
Once the turret ring section is attached, Step 17 will have you add several more parts. Make sure to add Part C3 before you add Part C20. I could not find a way to fit the photo-etch plate (Part MA18) no matter what I tried, and so it was left off. Furthermore, I could not find a single picture of this part on the internet so I wonder if this is a mistake in the instructions.
Parts C10 are shown as ‘Not Used’ on the Parts Map but will be used in Step 11.
Part B47 is shown as ‘Not Used’ on the Parts Map but will be used in Step 13.
Part (Black) C5 is actually Part C6 on the sprue in Step 16.
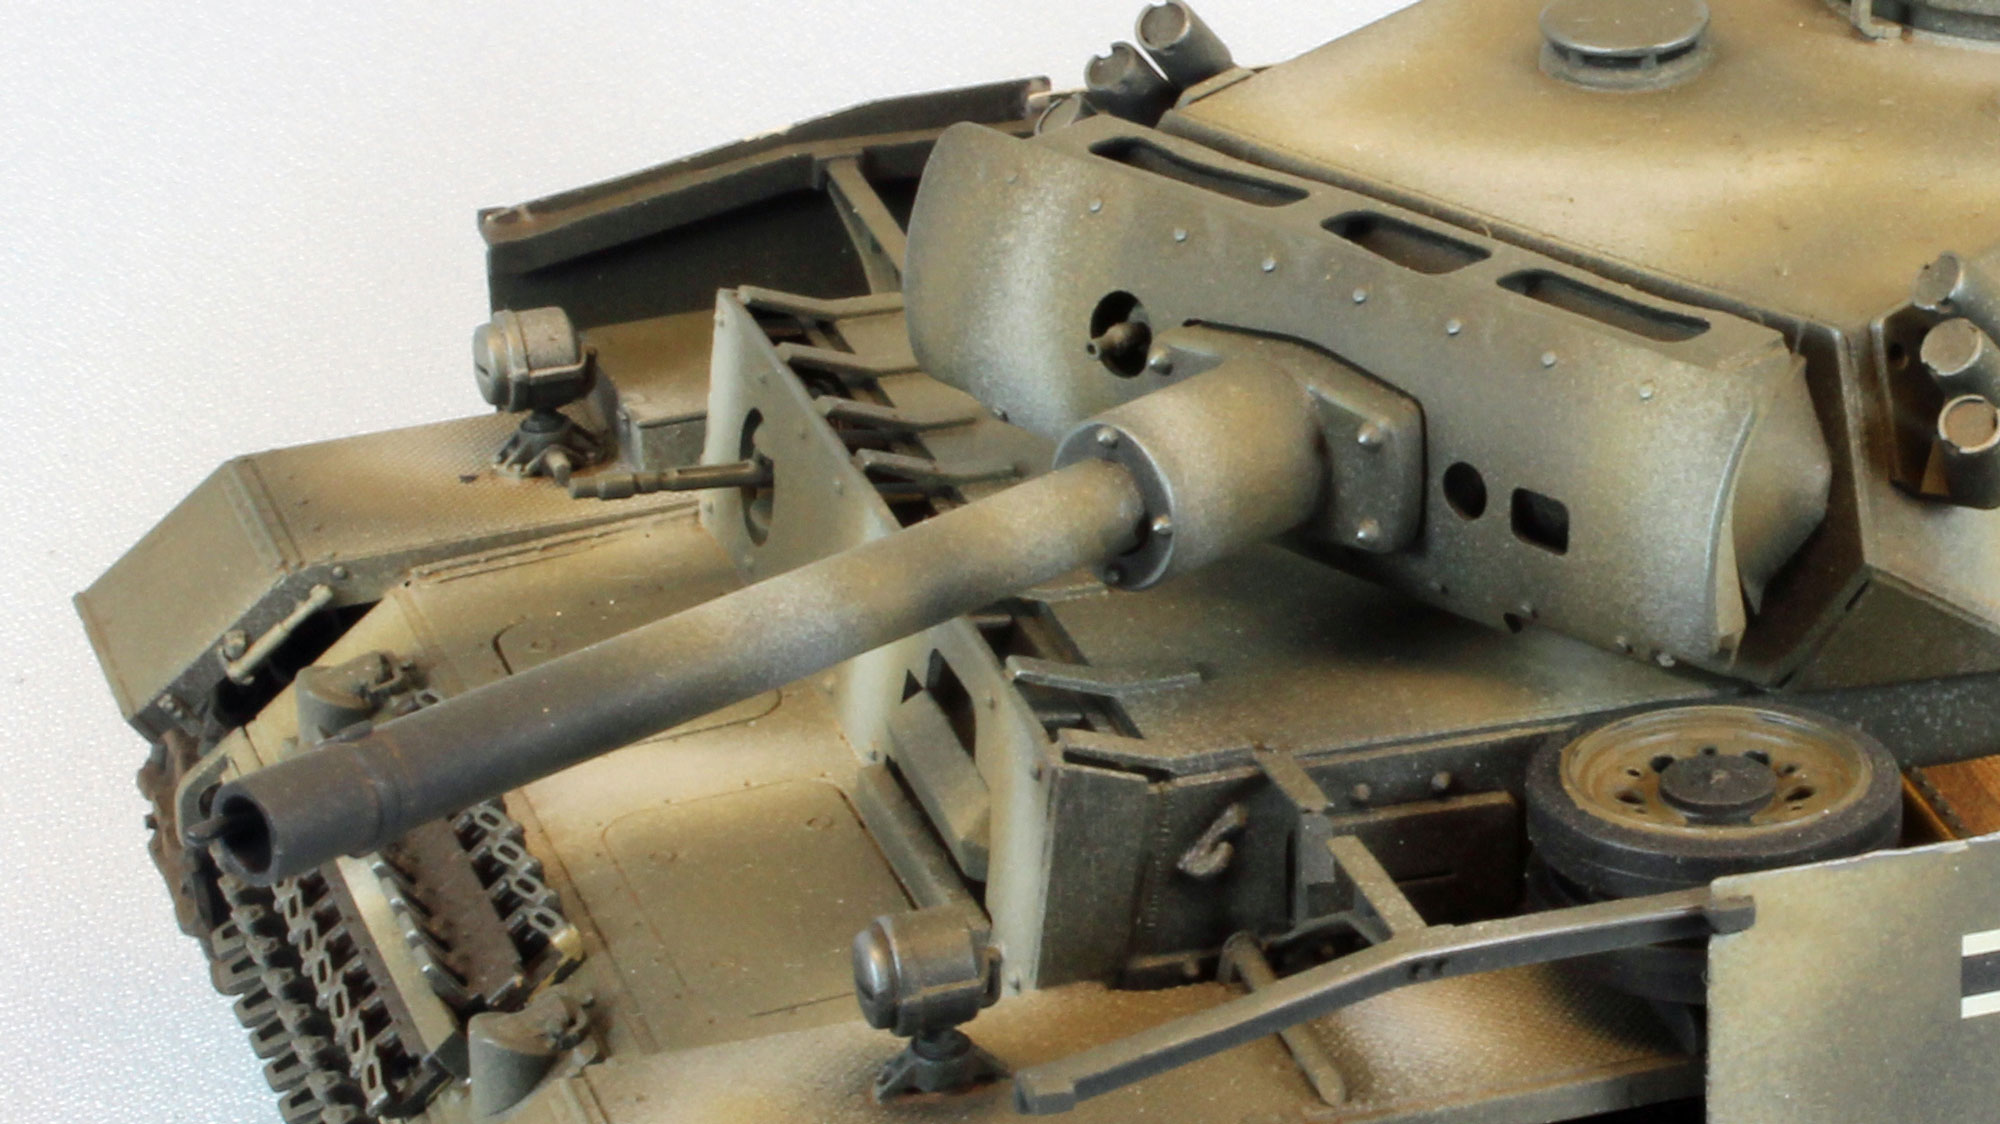
Steps 18 and 22 bring the turret and main weapon together. In Step 19, do not glue Parts H1 and H2 as shown in the instructions, unless you want the gun to point at a parade-up angle. I ended up taping together everything I needed (turret, mantlet, etc.) to find the right angle for the weapon and then glued these two pieces on.
Otherwise everything comes together pretty well. While there is no interior detail provided for the main weapon, I really like the slide-molded parts – plastic is so much easier to work with than turned aluminum.
The commander’s cupola contains 14 parts, and can be shown with the hatches open or closed, as with the five viewports (open or closed). Everything fits perfectly and looks really nice when done.
The hatches on either side of the turret can be assembled open or closed, and a rudimentary seat for a figure is supplied if you build them open. I suggest that you glue Parts G18 to the inside of the turret and let them dry before attaching the exterior door hardware.
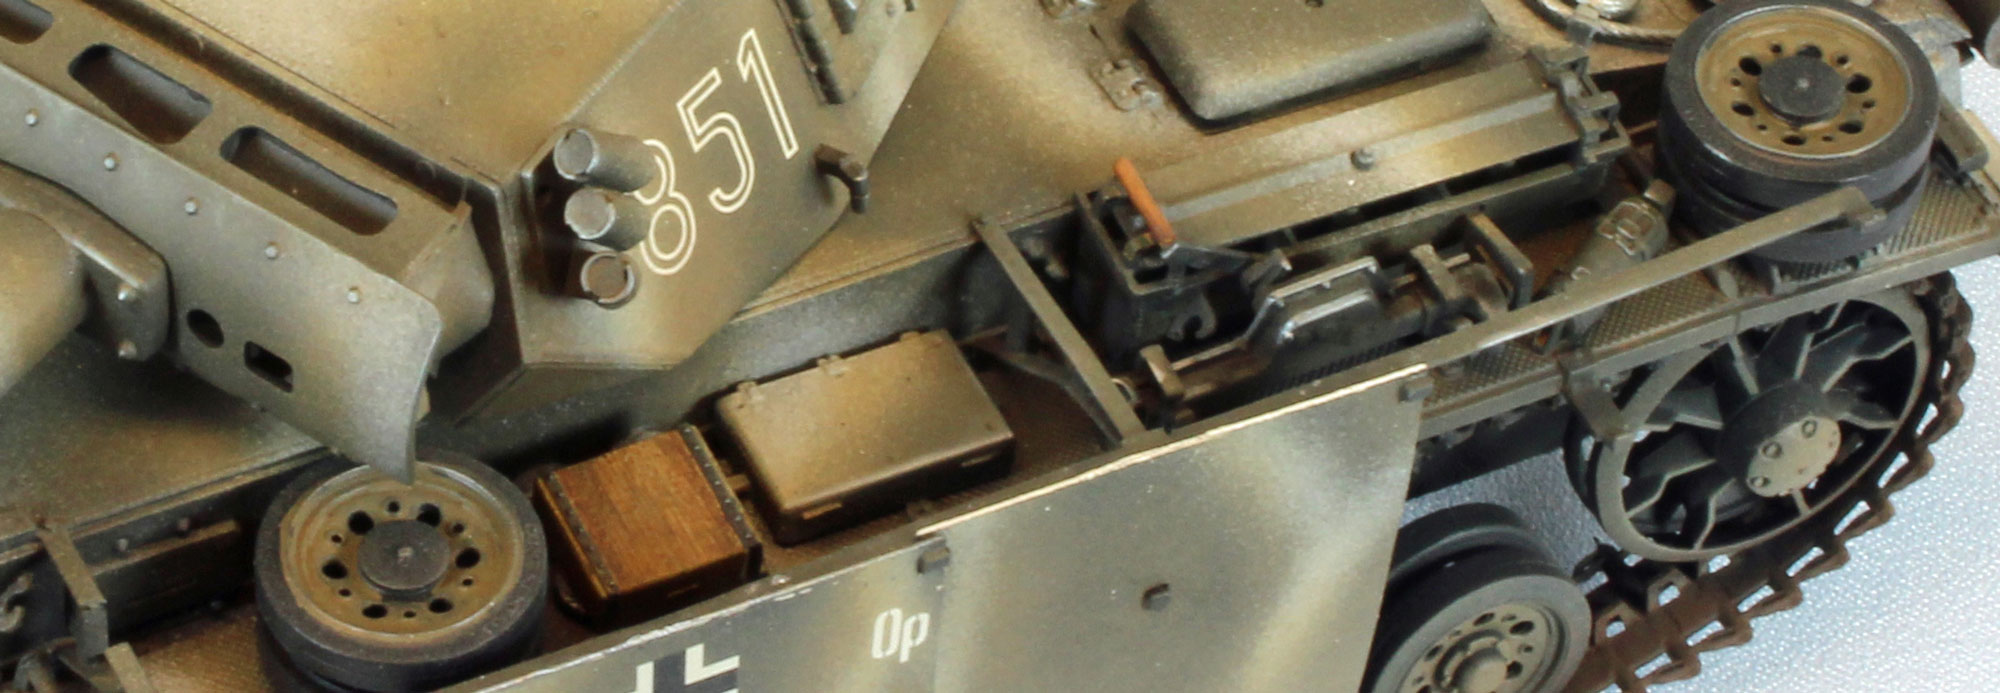
The two smoke discharges are difficult to clean, but easy to assemble.
Part E12 magically appears at the rear end of the main weapon assembly in the image in Step 22. You’ll need it to attach the gun to the turret.
For the schürtzen, I used a coarse drywall sanding block to rough up both surfaces of the two aluminum sprues containing the side plates. These plates would remain on their sprues all the way through painting, sealing, and weathering. After wiping off any aluminum powder residue left over from sanding, I sprayed a primer coat of Gunze Mr. Finisher 1500 on both sides of the two sprues and set them aside to dry and de-gas.
There are a dozen ways for the schürtzen brackets not to fit right, but Dragon solved every one of them. Every part can fit only one way, the joints are solid, and the bars that get added last fit perfectly. Hands down, Dragon is the best at doing this.
The two runs of DS track in this kit are very thin and beautifully detailed, and assembly was a snap. I connected the ends using Tamiya ‘green top’ thin cement and installed them without any problems. Unfortunately, Dragon did not leave enough slack in the DS track to adequately reproduce the sag common to the Mk. III, so it looks pretty tight when installed.
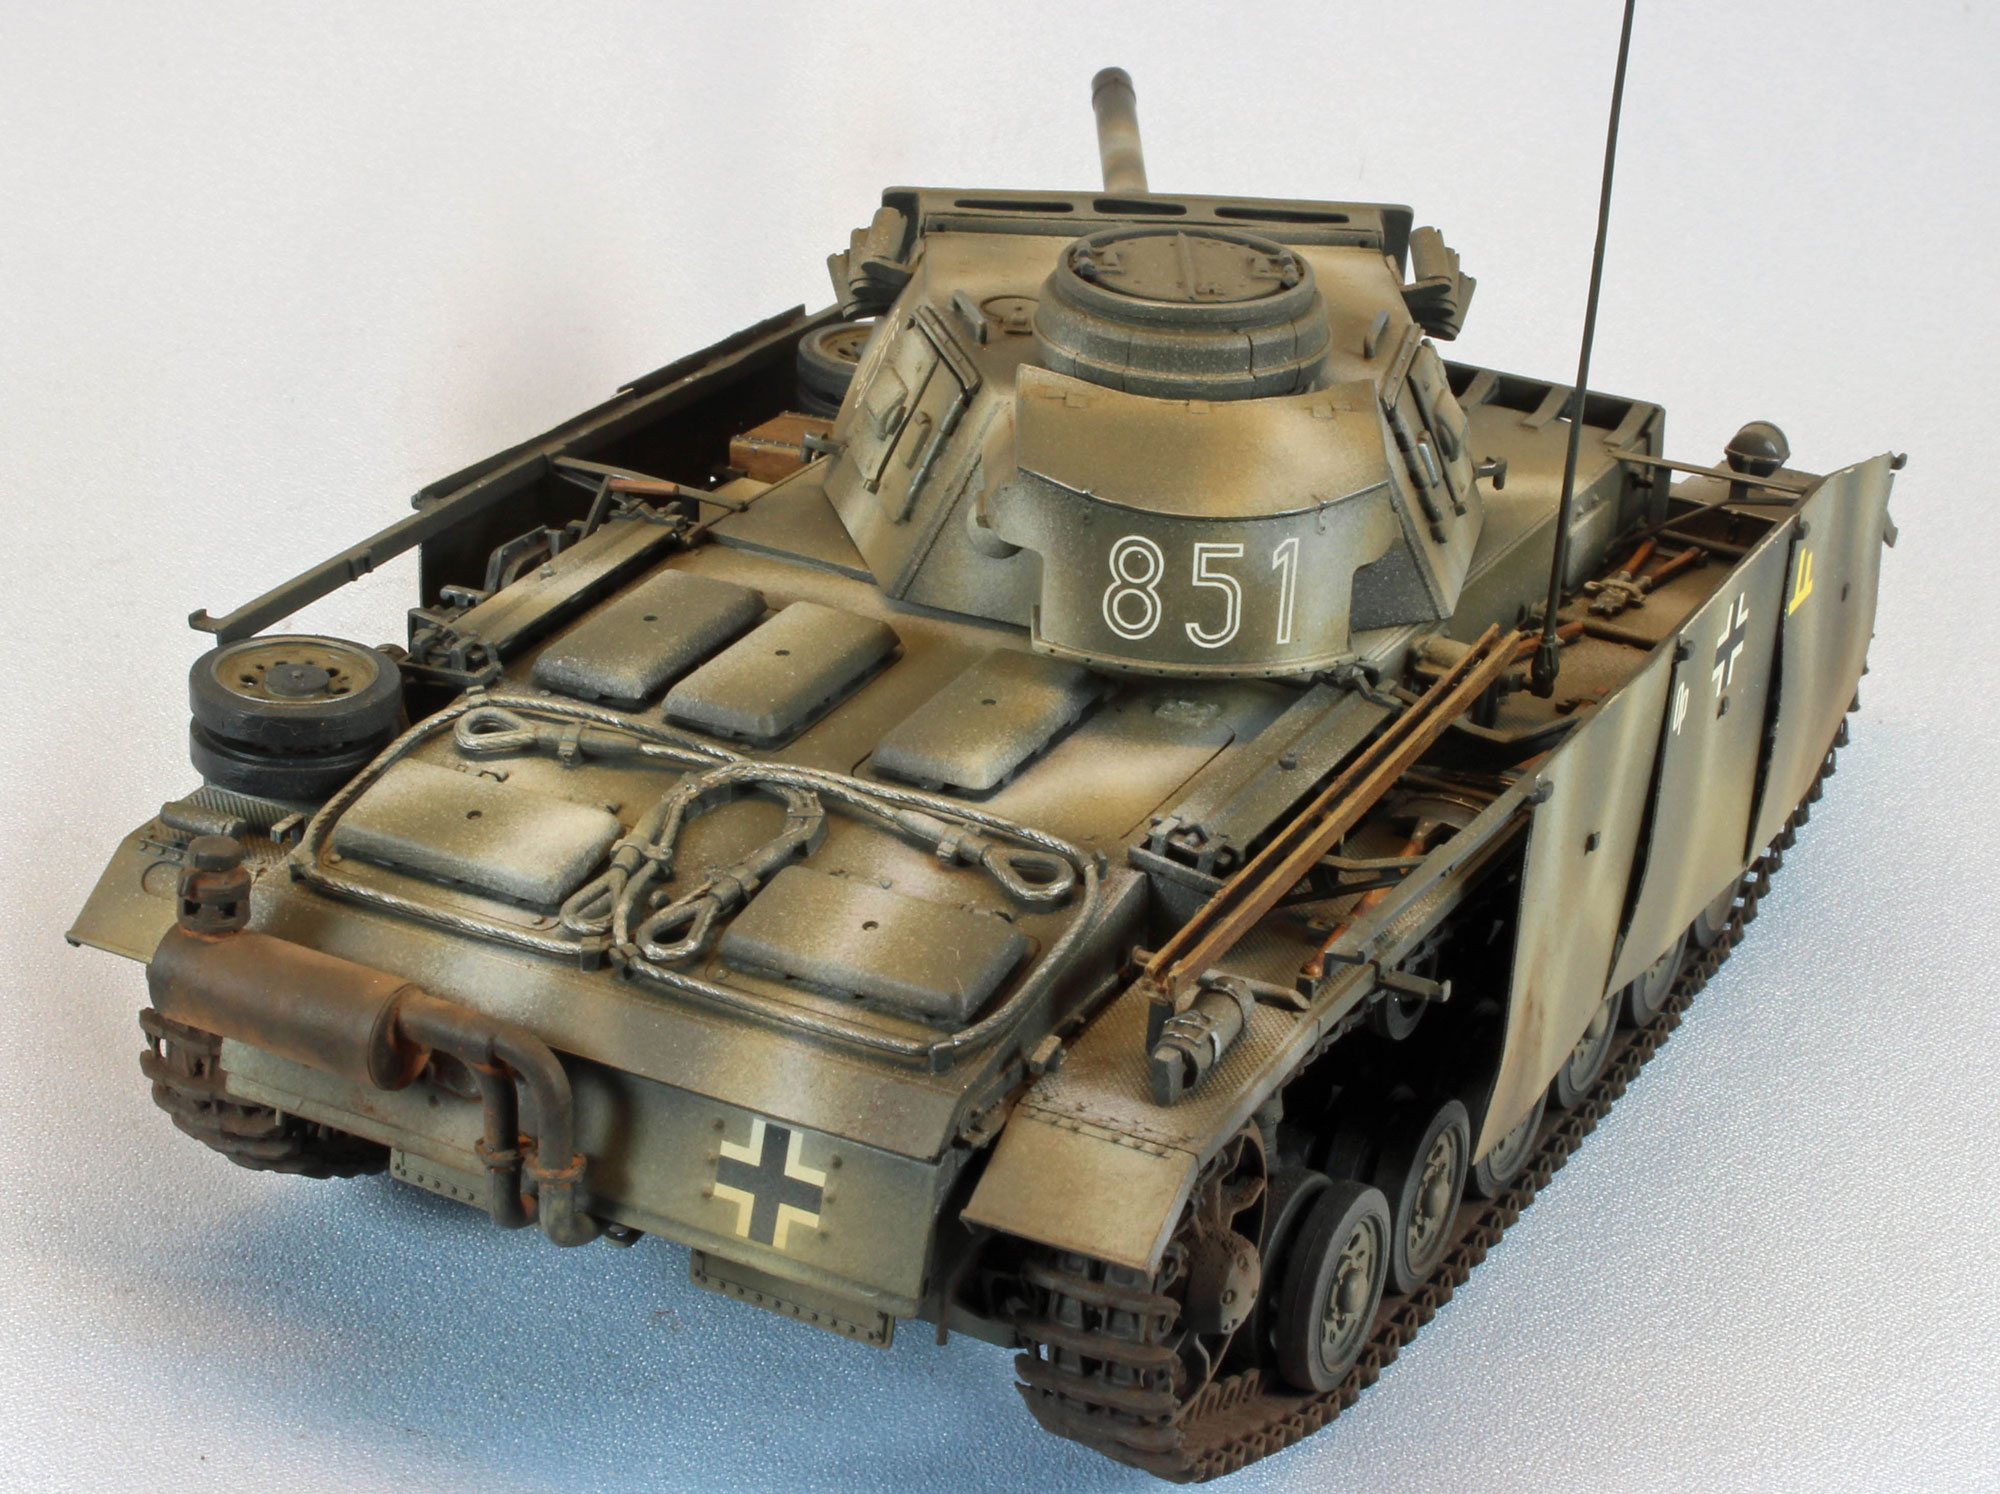
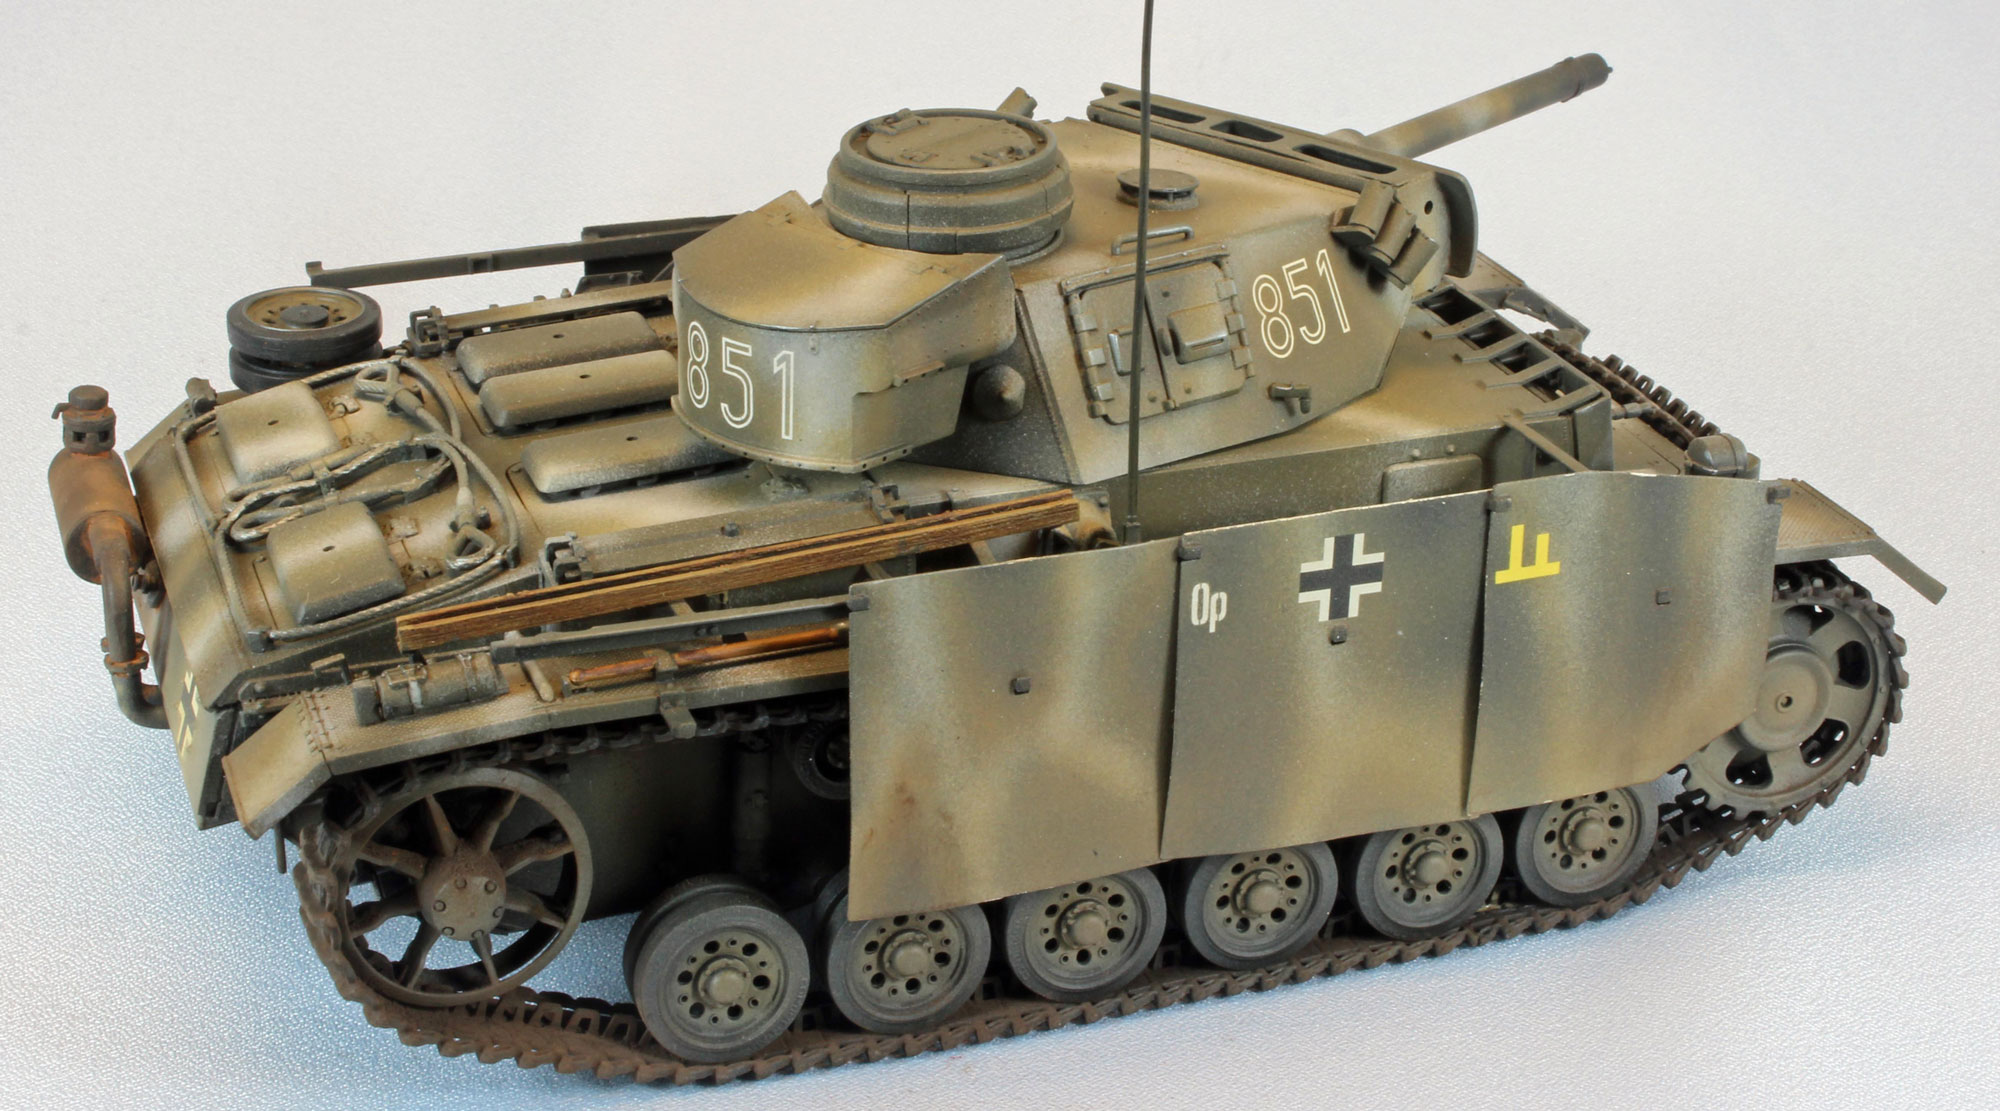
Painting and Finish
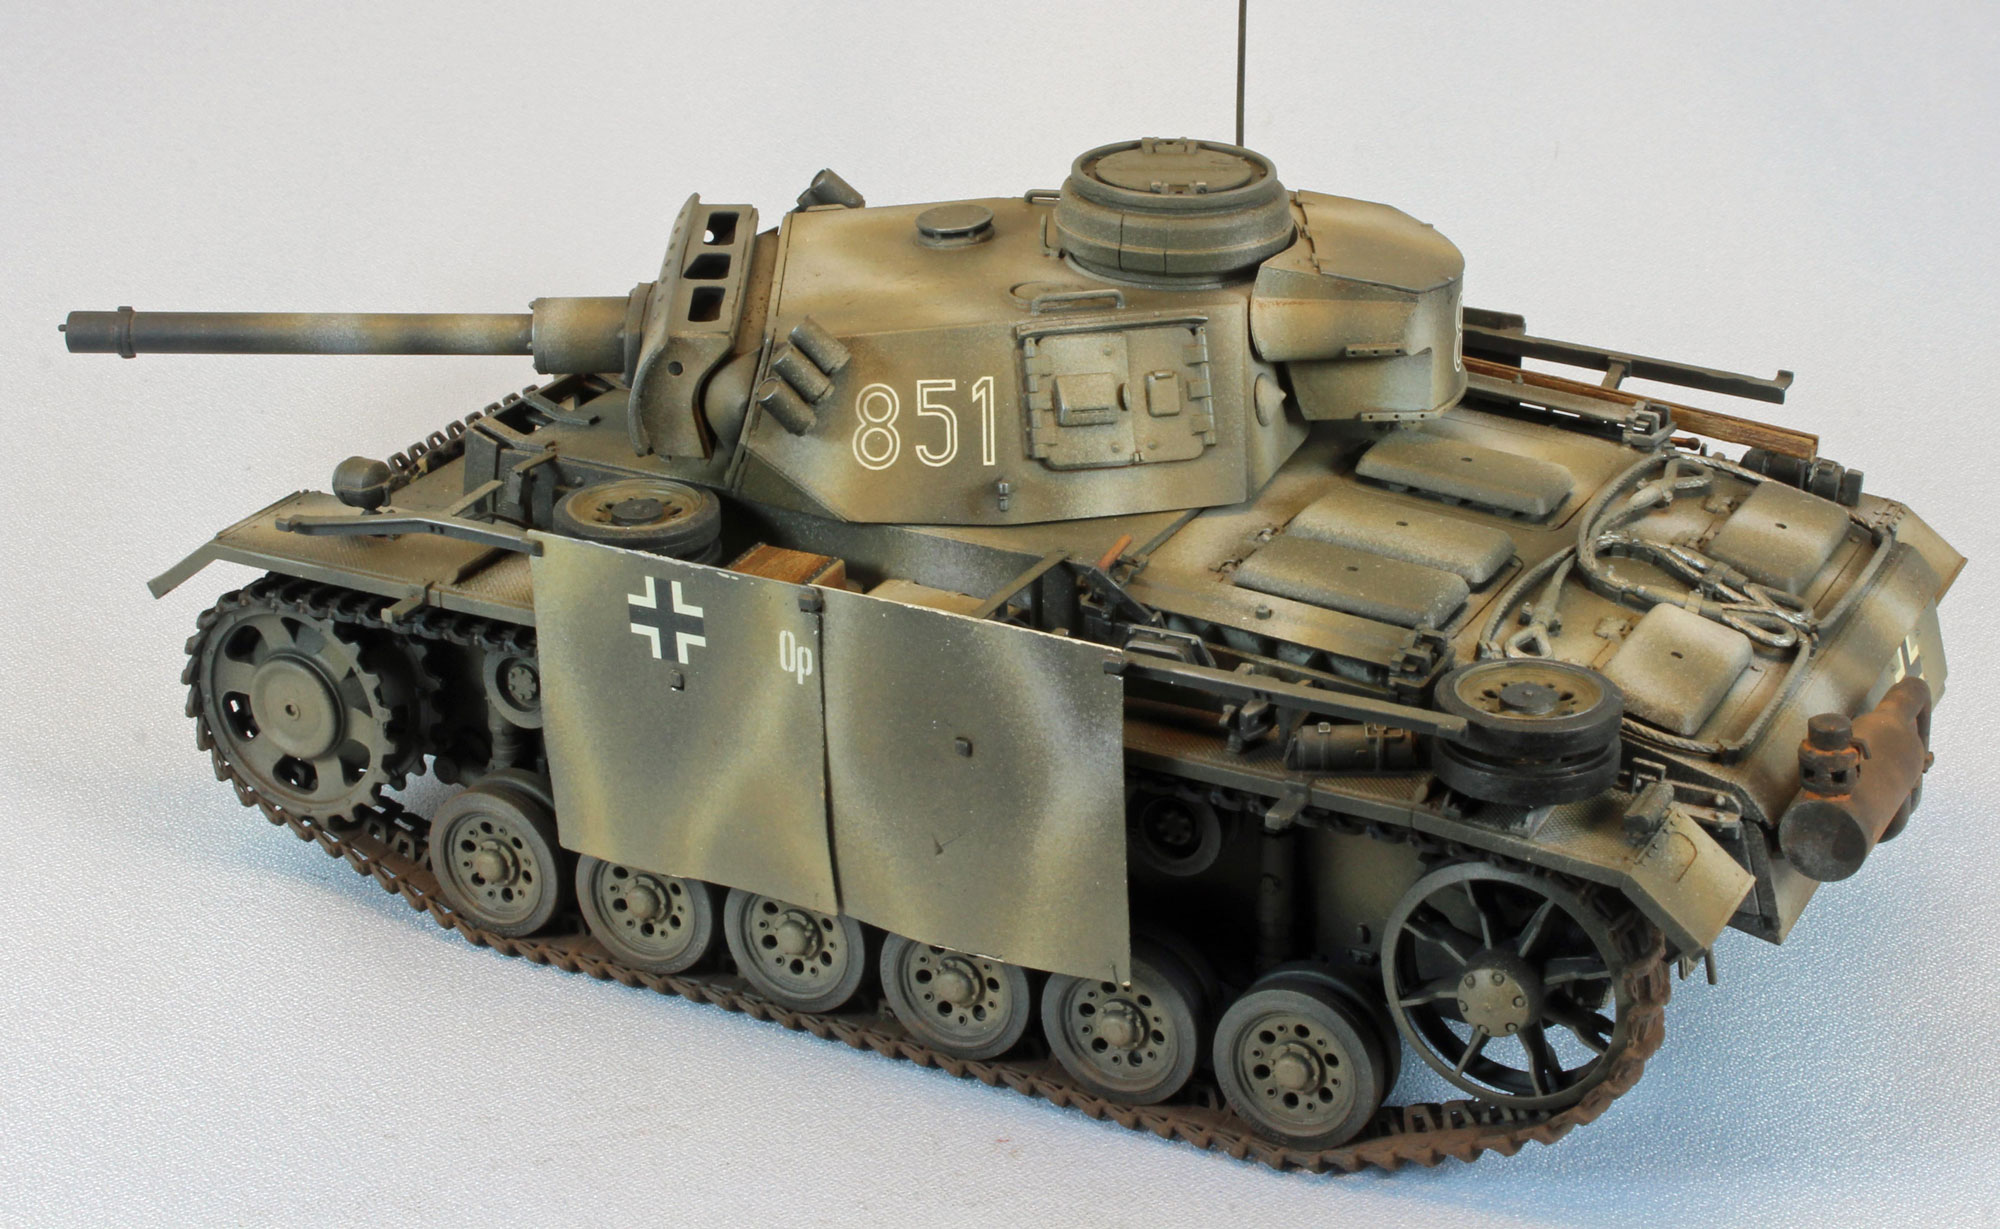
I came across a picture of a dark and sinister Mark III in an old Fine Scale Modeler (Reader’s Gallery, April 2013, by Matt McDougall) that I liked. I was looking for something that would make my FlammPanzer look ‘burnt’, since it would normally haunt areas that contained a lot of ash and soot.
In my continuing transition to true acrylics, I decided to use Vallejo paints throughout (apart from the initial primer coat).
- I started by airbrushing a primer/pre-shade coat of Gunze Mr. Finisher 1500 Black to give the plastic some grip for the following coats, and to fill in the recesses and create a shadow effect near the flat surface edges, adding depth for the subsequent coats to come.
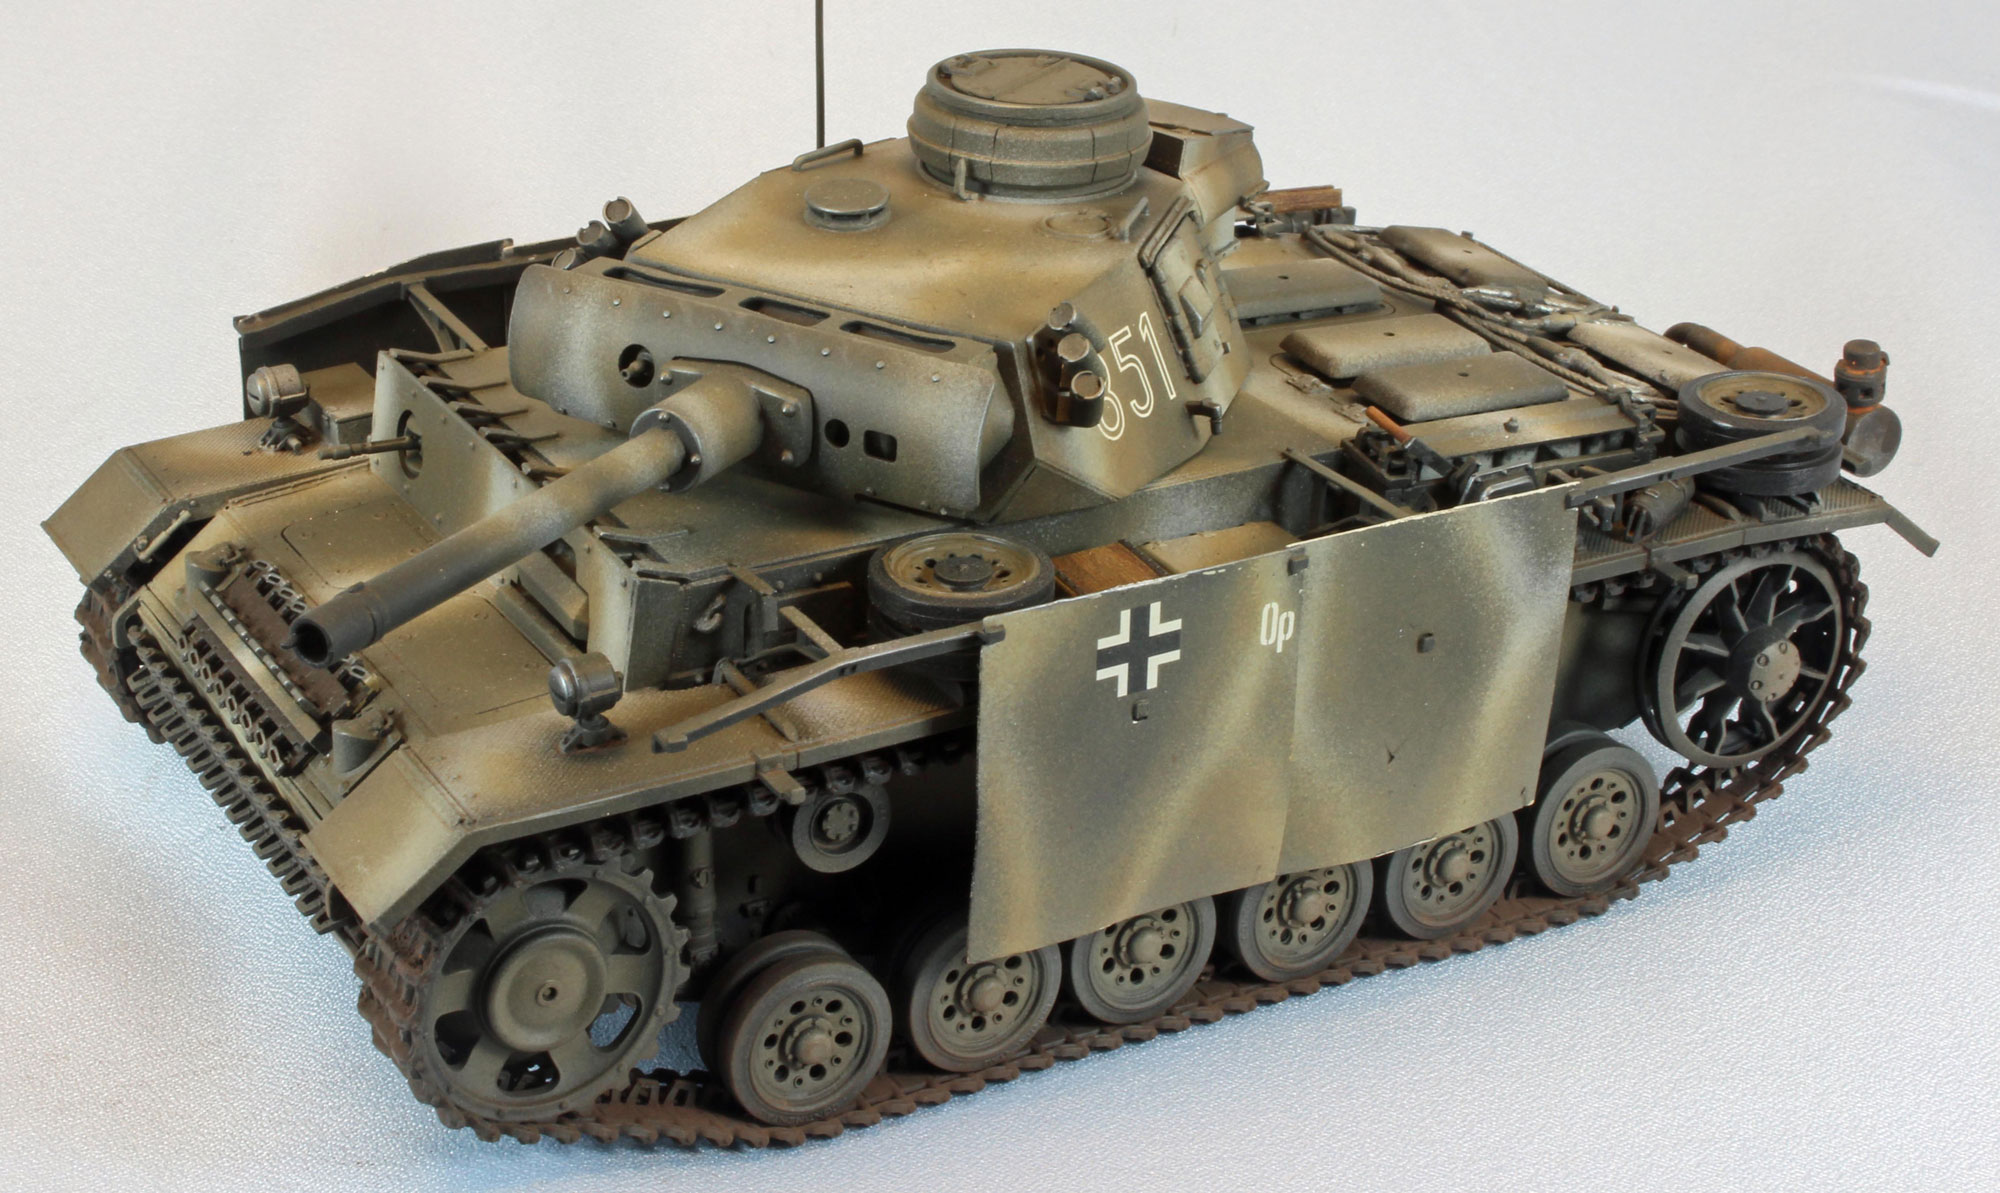
- I followed this with an overall base coat of Vallejo Model Air 71.029 Dark Earth, followed by a camouflage pattern made of Vallejo Model Color 70918 Ivory and Vallejo Model Color 70876 Brown Sand.
- Once the paint was dry, I hand-brushed just the areas that would receive decals with Future to give them a smooth surface to set up on.
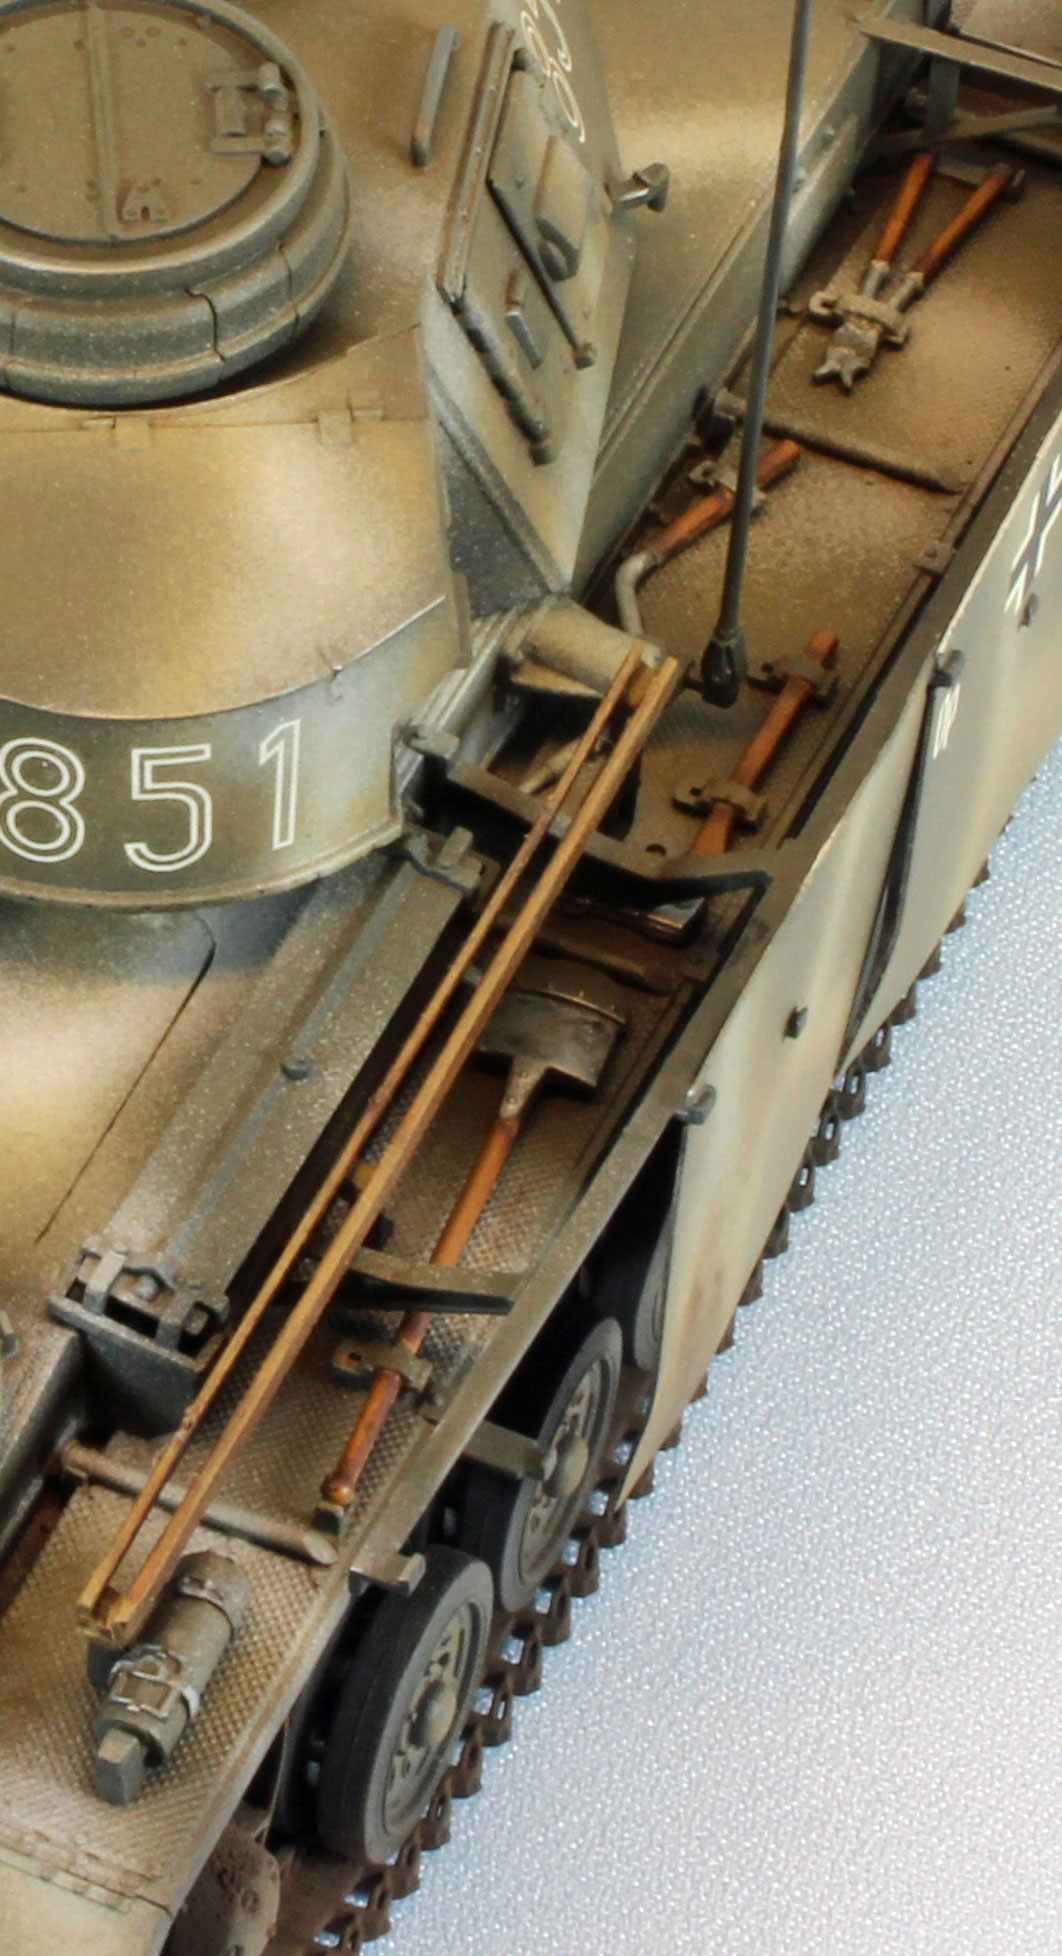
- While the Future was drying, I painted the wooden portions of the pioneer tools Vallejo Panzer Aces 311 New Wood and all the steel parts Vallejo Model Color 70865 Oily Steel. I used Vallejo Panzer Aces 310 Old Wood for the jack block and the rear rail. For hand-brushing Vallejo paints I mix a tiny bit of Vallejo Slow Dry and water with each color until it flows smoothly off a red sable brush.
- To give the wooden parts of the tools more depth, I brushed on a little Mig Wash Brown oil paint straight from the tube and let that set overnight. In the morning I carefully removed most of the oil paint using a dry Q-Tip, leaving the areas near the latches and metal parts darker than the center of the wooden shafts. I then let a little black wash puddle up on the horizontal surfaces of the metal axe and shovel head. When dry, I think this gives them a convincing look of used steel.
- I applied the decals using the Red and Blue Micro Sol/Set system without any problems, and then hand-brushed Future over the decals again to seal them.
- After I was sure the Future was dry, I airbrushed the shiny areas that received decals with Vallejo Flat Varnish to prepare the surfaces for filters which need a flat surface to spread properly. I cut the varnish 50/50 with Vallejo Airbrush Thinner to improve flow.
- I attached the wooden jack block and rear rail, as well as the two spare wheels and, with the flat coat on the model, I applied several filters to tie the camouflage together. I heavily thin all of my washes and filters with Mona Lisa White Spirit. This odorless paint thinner is very mild and will not react with the enamel paint underneath.
I applied a filter of Mig Wash Brown to the entire vehicle and Mig Black on the jack and Mig Dark Rust over the muffler. - I followed this with a ‘road-dusting’ coat of Vallejo Model Air Light Brown and then shot the whole vehicle with Vallejo Flat Varnish to kill any shiny spots still remaining.
- After carefully attaching the antenna, I moved this little guy on to the photo booth!
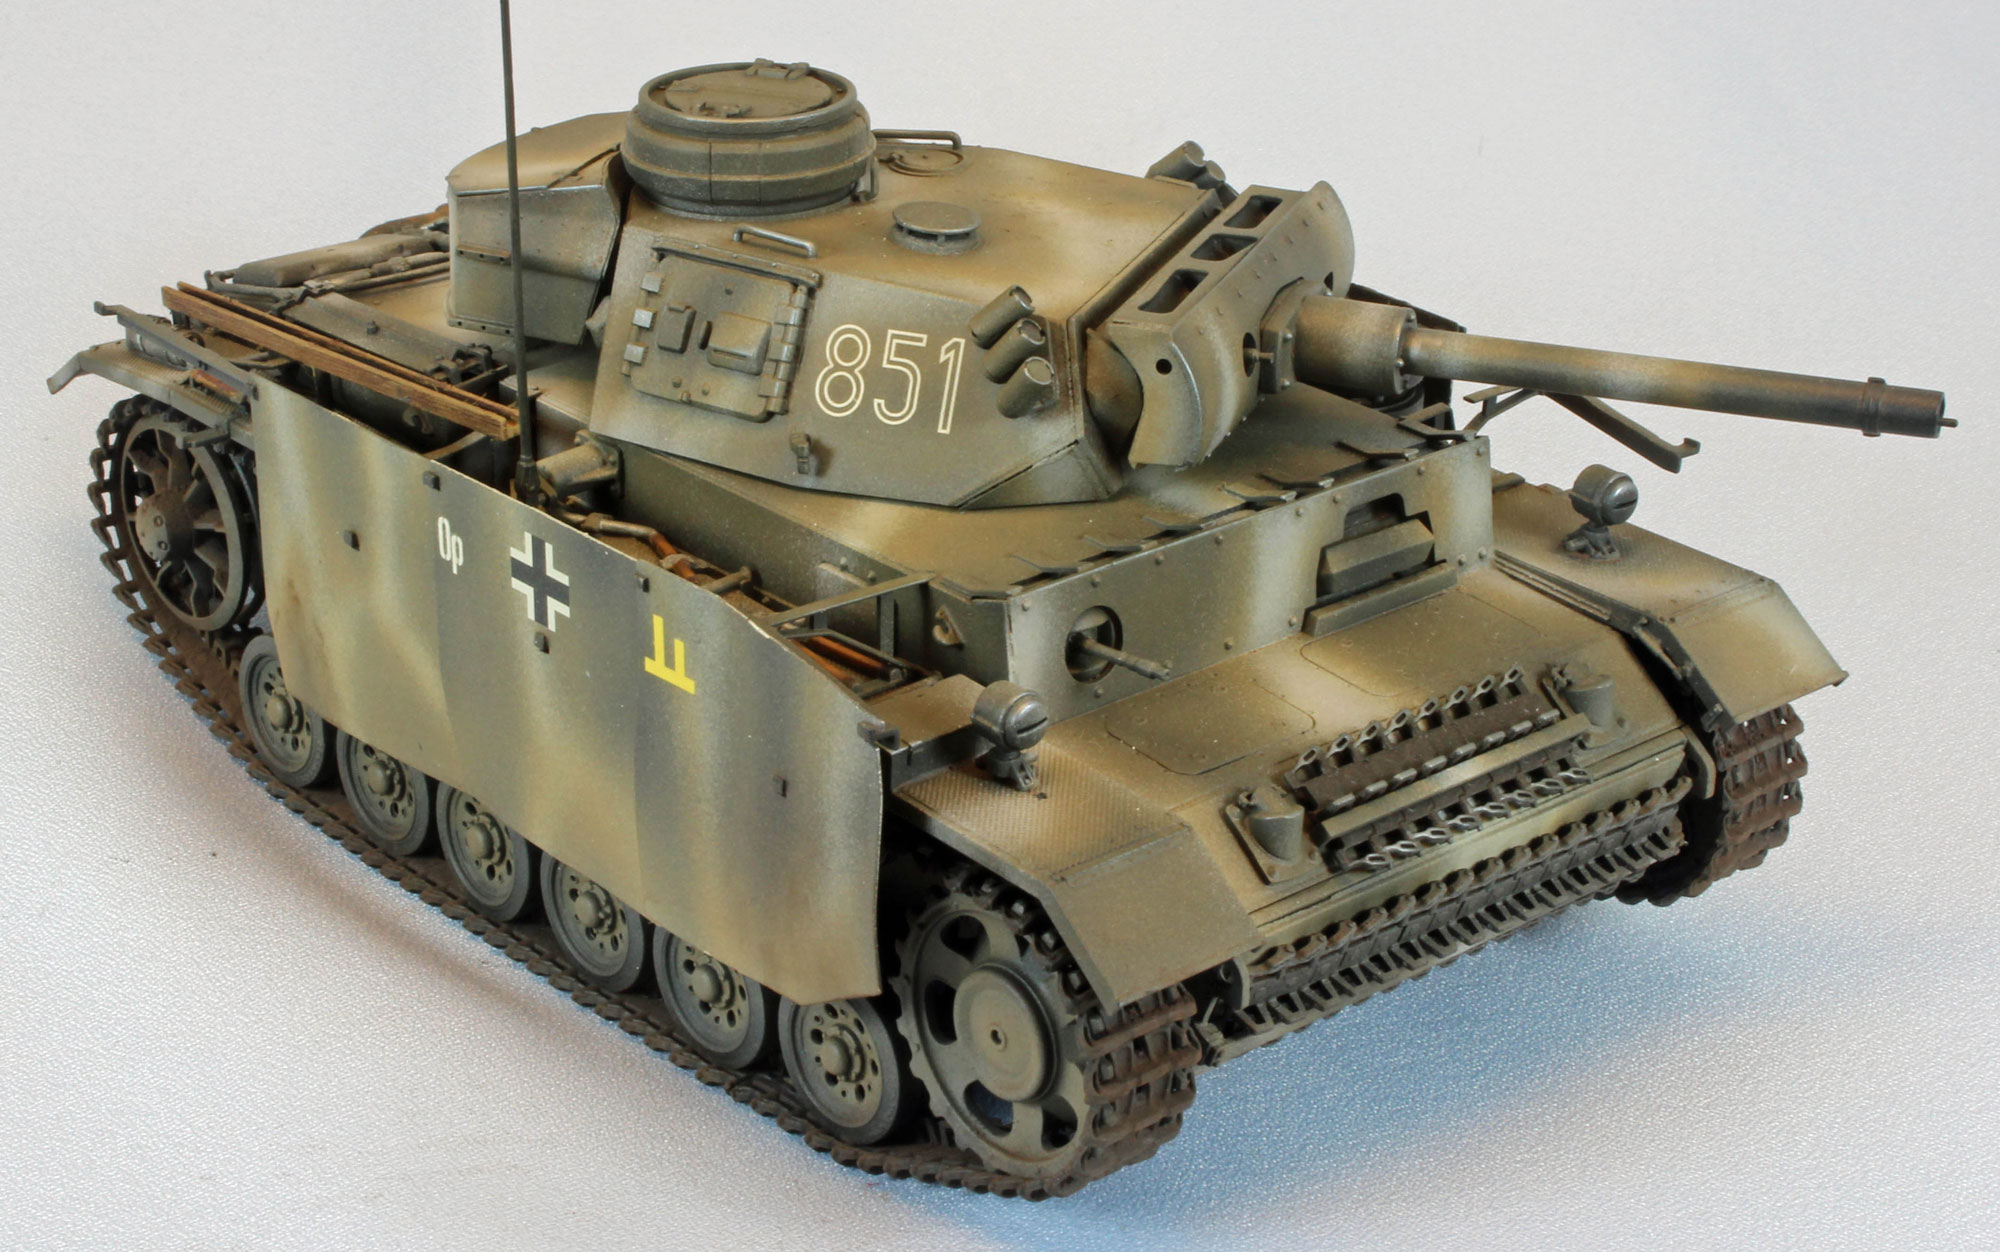
Conclusion
The PzKpfw III is one of the iconic tanks of World War II, and it is no wonder that Dragon has taken on this family of AFV’s to produce some of the very best models on the market. The parts fit and are beautifully detailed; together making these kits a lot of fun to build.
The design of the some of the parts such as the commander’s cupola, the schürtzen hardware, and the running gear is simply brilliant, and in my opinion, the very best available; Dragon sets the bar here.
The thin DS track has evolved into an excellent alternative to the Magic Track, which itself was a wonderful product (and still is). I just wish the DS runs would come in a more ‘military’ color since they are such a chore to paint.
The slide molding, included in all Dragon kits now, has really improved the detail and build-ability of their kits. This is nowhere more apparent than with their tank barrels which are, in my opinion, a vast improvement over the ill-fitting and hard-to-paint aluminum versions.
And last but not least, Dragon thoughtfully designs their models so that every hatch, door or access panel can be built in the open position, with enough interior detail to get you started if you roll that way.
I can recommend this kit to all modelers who are up to the small challenges that a kit with so many parts and options will offer. If you mark up the instructions beforehand as suggested, and go slow, you shouldn’t have any problems.
I would like to thank Dragon Models for providing this kit for review, and to IPMS USA for giving me the opportunity to review it.
Photos