.jpg)
Reviews
Armor
T-34/76 Mod. 1943 w/Commander Cupola
by Eric Christianson
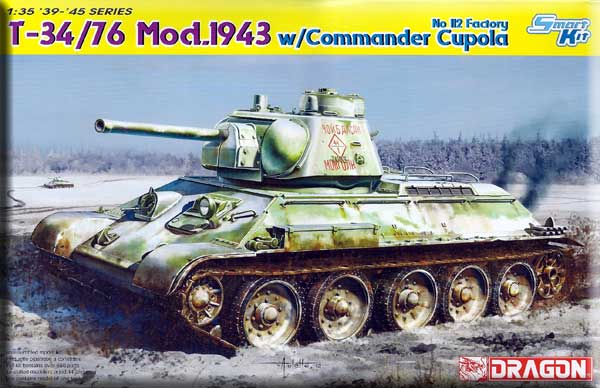 Model: T-34/76 Mod. 1943 w/Commander Cupola
Reviewed by: Eric Christianson, IPMS # 42218
Scale: 1/35
Company: Dragon
Price:
Product/Stock #: 06584
Website: Dragon
Product Web Page: View
Product provided by: Dragon Model USA
Summary
Dragon has released yet another T-34 for the Russian armor aficionados among us. This time we have a new Smart Kit offering of the Model 1943 T-34/76 with a commander cupola. The kit looks to be a mish-mash of several other kits with a few new parts thrown in for the new version. Nevertheless, the smart look of the new, beautifully cast turret and the generally detail-free main hull make this offering unique, and one to own.
Background
There is not much that can be said about the T-34 that hasn’t already been said, or couldn’t be found with a few clicks on the internet, so I’ll get right to the build.
The Kit
The T-34/76 comes replete with all the goodies we’ve come to expect from Dragon. The 26 sprues of soft, grey styrene come individually wrapped in plastic, with the upper and lower hull packaged separately. A decent sheet of photo-etch, two pieces of twisted wire for cables (not used), a clear sprue for optics round out the contents of the over-stuffed box. The wheels are works of art, beautifully detailed. The individual-link Magic Track are packaged two separate bags. With all this content for such a simple vehicle, the majority of the parts end up in the spare parts box. On the flip side – you gain a bunch of spare hatches, boxes, track, barrels etc, etc. for other projects.
The Instructions
The kit comes with a single sheet, 6-page fold-out set of instructions. The parts map and the decal/paint guide take up two of those pages. The remaining four pages contain Dragon’s typical exploded-view diagrams in blue and black ink. Dragon has always been a little lax with their instructions but usually even inexperienced modelers can work their way through any inaccuracies encountered. I’m not sure this can be said for this particular kit. Assuming I did not receive a bad review copy, something very wrong happened back at the plant. To summarize; what was on the sprues did not match the parts map, or the instructions. The parts map did not show all of the sprues contained in the box. The instructions showed parts that were not in the box (or on the parts map). The photo-etch sheets DID match the parts map, but did not match the PE shown in the instructions. The ‘not-used’ parts highlighted in blue on the parts map in many cases were supposed to be used.
Everything almost matched – I mean, the parts, parts map and instructions were all for a T-34/76 model kit, but that’s not enough to describe the experience as simply an annoyance. Dragon makes really great kits, covering a huge variety of subjects that fit and build up into beautiful replicas. It pains me to slam them for their documentation, but in this case, I have no choice. I had to remove my kit-assembler helmet and put on my modeler helmet for this build - I was in for a bumpy ride. In lieu of calling attention to every problem, however, I will simply suggest that you pay close attention and test fit everything.
Construction
Construction starts with the hull and main running gear. The only thing to say here is that in several cases, and throughout construction, there were missing ‘Option’ icons. Optional choices simply show 4, or 6 or 8 part numbers, with parenthesized part numbers for the other side of the vehicle. This is ok, but it is not always clear that these are choices between options.
I used a steel ruler to line up the main wheels, idler and drive sprockets. They go on with a firm ‘chunk’ and feel like they will stay put – nice. Placement of the detail on the front lower hull is ambiguous – there are no marks or guide holes to help. Studying photographs of T-34’s helped a little, but there are so many variations it was hard to find the right one.
In step five I wanted to use the PE rear fenders, so I trimmed off most of the plastic fenders, leaving a tab to support the PE, which worked out well.
You are given an option to use a three-part sandwich of PE to replace the single plastic rear grill. The PE is beautifully executed, but I could not pull it off convincingly and ended up using the plastic part. A modeler more experienced with very thin super glue would have had no problem with this.
In step six the rear hatch does not fit when closed and there is no interior detail provided on the hatch. I tried the four other rear hatches in the box to no avail – none of them fit. Doing a little surgery to the back of the hatch solved the problem (see photo). The front hull section (P1) should be attached prior to the right and left fenders so they will have some support.
In step seven the instructions will have you attach the interior machine gun mount (Part G10) to the outside of the housing (Part G11). This is reversed. It should be attached on the inside of G11.
In step ten there is a large, noticeable seam between parts L13 and L14 that will be obvious on the completed model. I recommend test fitting everything here and plan on how and when you will fill that seam. I used super glue and sanded it out before attaching it to part L18.
The photo-etch called out in step eleven (MA-13) doesn’t exist – I used three grab handles that were marked as ‘not-used’ for replacements.
In step thirteen you are given a set of serial numbers (‘2003’) to shave off the sprue and place on the turret sides. Again, I need more practice with this – a more experienced modeler can probably pull this off.
The 14 prominent grab handles look really nice all lined up but there are no guides or marks to tell you where they go – you have to look at pictures and just go for it. I drew a pencil line across the sides of the hull to give me a starting point, but other areas were too constricted for this approach.
You’ll have to snip the tabs off the turret in order to fit it into the hull – this is because the hull shown in the instructions, which mates to the turret, is not the one provided in the kit.
Track
Construction ends with the track, which is beautifully executed but suffers from having not enough ‘gripping’ power between links when being laid out prior to gluing. And, if you use one drop of glue between links, as I did on one run of the track, you will find that this lack of grip will carry though when installed on the vehicle. The links really want to come apart. As a consequence, I recommend adding two drops of glue between each and every link. I use Testors ‘black bottle’ cement for this because it gives me plenty of working time. After about 20 minutes the track comes up in a single, nice, bend-y piece that can be worked around the wheels, sprocket and return rollers. The instructions give you no indication of how many links to use per side, and Dragon provides 88 links per bag. I found that 70 links on each side works well, maybe one more ‘pair’ if you want to add more sag.
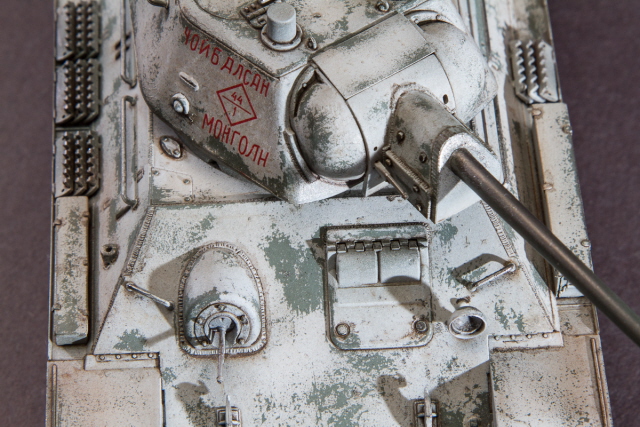
Painting
One great thing about T-34’s, and Dragon’s offering is no exception, is that you can leave the three main sections, upper hull, lower hull and turret separate all the way through to the end, which greatly helps with painting and finishing. I decided to paint my Command T-34 using the winter-white ‘hair-spray’ technique applied over Russian Green. I started by airbrushing a primer coat of Gunze Mr. Surfacer 1200 over the entire surface to cover the oils and glue spots and to prepare it for the subsequent finish.
I then airbrushed the lower hull and running gear Tamiya NATO Black, and the upper hull, tracks and turret Tamiya Flat Brown. This provides the dark shadow that is needed in all the nooks and crannies. Once dry, I airbrushed a base coat of Model Master Russian Green over the entire model save the track. I made sure not to completely cover up the pre-shade colors, starting from the center of the panels and working my way outward to the edges.
I followed this with light post-shading coat of Model Master Topside Green, again trying to leave enough of color exposed underneath to show depth.
Winter ‘Hair Spray’ Technique
Using hair spray to selectively protect underlying layers of paint, while allowing heavy weathering of the white (or other color) top coat is a relatively new technique and is becoming quite popular with modelers of all types, although the technique is mostly associated with armor modelers. The technique is simple - and with a little practice - extremely convincing. I am still a novice but things are improving. Here is the gist of the technique for applying a white winter coat:
- Start with a completely painted and decaled surface, prior to applying filters, washes, pigments, etc. If you have decals, they should be sealed with a layer of whatever you normally use (I use Tamiya Clear or Future Floor Wax). If you want to have your decals on top of the white coat, then apply them after step six, below, but before you seal the vehicle with another coat of clear.
- Using common hair spray (I use TRESemmѐ Extra Hold from the drugstore), spray a generous coat over the surfaces of the model that will receive a white coat. This layer is not water soluble and will protect the underlying paint.
- Next, spray Tamiya Flat White in a splotchy pattern and set aside for a few minutes to dry while you clean your airbrush,
- Working in sections, wet an area with water (for slower weathering). You can also use isopropyl alcohol (for faster weathering) but I found that alcohol takes too much paint off, too quickly.
- Using a medium-soft square-ended brush wet with water (or alcohol) begin to work the layer of white paint until you see it start to come off. Stop when you have reached a point where the weathering is what you are looking for. Work around the decals especially if you want them to show clearly. If you take too much off, you can simply repeat the application of white paint.
- Continue with each section of the vehicle until you are satisfied with your work.
- Apply any filters next, starting with a diluted shade of the base color.
- Seal everything with another layer of clear to prepare the surface for washes.
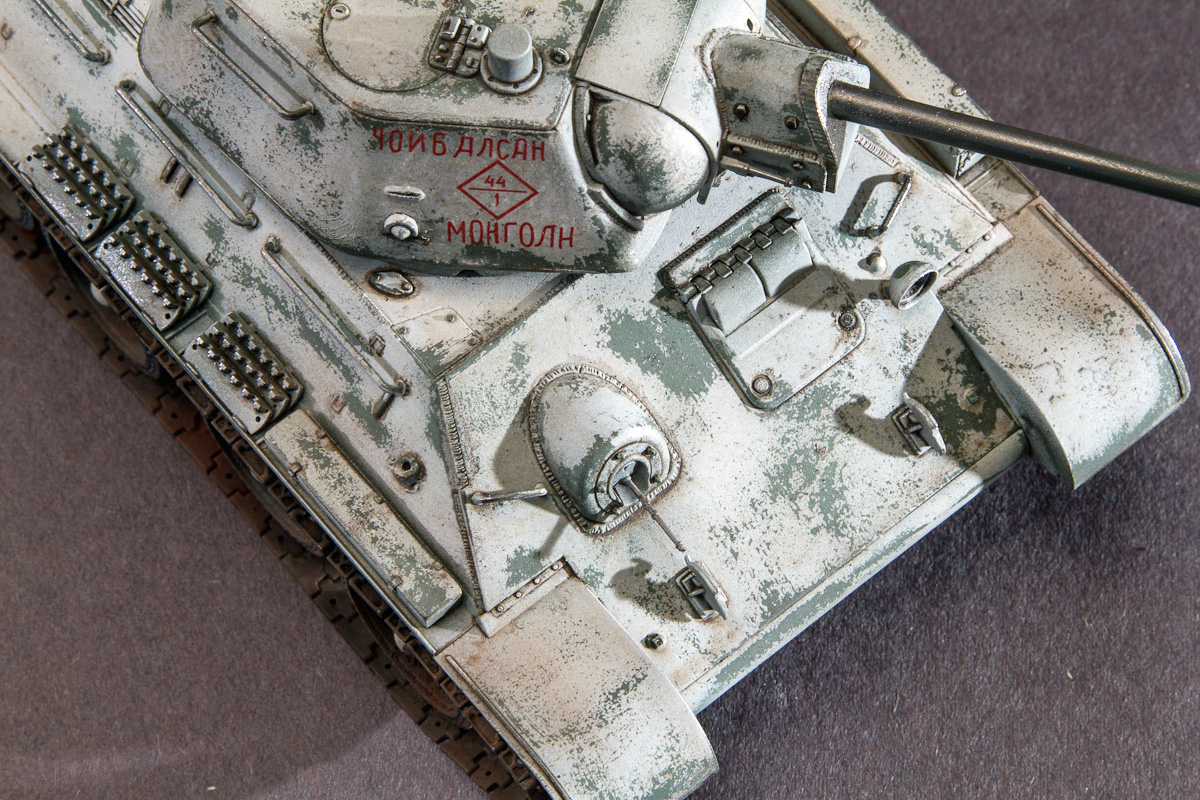
Finish
I was looking for a beat up look over the top of my winter camouflage - nothing on the Eastern front was ever clean. So immediately following the flat hairspray/Tamiya White coat, I started with two filter coats of Mig Abt015 Shadow Brown Oil paint, heavily thinned with Mona Lisa Paint Thinner.
I then sprayed Future over the entire model to prepare it for a wash. Once this was thoroughly dry, I gave the model surface a pin wash of Mig Dark Wash (an enamel). The T-34 is covered with weld seams and panel lines; these took Mig’s wash perfectly.
I followed this with a coat of Vallejo Matt Varnish thinned with a little distilled water to kill the shine and prepare the surface for pigments.
The final step was to add dry pigments – earth colors to the vehicle, black and rust to the track, and rust colors to the exhaust. I also went over some of the edges, door hinges and the gun barrel with a finger full of Mig Gun Metal pigment.
Conclusion
Every armor collection needs a T-34 of some type, and there are a bunch of them to choose from. I like the straight lines of this vehicle and the angular turret with the prominent cupola on top. The turret, wheels and rear deck are beautifully rendered and the track detail (once you get it assembled) is excellent. This kit builds up into a nice and unique representation of the real vehicle.
Unfortunately, because of the poor execution of the documentation, I can only recommend this kit to experienced modelers. Hopefully, I received a bad review copy and the kits available now have been updated with new instructions.
I would like to thank Dragon and Stevens International for providing this kit for review, and to Internet Modeler for giving me the opportunity to build it.
.jpg)
.jpg)
.jpg)
.jpg)
.jpg)