Reviews
Armor
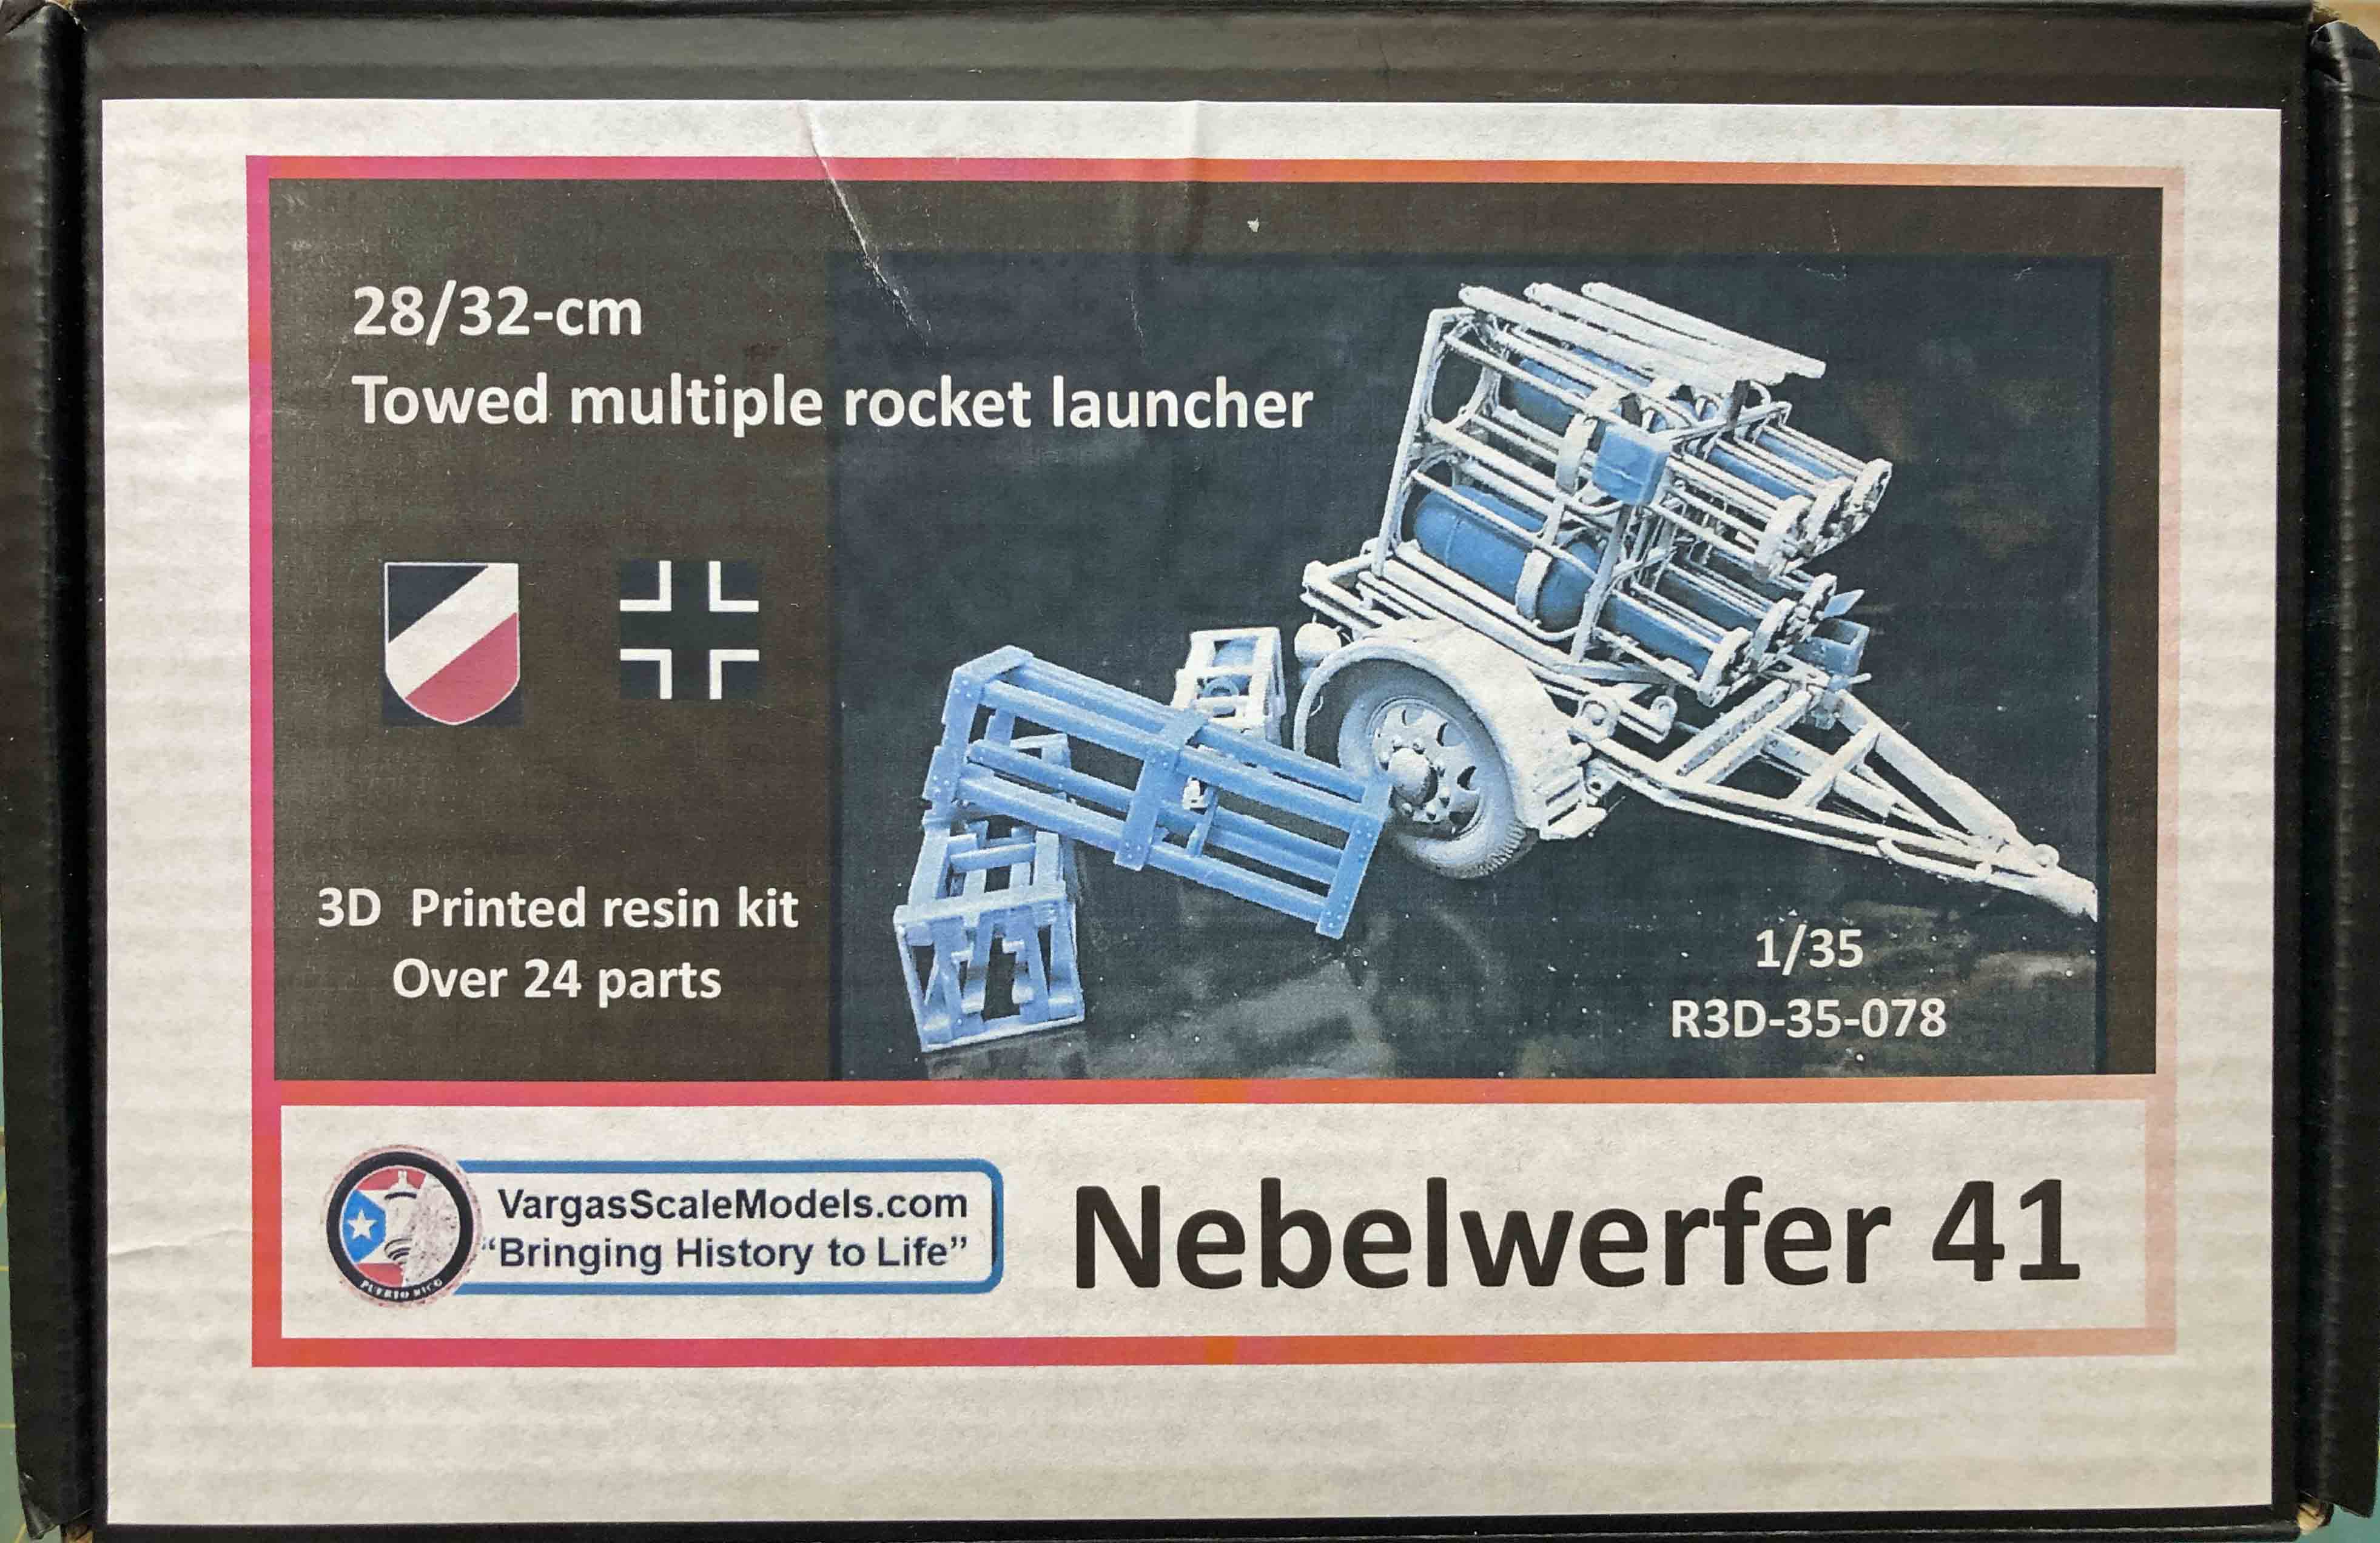
Nebelwerfer 41 Towed German Rocket Launcher
by Eric Christianson
 Model: Nebelwerfer 41 Towed German Rocket Launcher
Reviewed by: Eric Christianson, IPMS # 42218
Scale: 1/35
Company: Vargas Scale Models
Price: $44.50
Product/Stock #: R3D-35-078
Website: Vargas Scale Models
Product Web Page: View
Product provided by: Vargas Scale Models
Vargas Scale Models has historically occupied a niche specializing in unusual, 3-D printed, limited-run armor models, mostly pre- and between World Wars. So far this has been a winning strategy for this prolific company, fleshing out all those subjects ignored by others. Lately, however, Vargas has been entering more well-trodden areas, as well as experimenting in other scales. such as 1/72nd, and even the odd 1/16th aftermarket item. One such release (in 1/35th) is a late-WWII-era German Nebelwerfer 41 towed rocket launcher; the subject of this review.
The Nebelwerfer (roughly translated as ‘smoke thrower’) was a German multiple rocket launcher that served with German Chemical Corps units, which had the responsibility for poison gas and smoke weapons that were also used to deliver high-explosives during the war.
The 150mm, spin-stabilized rocket ammunition was fired from a variety of different launchers, the more unusual ‘square cage’ version being the subject of this Vargas release. Like the more ubiquitous six-tube version, it was mounted on a towed carriage adapted from that used by the 3.7 cm PaK 36 anti-tank gun, and had a range of 7,500 yds. Later the rockets were also mounted on a Sd. Kfz.251 halftrack as Panzerwerfer 42. Almost five and a half million 150mm rockets and six thousand launchers were manufactured over the course of the war.
The Kit
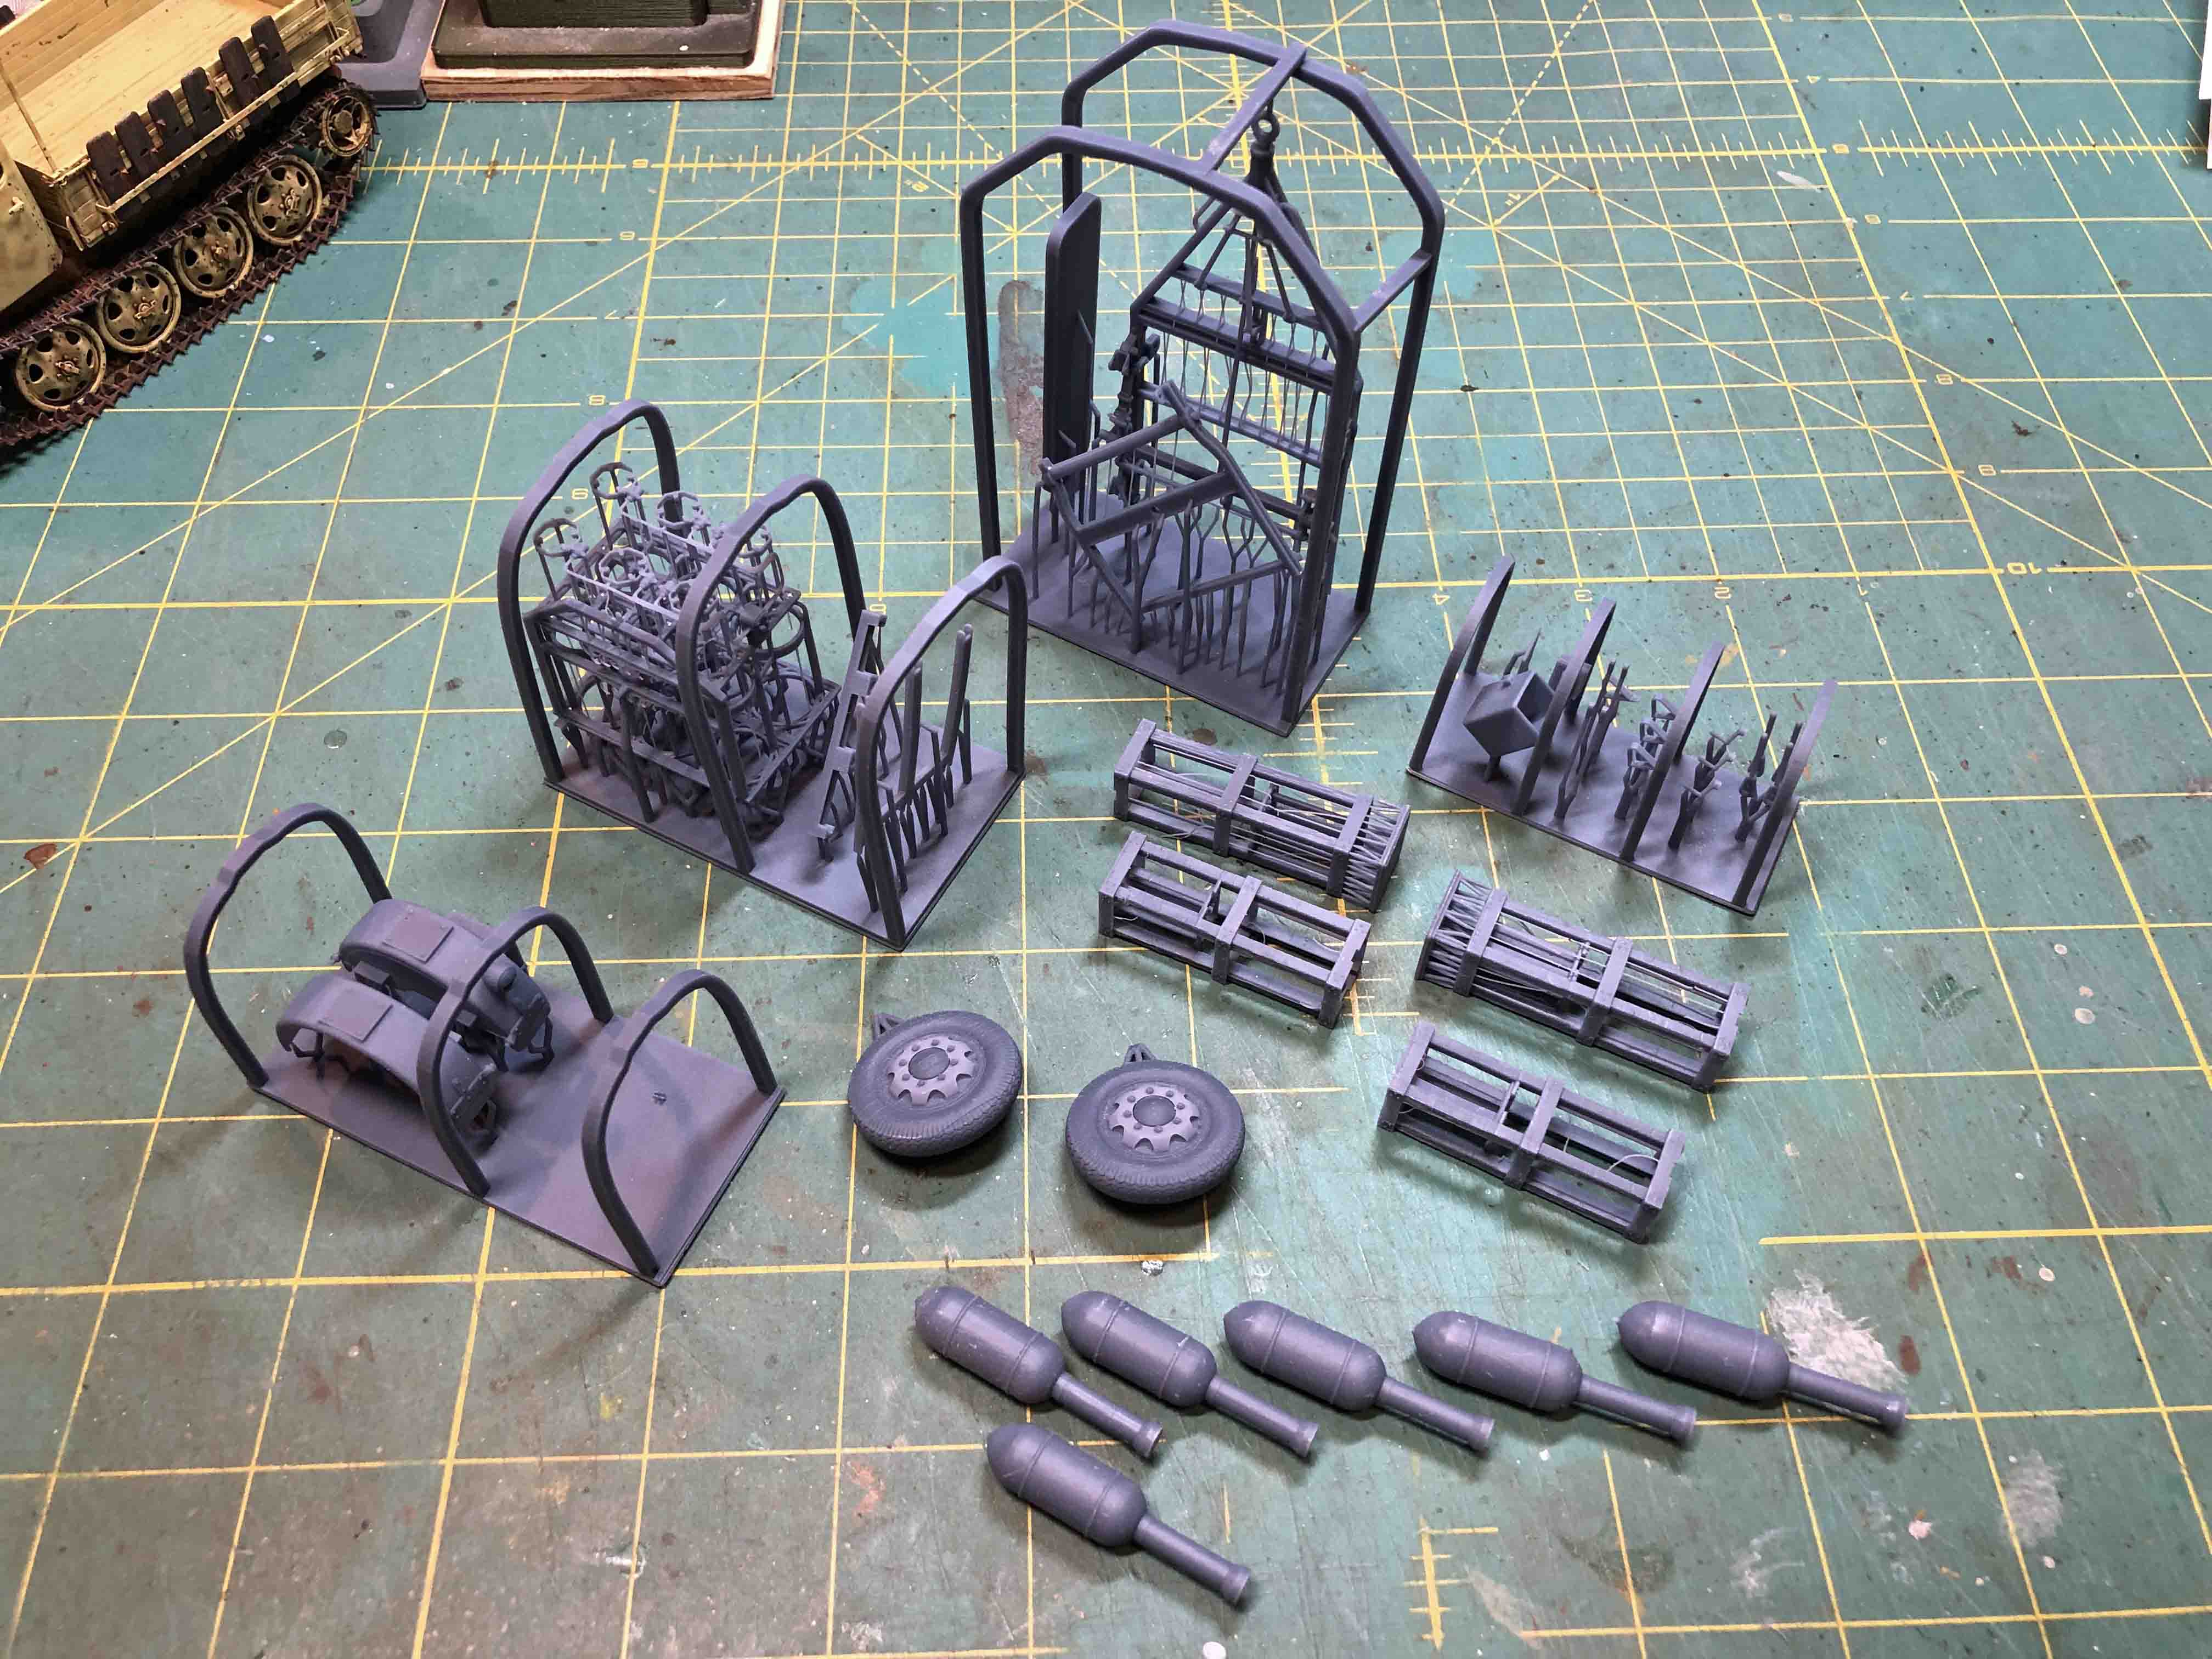
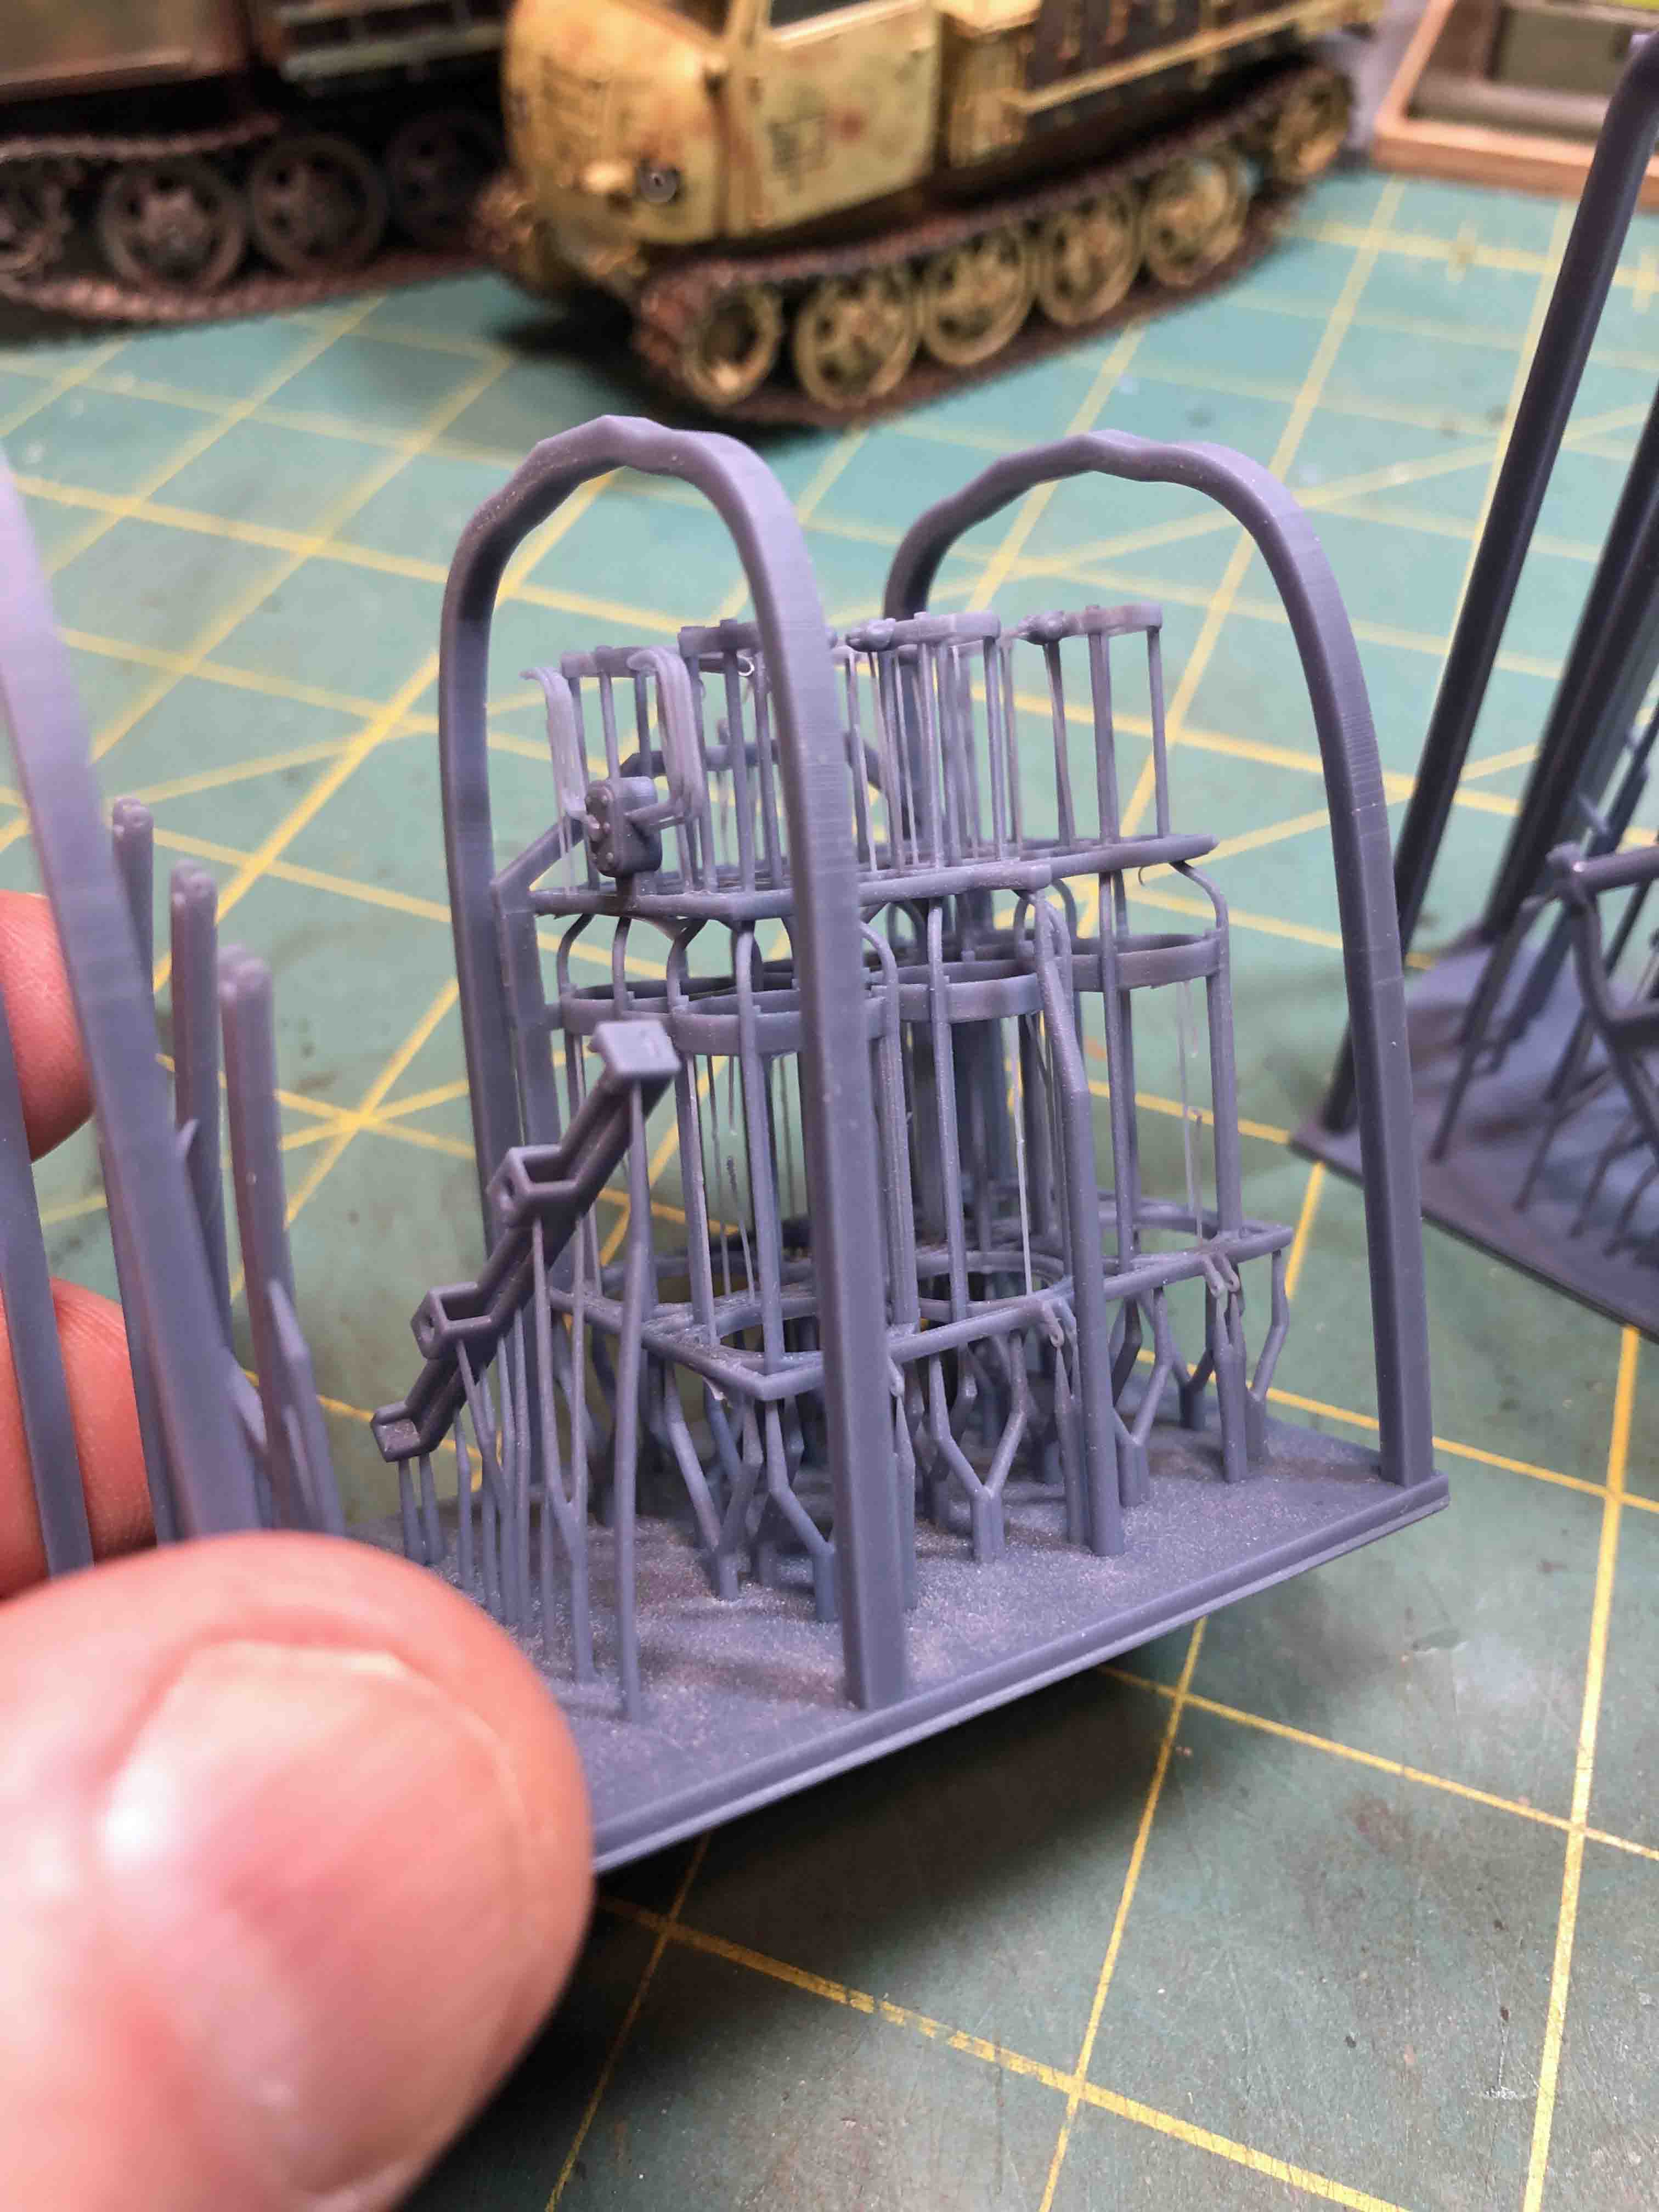
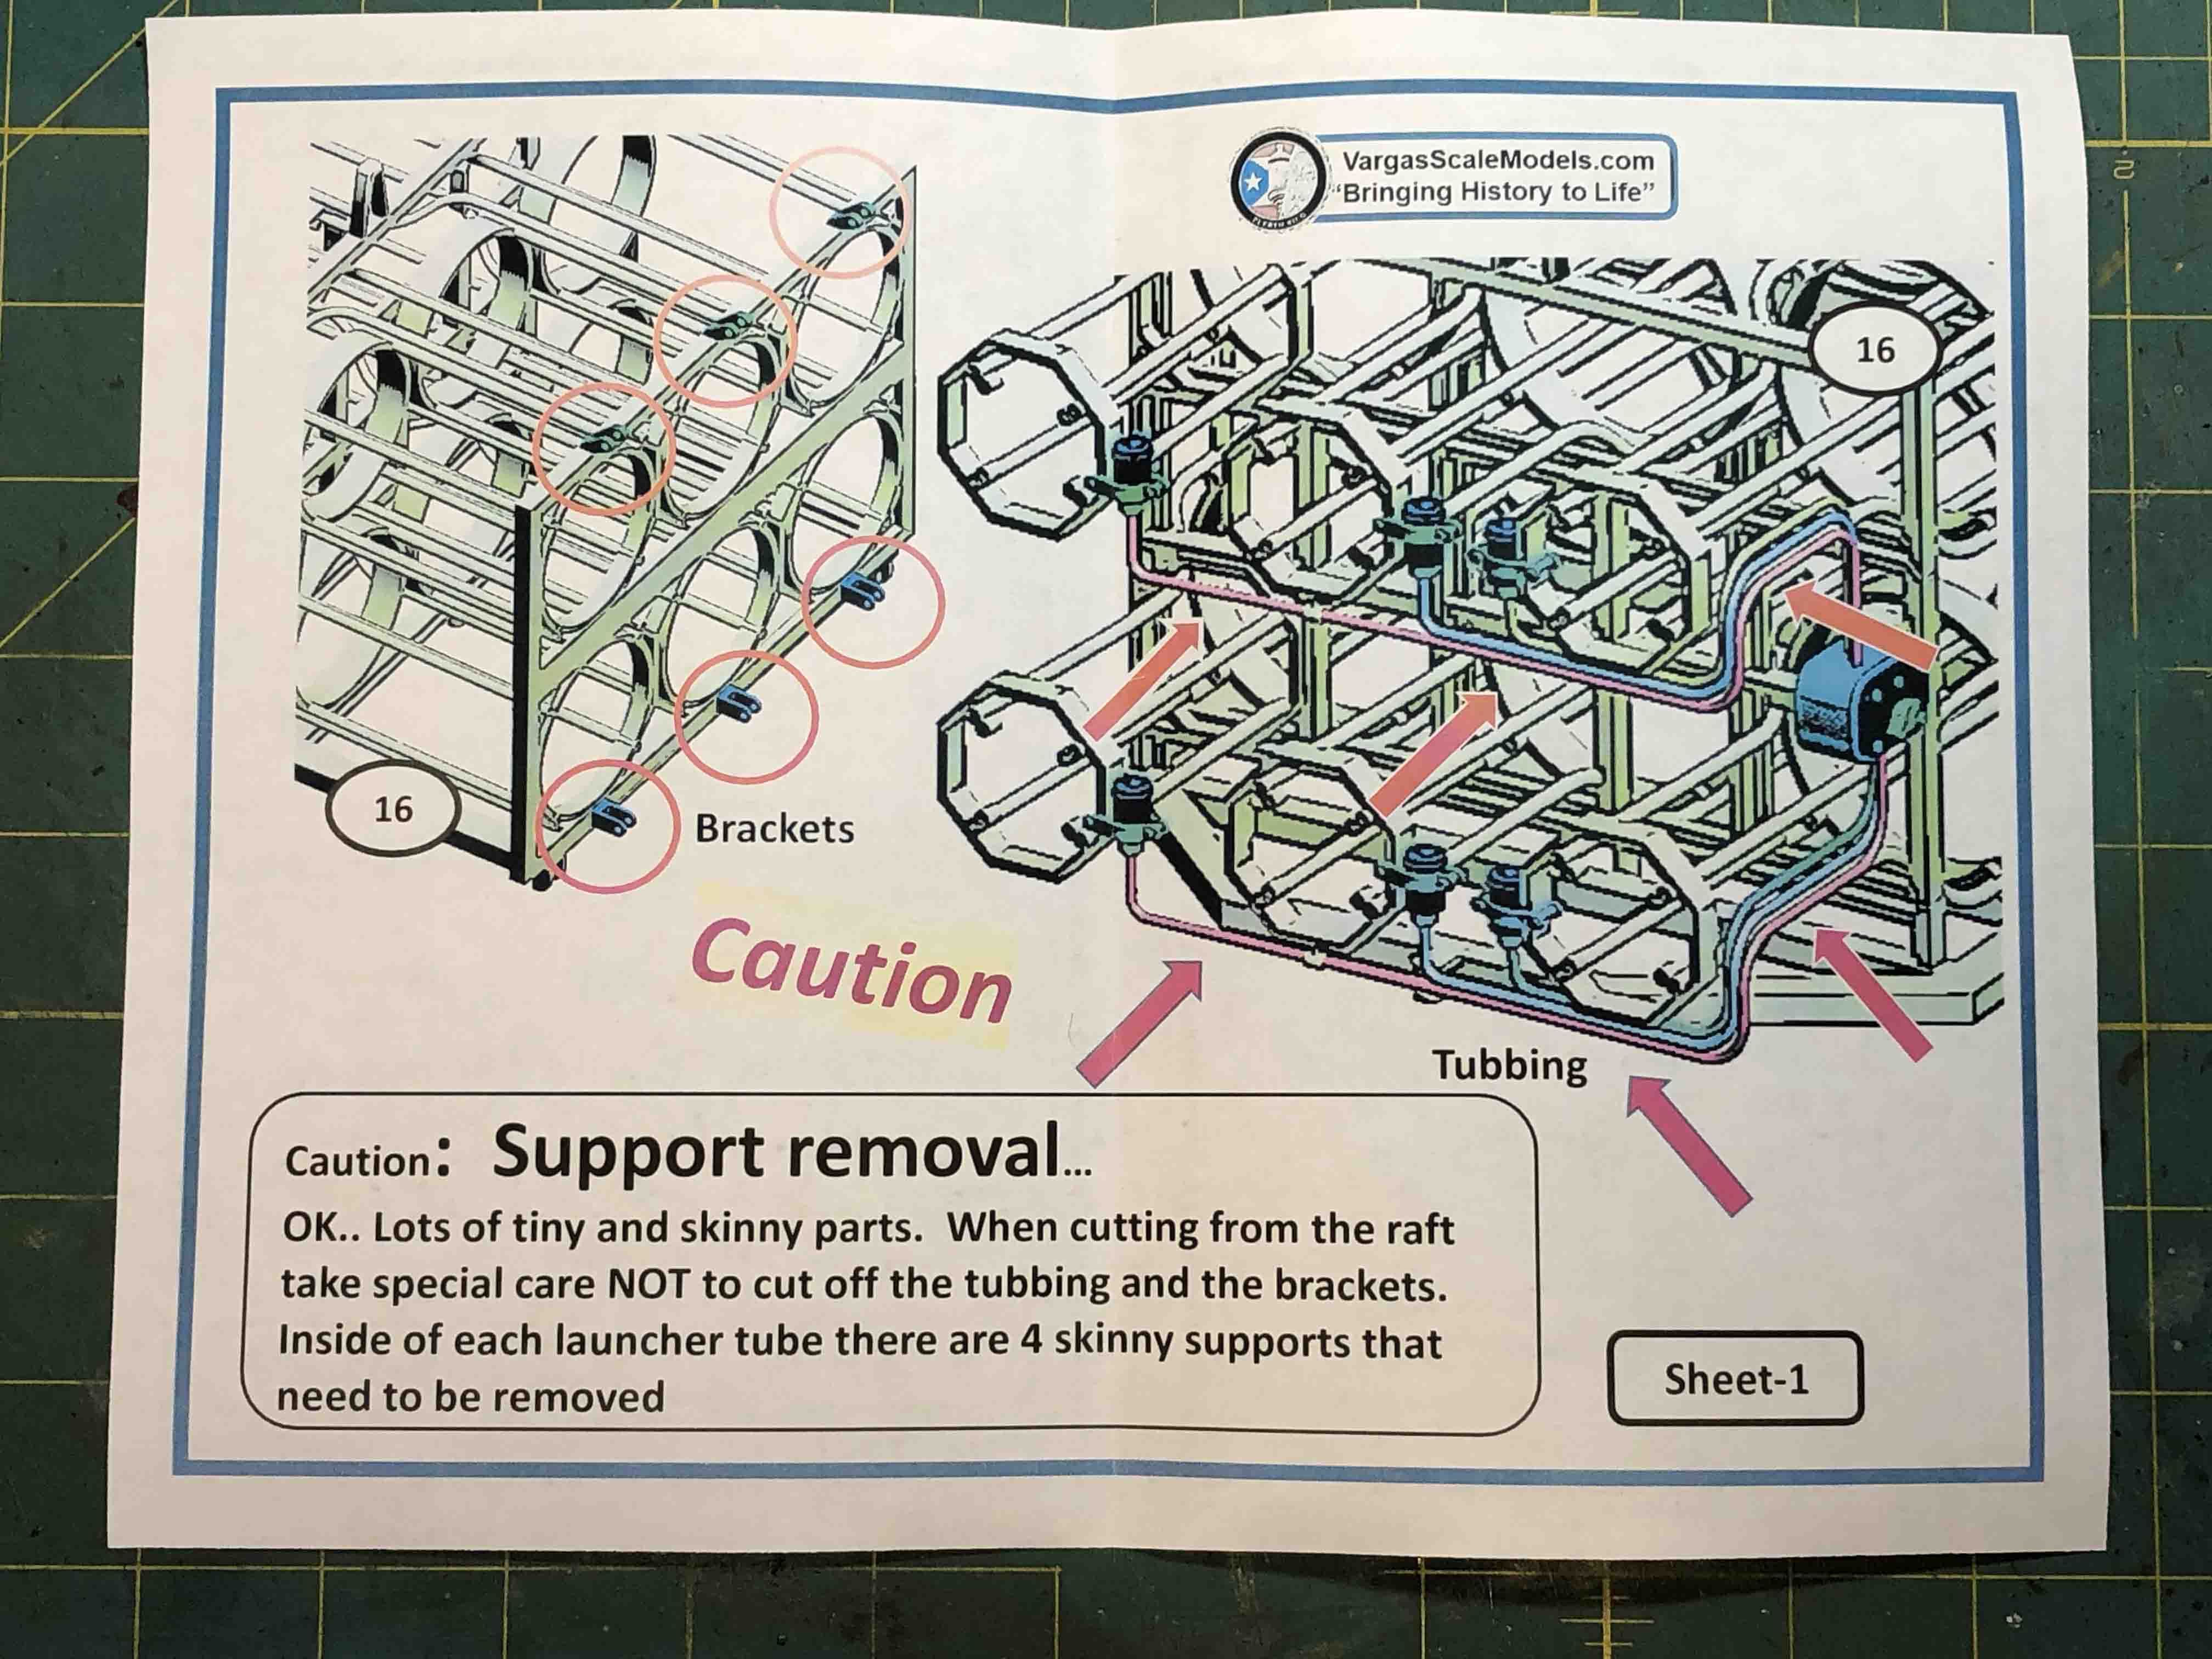
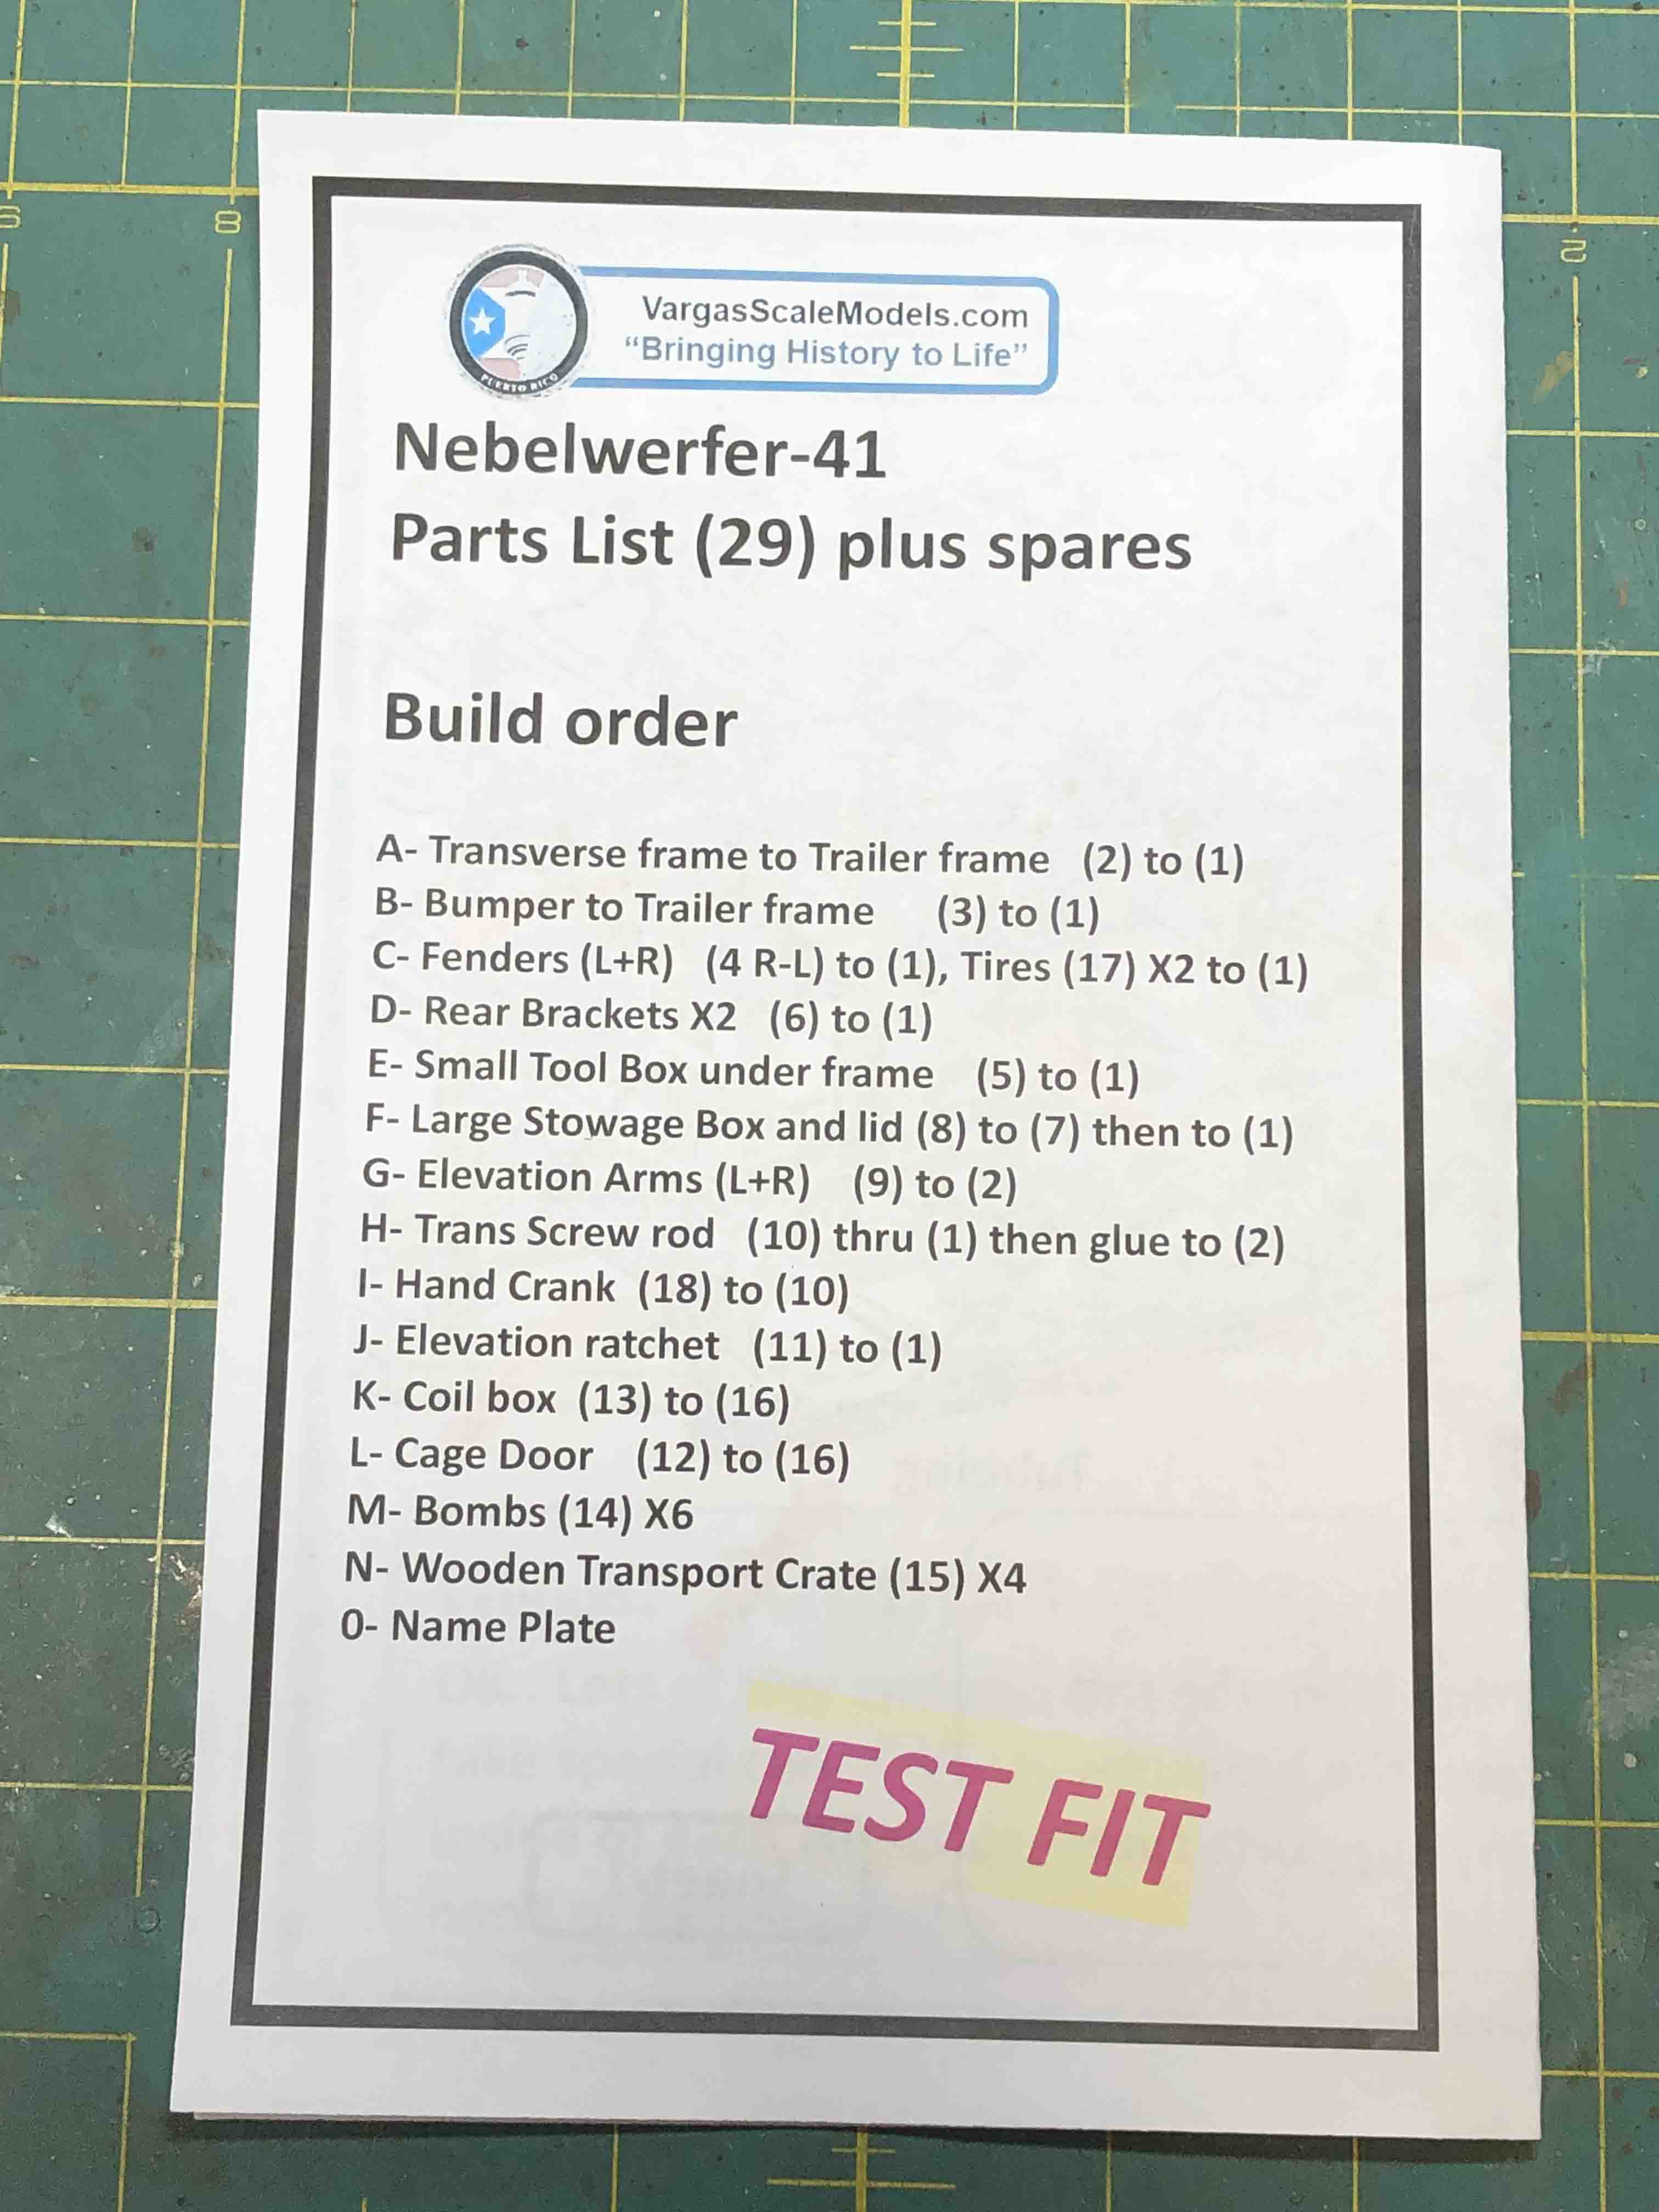
As with most 3-D printed kits, the Vargas sprues do not have any old-school poured-resin blocks to remove; instead, each sprue contains dozens of very thin connecting rods that are part of the printing process. This makes the parts very simple to remove from the sprues. Most of the smaller parts are printed within a flexible, protective ‘cage’ of resin. There are very few actual parts (26, plus nameplate), and these are exquisitely detailed – the single-piece cage that holds the six ammunition rounds is itself a wonder to behold. There is cleanup required, to be sure, but nothing like what I would normally expect for limited-run, resin subjects. Some extra parts are thrown in as well, which serve to replace some of the smaller items that might go on walkabout. Four of these extra parts are fully constructed, ‘wooden’ ammunition crates – a very welcome addition for dioramas.
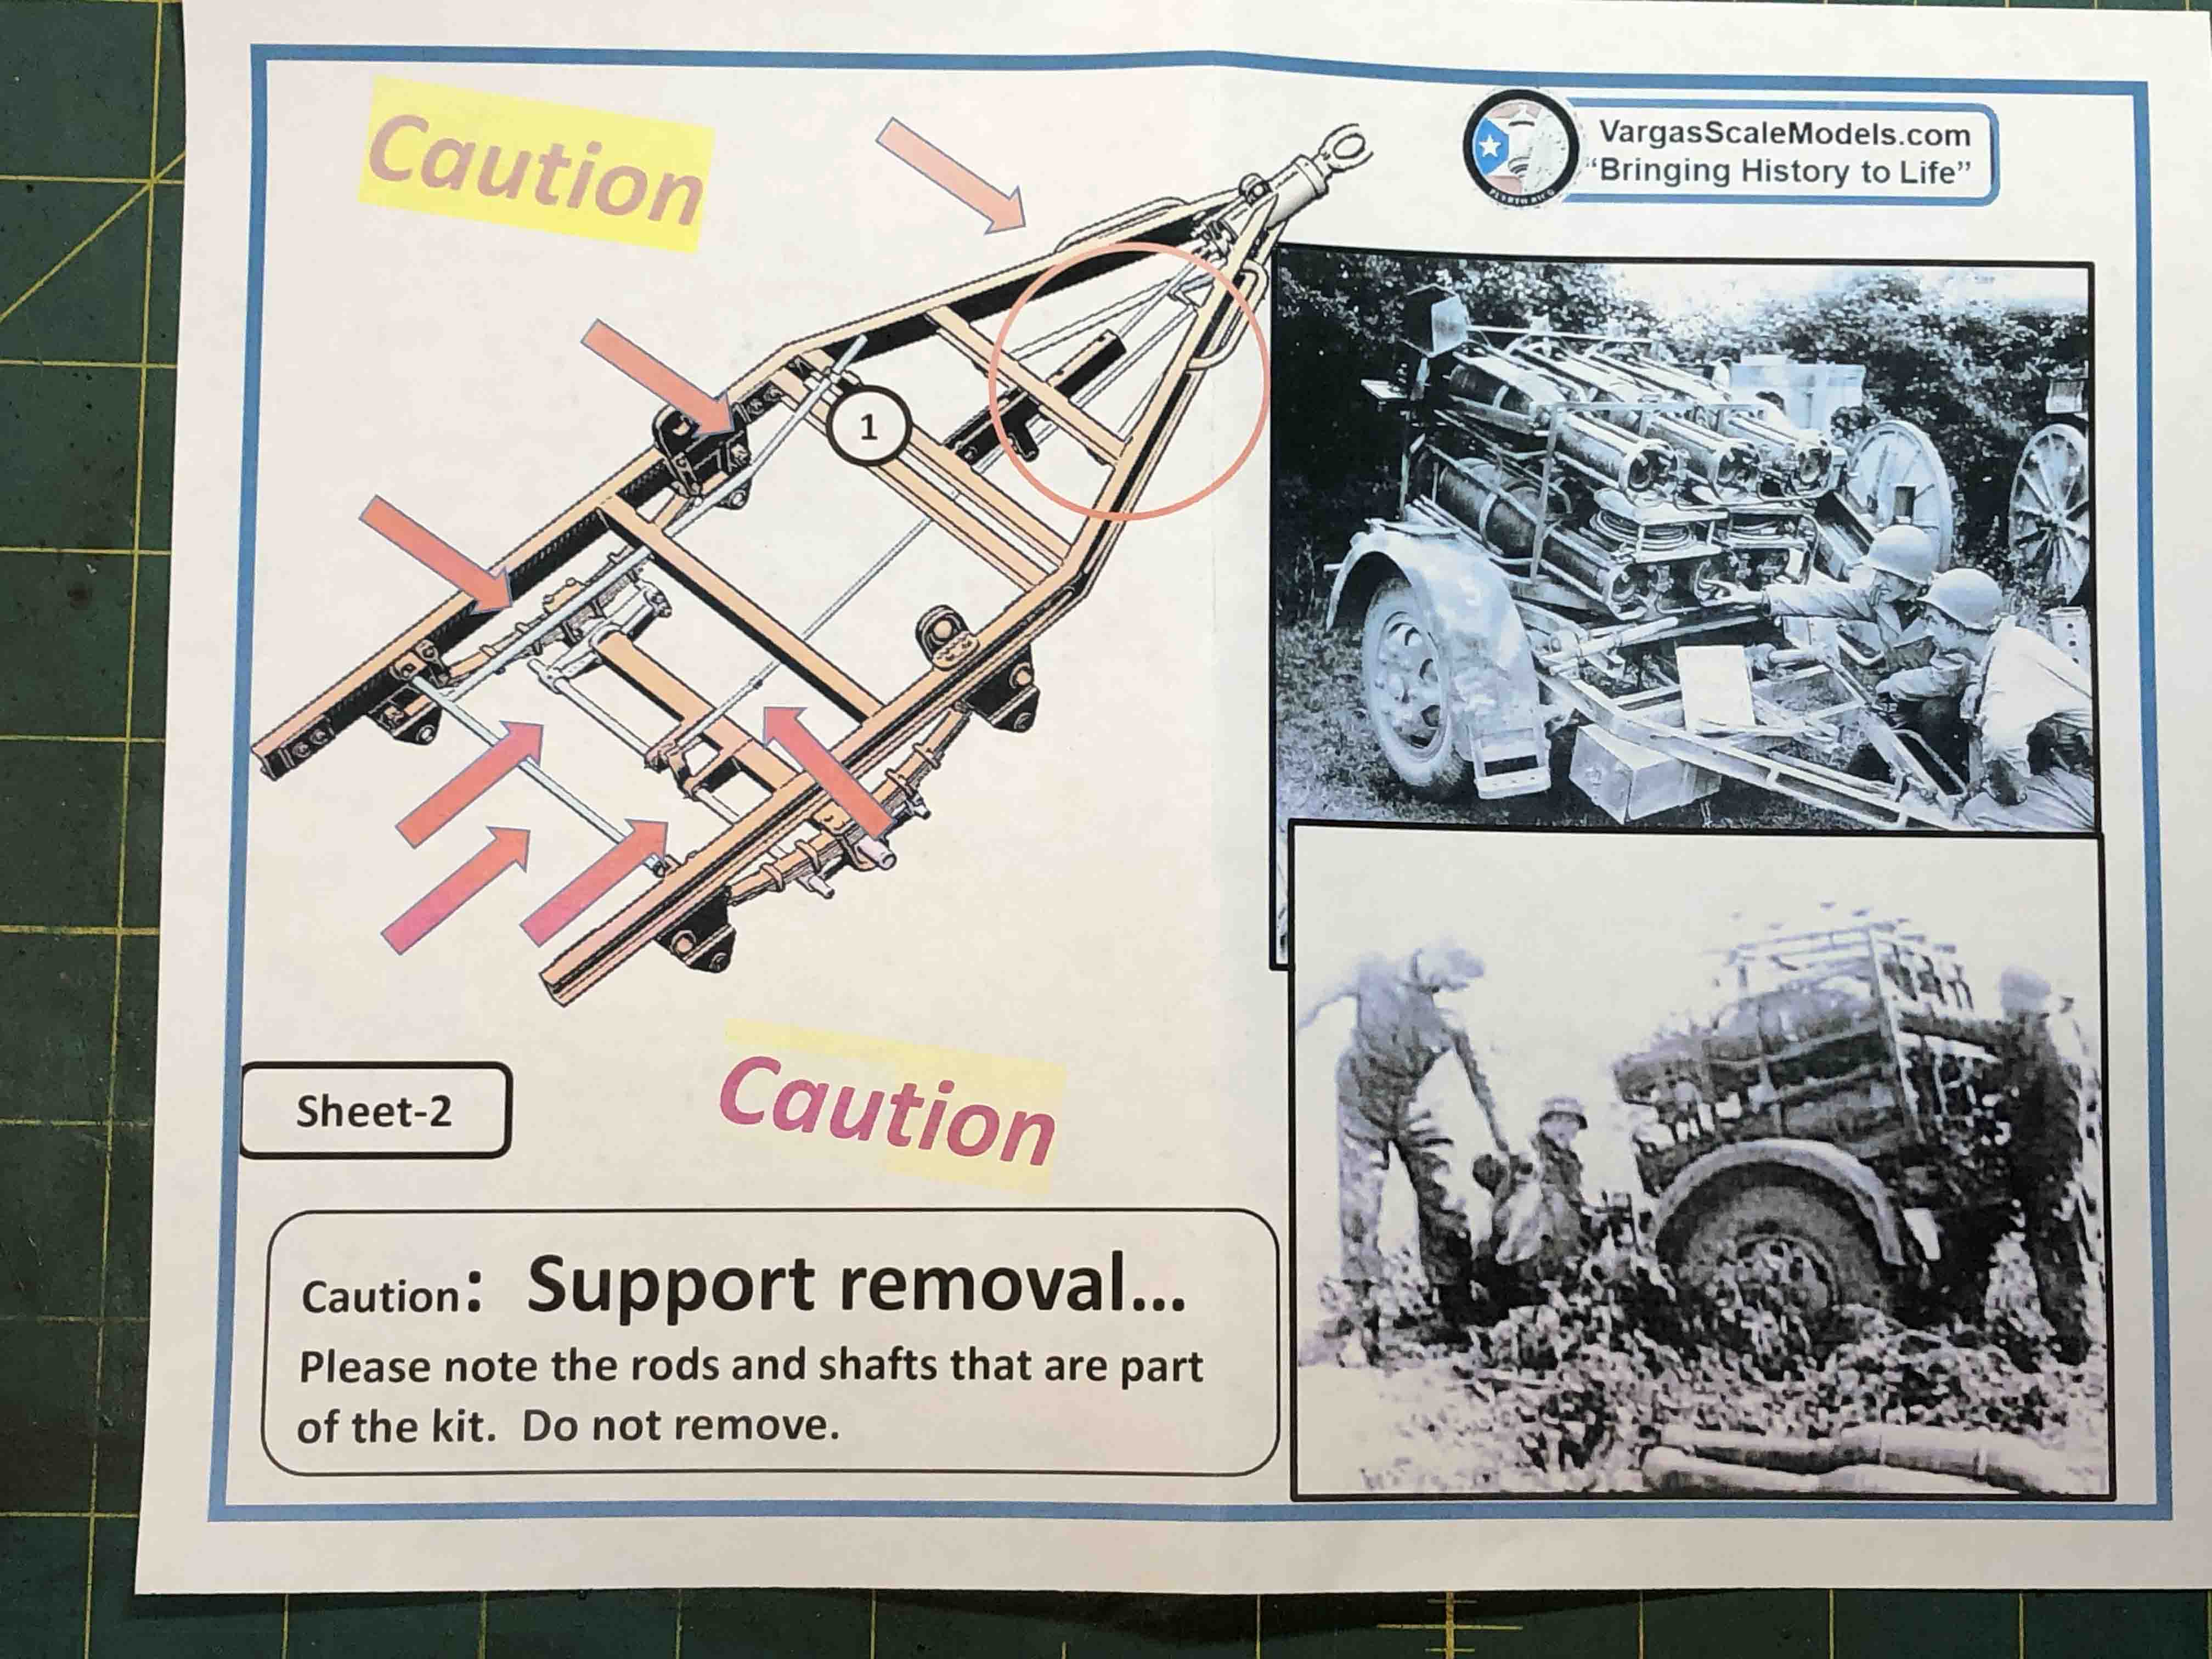
The dark-grey resin is firm, but sands easily enough, and there are some very slight surface striations on some of the curved parts that require attention, making preparation more important than with typical styrene kits. Comparatively, however, this work from Vargas is pretty darn good as delivered. There are very few, if any, surface flaws and the molding is excellent with no noticeable defects. The detail overall is crisp, and while many of the parts are very delicate, Vargas pulls everything together without resorting to using photo-etch or other finicky mediums, which is a big plus (for me, at least). The small instruction booklet uses up a full two pages cautioning the modeler about removing the support structures without damaging the kit parts. I managed to get everything separated without mishap, so go slowly here!
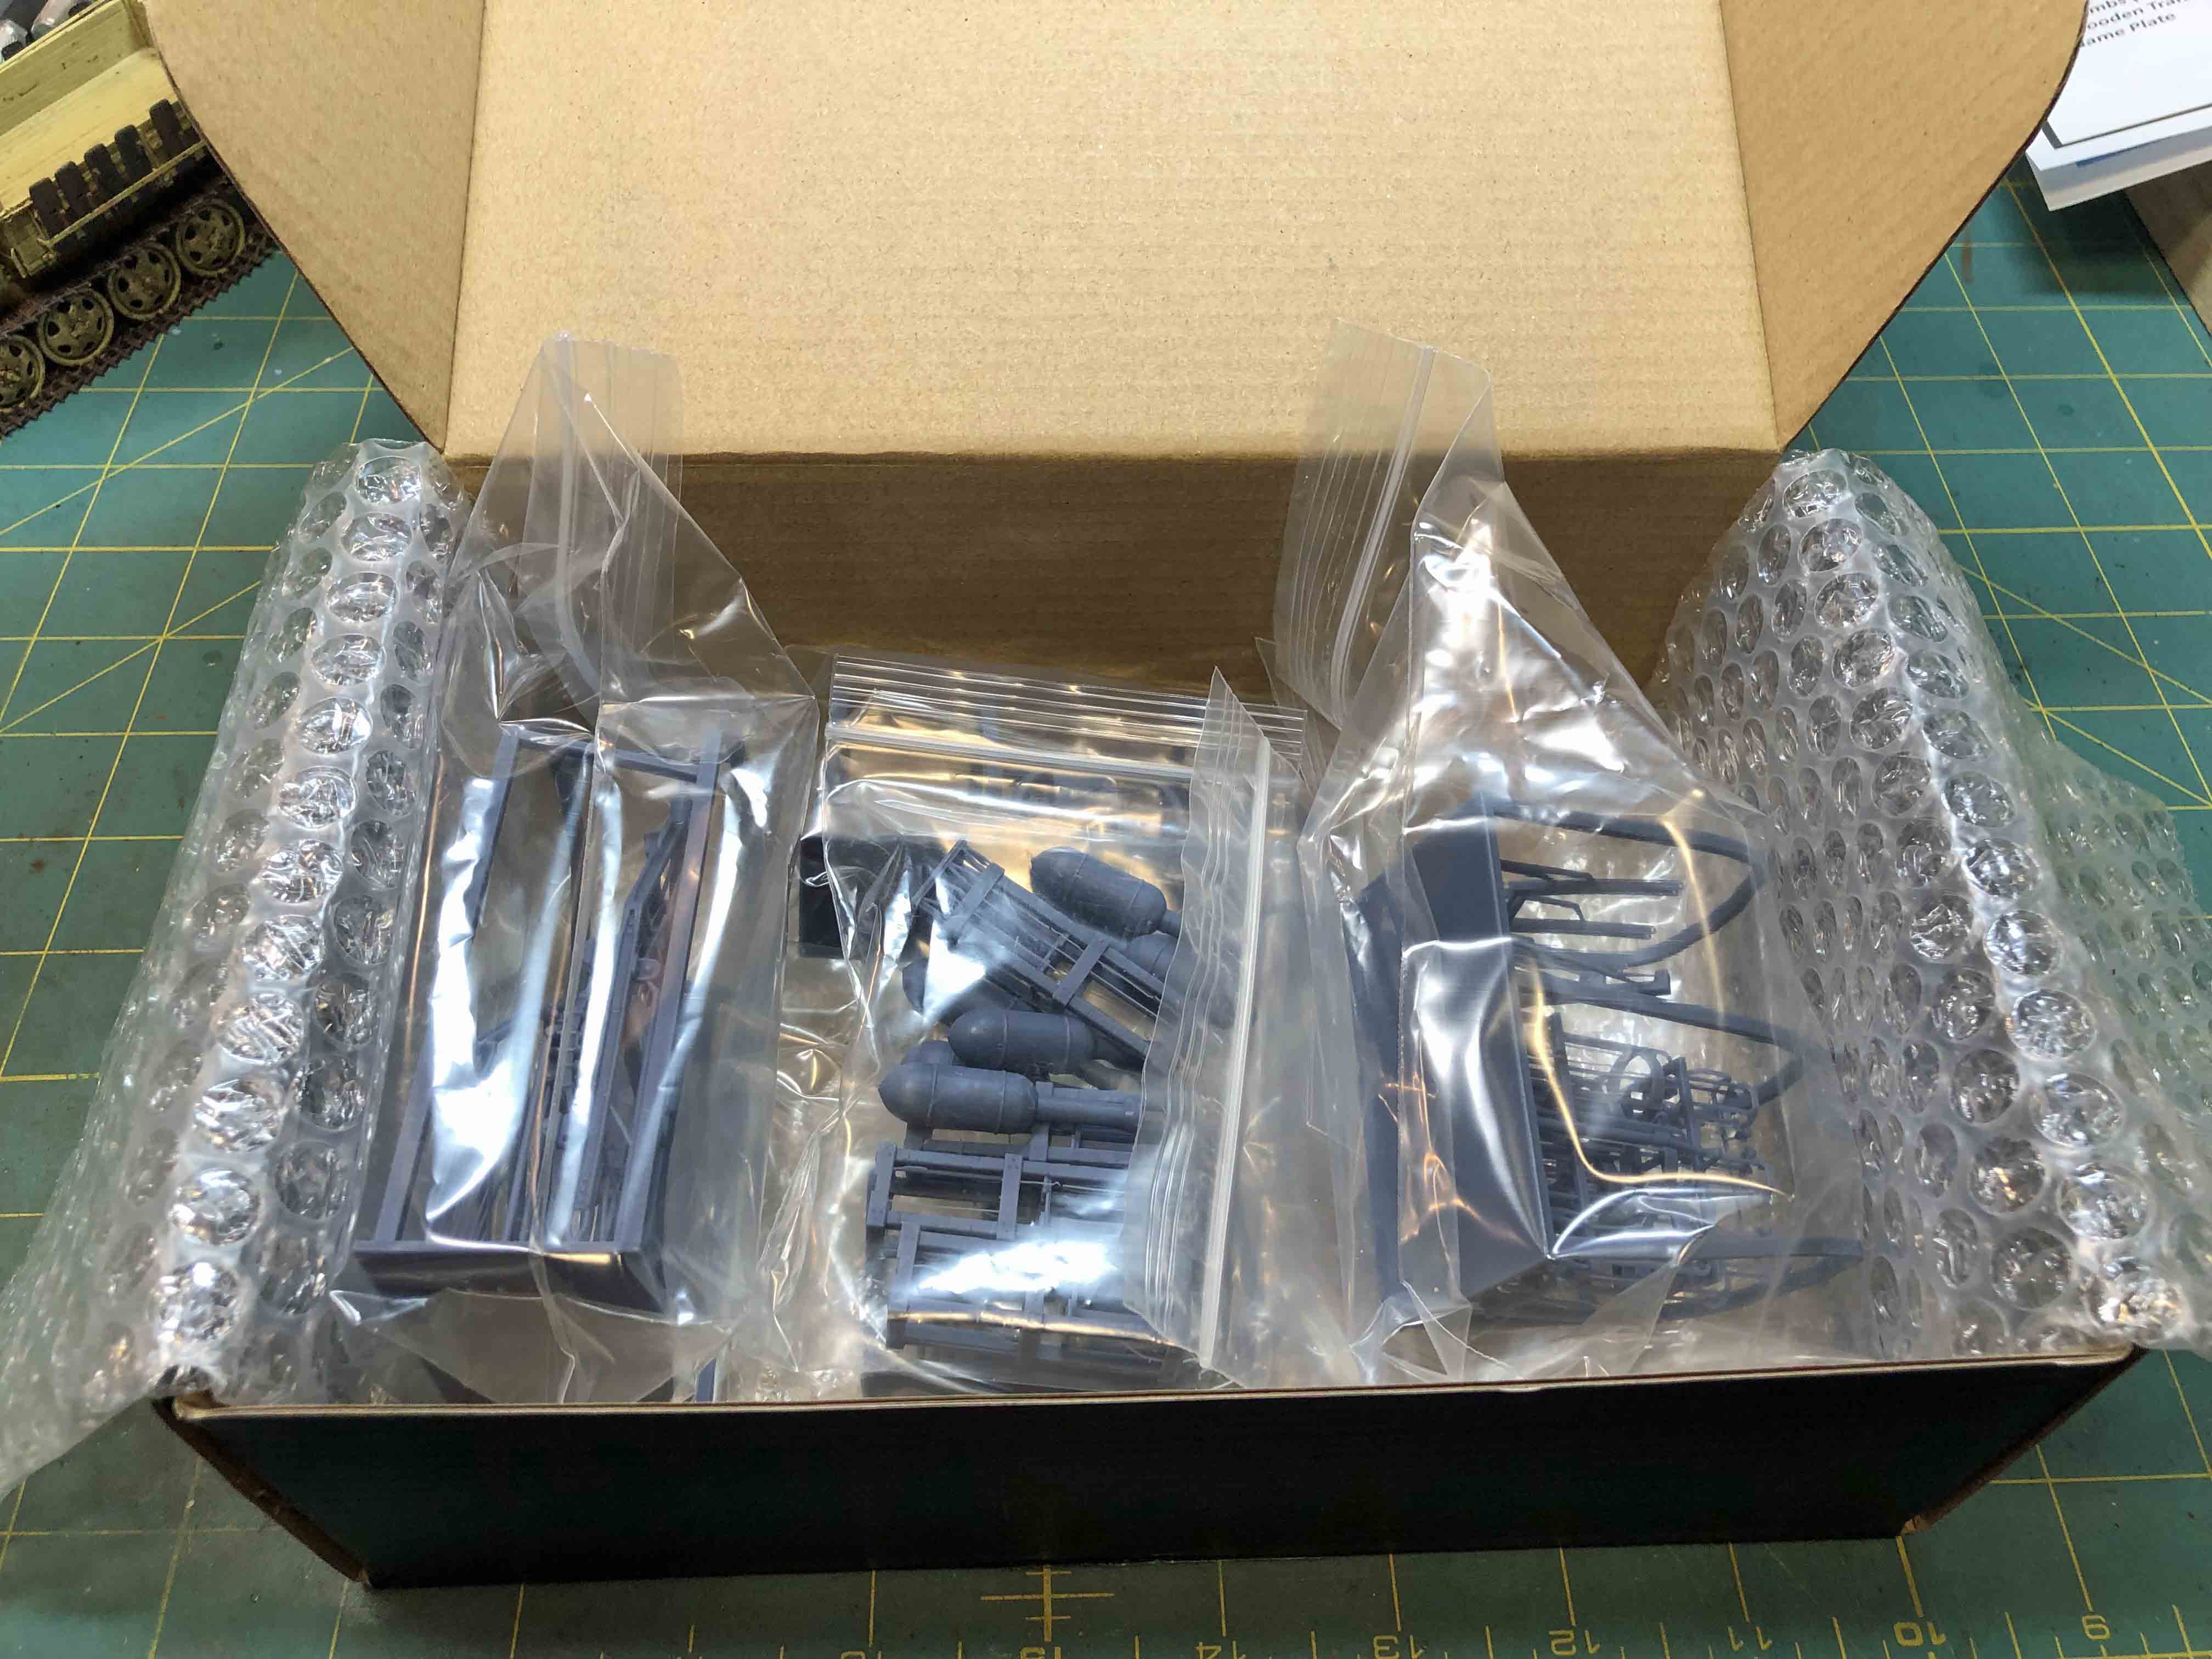
The contents of the box include:
- A single, ammunition cage sprue, packaged separately.
- A single chassis and nameplate sprue, packaged separately.
- The single dual fender sprue, packaged separately.
- A single sprue of all the remaining parts, packaged separately.
- A single bag containing the wheels, ammunition rounds, and four ‘wooden’ cases.
- A 12-page, color instruction booklet consisting of six full-size sheets, folded in half. All text and label information are printed in English.
The Instructions
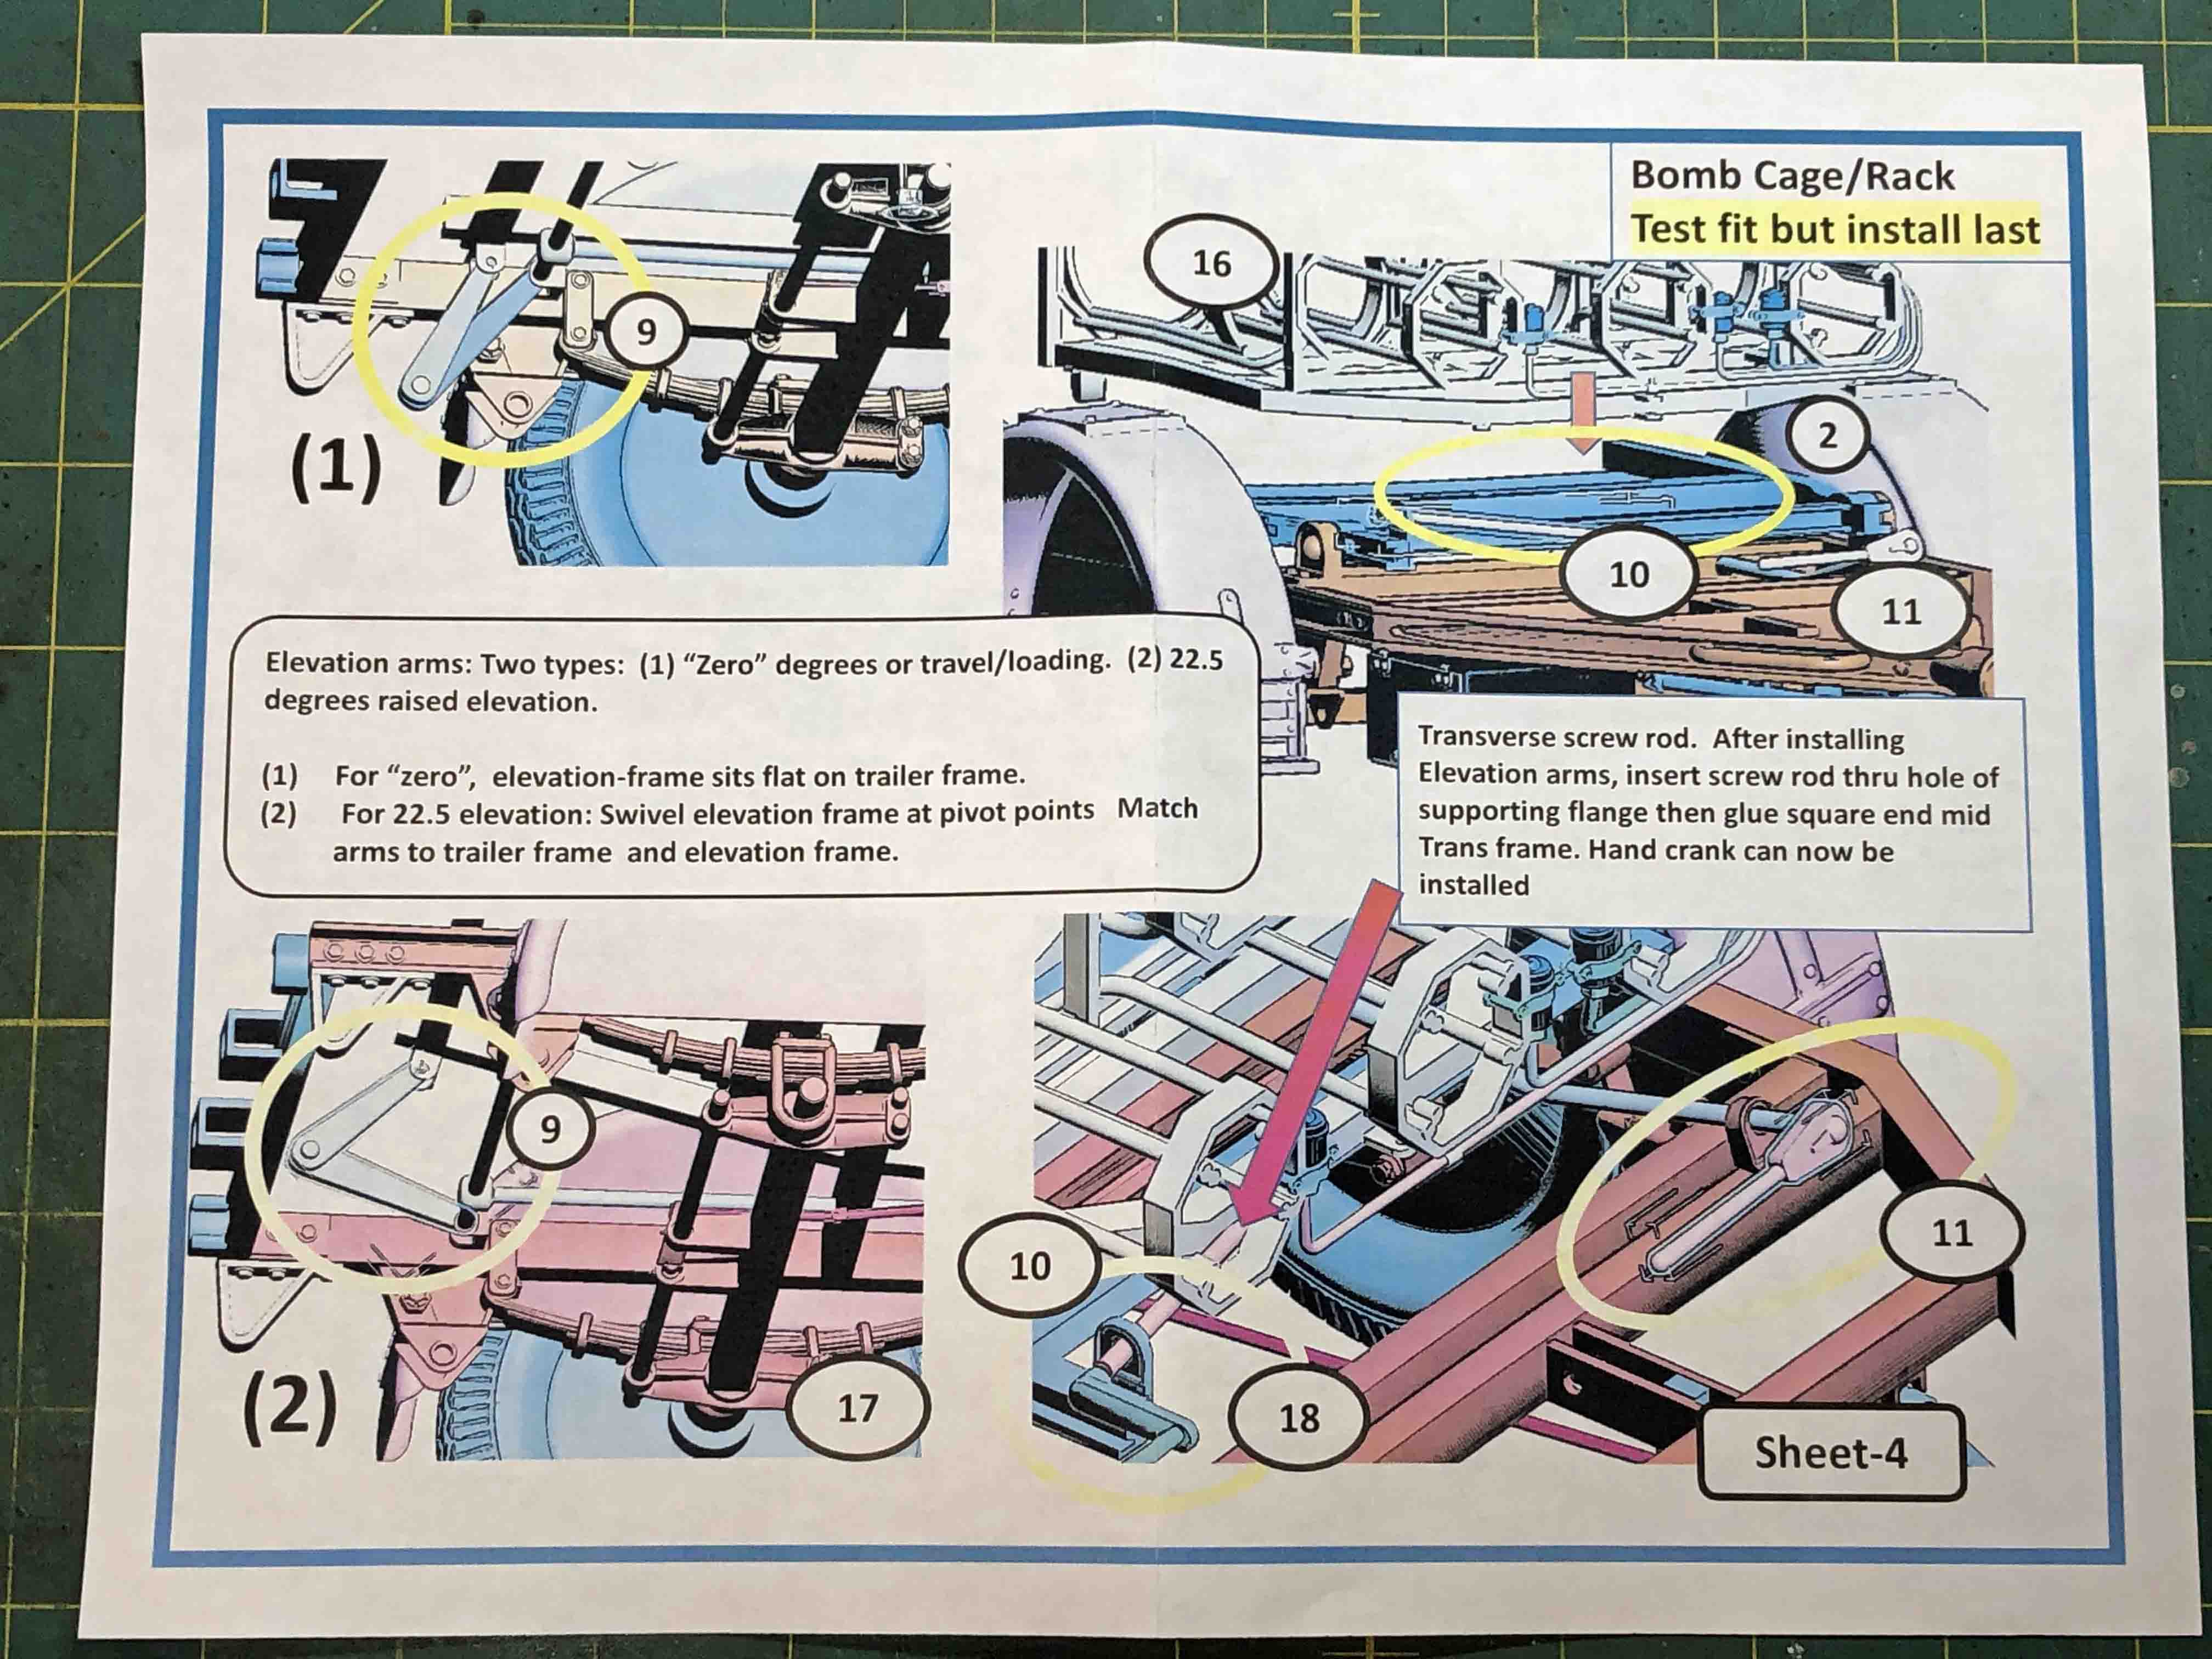
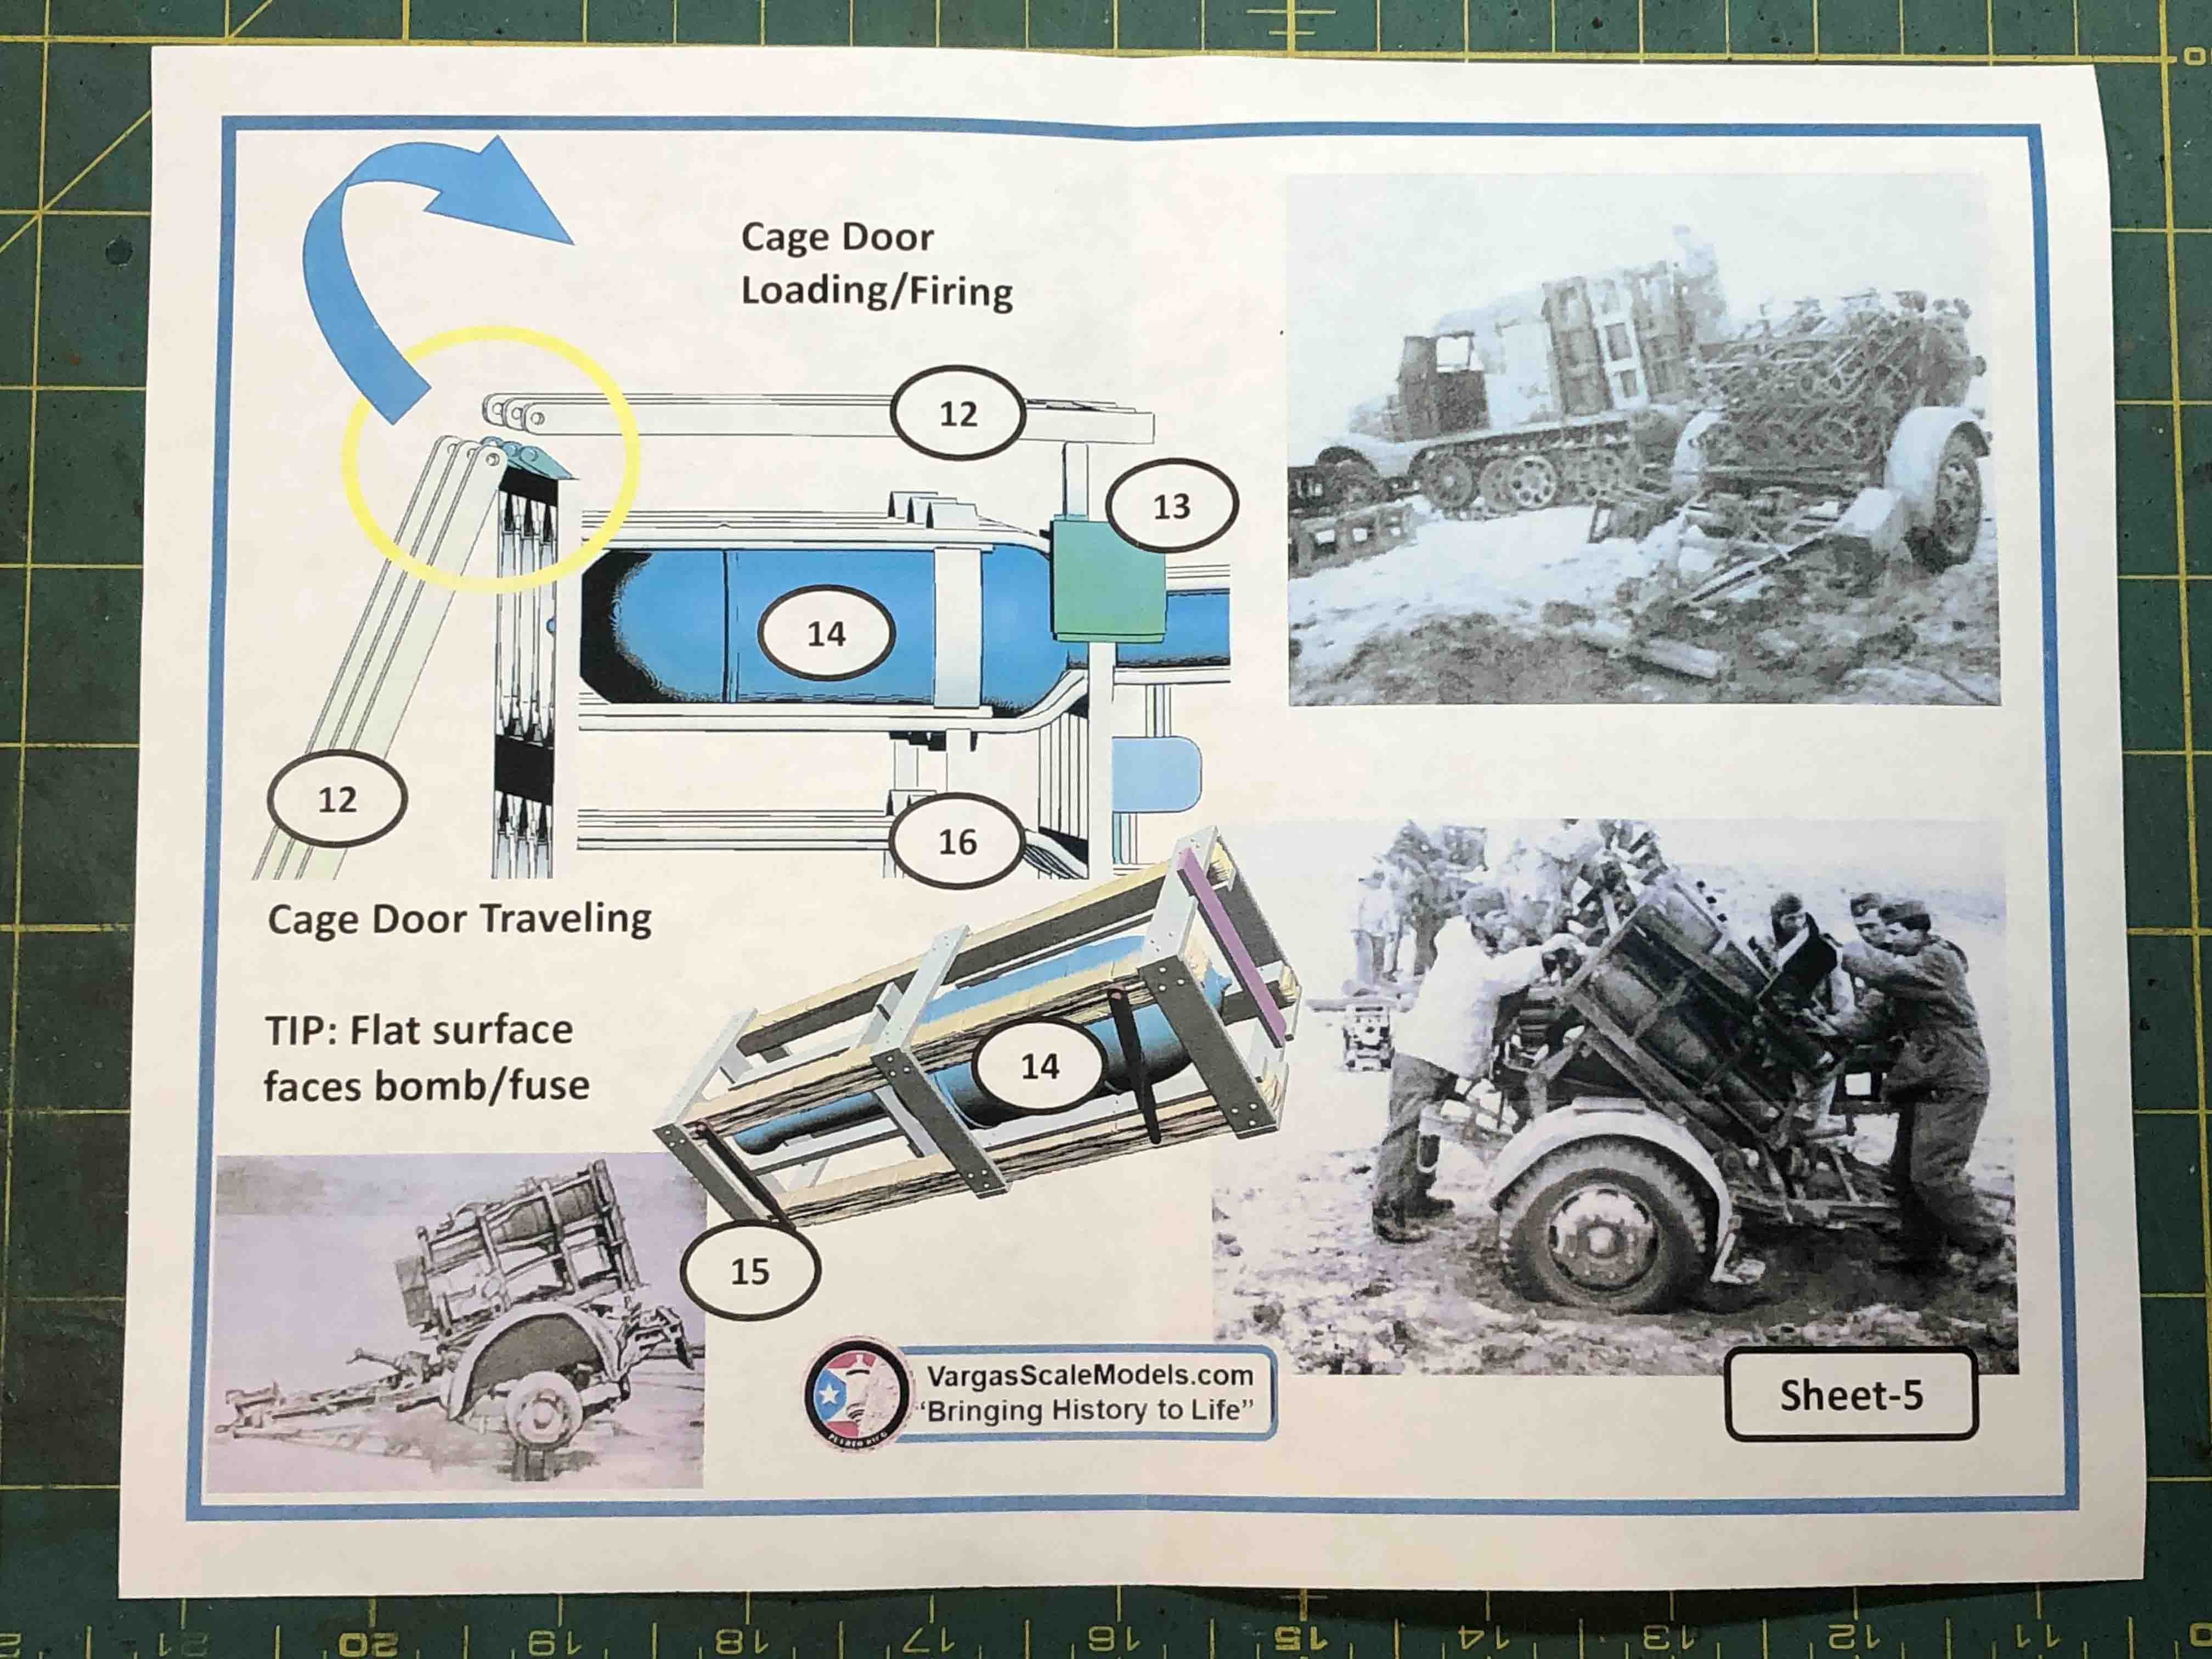
As with most limited-run resin kits, the instructions are brief and not always ‘enough’. Assembly requires test fitting and comparing what you have to drawings and images of the real thing, easily found on-line. In place of text, Vargas provides simple CAD images from the printing process itself for use as a rough go-by to start with. Fortunately, each piece is shown assembled and printed in a different color from the one adjoining it, which makes things a little easier to follow – but only a little. If you have built limited-run kits before, this one is typical – a lot of testing and sometimes adjusting surfaces to fit. Fortunately, the images are rendered from several angles so you are rarely forced to guess about how things go on ‘the other side.’
Clean Before You Start
Even though there are relatively few parts in this kit, a 3-D printed model requires a good amount of preparation before assembly. After unwrapping all the parts, and carefully snipping (not pulling) the parts printed inside the protective sprue ‘frames,’ I carefully shaved and sanded the surfaces of everything to remove any remaining vestiges of the thin resin posts that held the parts to the sprues.
Next, I went to work smoothing out some minor (but noticeable) grooves on the surfaces of the round parts, such as the two wheels. The resin is not soft, but it works away with a little effort, resulting in a smooth surface relatively quickly. Once I thought I had everything pretty well cleaned up, I gave the parts a warm bath in soapy water, rinsing them in warm water. After drying I felt the surfaces with my fingers, and, if I found anything tacky, I repeated the wash, rinse, and dry steps until all the tackiness was gone. With all the parts clean and free of defects, I was ready for assembly.
The Build
The Nebelwerfer instructions start with some good advice – carefully remove the trailer chassis and ammunition cage from their sprues. The connection points are all slightly thinner than the ‘real’ parts, and must be accessed from a variety of different angles to remove all of them. Go slow and tread lightly. In my mind, I likened this part of the build to that of a bomb-disposal task, cutting only the ‘correct’ wires, or boom! Somehow, I found myself at the end with an unbelievable set of 3-D printed parts. Exquisite.
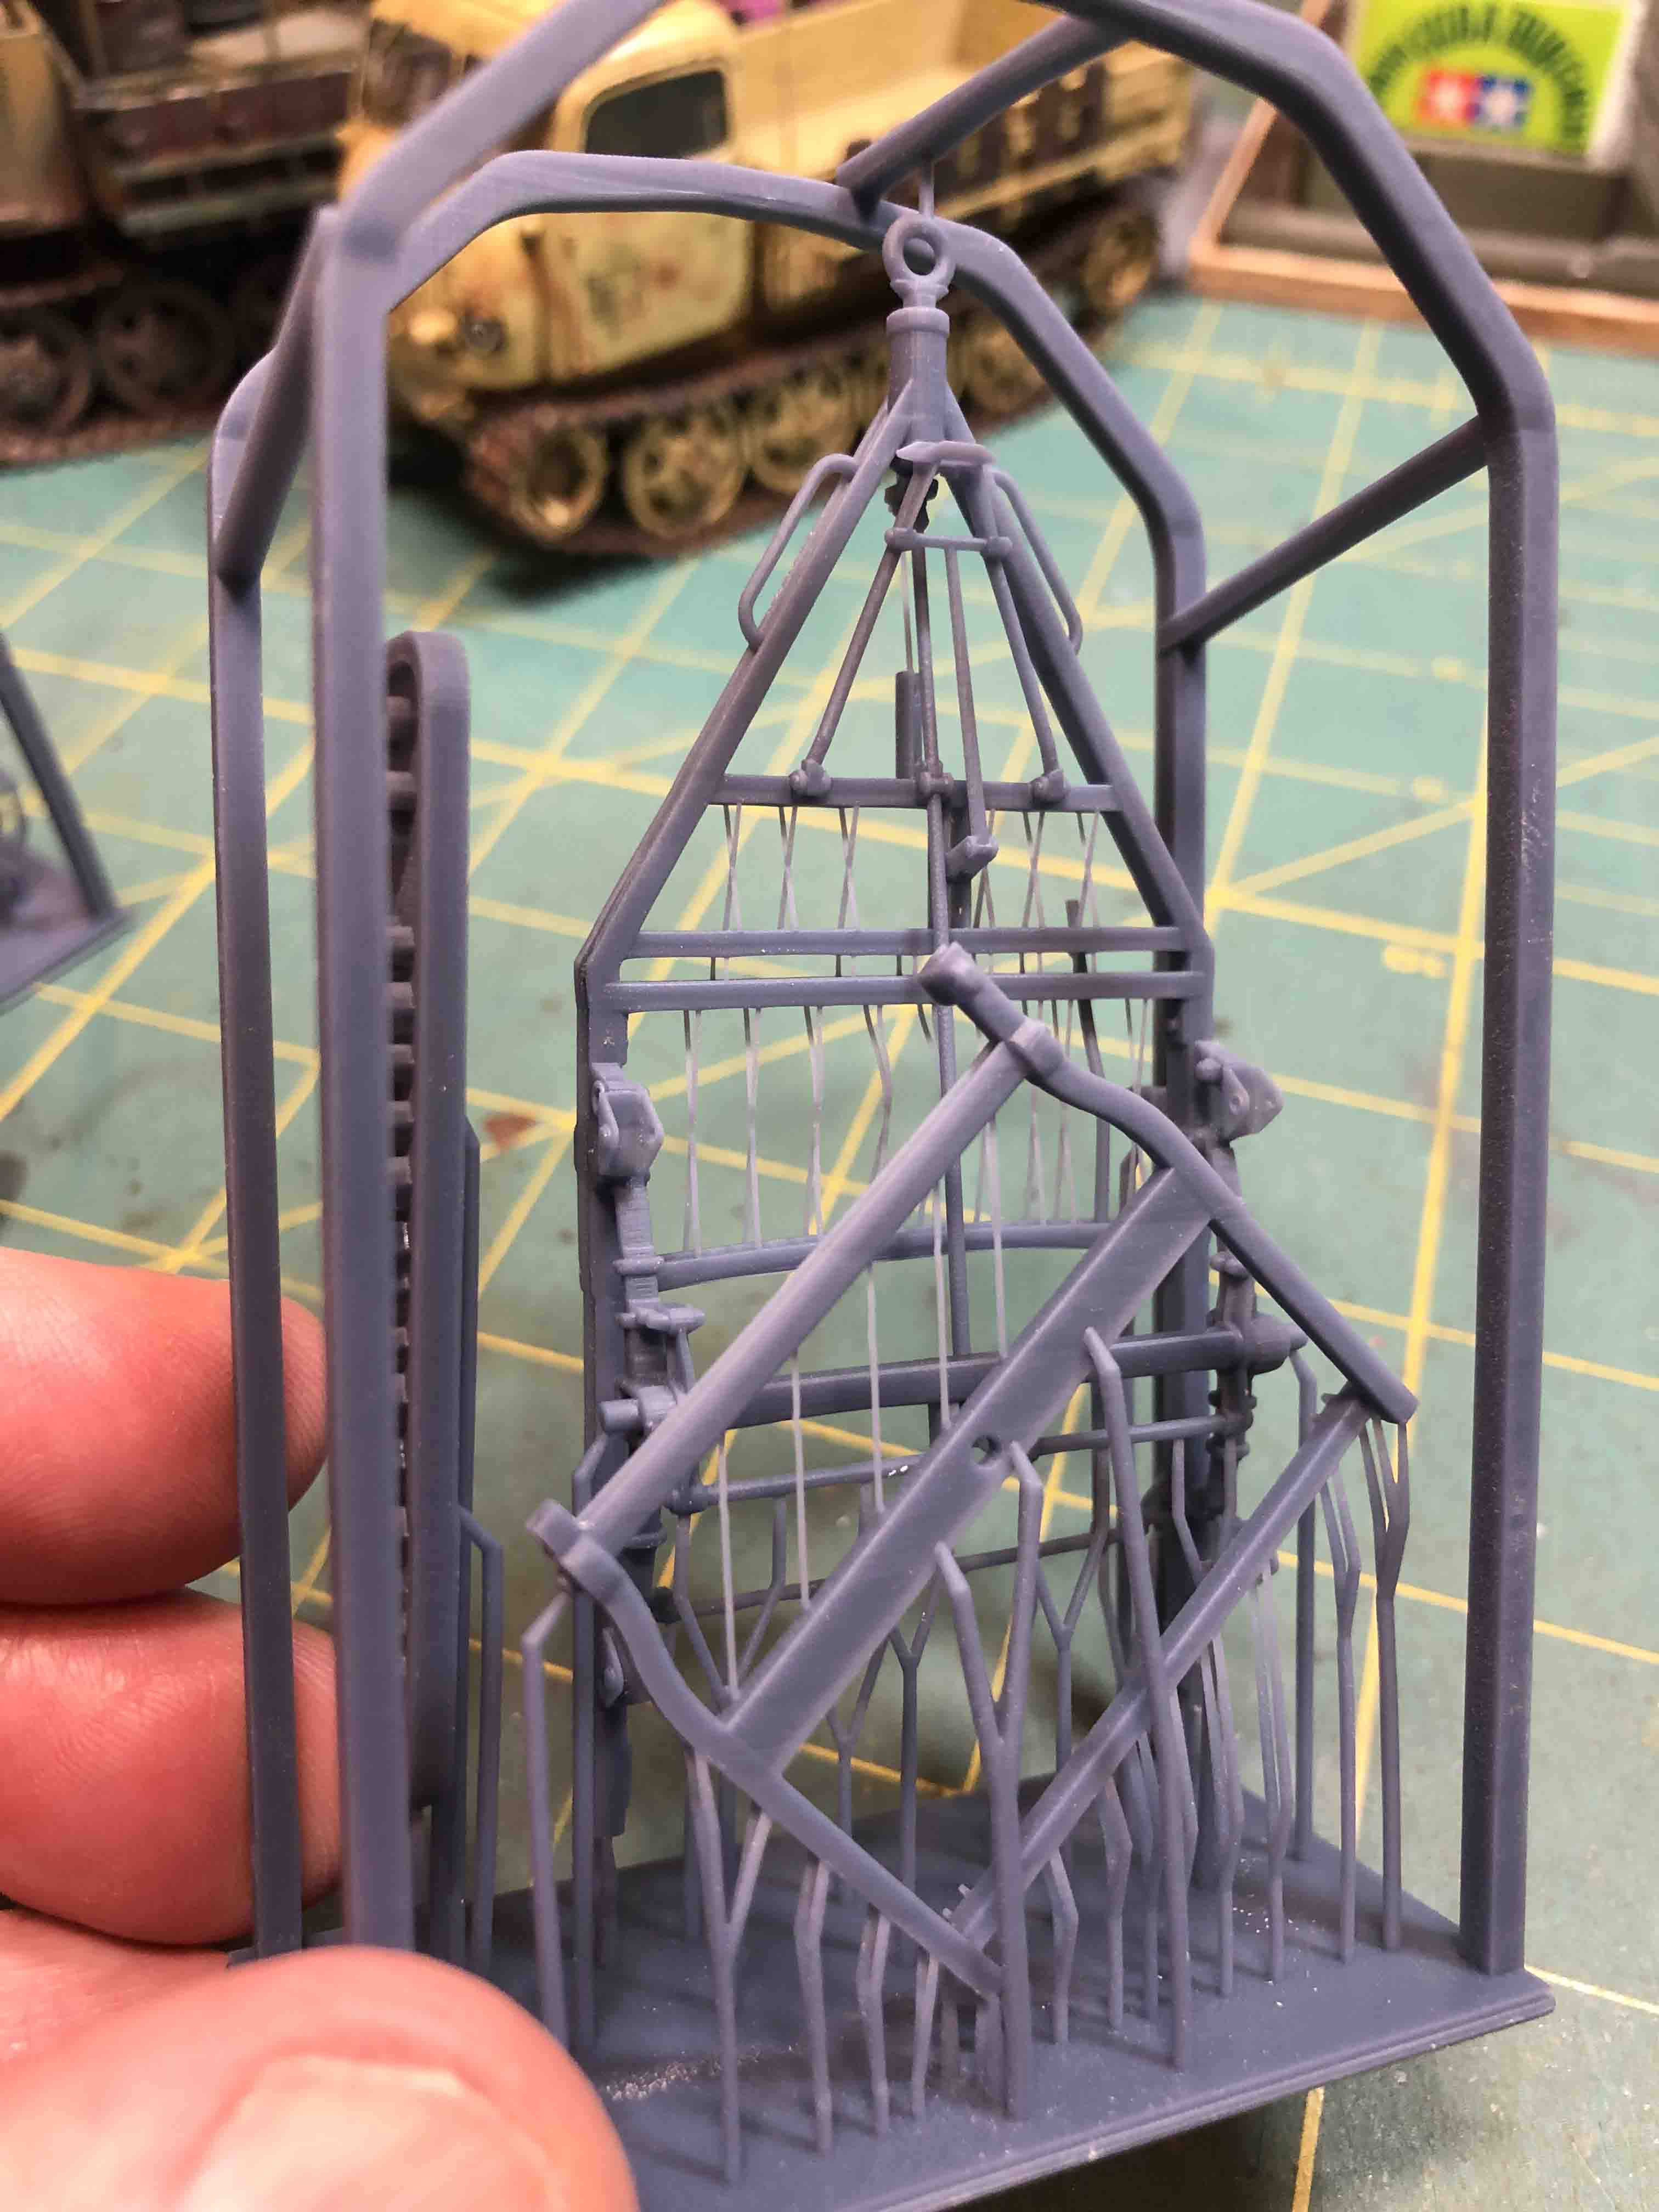
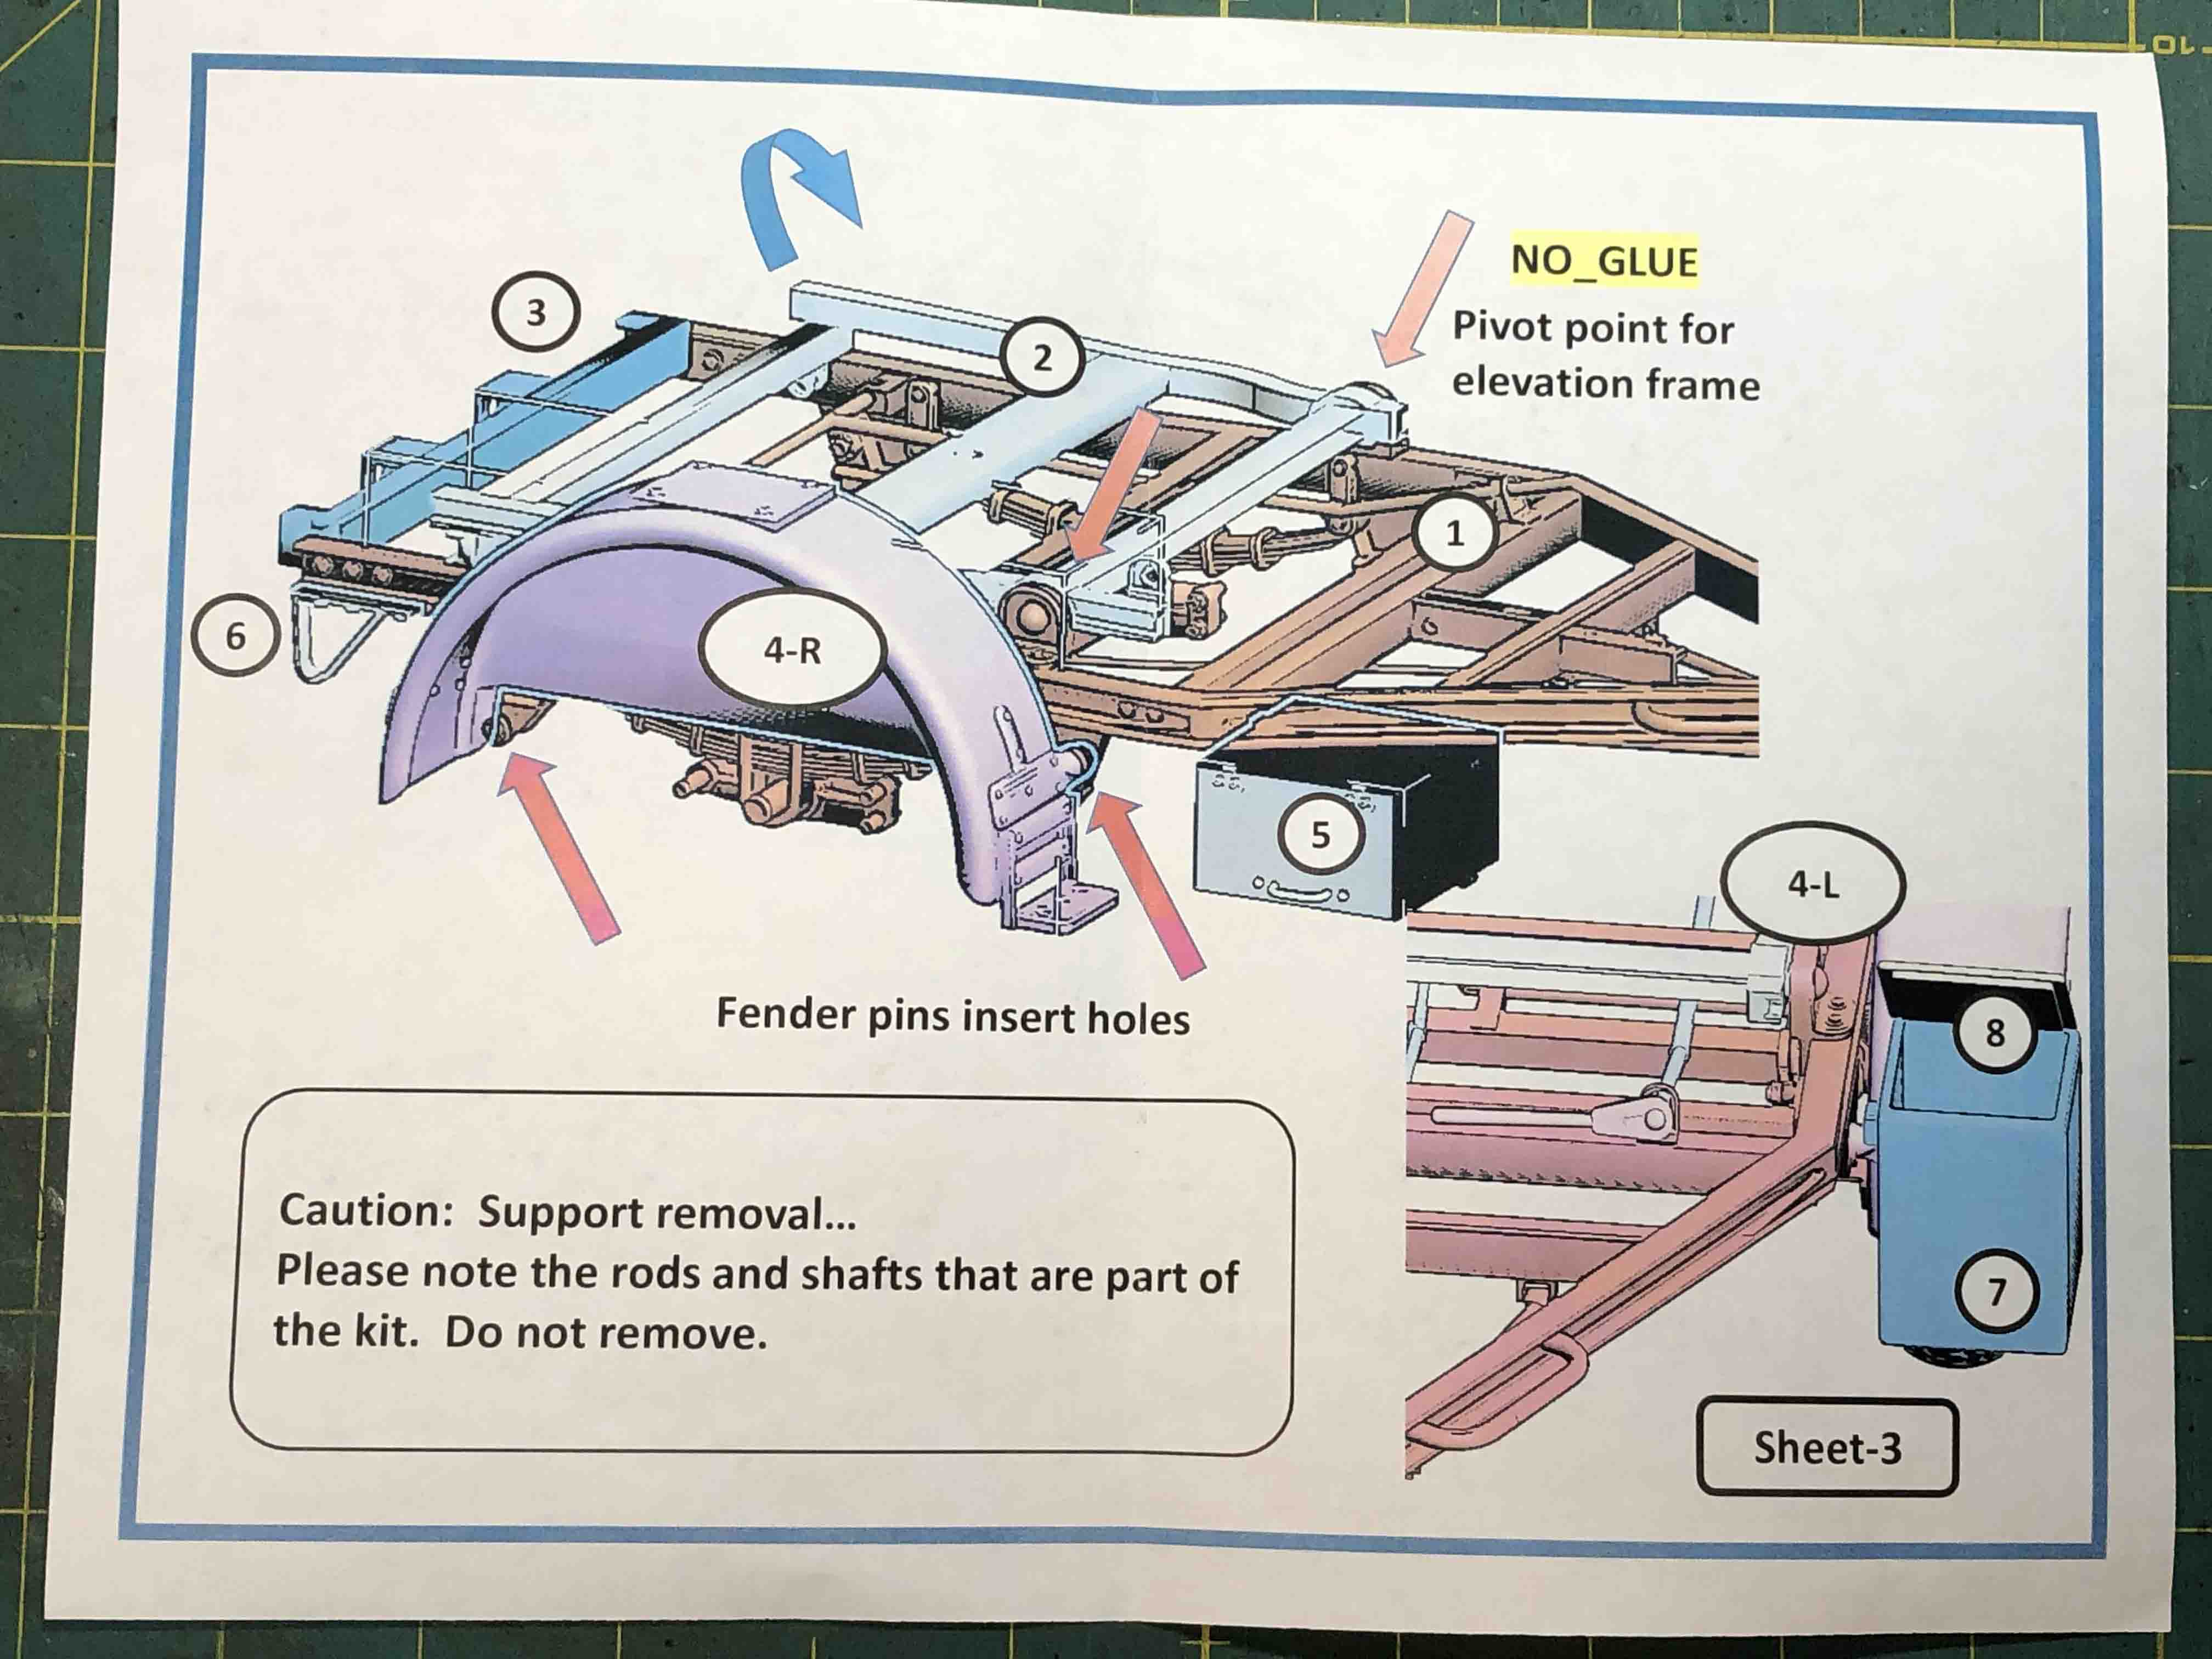
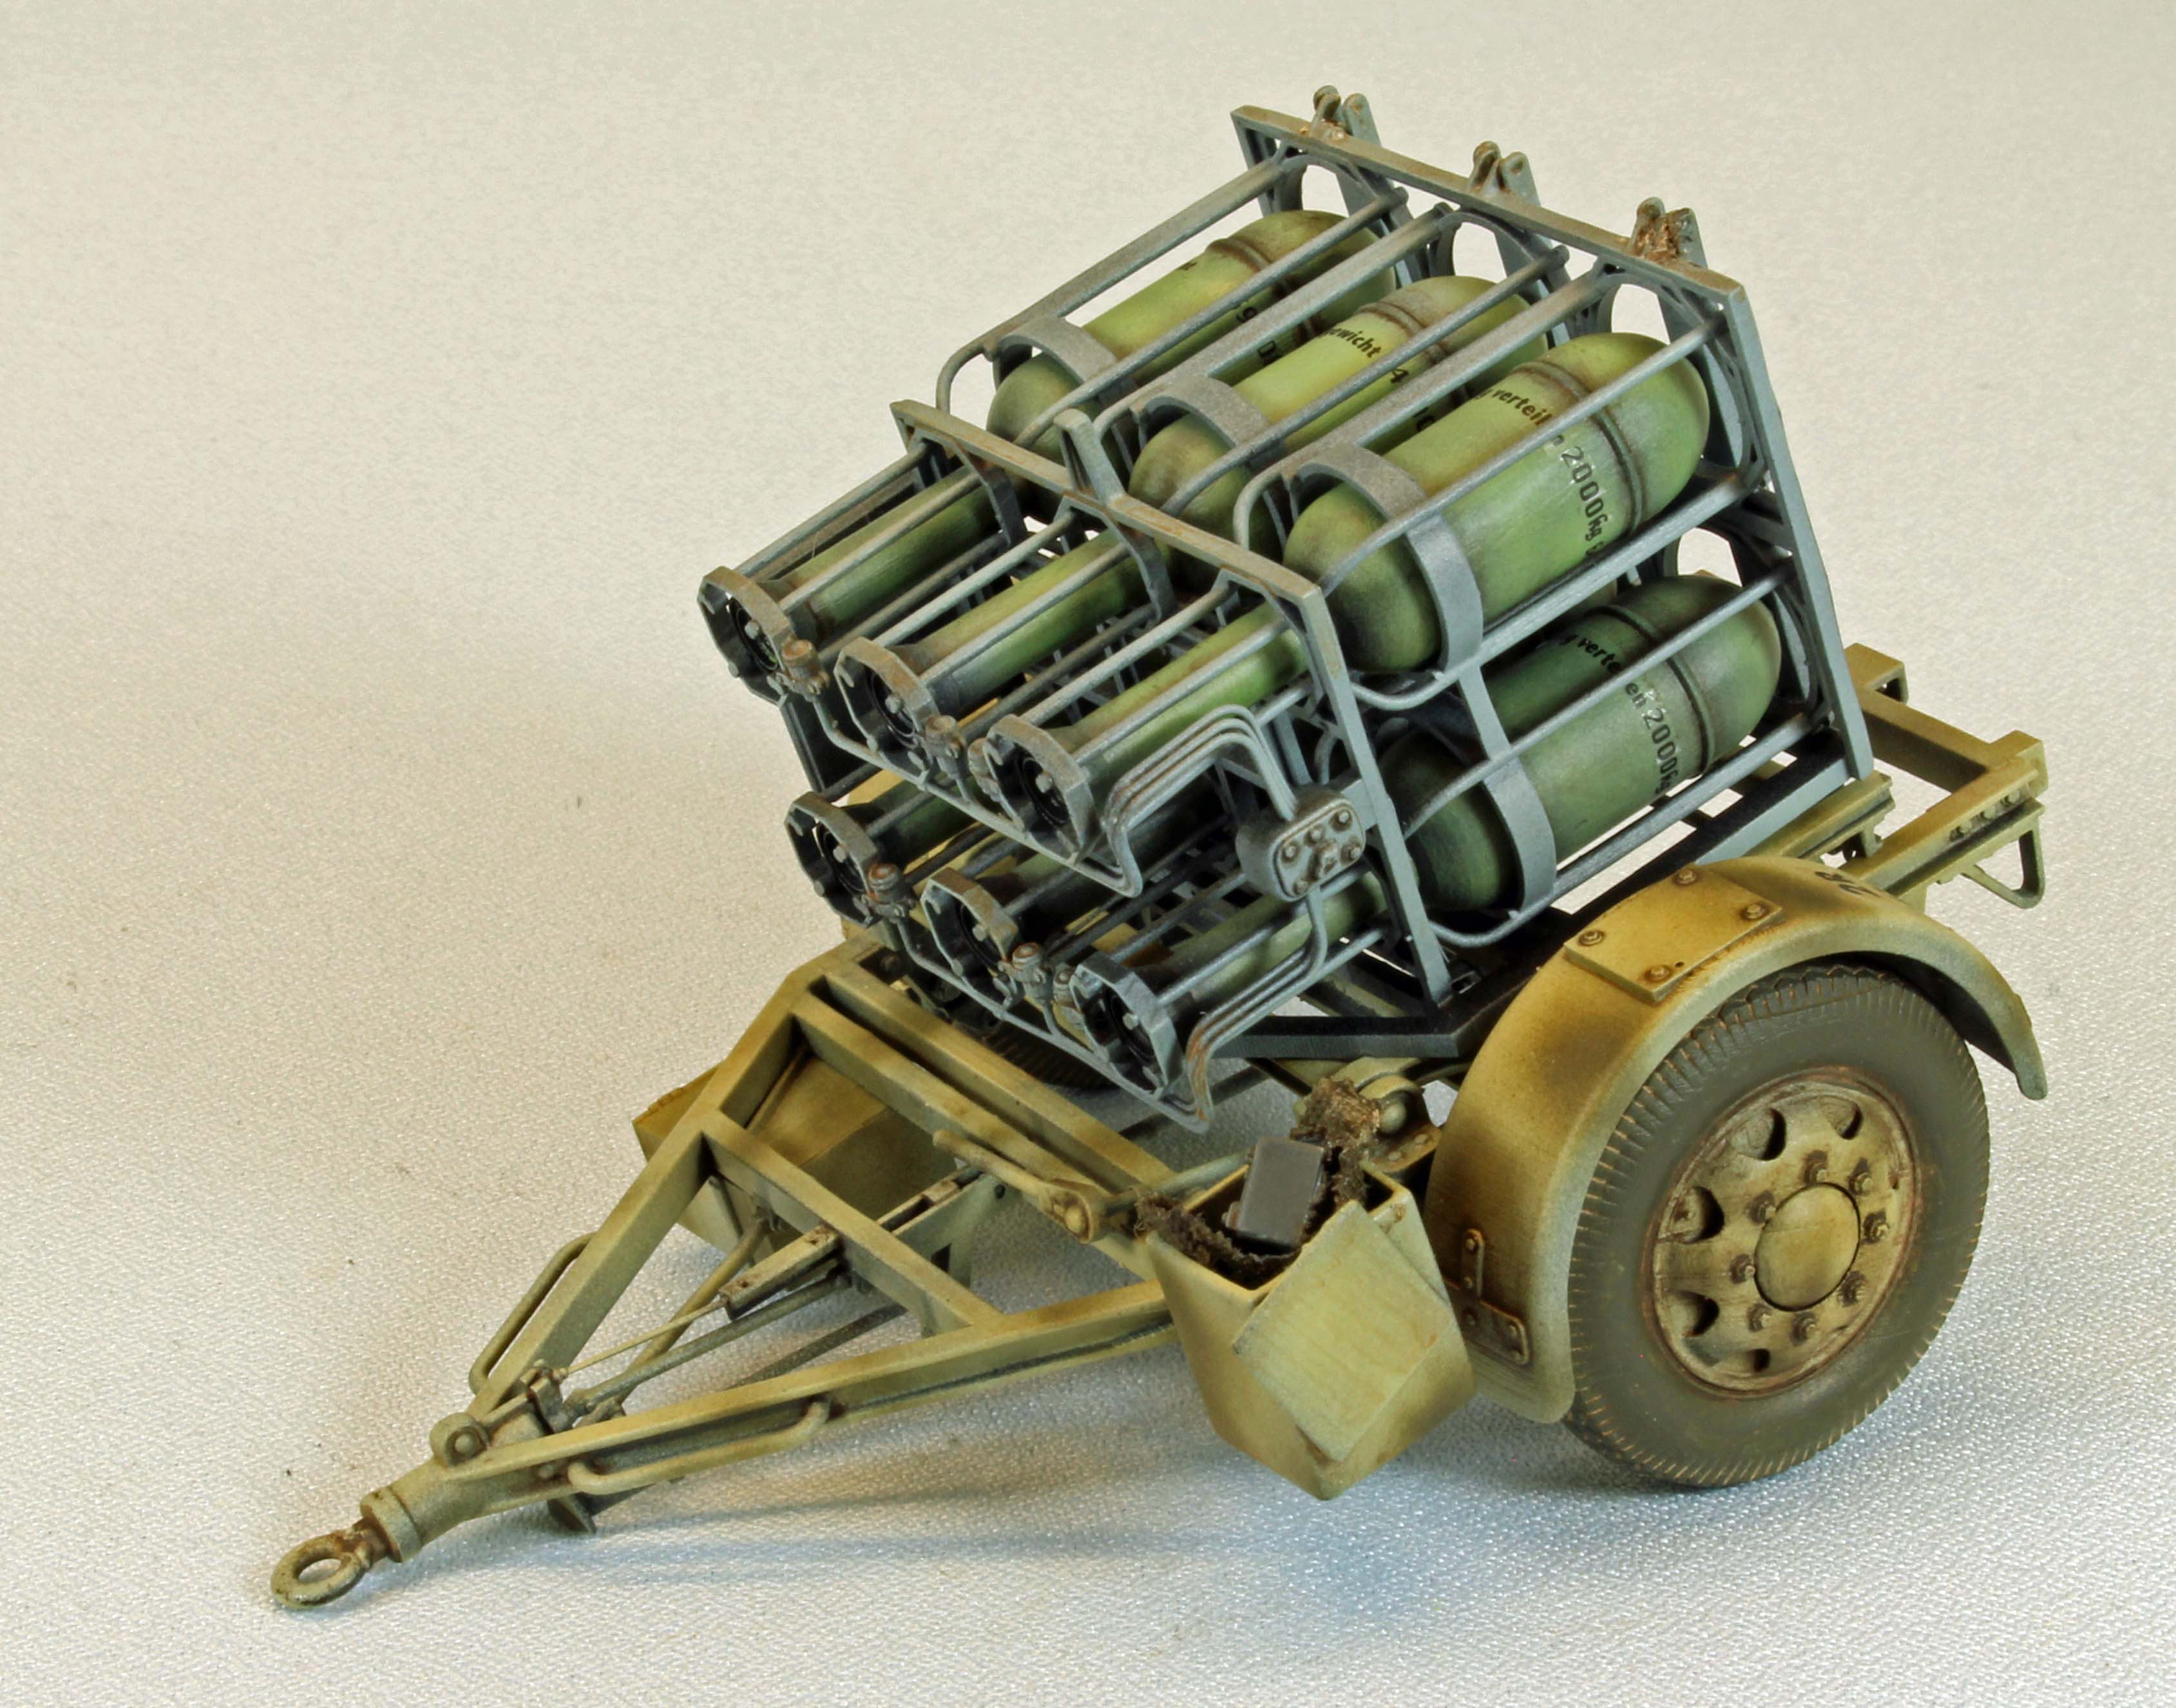
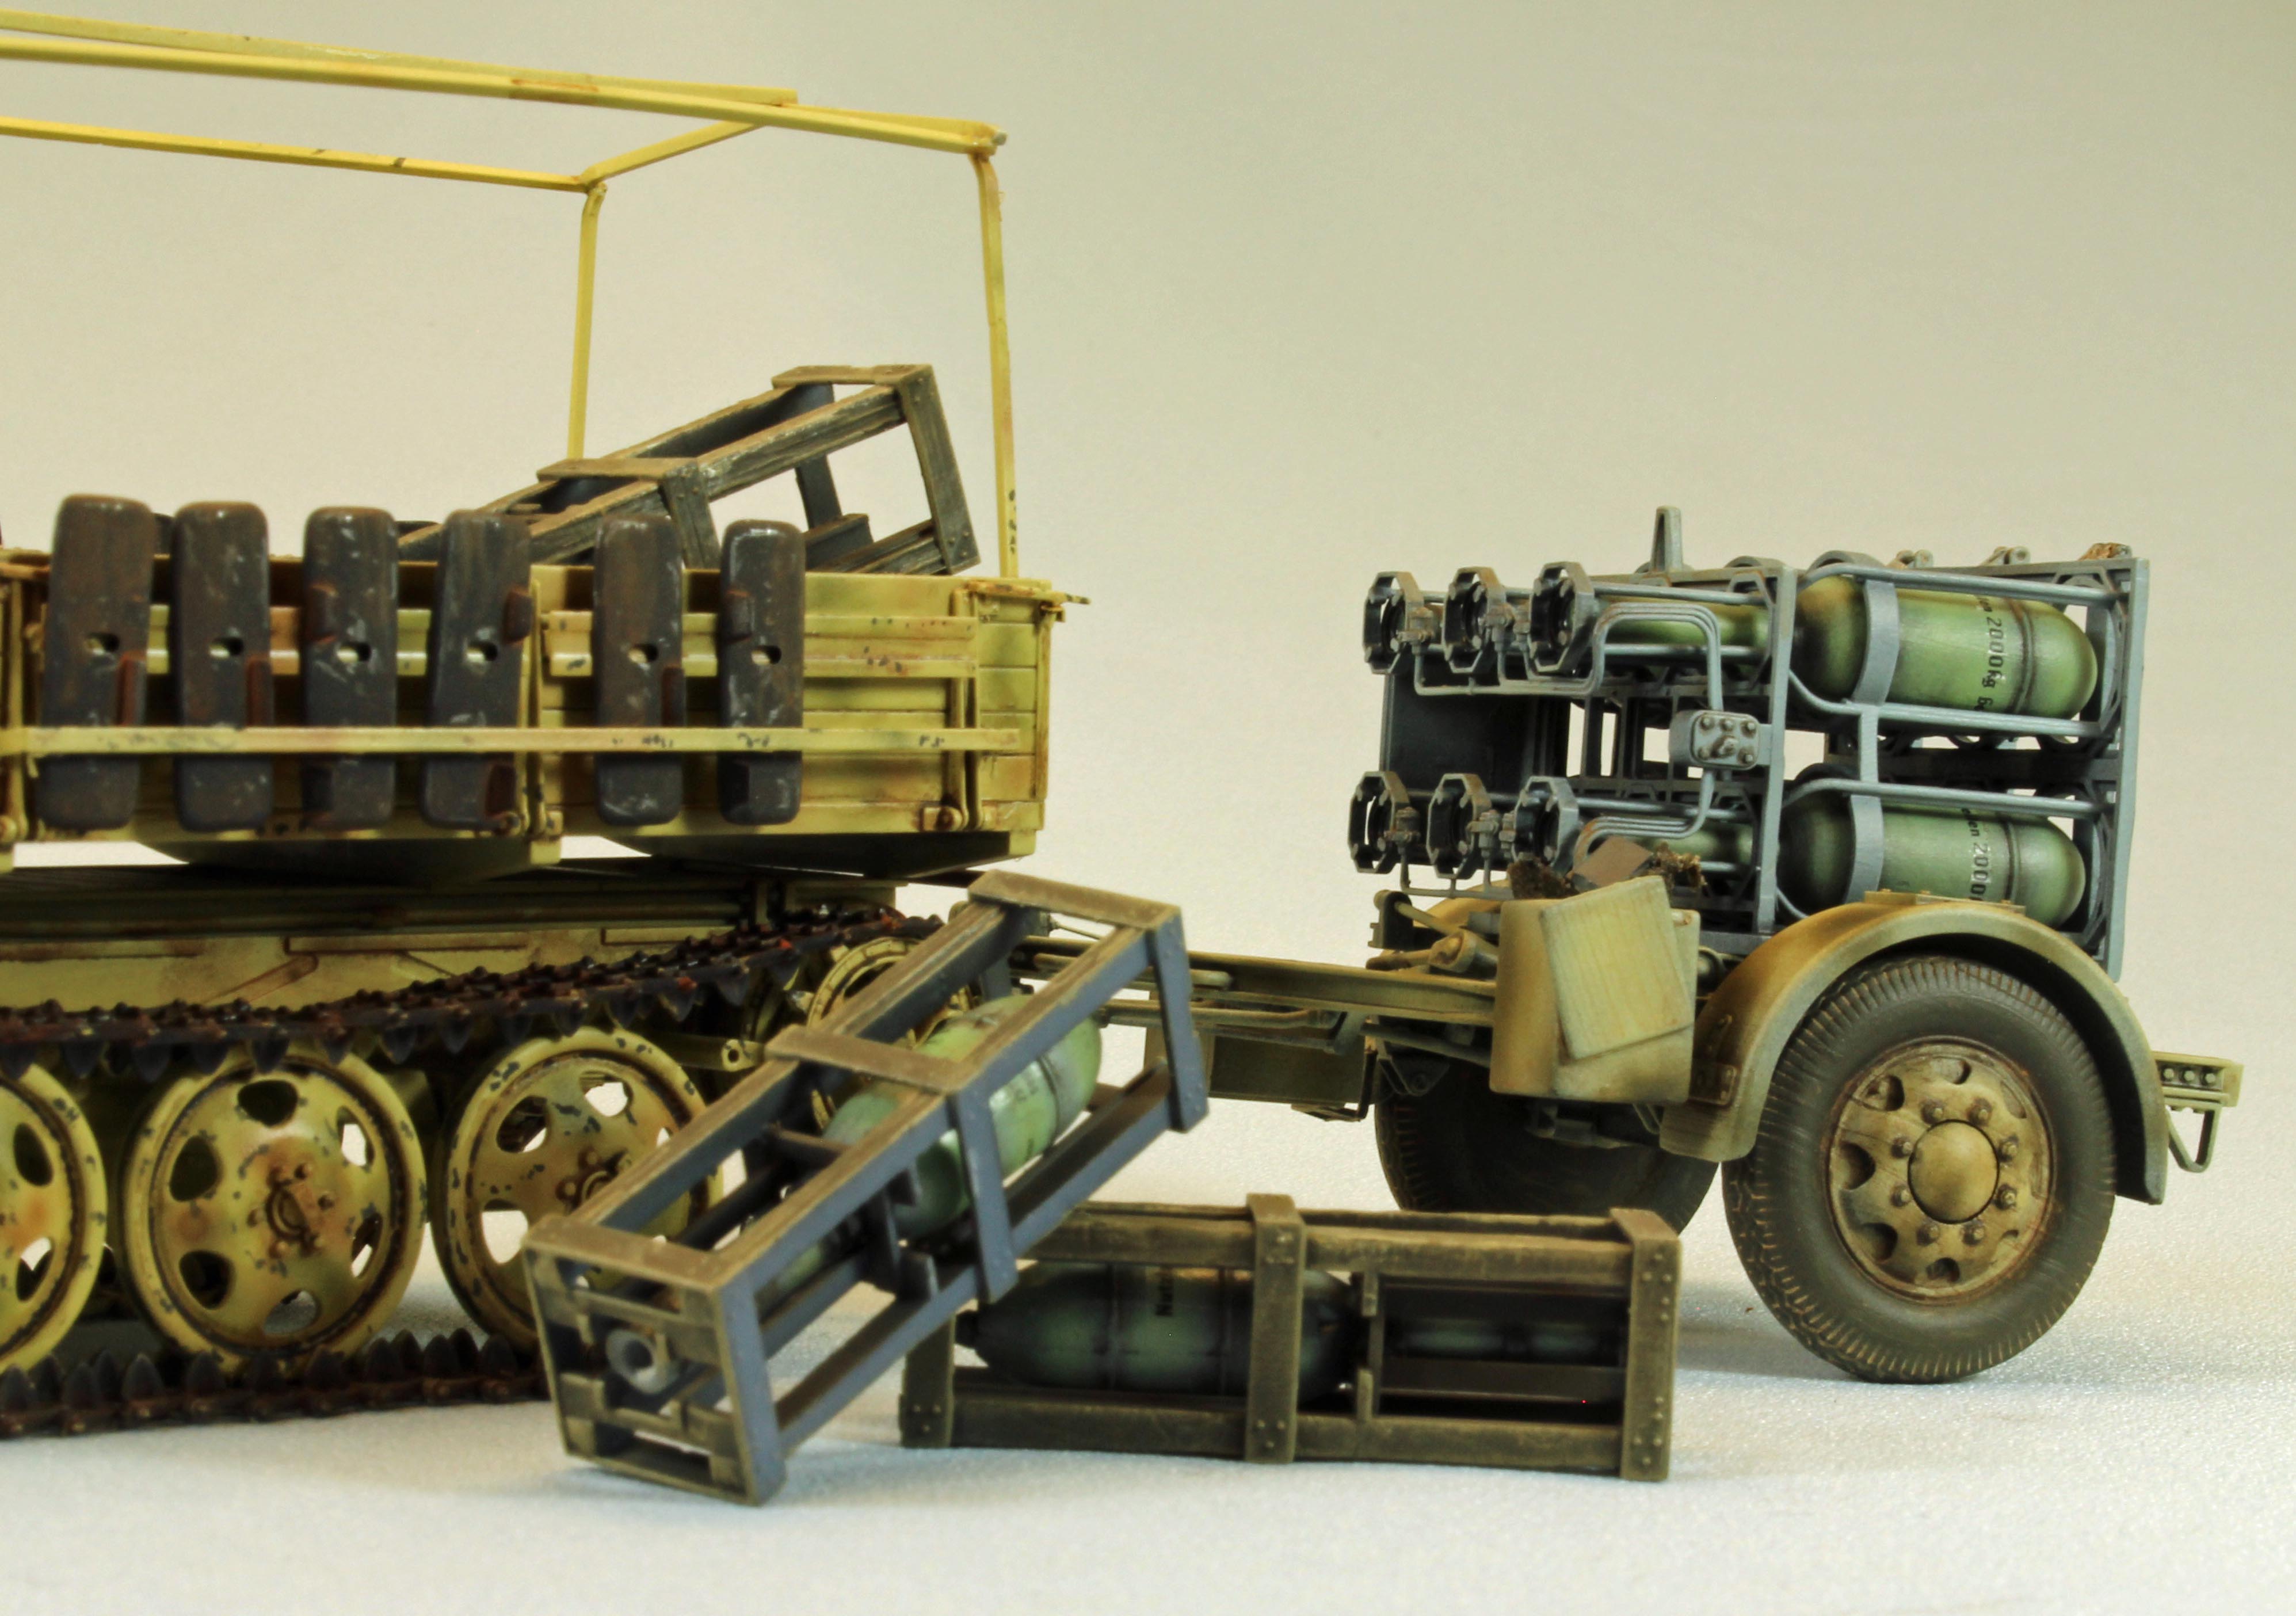
Assembly was straightforward and nearly hassle-free. The ammunition cage swivels on an axis that lifts from the main chassis frame. Test fitting this assembly takes finesse since I did not want to damage any of the fine detail on either piece. You can model the cage in firing mode or travel mode (I chose the latter) but I left off the locking mechanism so I could show the raised firing cage in pictures.
The firing cage has a door that flips down when in travel mode. This door stood a little proud of the front of the cage, bumping up against the tiny fuses on the front of the ammunition rounds. Since the door effectively covers the fuses when in place, I carefully snipped the fuses off so that the door would sit correctly when closed.
There is a large box with a lid just forward of the left fender that I just could not leave empty and closed, so I left the lid attached to the side, and filled the box with a rag and a control box I pulled from my spares.
Vargas thoughtfully designed the wheel attachment points with deep shafts and receiving holes to ensure that the wheels, once attached, would remain robust when handling – thank you! I cannot tell you how many times I have snapped a resin wheel off during finishing and had to nurse everything along from that point forward.
And that was that – assembly complete, with the major parts still separated for painting (chassis, wheels, ammunition, and firing cage). Vargas models are perfect for modelers like me, who enjoy the ‘finishing’ steps to those involving assembly!
Painting and Finish
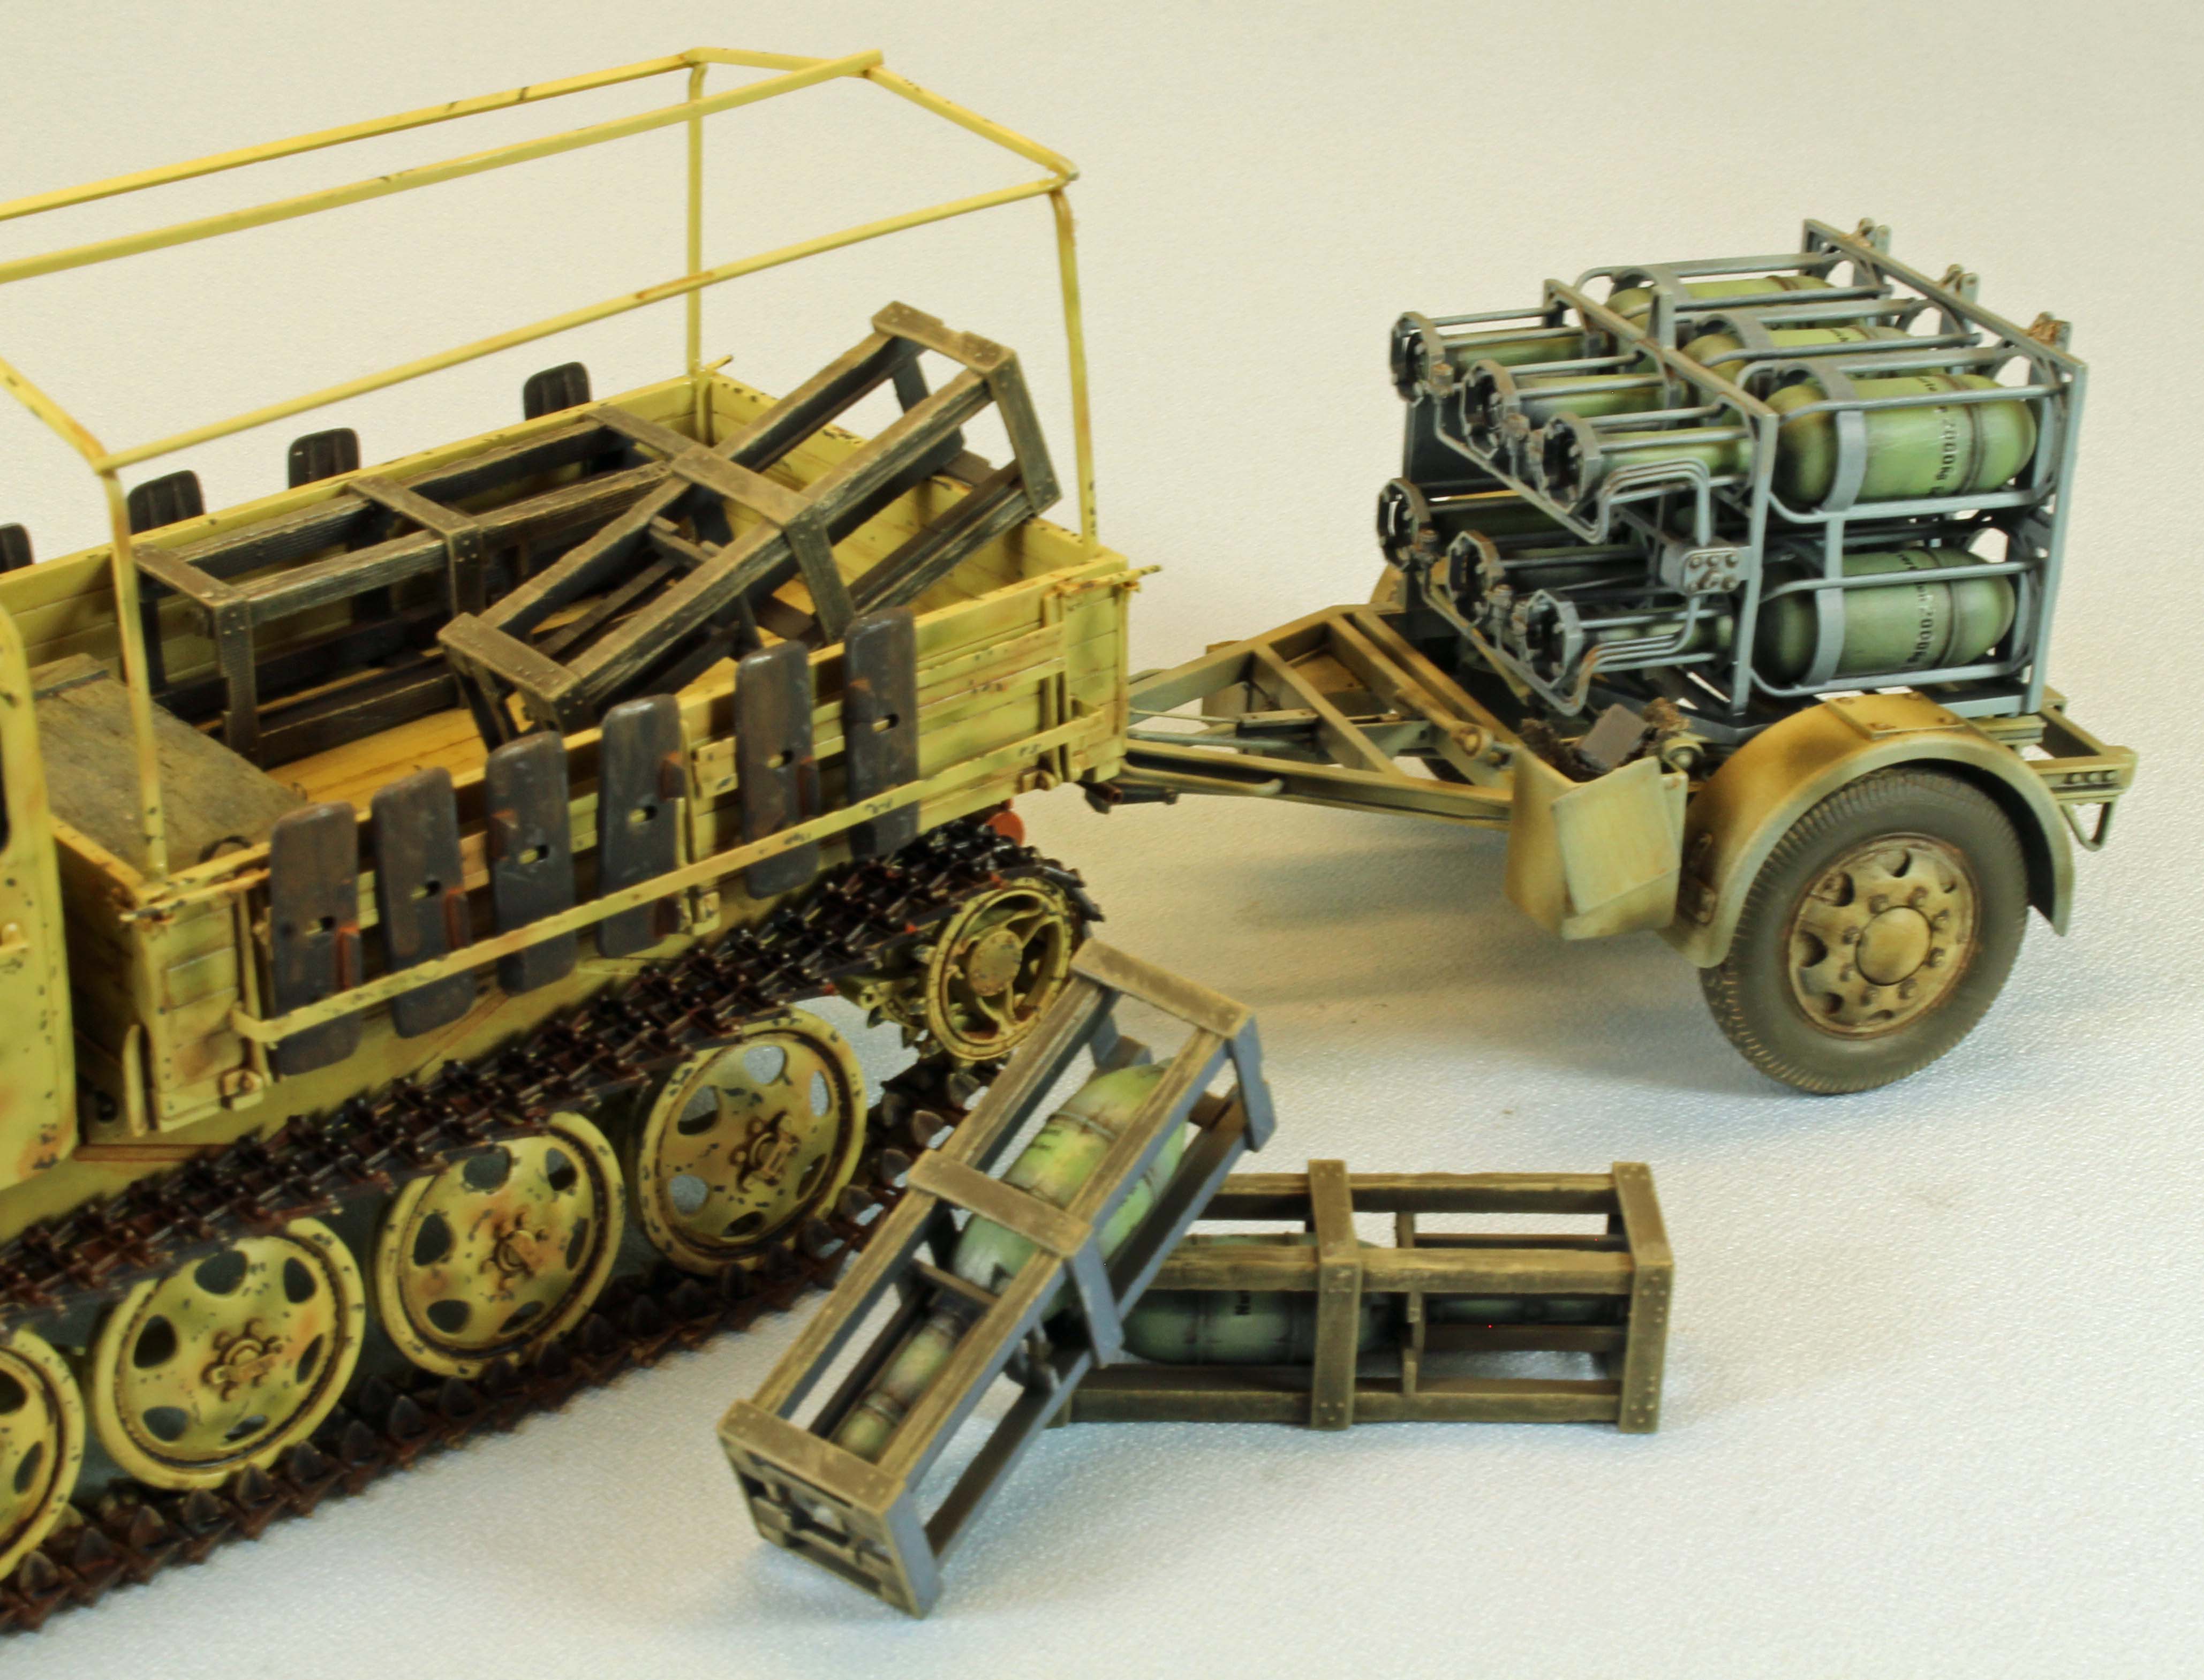
There are not many pictures of the box-version of the Nebelwerfer 41 online; most are grainy black and white images, or simply images of the trailer being pulled behind a prime mover. While it might have been more accurate to choose an overall dark German-grey scheme for my build, I wanted to highlight the incredible detail found in the Vargas kit, so I chose a ‘summer Kursk’ scheme of dark green mottling over light German yellow, with some minor weathering to match whatever prime mover I will set it up with in the future.
Here is a breakdown of the colors and materials I used to finish the build:
Painting:
- Overall Primer - Mr. Hobby Mr. Finishing Surfacer Black 1500
Painting: Chassis and Wheels
- Base Coat – 80/20 mix of Tamiya XF-60 Dark Yellow and XF-1 Flat White
- Post Shade Mottling – Tamiya XF-61 Dark Green
Painting: Ammunition Rounds and Wooden Containers
- AKI Real Colors RC232 Pale Green
- AKI Real Colors RC056 Dark Brown, drybrushed with Tamiya XF-57 Buff
Painting: Rocket Cage and remaining detail
- AKI Real Colors RC256 Blue Grey cage
- Mission Models MMP040 Tire Black tires
Painting: Weathering
- A.MIG Dark Wash pin wash overall
- A.MIG-1510 Tan for 3-Tone Camo Filter overall
- Vallejo 77.716 Semi-Matt Aluminum and Uschi Chrome pigment bling overall
Decals
The Vargas kit did not come with any markings so I added stenciling on the rounds and unit markings from my spares box, using images from the internet as a go-by.
Weathering
- While the surface was still glossy, I applied Mr. Hobby Mr. Weathering Color Enamels - Stain Brown to all surface detail, stumped with Mr. Hobby thinner.
- Once a flat coat was laid down, I added an overall application of ‘bling’, using Ammo Mig Gun Metal Powder.
Conclusion
This is my sixth 3-D printed model from Vargas and, as always, the build was a breeze. Luis Vargas does a solid job researching his subjects, and the design and engineering that went into his kits is readily apparent. As I said with the most recent (and every) Vargas project – each one makes me want to build another.
As with any all-resin project, this kit has its challenges, especially with separating the ‘real’ parts from the 3-D support structures. I managed to get everything the way it needed to be, however, without a single mishap. I think the build was straightforward enough, however, for any modeler to finish. Having a solid working knowledge of alternative adhesives (CA Glue, epoxy, and/or ‘fortified’ white glues) would certainly be a plus.
I would like to heartedly thank Luis Vargas at Vargas Scale Models for providing this kit for review, and to IPMS USA for giving me the opportunity to build it.