Reviews
Armor
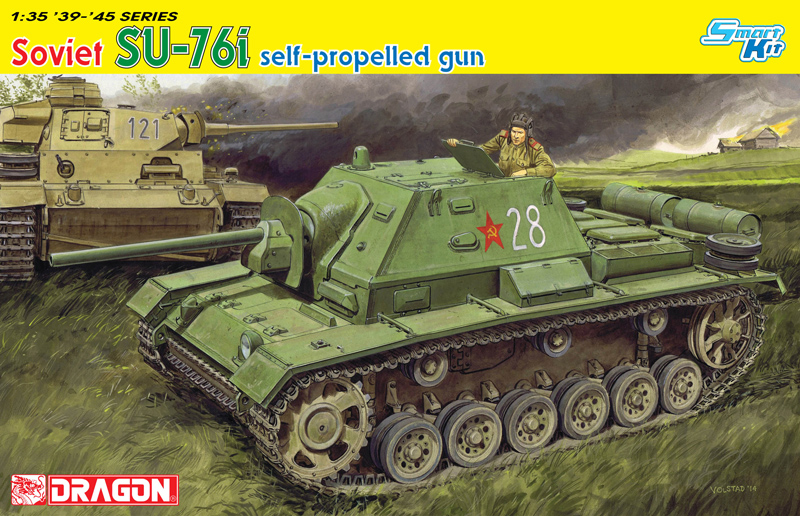
Dragon SU-76i
by Eric Christianson
 Model: SU-76i
Reviewed by: Eric Christianson, IPMS # 42218
Scale: 1/35
Company: Dragon
Price: $56.49
Product/Stock #: 6838
Website: Dragon Models
Product Web Page: View
Product provided by: Dragon Models
Summary
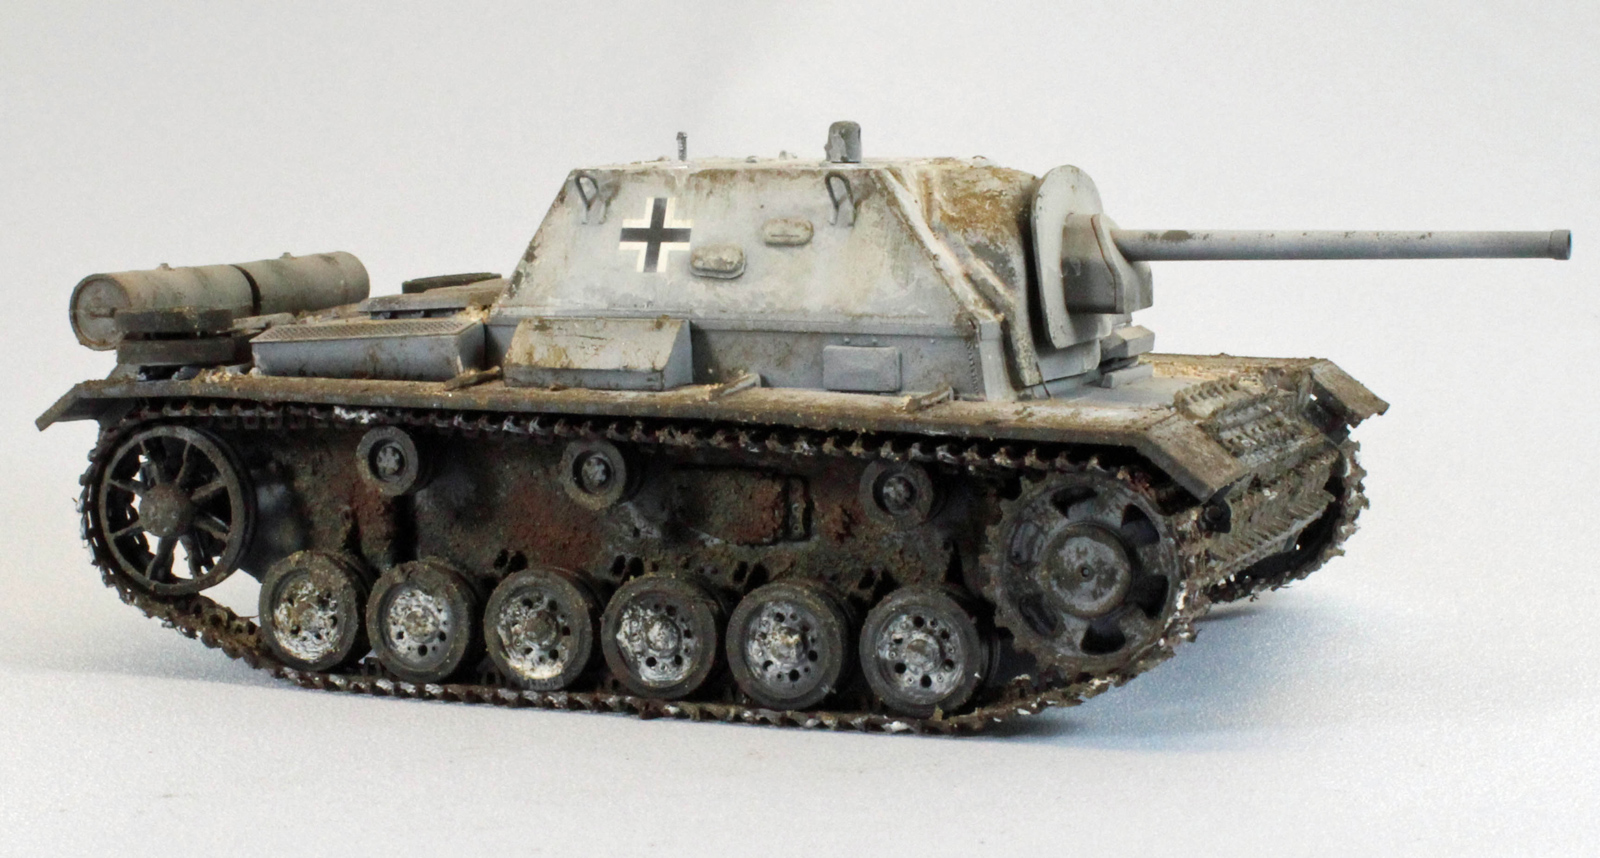
Dragon has recently released the interesting “cross-over” SU-76i Self Propelled Gun (SPG) in 1/35th scale, marrying their excellent and accurate Panzer III/Stug III chassis with what appears to be an out-sourced superstructure. The superstructure features intricate bolt detail, and is accompanied by new storage boxes on both sides as well as rear-mounted fuel tanks. This was an unusual armored vehicle used by the Soviets, and promises to build into an unusual subject for German and Russian WWII armor fans.
Background
Germany and the USSR employed a large number of captured enemy vehicles during WWII because of shortages in their inventories. Sometimes they also created hybrids by combining domestic and foreign components, and one example of this approach was the SU-76i SPG used by the Soviets (the ‘i’ denotes Inostrannaya (or ‘foreign’)). This vehicle is based on the chassis of either the (PzKpfw or StuG) III and featured a Soviet 76.2mm F-34 main gun. The Russians captured a large number of Panzer III/StuG III armored vehicles, many at Stalingrad, and Factory No.38 added an enclosed superstructure to the hulls. They were first issued to tank and SPG units in the fall of 1943, but were withdrawn the following year from frontline service and relegated to training use. An estimated 611 SU-76i SPGs were converted.
Opening the Box
The SU-76i comes in a relatively large box for such a diminutive subject – there is a lot of space inside which is unusual for a Dragon kit. Of note: you can tell at a glance the difference between the smooth, soft, and highly detailed (Dragon) PzKpfw III sprues and the two rough and slightly brittle (non-Dragon) superstructure and weapon sprues. On the plus side, the superstructure has a nice textured surface, but the engineering and molding is rough and outdated by Dragon’s standards. Not surprising, the barrel is not slide molded and comes in two halves. Since the assembled barrel has no specific orientation, the exposed seamline can be along the top or on each side, modeler’s choice. Luckily, I found an extra barrel in my spare parts box for the build.
Needless to say, there are a LOT of extra parts for your past box since only the lower hull of the PzKpfw III is used. Even the pioneer tools and other deck equipment are set aside.
The contents of the box include:
- Lower hull, packaged separately
- 10 sprues in soft, light grey plastic, packaged in four separate bags
- 2 runs of DS Track, each run packaged separately
- 1 photo-etch sheet, including mesh intake panels
- 1 8-page blue and white instruction sheet with 19 steps
The kit comes with six finishing schemes (1 German and 5 Soviet) represented, using blue-and-white ink three-view drawings; and a small (but perfectly registered) sheet of decals from Cartograph of Italy. These units include:
- Unidentified Unit, 1943 (4 schemes)
- 58th Tank Regiment, Winter-Spring 1944
- Panzerjaeger Abt.128, 23rd Panzer Division, December 1943
The ‘E’ and ‘K’ sprues have very thick sprue connection points and are of a more brittle, grey plastic. I damaged the main upper hull snipping it from the sprue requiring cleanup with putty and sanding – take care here.
The Instructions
This is a ‘fortified re-box’, containing sprues from several different Dragon kits, which sometimes leads to inaccuracies in the instructions. The issues encountered have been noted below.
Things to consider before building:
The lower hull is a pretty straight-forward build. The upper superstructure has fit problems, and lacks some of the modeling ‘aids’ Dragon uses, so I suggest dry fitting everything. You will probably need to pick up some good putty for help around the gun mantle.
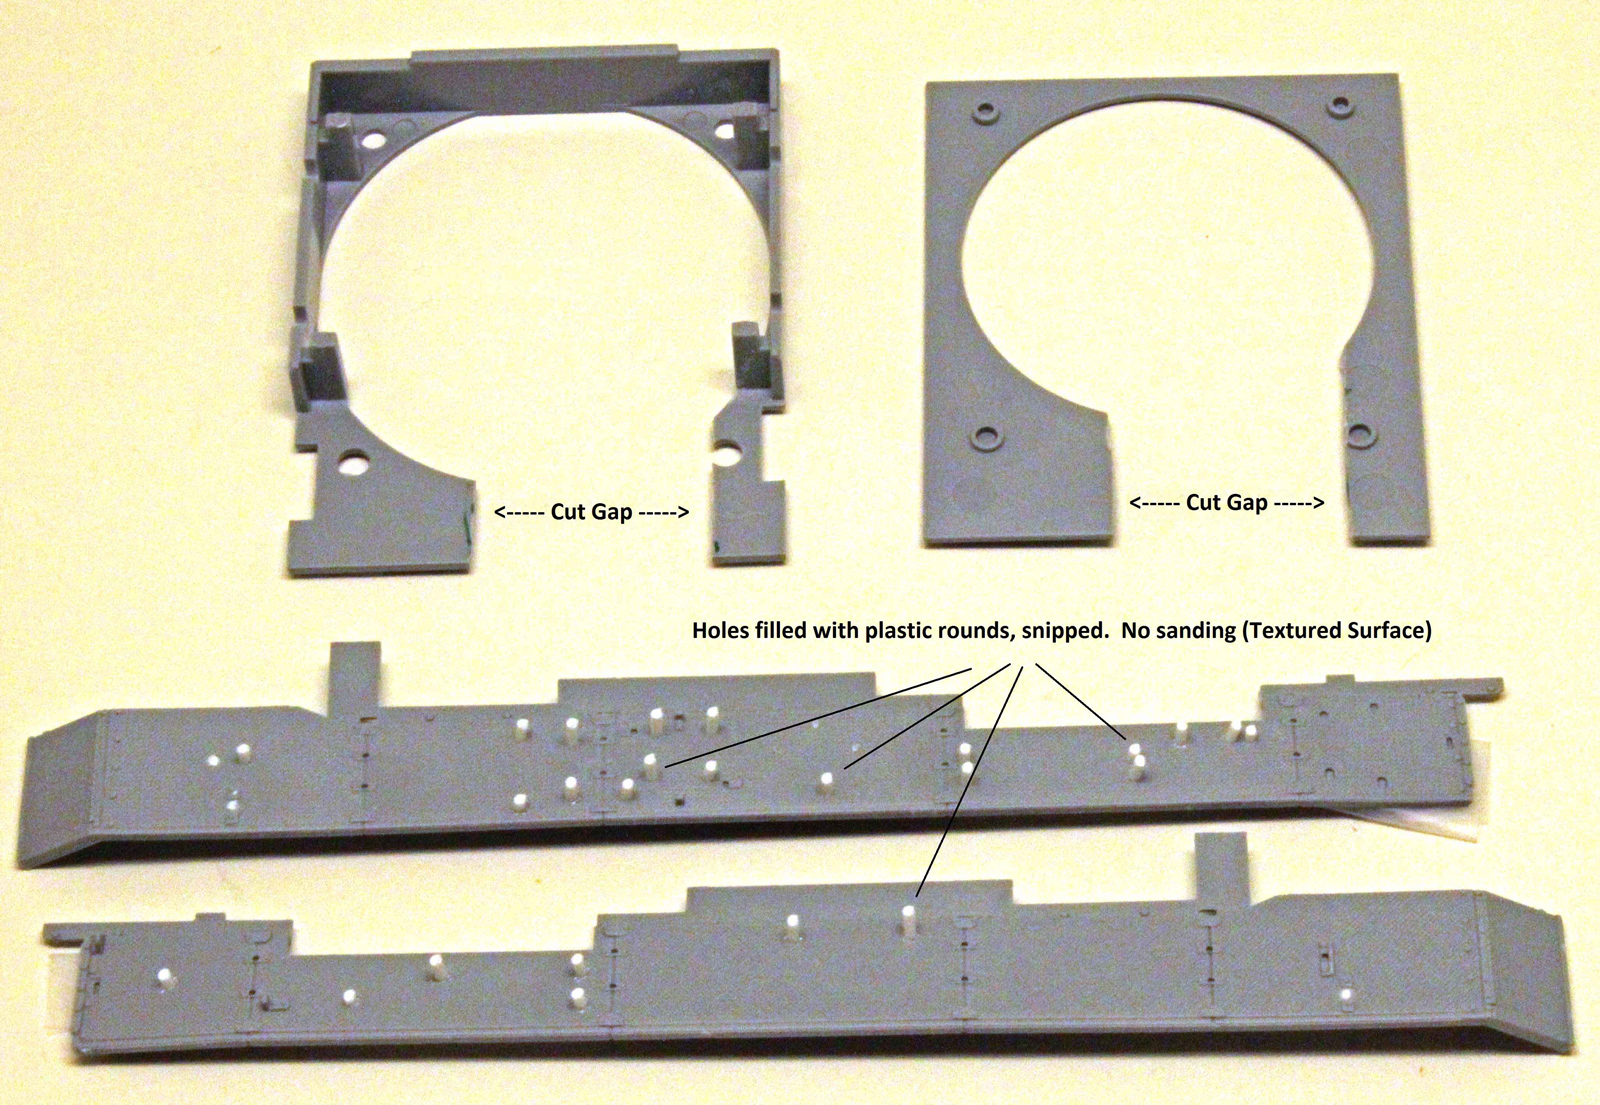
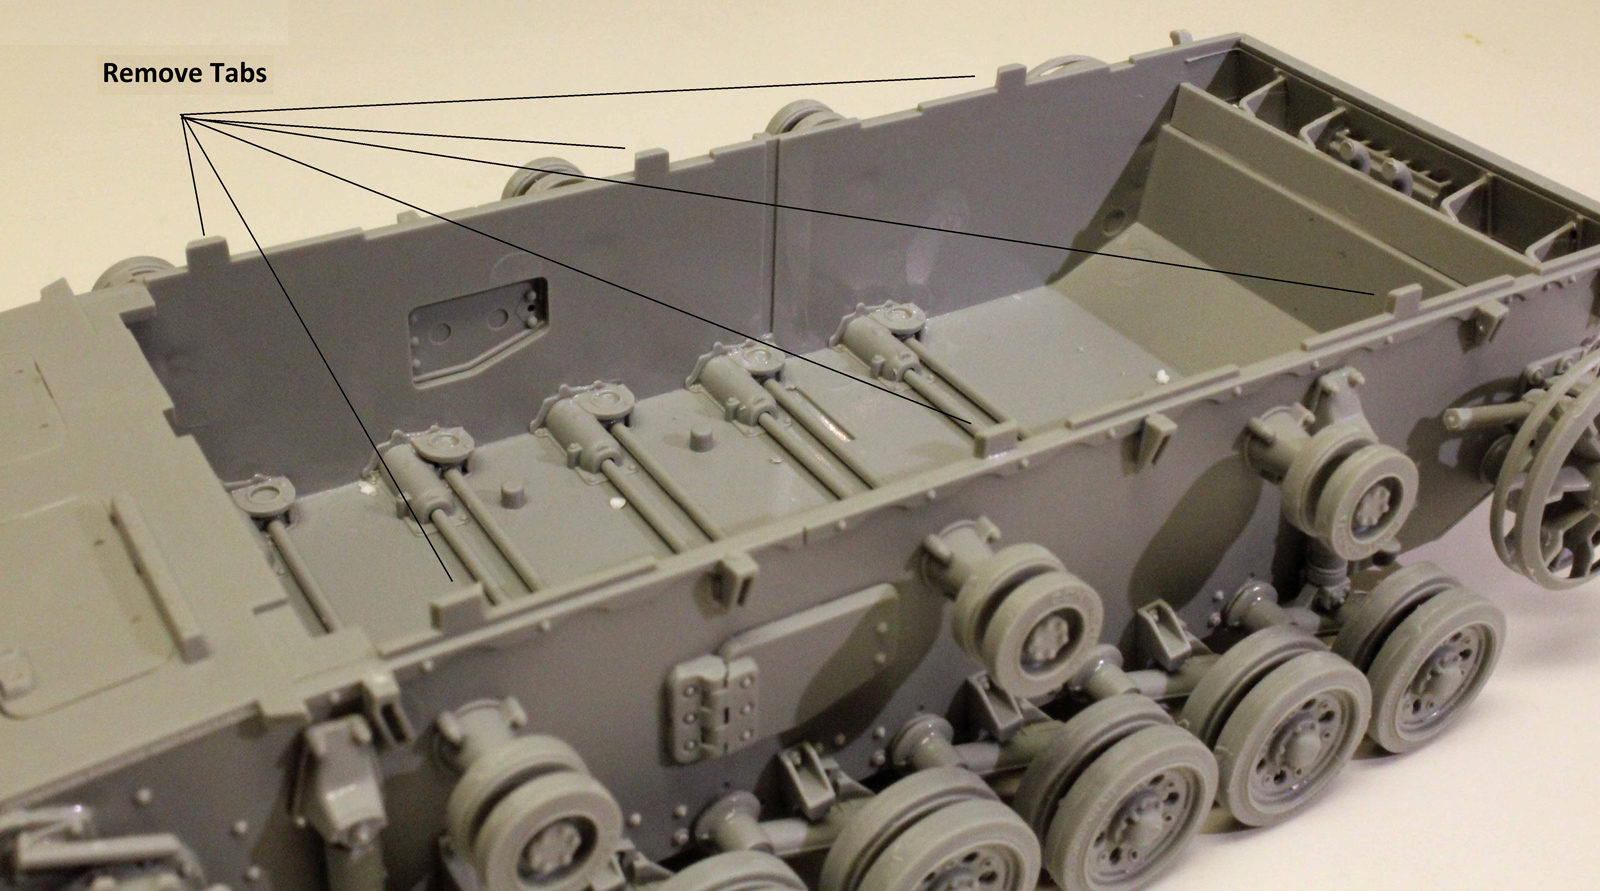
Since there are no pioneer tools and other deck equipment, you will need to fill a bunch of pre-drilled holes, many of which are in surfaces that are delicately textured. I glued very thin rods of plastic into these holes and snipped them flush since sanding would ruin the texture. Unfortunately, Dragon did not provide parts to mate the lower hull to the superstructure, instead relying on the modeler to remove large sections of plastic out of the deck and forward panels. This is a much easier process when performed before cleanup, in fact, it’s probably the first thing you should do (see Step 11).
There are relatively few options (for Dragon) so there are few up-front decisions to be made. The area beneath the fenders is un-obstructed so the DS track can be attached at the very end without any problems. I built the entire vehicle before painting, with the only exceptions being the two spare wheels, which were painted separately.
Construction:
The design and fit of the running gear in most of Dragon’s armor kits is excellent, and this kit is no exception. Pay attention to the callouts, as parts fit only one way if they are where they are supposed to go.
The torsion bars are sided – each has a rectangle ‘female’ hole that accepts the ‘male’ post on each axle. When you are inserting the torsion bars, just make sure the rectangle holes are orientated in-line and that the tabs inside the hull show the flat portion exposed, or you will have trouble lining up the axles later.
There is a little play in the wheels after they are attached and the large, visible wheels on the Mk. III really need to line up perfectly. I used a small steel ruler inserted along the slot between the wheels to do this while the glue was drying.
The unusual exhaust system (Steps 4 and 6) is busy and built in layers, but fits well in the end. It’s a good idea to use slow-drying glue so that you can manipulate previous parts as new ones go on. Dragon includes nice photo-etch screens that fit up underneath the exhaust manifolds, but unfortunately cannot be seen on the finished model without turning it upside down.
I had no issues with the fenders, other than filling the unused holes, as previously mentioned.
The front and rear decks of the Mark III are covered with hatches that can be assembled open or closed (six in all). The detail on the inside of the hatches is limited to the underside of the air intakes that adorn each hatch.
The front glacis plate has options for up to two runs of track links that act as spares and as extra armor for the vehicle, but uncharacteristically, Dragon did not provide any links in the kit to put here. I went to my spare parts box for 22 PzKpfw III links, which is enough for both runs (14 links for the lower run, and 8 for the upper run).
In Step 11you will need to remove two relatively large pieces of plastic from the turret ring section of the superstructure. While there is a nice diagram to help with this, it is not exact to scale, and the measurements provided are in millimeters, just too small for my old eyes to distinguish on a ruler. I made four ‘that’s about right’ cuts and moved on. As it turns out, ‘close’ is ok – the modified pieces are not visible and do not impede the fit of other parts, later. Everything comes together in Step 14. The order in which the major assemblies are added matters, even though the instructions don’t tell you that.
I attached the front deck first, followed by the left and right fenders. I then attached the rear deck and finally the turret ring section. The fit of everything here is very good.
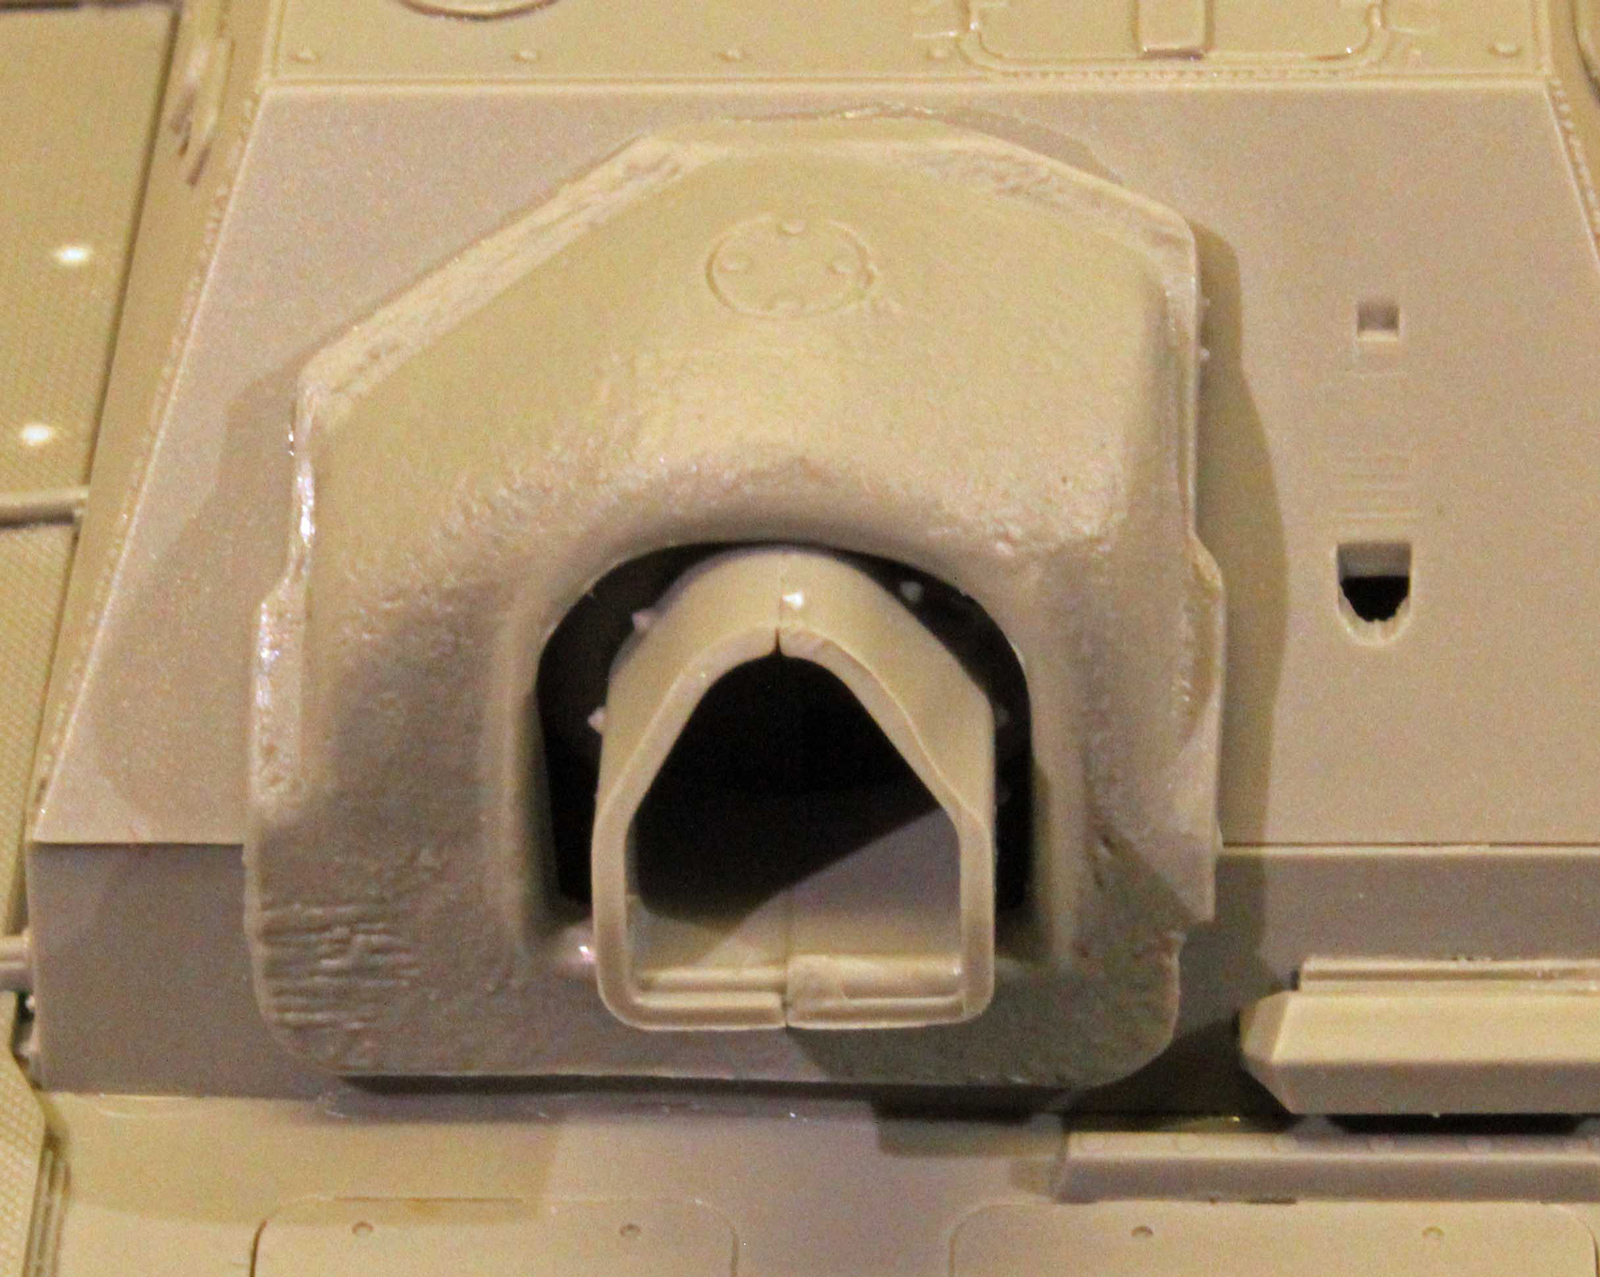
Once the turret ring section is attached, Step 15 will guide you through assembling and attaching the superstructure – where you definitely ‘move off the Dragon reservation’. The plastic is rough, the seams are significant (and visible), and the fit is poor relative to the rest of the kit. In Step 15 Parts K3 and K4 are not used, even though they are pictured, and the attachment of the whole (internal) gun assembly to the inside of the turret housing is wobbly and unstable, relying on two small parts (E35 and E14) that themselves don’t quite fit right since the attachment points are vague at best. Unfortunately, the location and orientation of the highly visible main weapon depend on these internal parts lining up correctly. I did the best I could and ended up with large gaps around the mantle that I used Perfect Plastic Putty to fill.
In Step 16, the rear hatches (Parts E23/E28) have no support and will fall into the superstructure without adding plastic supports on the inside. While the hatches can be left open, there is no detail provided on the inside if you decide go that route.
The same can be said for the two hatches in Step 19 (E13/E29) – you will need to add plastic supports here as well. Also in Step 19, the inside of the main gun shield (Part E11) has three significant, protruding sprue ejection marks that have to be removed since they are visible if left alone.
The two runs of DS track in this kit are very thin and beautifully detailed, and assembly was a snap. Once each run was painted and weathered (see below), I glued the ends using Tamiya ‘green top’ thin liquid cement and installed them without any problems. Unfortunately, Dragon did not leave enough slack in the DS track to adequately reproduce the sag common to the Mk. III, so it looks pretty tight when installed.
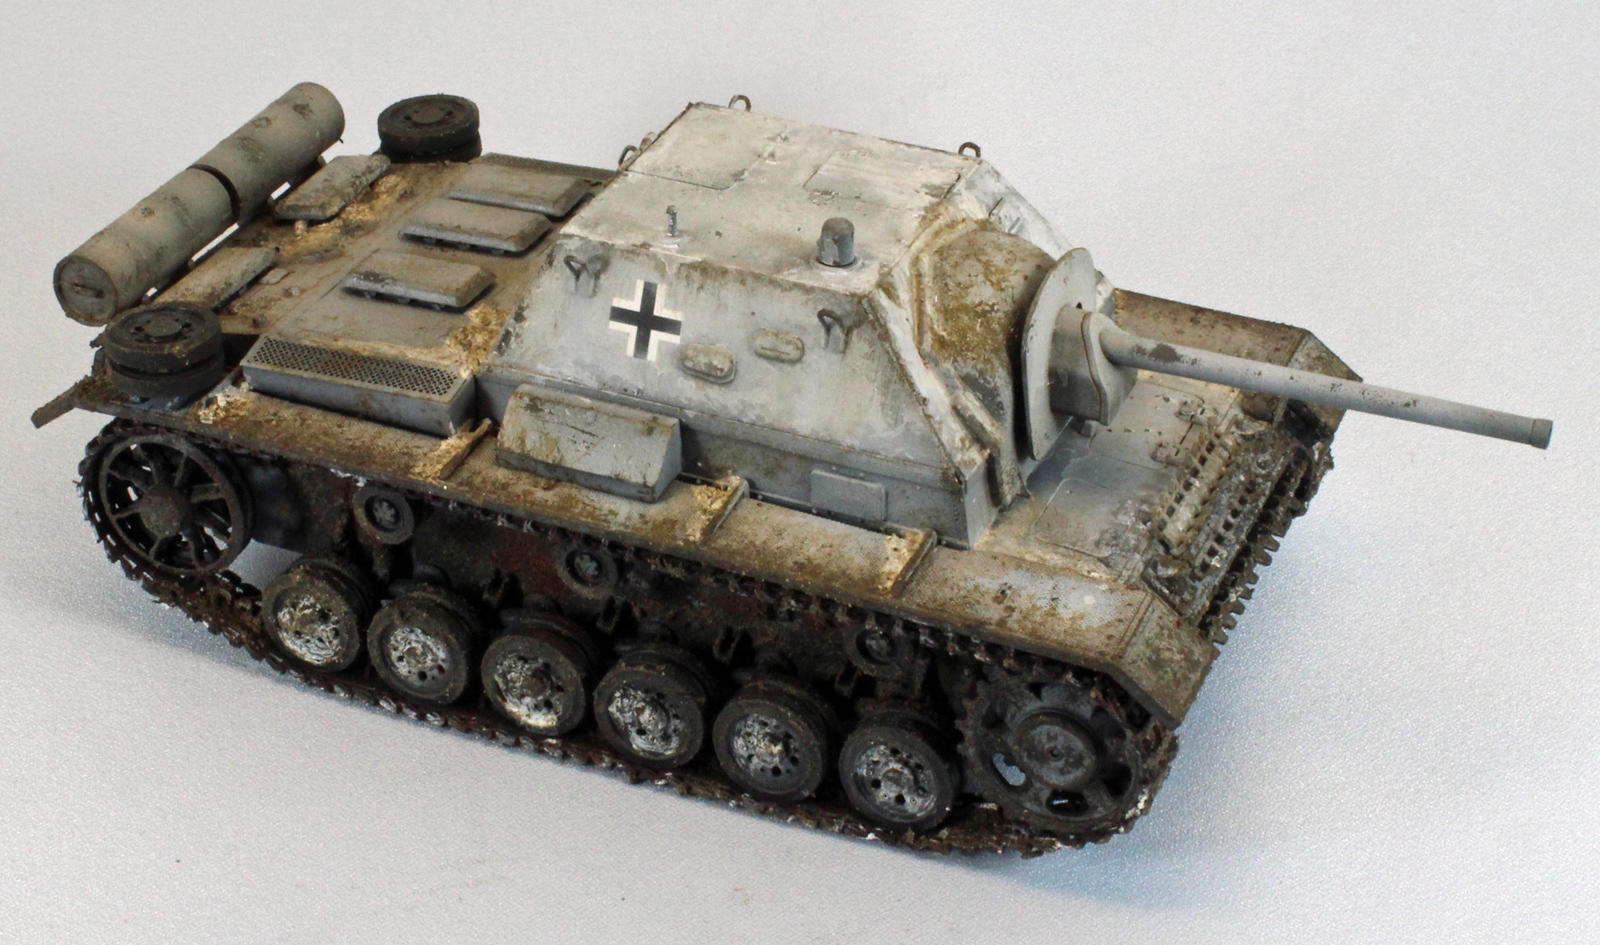
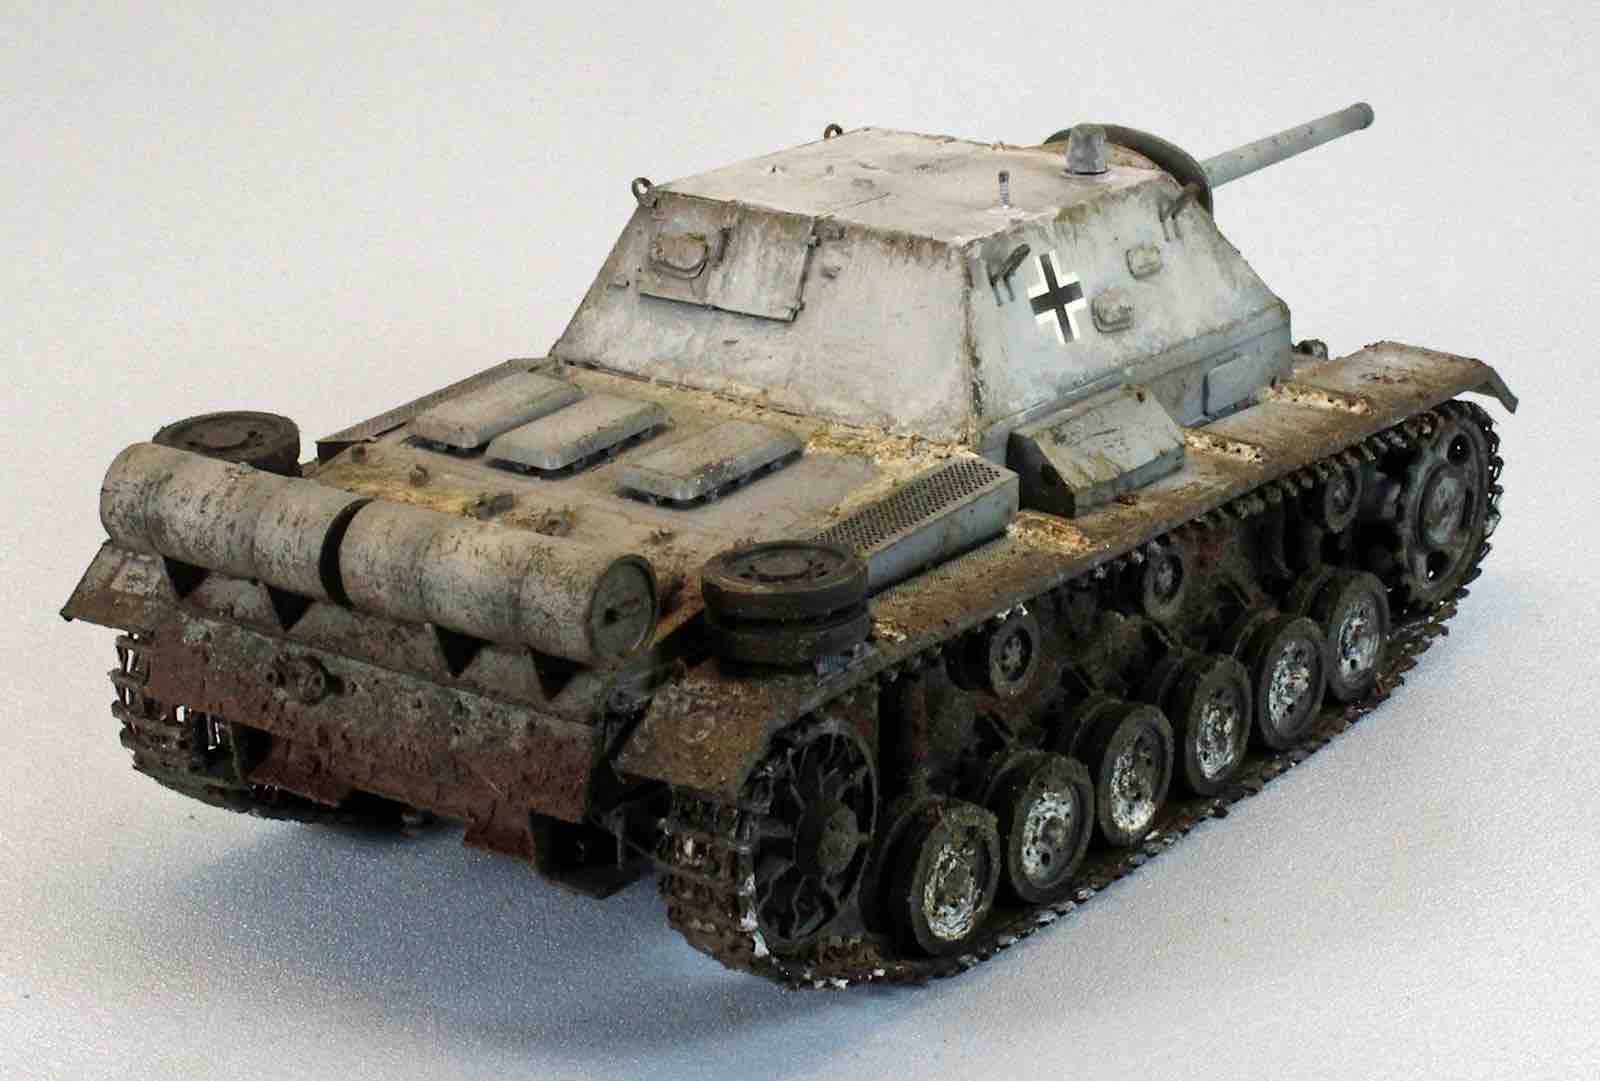
Painting and Finish
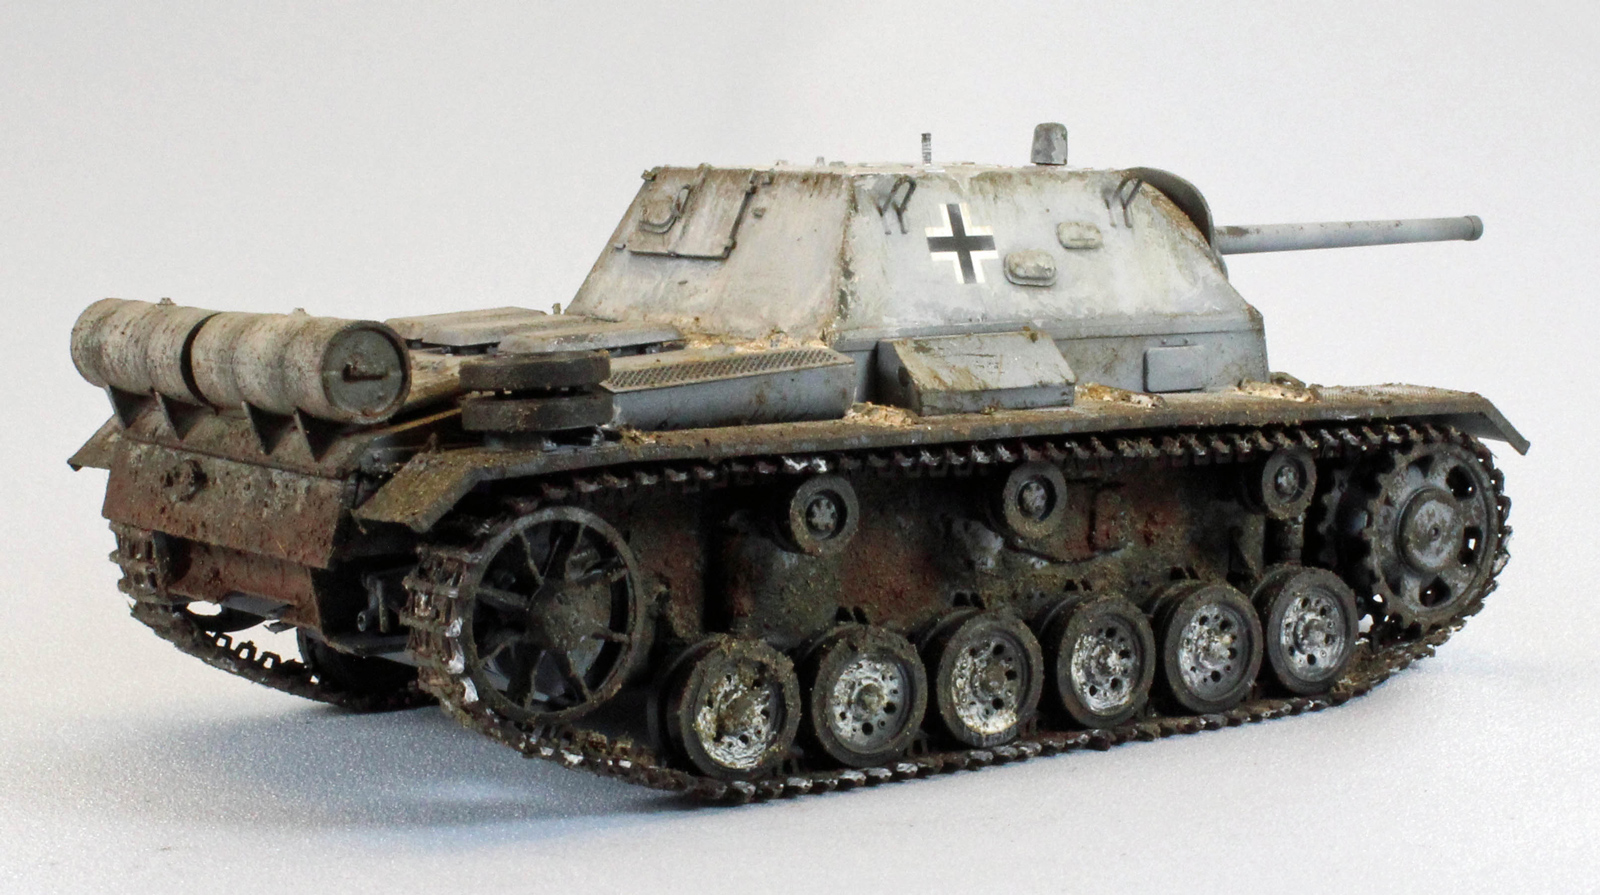
I am a German Armor enthusiast and I was pleasantly surprised when I saw that Dragon thoughtfully included a set of German ‘balkenkreuz’ decals for a SU-76i that apparently changed hands (again!) I decided to paint the lower hull German Grey, the superstructure 4BO Russian Green, and then use some of the new Vallejo Thick Mud and Winter Weathering products to ‘winterize’ the lot. Primer and Pre-Shade
I started by applying a primer consisting of Krylon Color Master with Durable ColorMax Technology rattlecan (Flat Black) lacquer paint. This is the third rattlecan primer I’ve tried, and I’m glad I kept going because this stuff is a superior product, drying super thin and very tough. Not to mention cheap and quick. Once the lacquer paint degassed overnight, I touched things up back in the paint booth using Alclad (lacquer) Black Primer and Microfiller – also very quick, and no thinning required.
The primer/pre-shade coat gives the plastic and PE some grip for the following coats, and fills in the recesses, creating a shadow effect near the flat surface edges. This will add depth for the subsequent coats to come. I used Rust-oleum American Accents Ultra Cover ‘ Satin Expresso’ rattlecan enamel paint on the DS track, which is a little less harsh than the lacquer paint. The very thin DS material held up fine under this paint and Tamiya liquid cement.
Except for my primer coat, I now exclusively use Vallejo paints in my continuing transformation over to true acrylics. I went through a bit of experimentation up front, but eventually found them to spray beautifully once I dialed in the right setup and thinning ratio. First, I pushed the pressure up to 20lbs - Vallejo recommends 12-15lbs, but I think I need the higher pressure because I use a siphon-style airbrush (Pasche H) as opposed to a gravity-feed airbrush. Once I did that, the spray pattern evened out and I lost the scatter-shot look of the paint on the surface.
Next, regardless of what line of paint I used (Model Air, Model Color, Panzer Color, or their Primers), I found that adding Liquitex Flow-Aid to an equal ratio of (Vallejo Airbrush Thinner and paint) worked well and (almost) never clogged. Not too much Flow-Aid: one drop to every ten drops of thinner. For example: in a typical paint session I would put two of drops flow-aid, 20 drops of thinner, and 20 drops of (any Vallejo) paint into a plastic, disposable cup and swish that around until it is mixed, and then pour it into the Pasche cup.
Also, and this is important: I keep the airbrush and the model moving as I spray, holding the model in such a way that I can see the reflection of the (nearly invisible) paint actually hitting the surface of the plastic. If I simply spray thinned acrylic paint until I see the color change on my dark primer, it will be too late - the paint will run. This is one mistake I made for a long time when using acrylic paint. The color is built up slowly on the surface of the plastic with consecutive passes.
Vallejo paints come in a huge variety, are odor-free, and allow me swap my heavy, uncomfortable vapor mask I use with distillate-based paints for a simple painters (particulate) mask. I am sold. Now on to the model!
I followed the pre-shade coat with Vallejo’s 76.603 DunkleGrau (German Panzer Grey) Surface Primer for the lower hull and the same line’s (73.609) Verde Russian 4BO Green on the superstructure. Normally I would apply a lighter shade of each as a post-shading coat, but since these colors would be ‘winterized’, I skipped that step this time around. After the paint was dry, I applied a coat of hairspray, followed by a light dusting of Vallejo Model Air 71.001 White. I waited several hours and then chipped away the white paint here and there using a short, stiff horsehair brush and water.
I hand-brushed Future (acrylic) on the areas that would receive decals to give them a smooth surface to set up on. I then applied the decals using the Red and Blue Micro Sol/Set system without any problems, and then followed that with an additional layer of Future to seal them. Once dry, I sprayed the entire vehicle with Vallejo Matt Varnish to knock down any shiny areas.
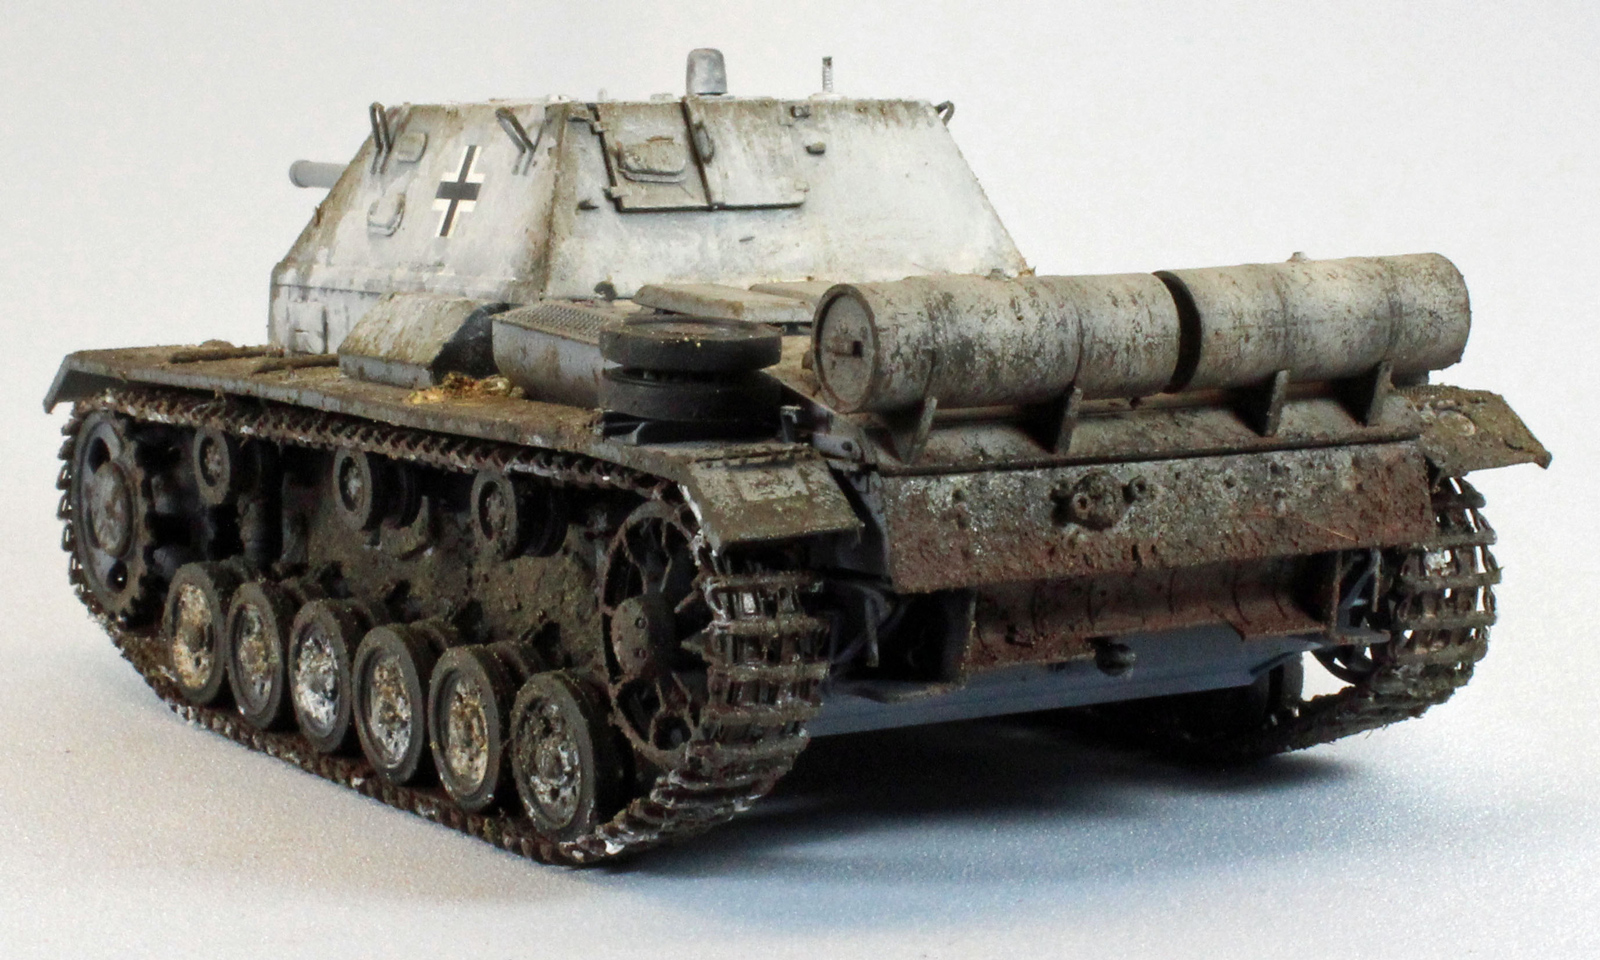
I received a set of the new Vallejo ‘Thick Mud’ weathering products (reviewed separately) and I wanted to try them on the 76i. These acrylic ‘sludge gels’ are colorfast and go on easily, providing you know what you are doing as far as color and layering (this is my first try!). I started with dabs of 73.820 Snow here and there, followed (in this order) with similar applications of 73.808 Russian Mud, 73.811 Brown Mud, 73.807 European Mud, and finally 73.825 Crushed Grass. The ‘Snow’ and ‘Crushed Grass’ are from Vallejo’s ‘Environment’ line, but look, act, and clean up just like the thick mud products. I worked from dark to light, using a short-bristled, flat-edged paint brush to blend and mash the mud into submission. The mud can be caked on or lightly worked across the surfaces using a motion similar to dry-brushing. This was especially effective along the hull and superstructure edges. I used the same colors, in the same order, for the track.
I let the mud dry for about an hour and then mixed up a batch of Windsor Newton white acrylic gouache and applied that with a paint brush here and there, focusing on the areas of the superstructure that would remain ‘clean’ from the mud.
Now that all the acrylic products had been used, I switched to Mig enamels for the remainder of the weathering process. I used their excellent (Rust) and (Winter) Streaking products thinned with Mona Lisa thinner, applying them here and there with a thick brush, focusing on the lower hull and rear. I usually apply a layer of road dust at this point in time, but skipped that step this time in light of all that mud! This little guy (with such a confusing heritage!) was done.
Conclusion
Building this kit was a challenge due to issues with the superstructure, which seemed to have been quickly added in from an outside source. The qualitative difference in engineering and design between their (excellent) lower hull and that of the superstructure is quite evident. On the positive side, the native Dragon parts are simply amazing – the detail, design and engineering, DS Track, opening hatches, slide molding… Dragon produces some of the very finest models in the industry, and that’s what keeps me coming back for more. In the end, the Su-76i is a real eye-catcher, providing a unique addition to my model case.
I would like to thank Dragon Models for providing this kit for review, and to IPMS USA for giving me the opportunity to review it.
Photos


.jpg)